I’ve always liked XMMS as a music player program on Linux. It had enough features, but the basic interface was always simple enough to just work. Unfortunately, it is not maintained any longer, and in my latest Ubuntu upgrade to version 8.10, I found it was no longer included or supported.
The XMMS project continued with a successor, XMMS2, but it is much more than just a simple audio player. I looked at it and got lost fairly quickly. I just wanted something simple like the original XMMS.
Thanks to the open source model, I fortunately found what I was looking for: Audacious. It is an off-shoot of the original XMMS, which maintains the same overall operation and feel, but is continuing to be maintained and updated for current Linux releases like Ubuntu 8.10. I installed it and within a minute I was happily playing music with my familiar controls and playlist.
We had a short power outage, and when the power resumed, the fan in our iMac (intel core duo) was stuck on full speed. It sounded like a jet plane. I waited a minute or two for it to slow down, but it didn’t stop. Even rebooting didn’t affect it.
After some Internet searching, I found that there is a chip which controls the fans, which can get stuck like this. Fortunately it can be reset also.
I eventually found the iMac intel reset procedure at the Apple support web site. The procedure varies with the model, but this was the correct one for my iMac core duo.
The basic procedure is:
Unplug all cables from the computer, including the power cord and any display cables.
Wait at least 15 seconds.
Plug the power cord back in, making sure the power button is not being pressed at the time. Then reconnect your keyboard and mouse to the computer.
Press the power button on the back to start up your computer.
Thirty seconds later, it was fixed. I like nice simple solutions.
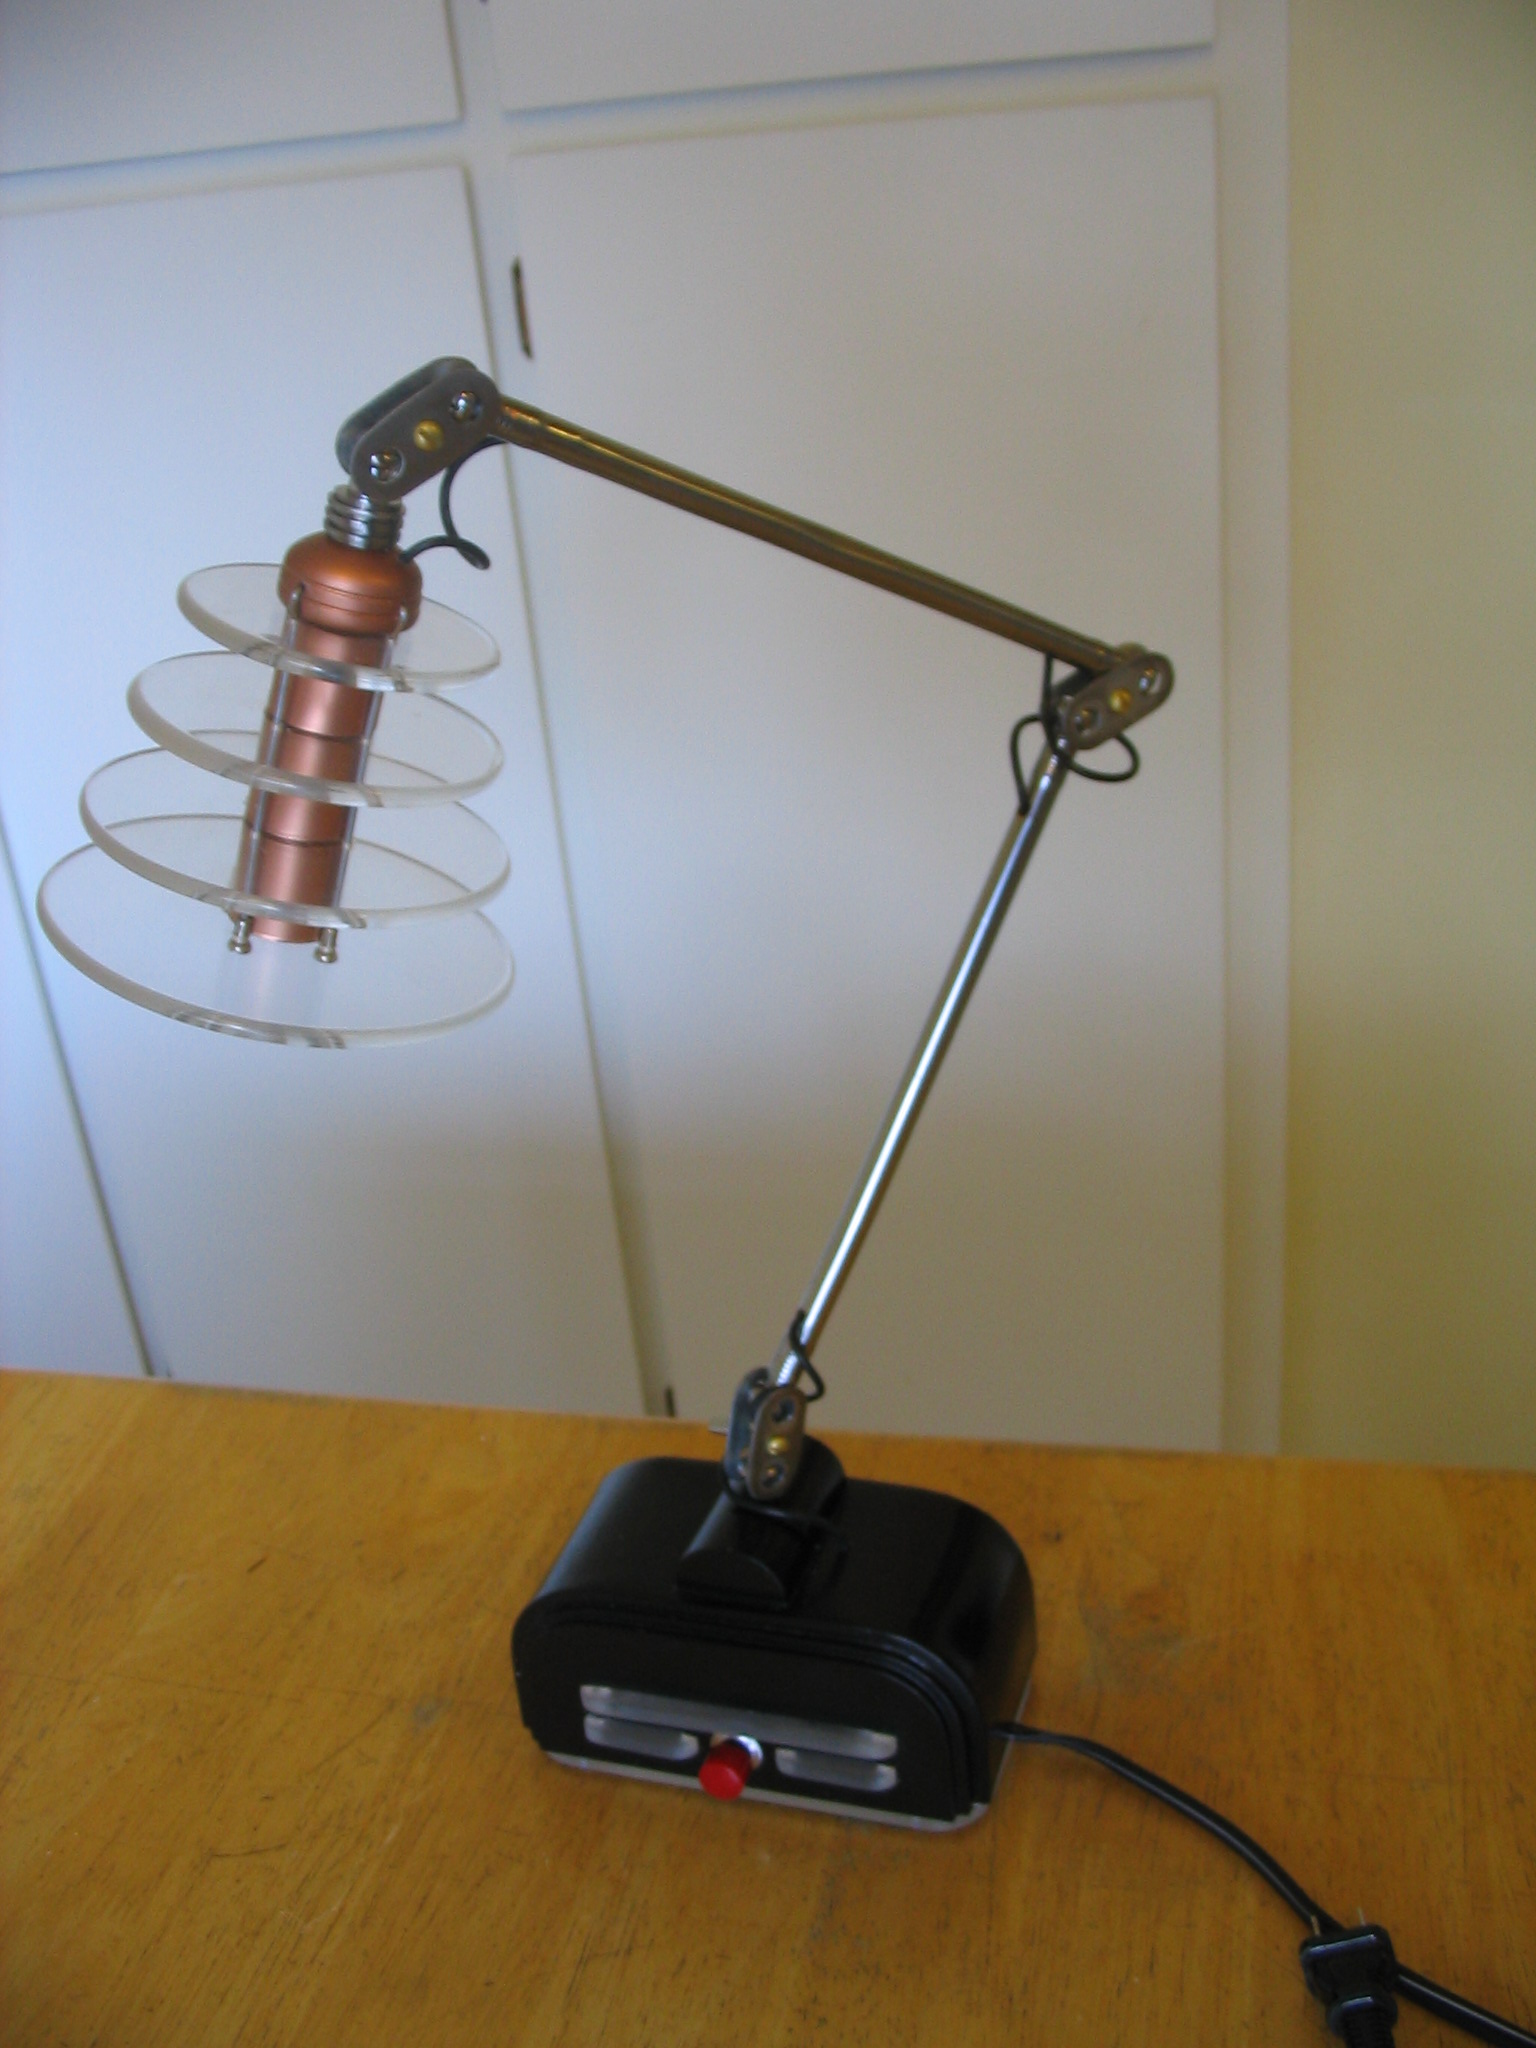
I built a stylish energy-efficient desk lamp, entirely from scratch. I have always enjoyed Art Deco and Machine Age industrial styling, and was inspired to use it for the lamp when my son and I were watching Batman, the Animated Series. A desk lamp worthy of Wayne Manor was in order.
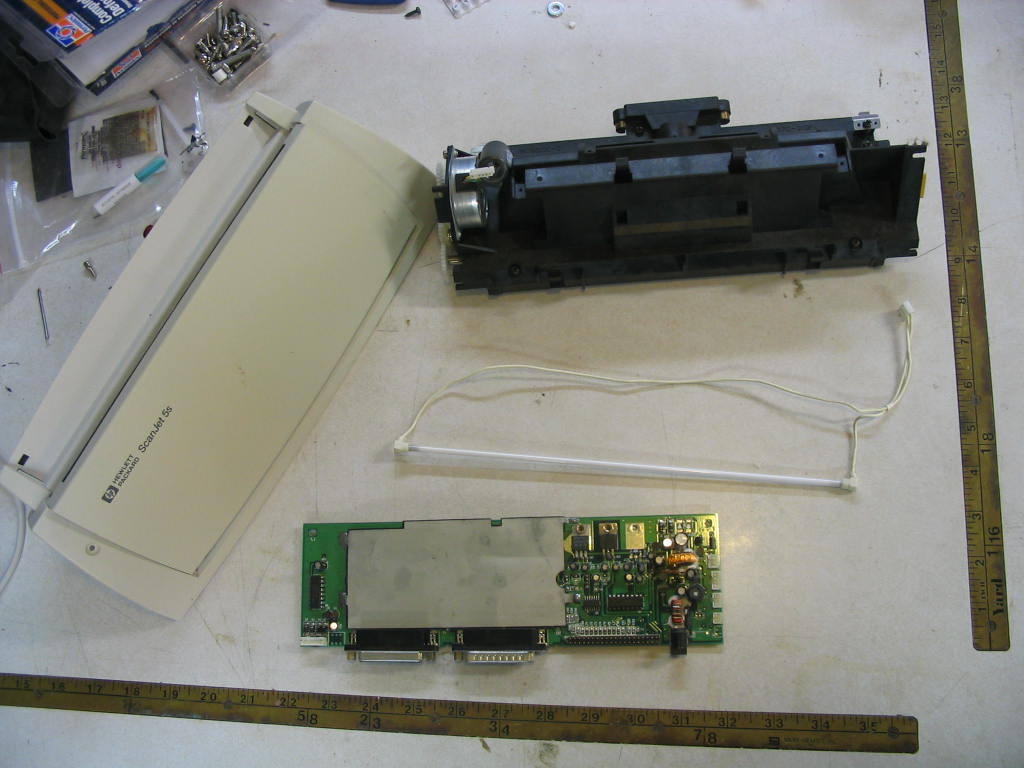
The thing that originally prompted me to build a lamp was a broken computer scanner. I took it apart and removed the cold-cathode fluorescent light, and thought to myself “this would make a cool lamp”. And efficient too; putting out a lot of light at only about 5 watts as I recall.
I envisioned a long thin tube light at the end of an arm, which could be swiveled and positioned as desired over the desk. I made a shade for the tube from copper plumbing pipe. The CCFL inverter would be placed in the base of the lamp, along with a 12v power adapter and a few yellow LEDs to make the base glow.
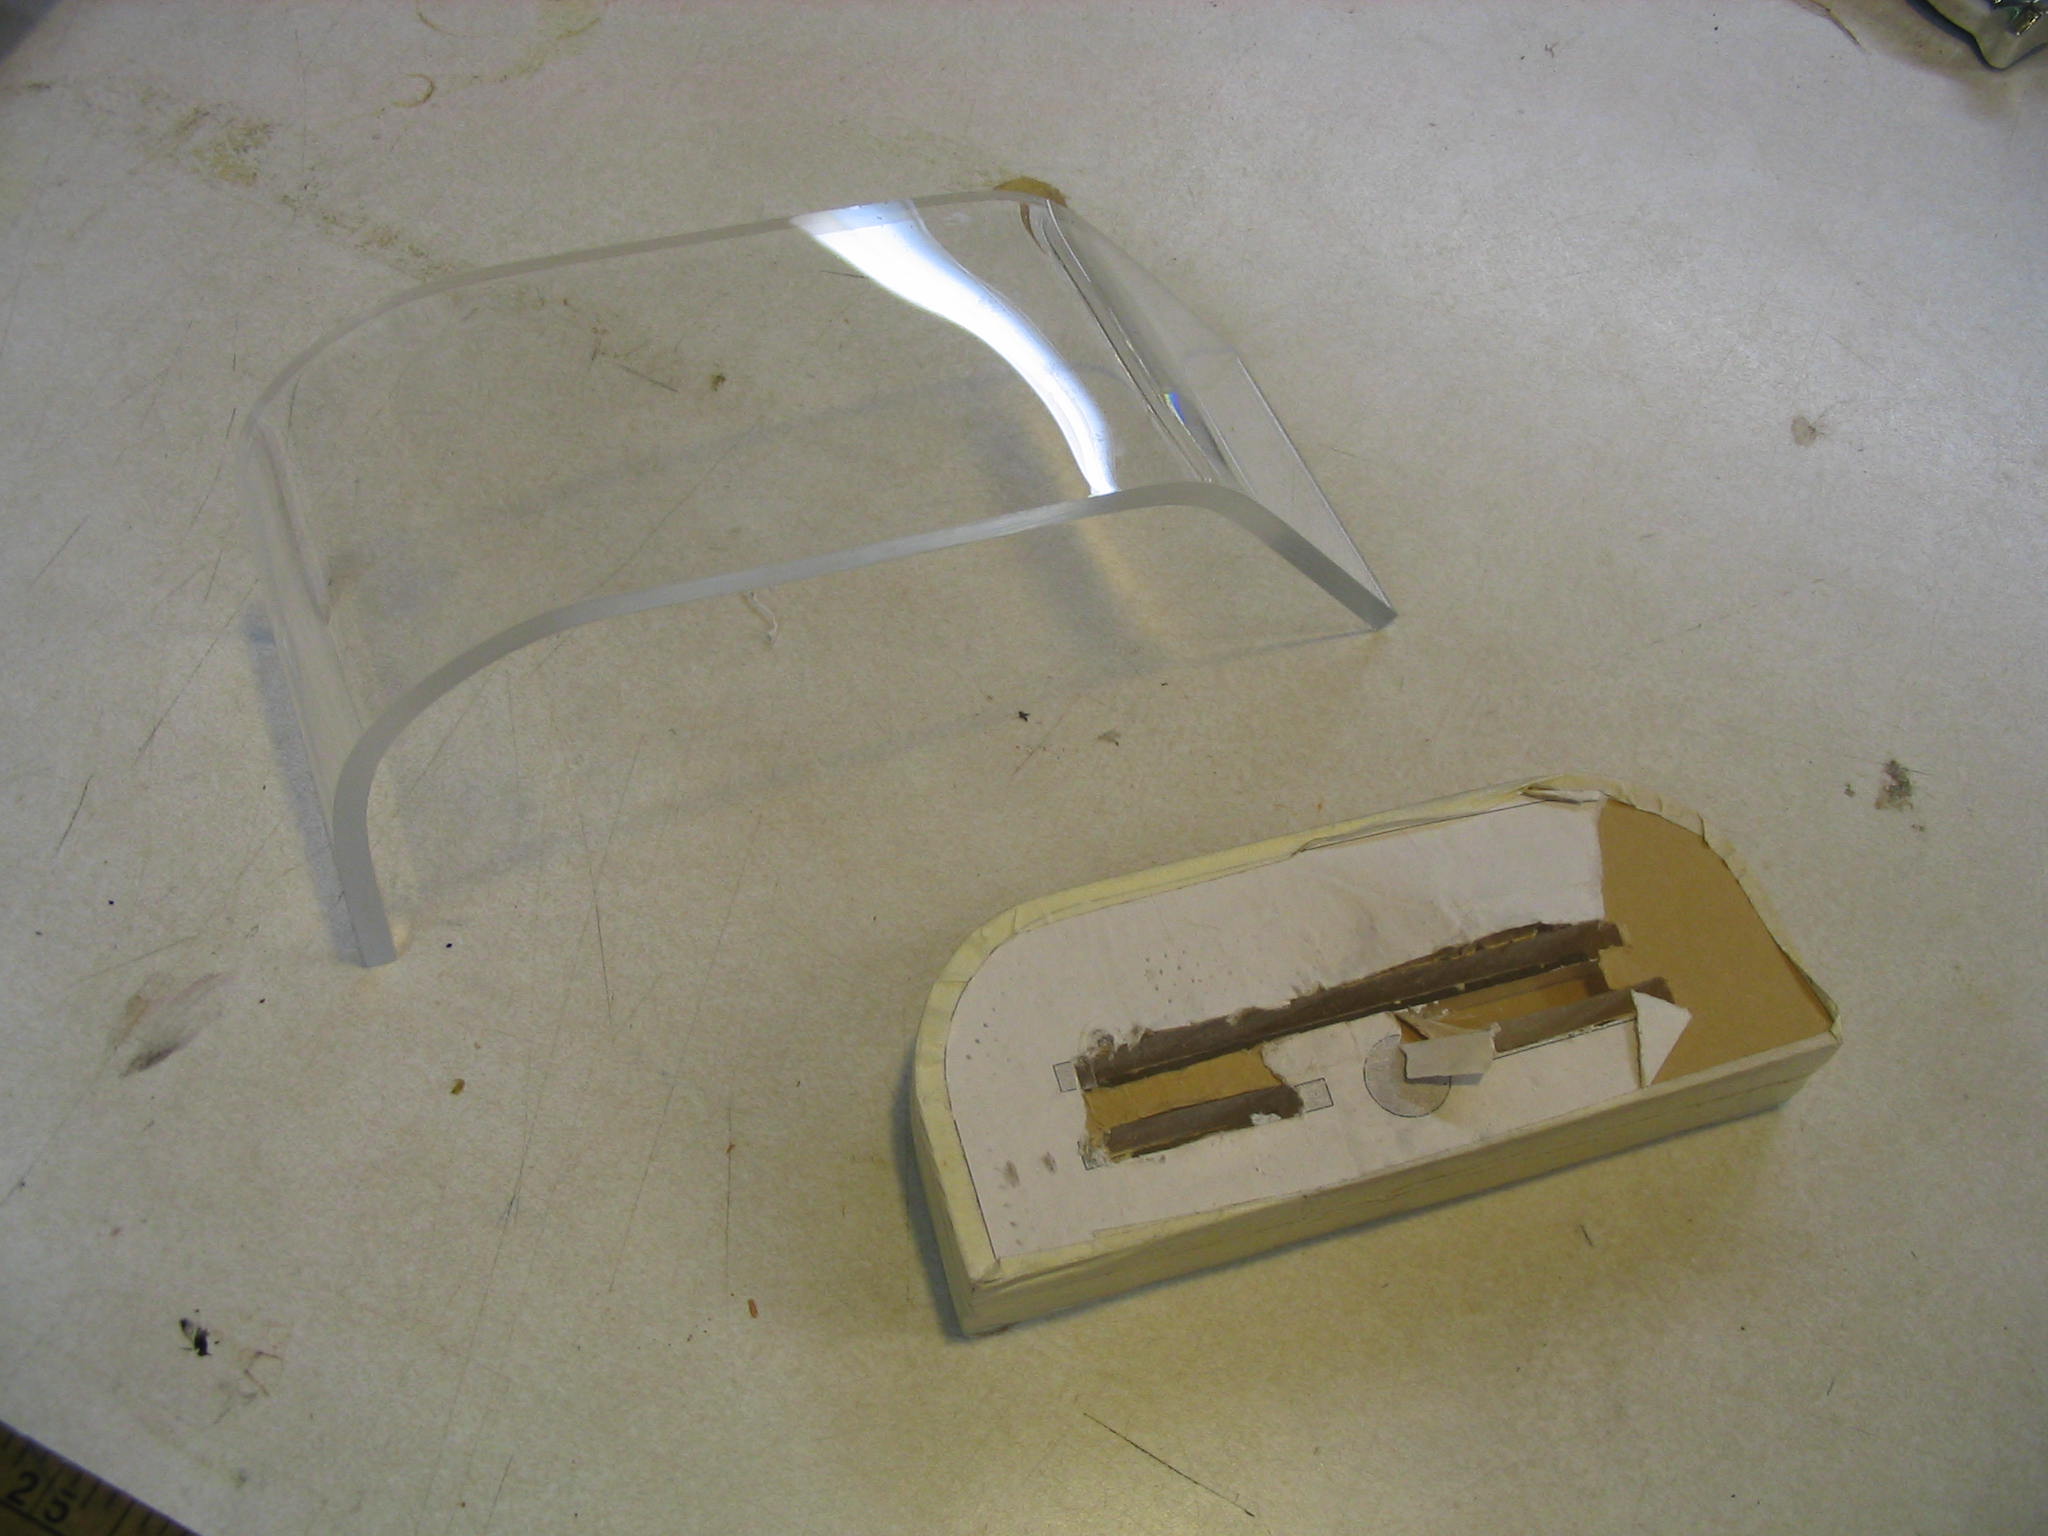
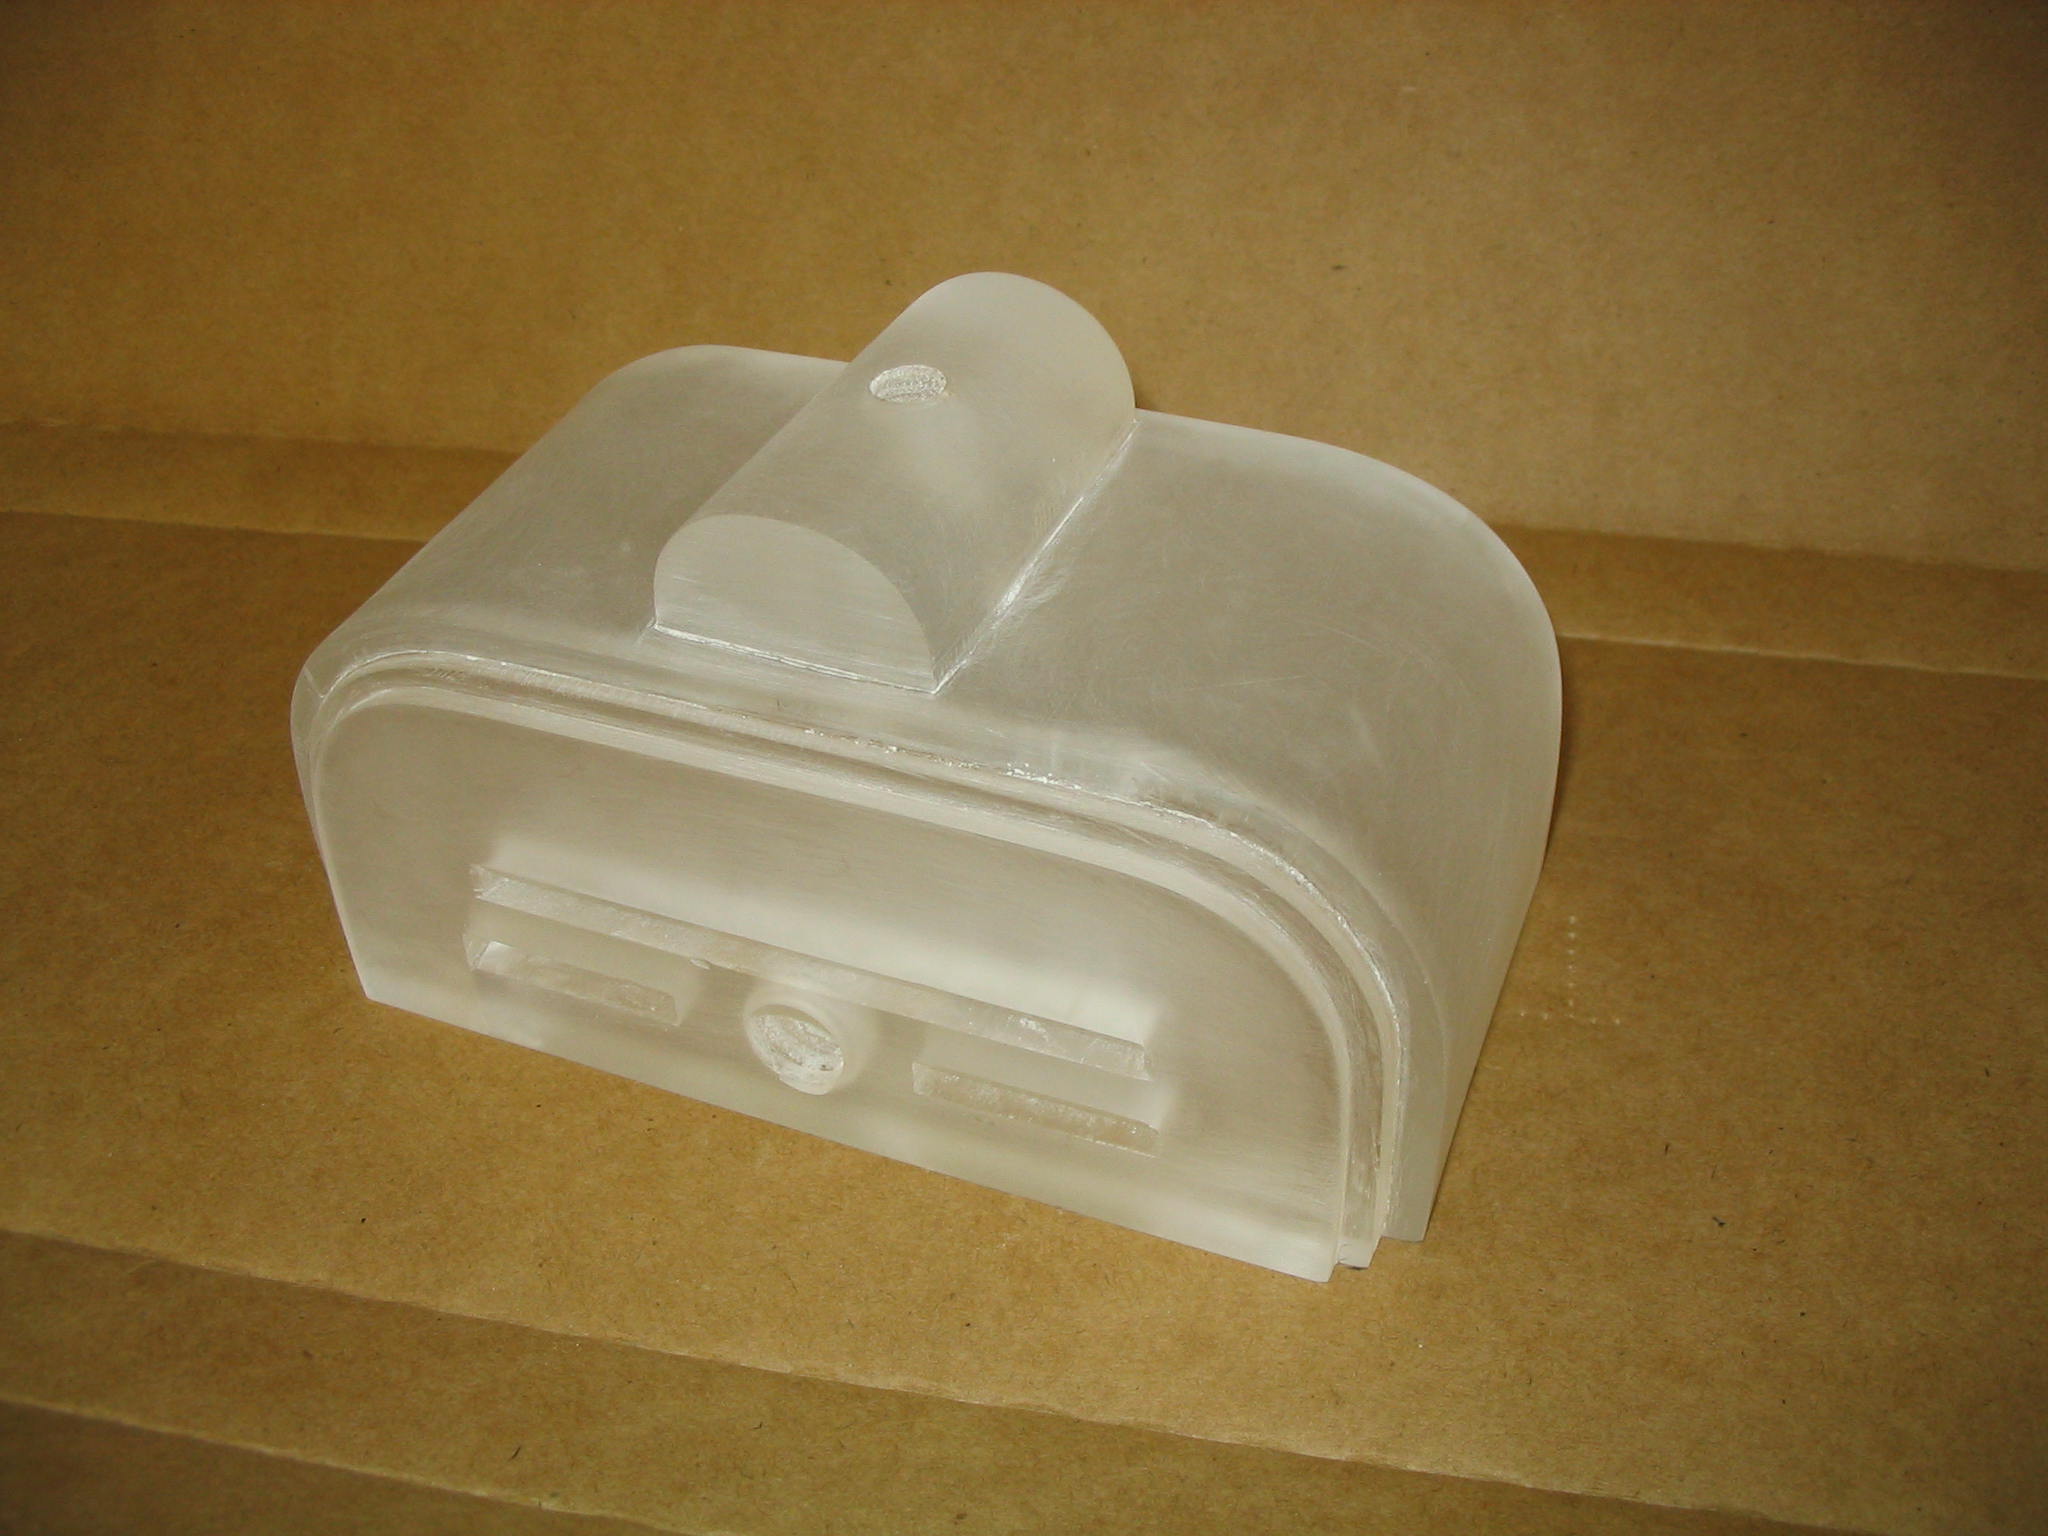
As in most of my projects, I started the base with some sketches and then a cardboard model. I built it from acrylic plastic, cut on the table saw and bent by heating with the heat gun. I sanded it with fine sand paper, to change the gloss finish to a matte. Then I painted it with black vinyl dye.
Although it looks more like an Art Deco radio than a lamp, the result is still pretty good I think. It was just big enough to fit the 12v power supply, the CCFL inverter, a power switch and a few LEDs. Only one problem: it weighs nothing. Not good for the base of a lamp with metal arms and head. A heavy piece of steel in the bottom solved that.
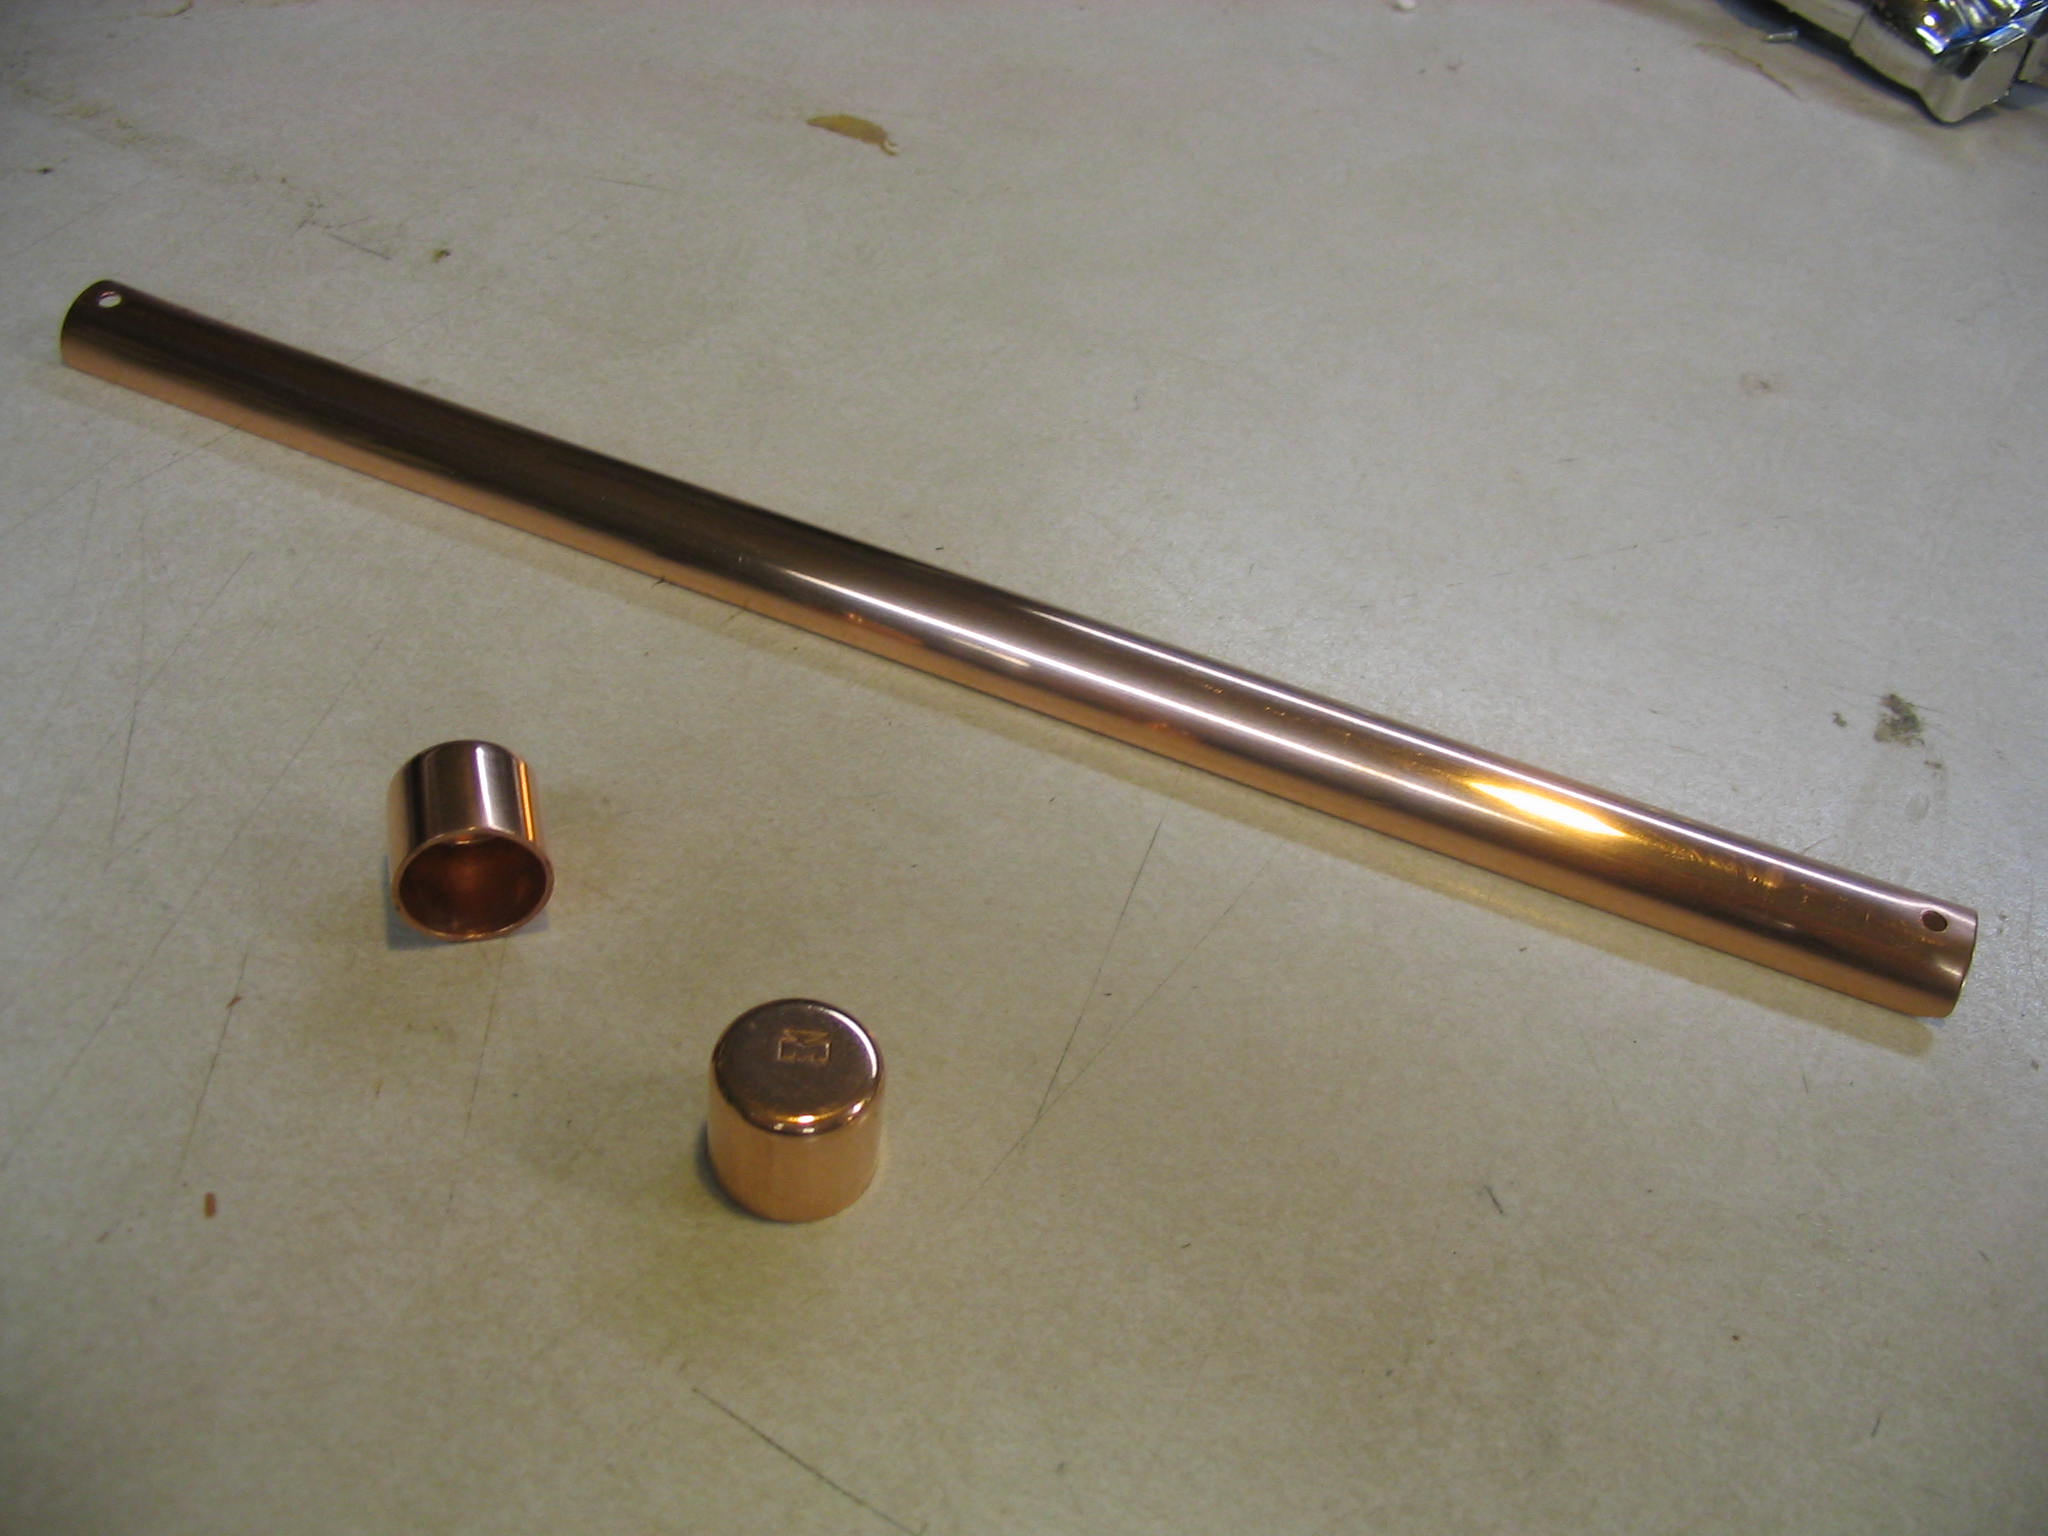
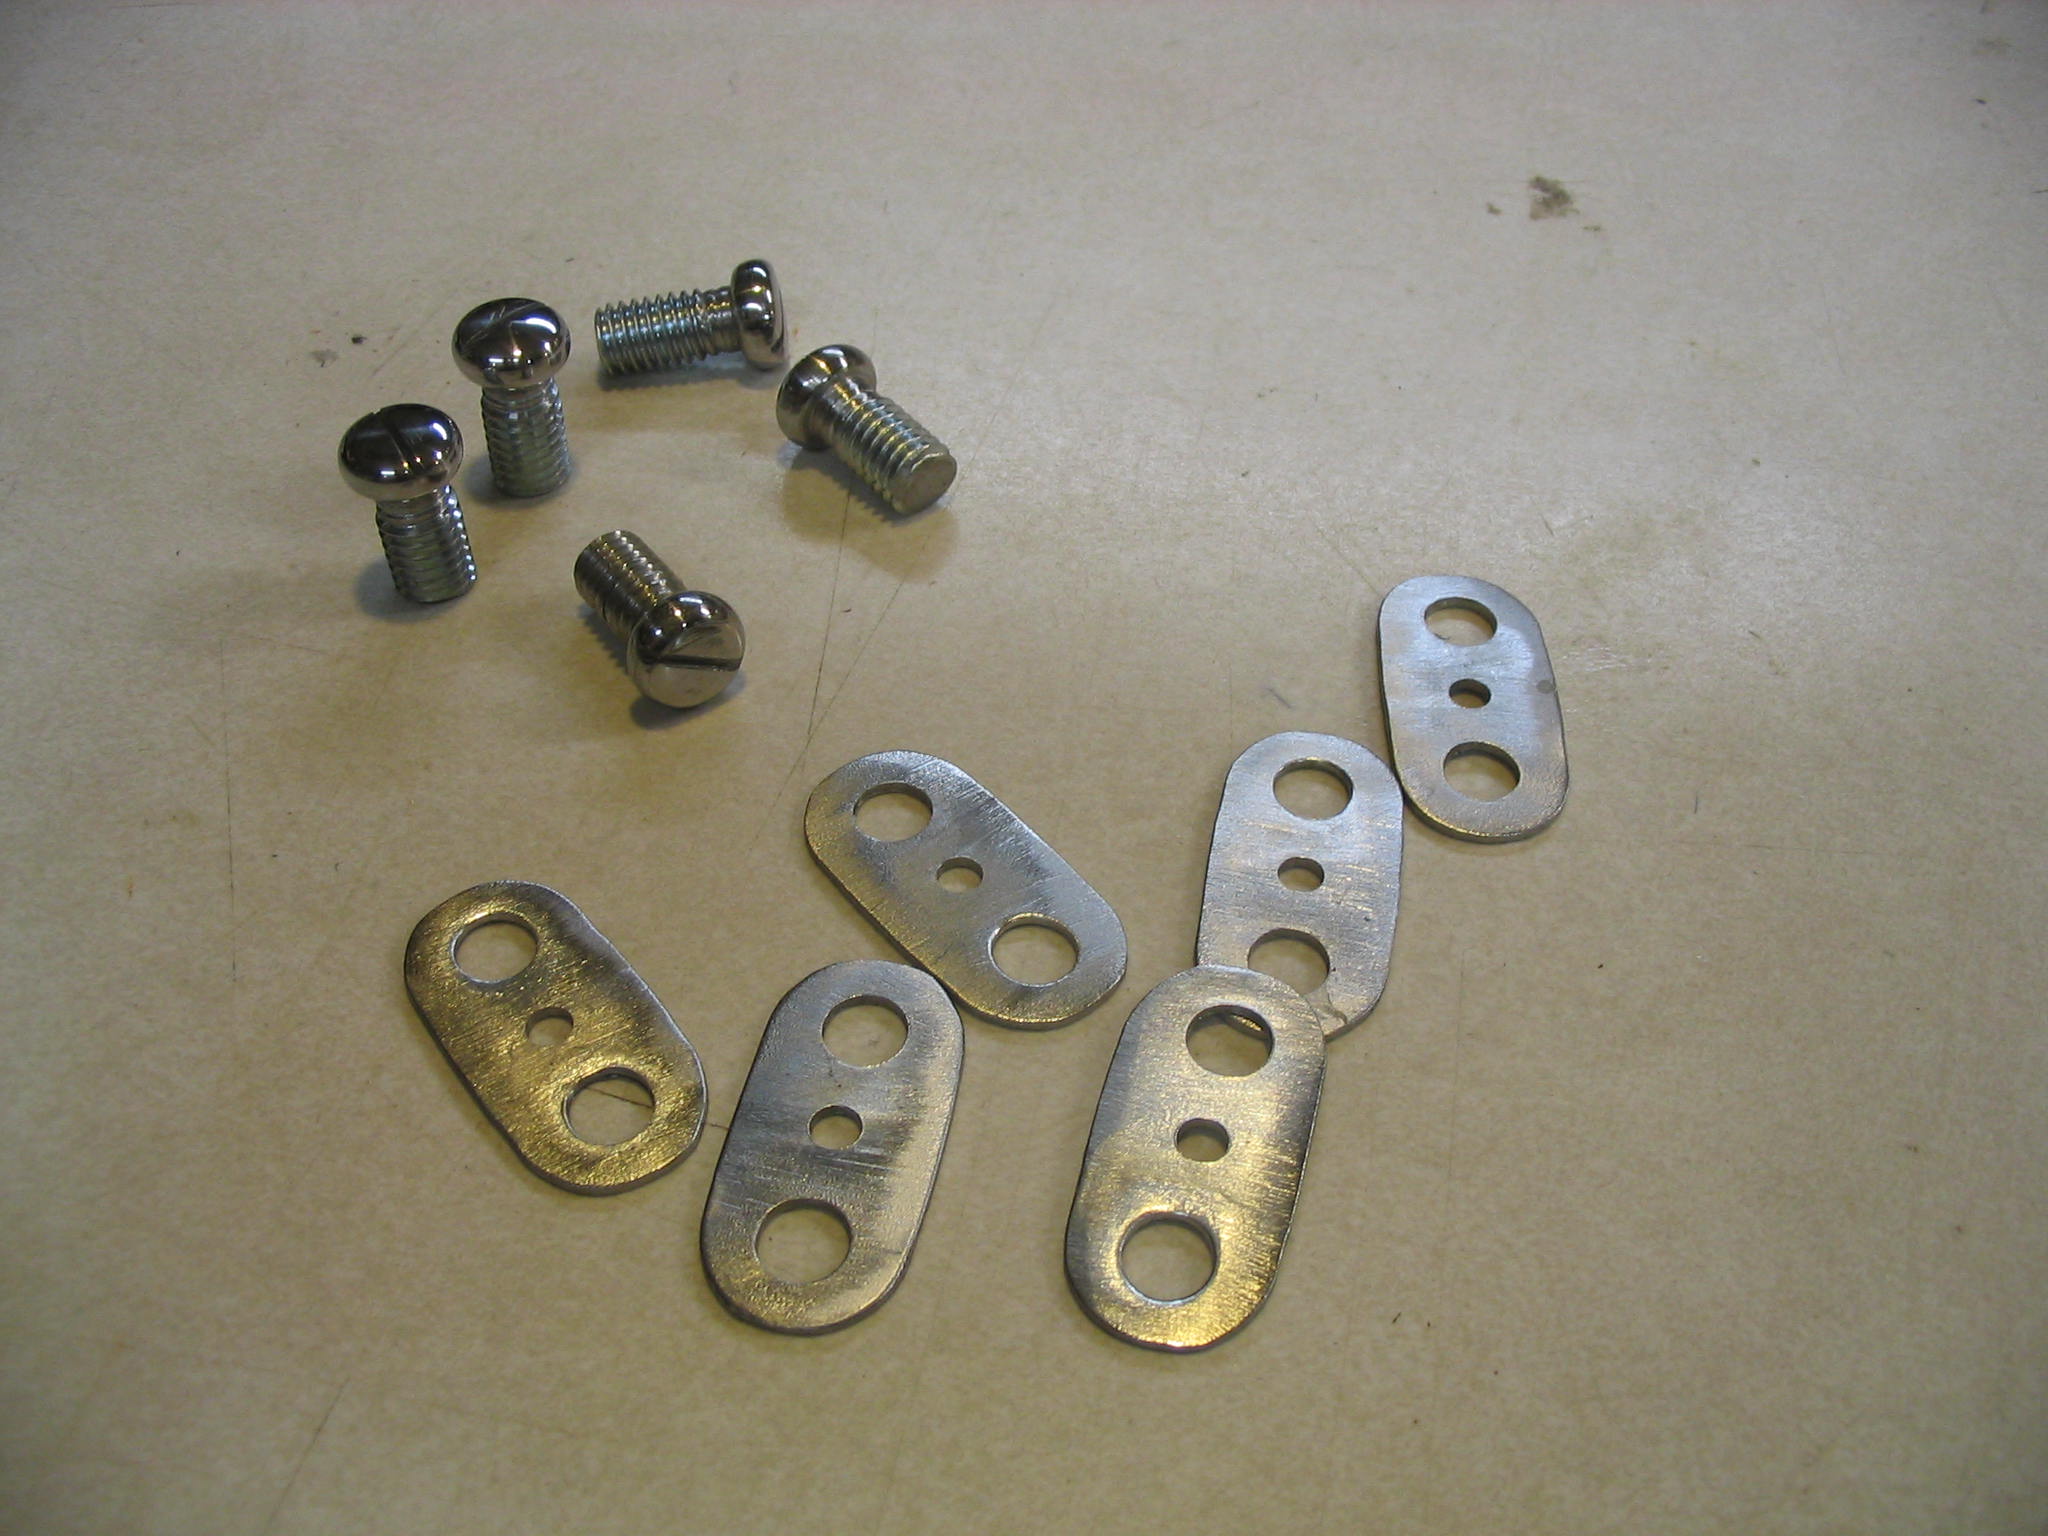
I built the arm using 3/8″ chrome-plated copper pipe. The sections are connected by ball joints made from short bolts, with the heads rounded off using a file in the drill press. I first thought I needed to tap the tubes for the bolts. Then I found the copper was so soft the bolts would tap themselves.
The relatively-small contact area of the ball joints makes them somewhat weak. This means the lamp shade should be as light as possible.
First assembly
Once I had the base, arms, and CCFL lamp built, I assembled them together and soldered the CCFL bulb on the end of the wires running through the arms, to the CCFL inverter in the base. First try: Oh no! It didn’t work. The tube just glowed dimly on each end.
I checked all the connections; no help. I disassembled it and connected the tube back directly to the inverter. It worked. Huh?!?! I determined there was nothing wrong with any of the individual parts or wires; they just didn’t work together. I could not get the lamp to work with the inverter in the base, away from the tube.
Argh! Frustrated, I set the project aside for quite a few months.
Here is my crazy explorer costume from Halloween 2007. I was inspired by old pictures of European explorers from the late 19th and early 20th century. Finishing touches included a pith helmet with goggles, a latern with a working flashlight in it, and a ridiculously oversized gun.
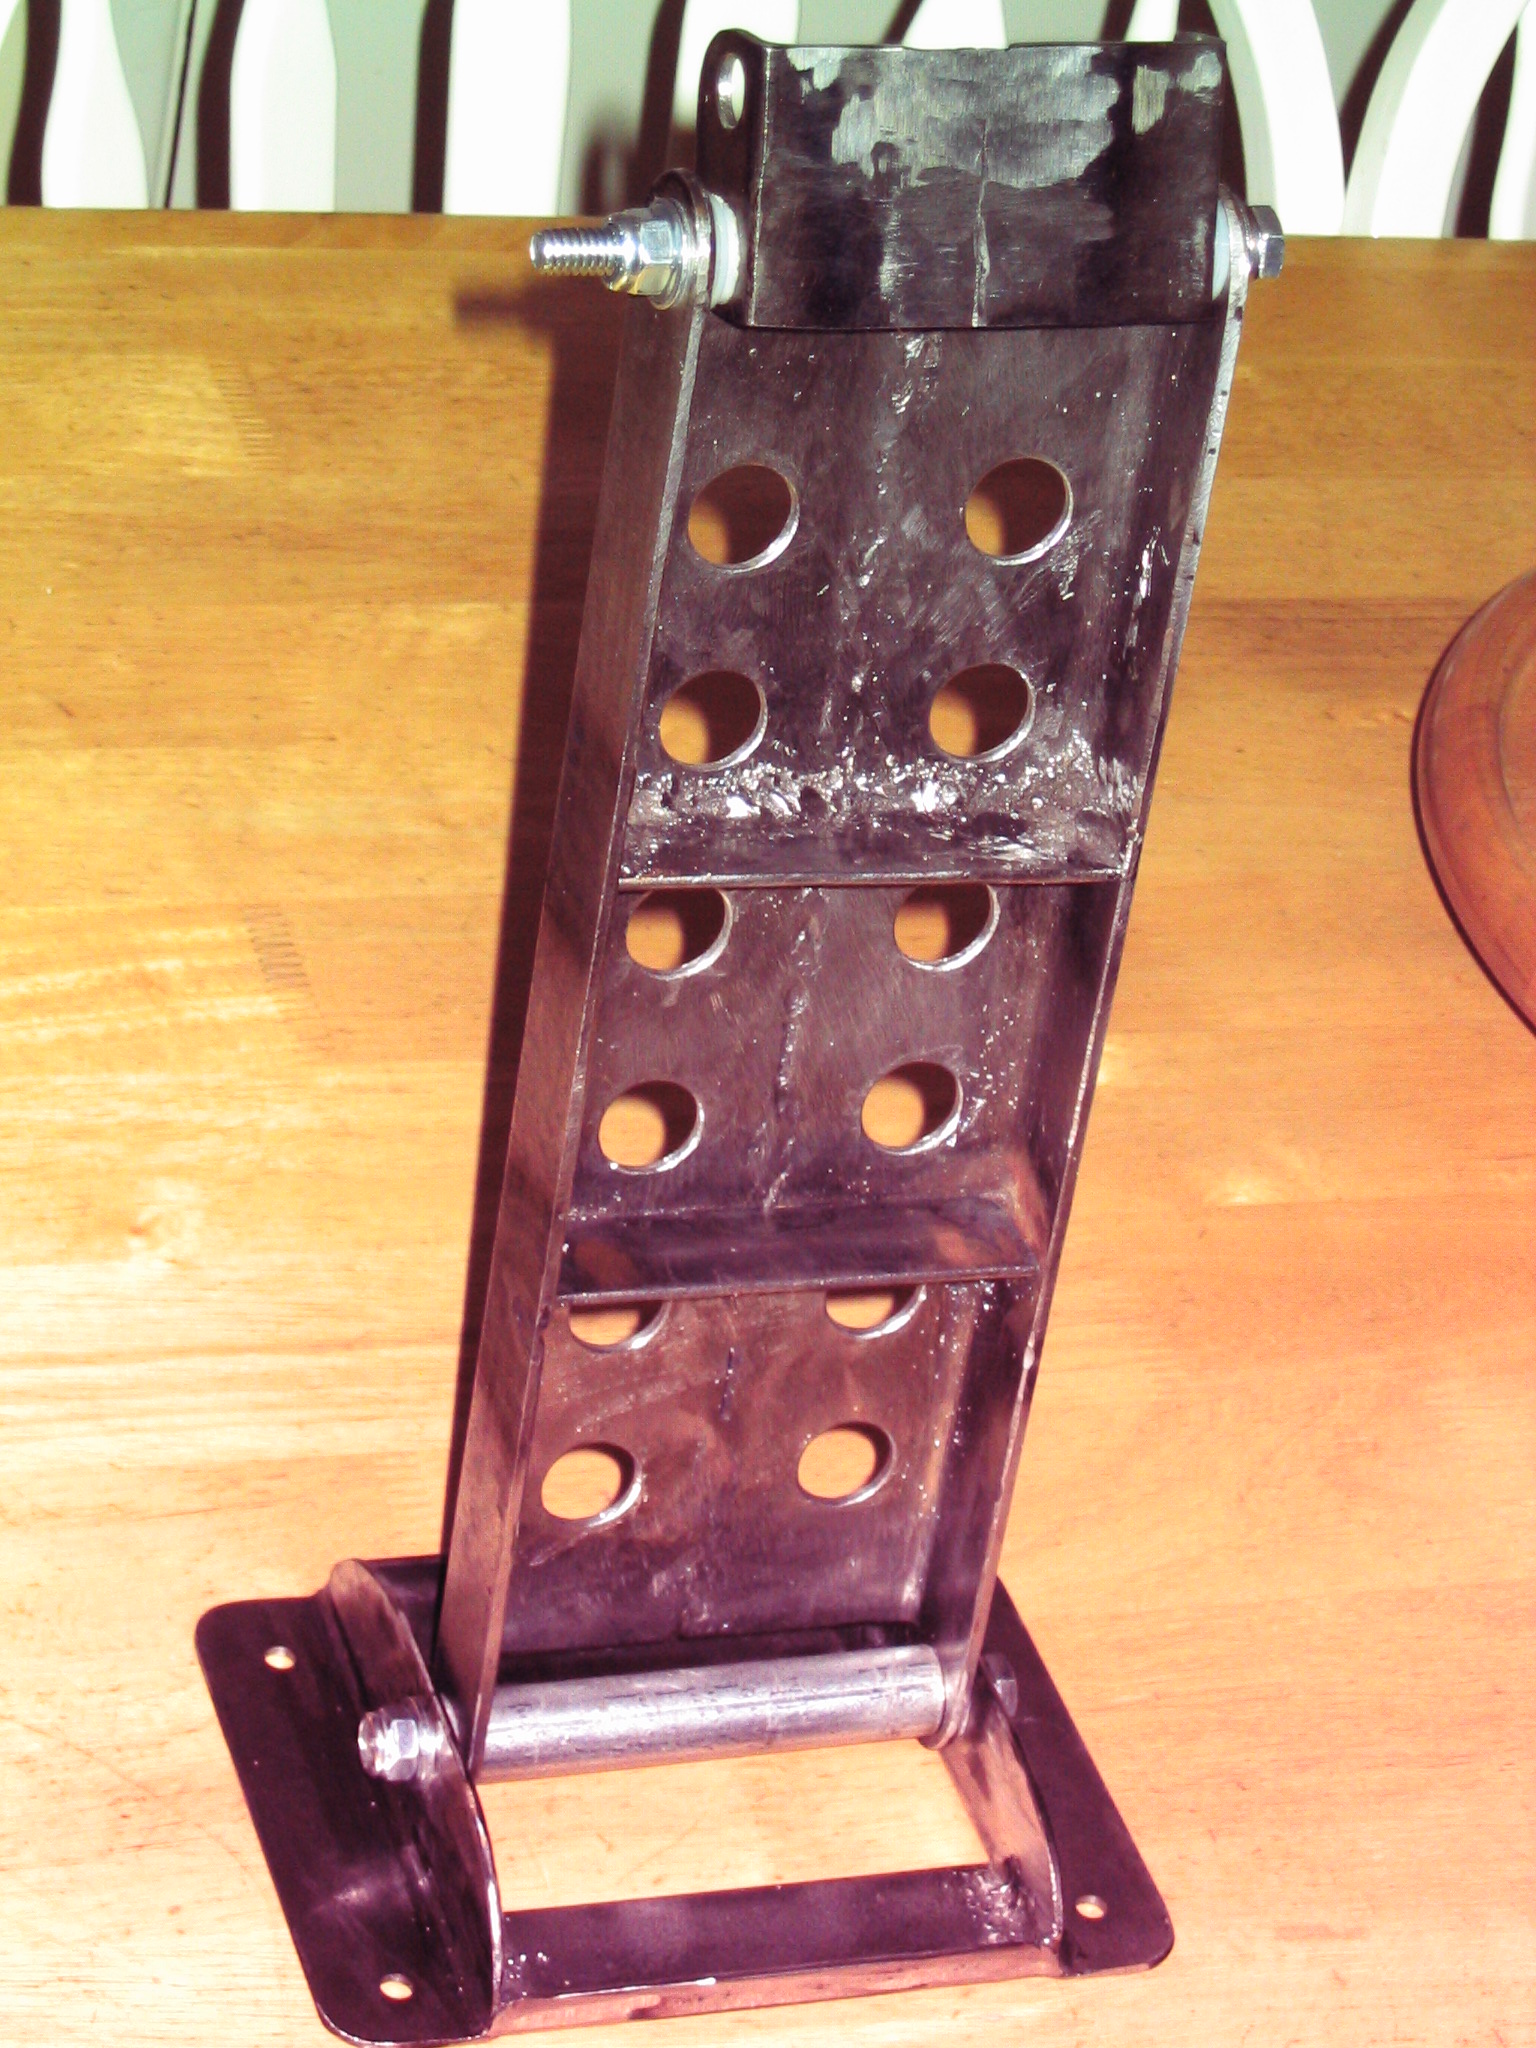
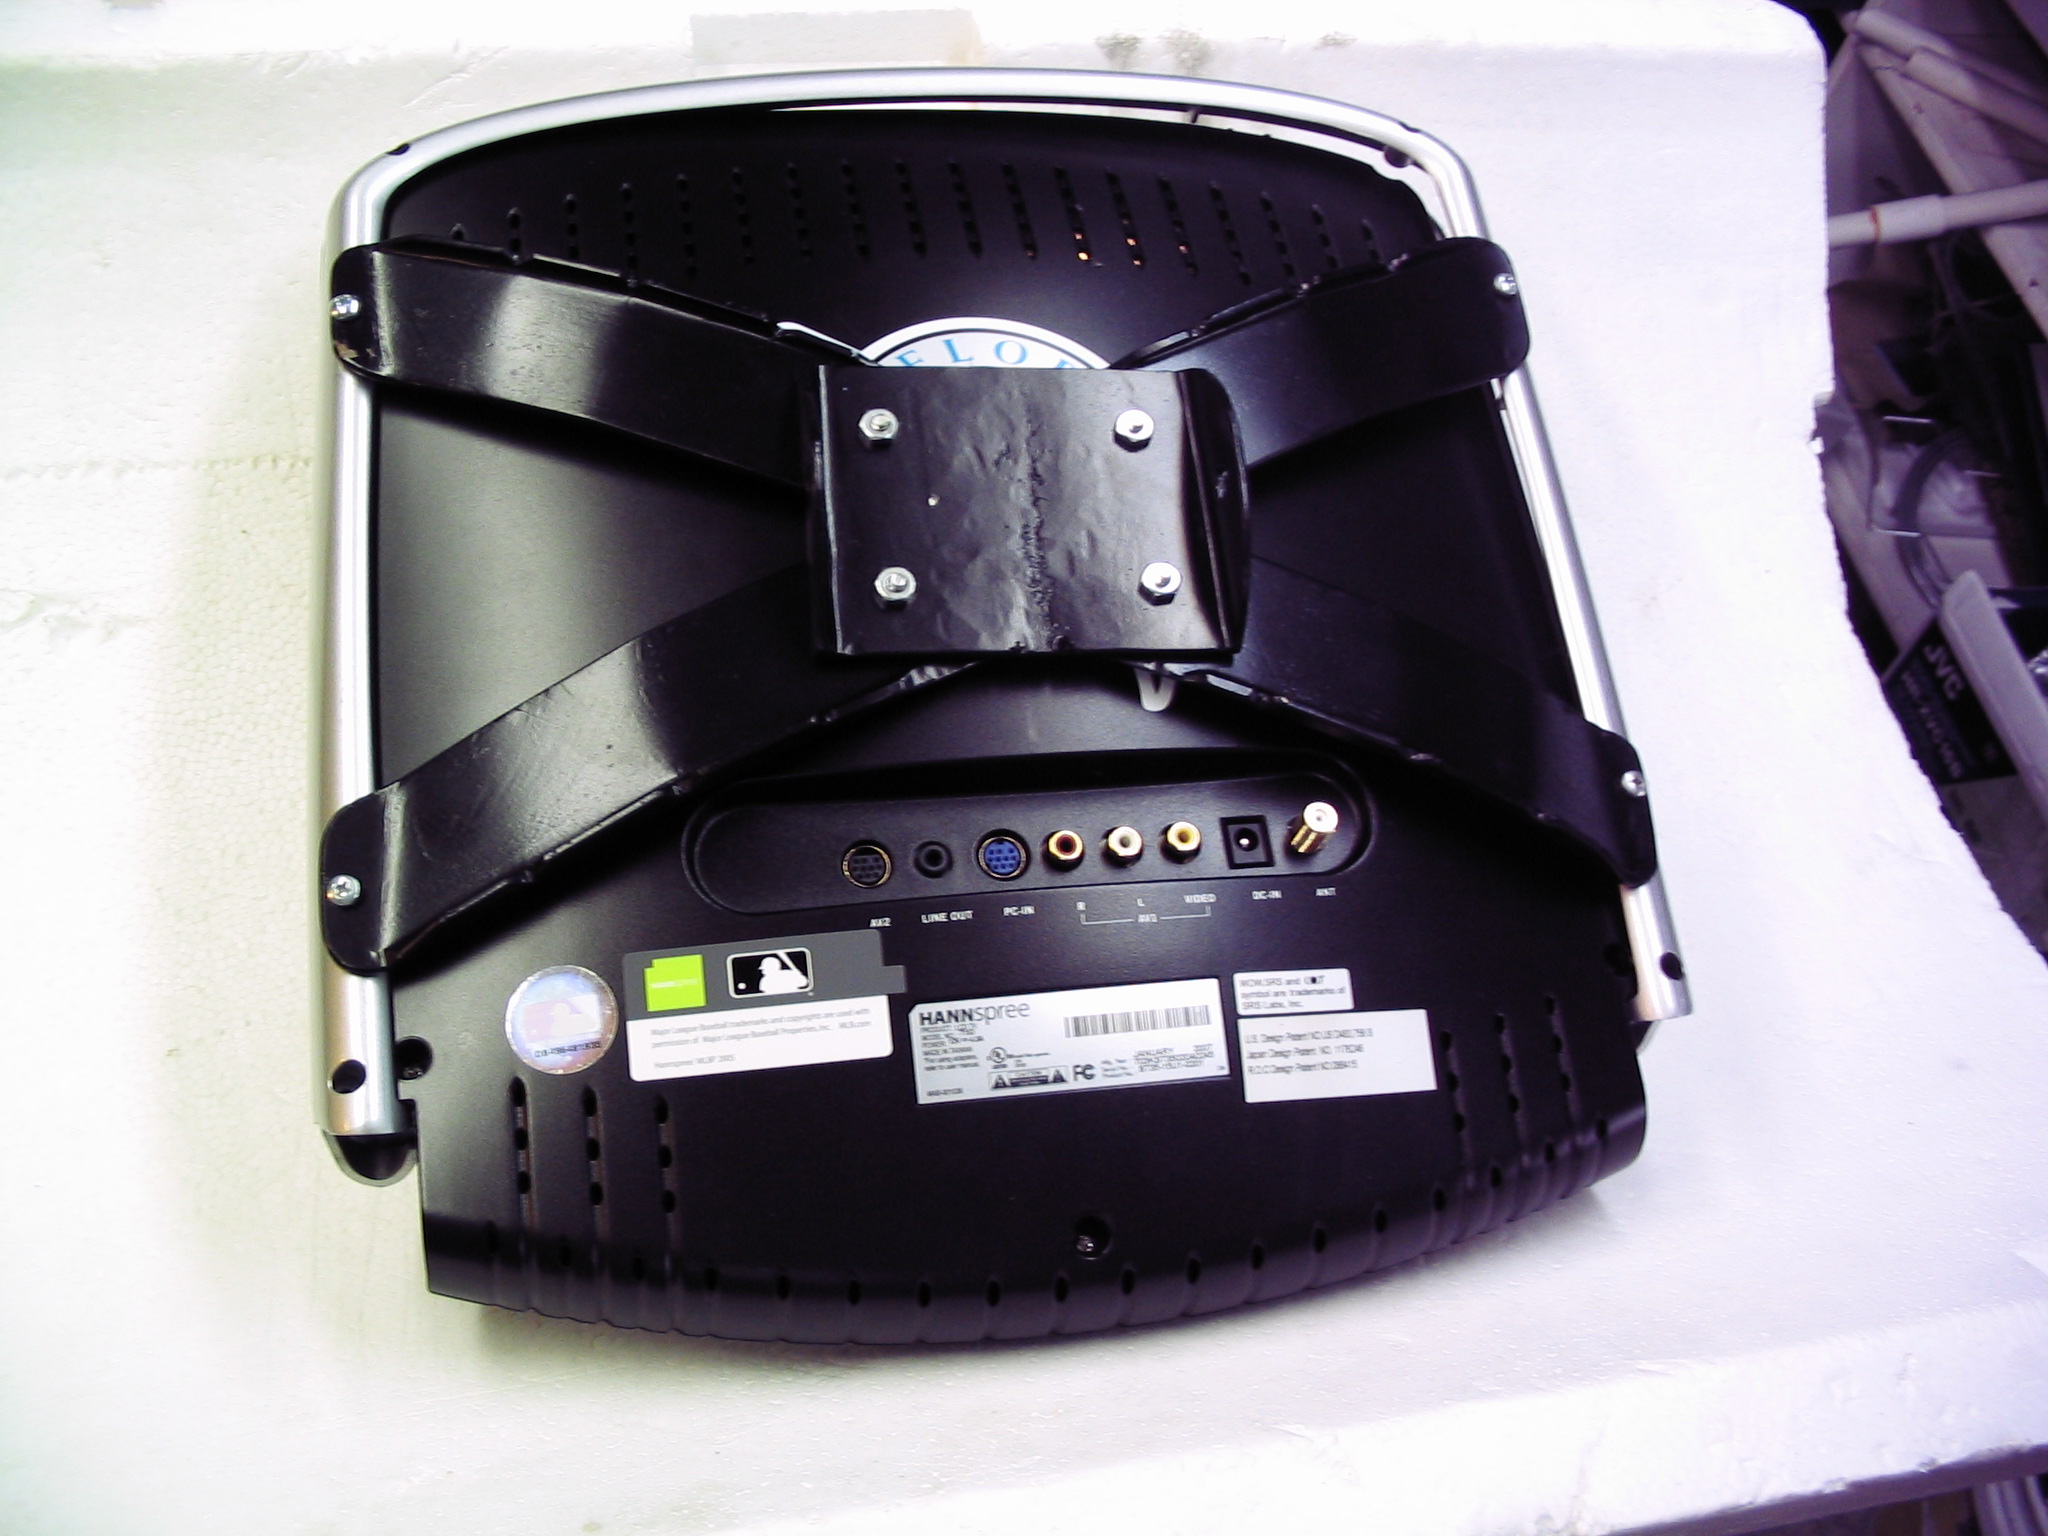
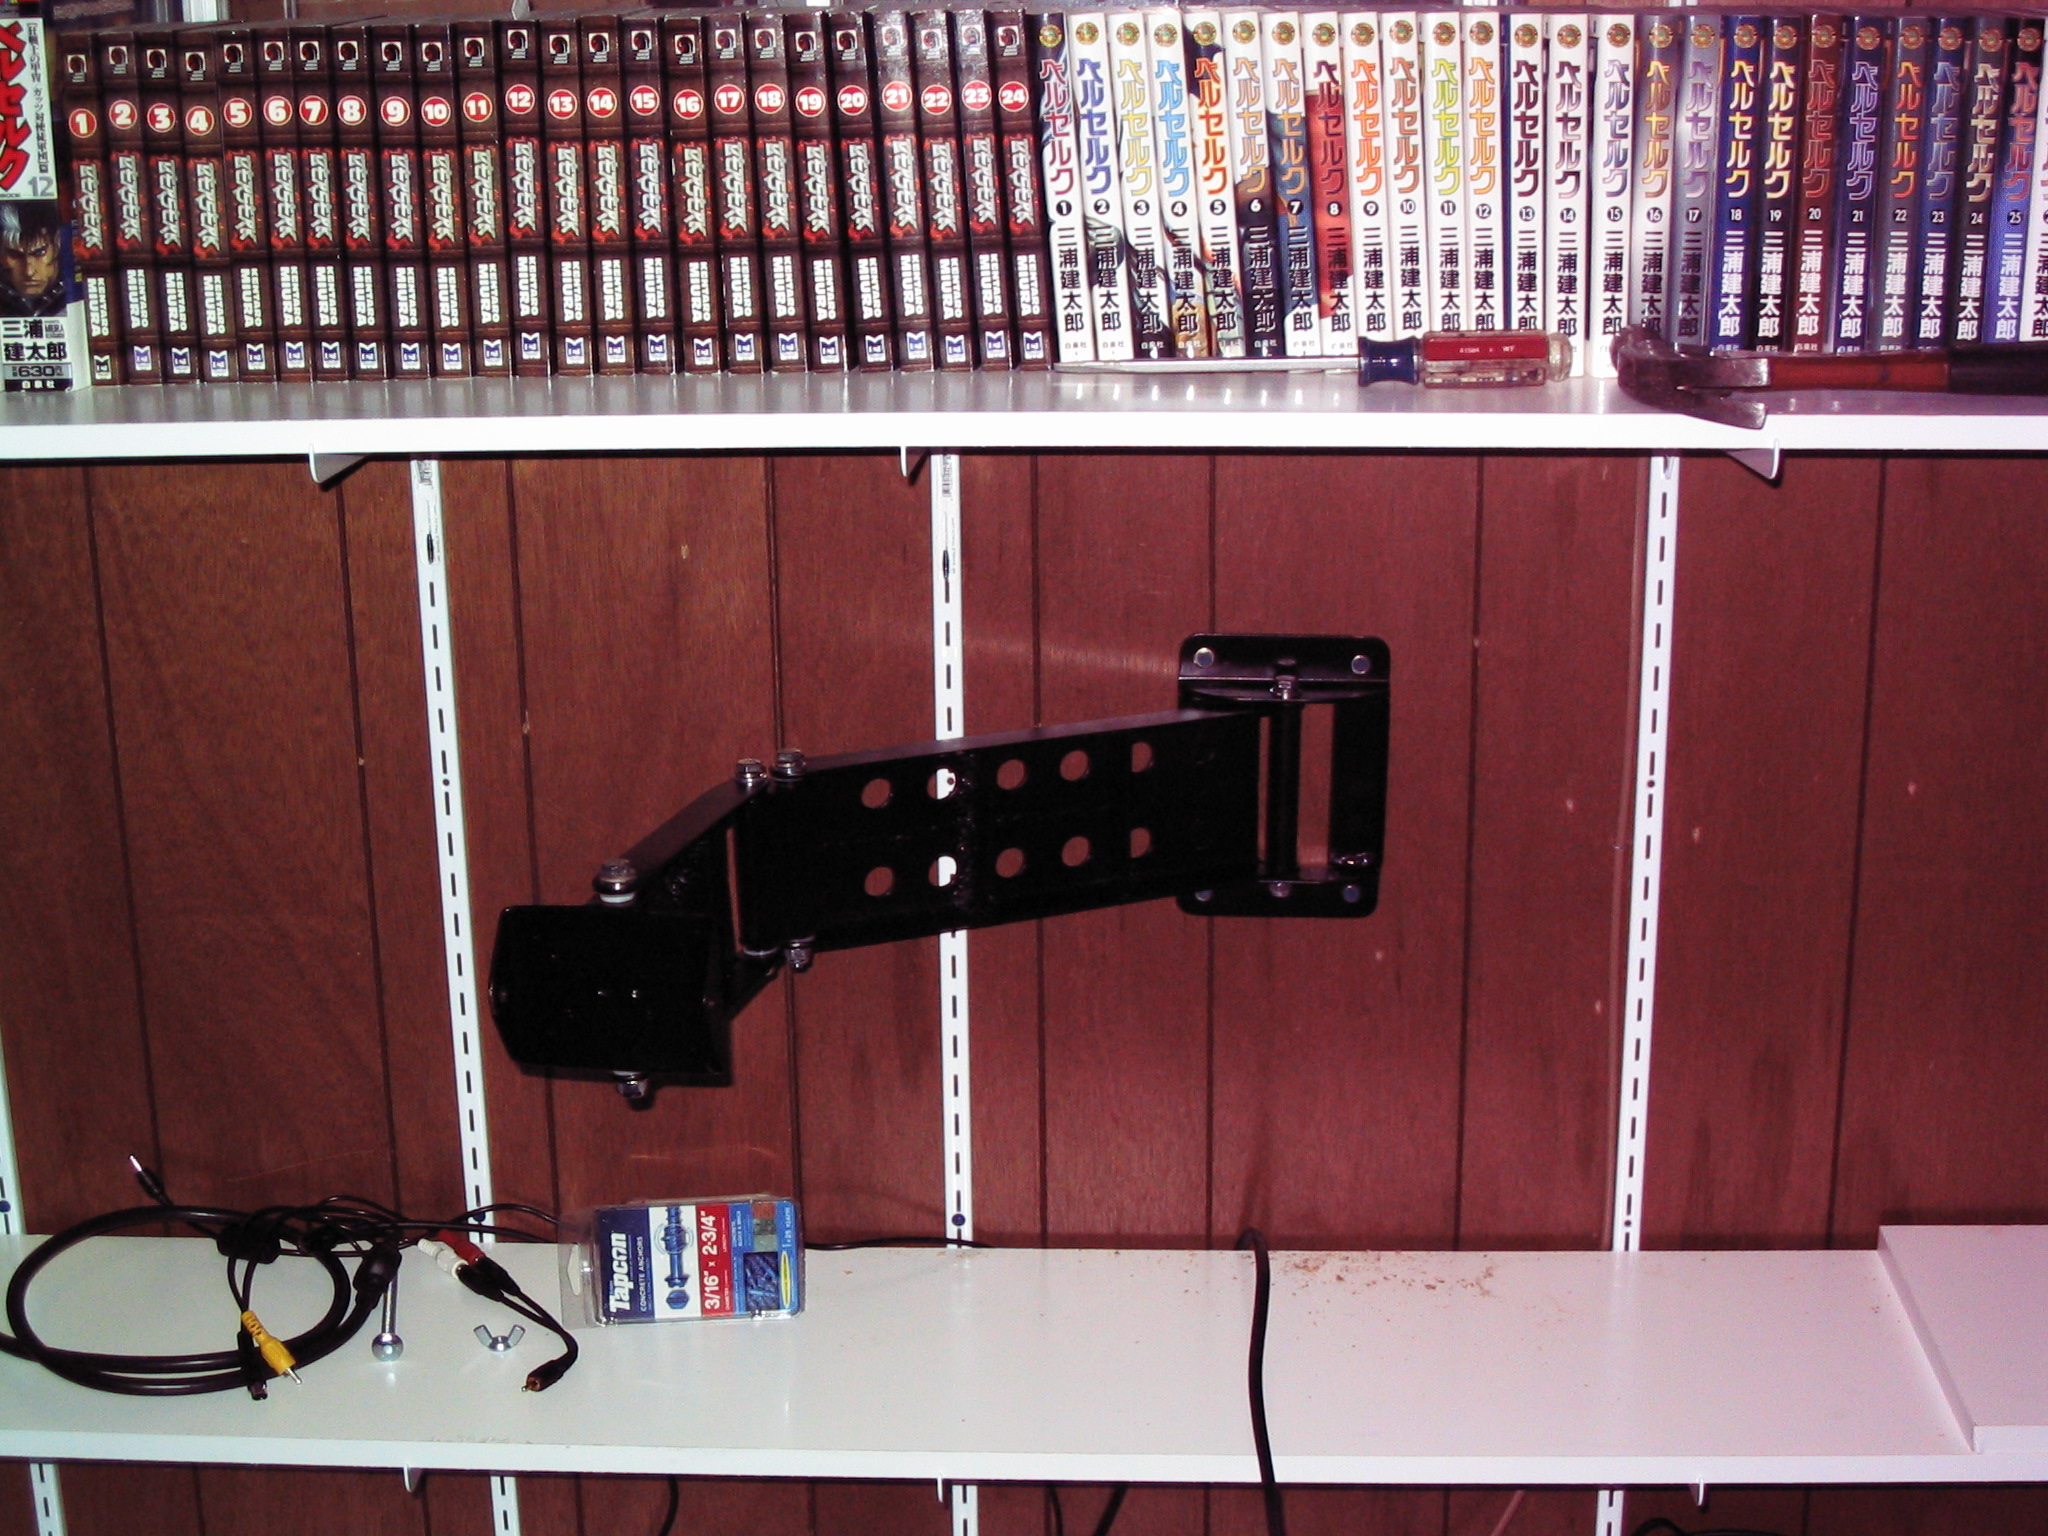
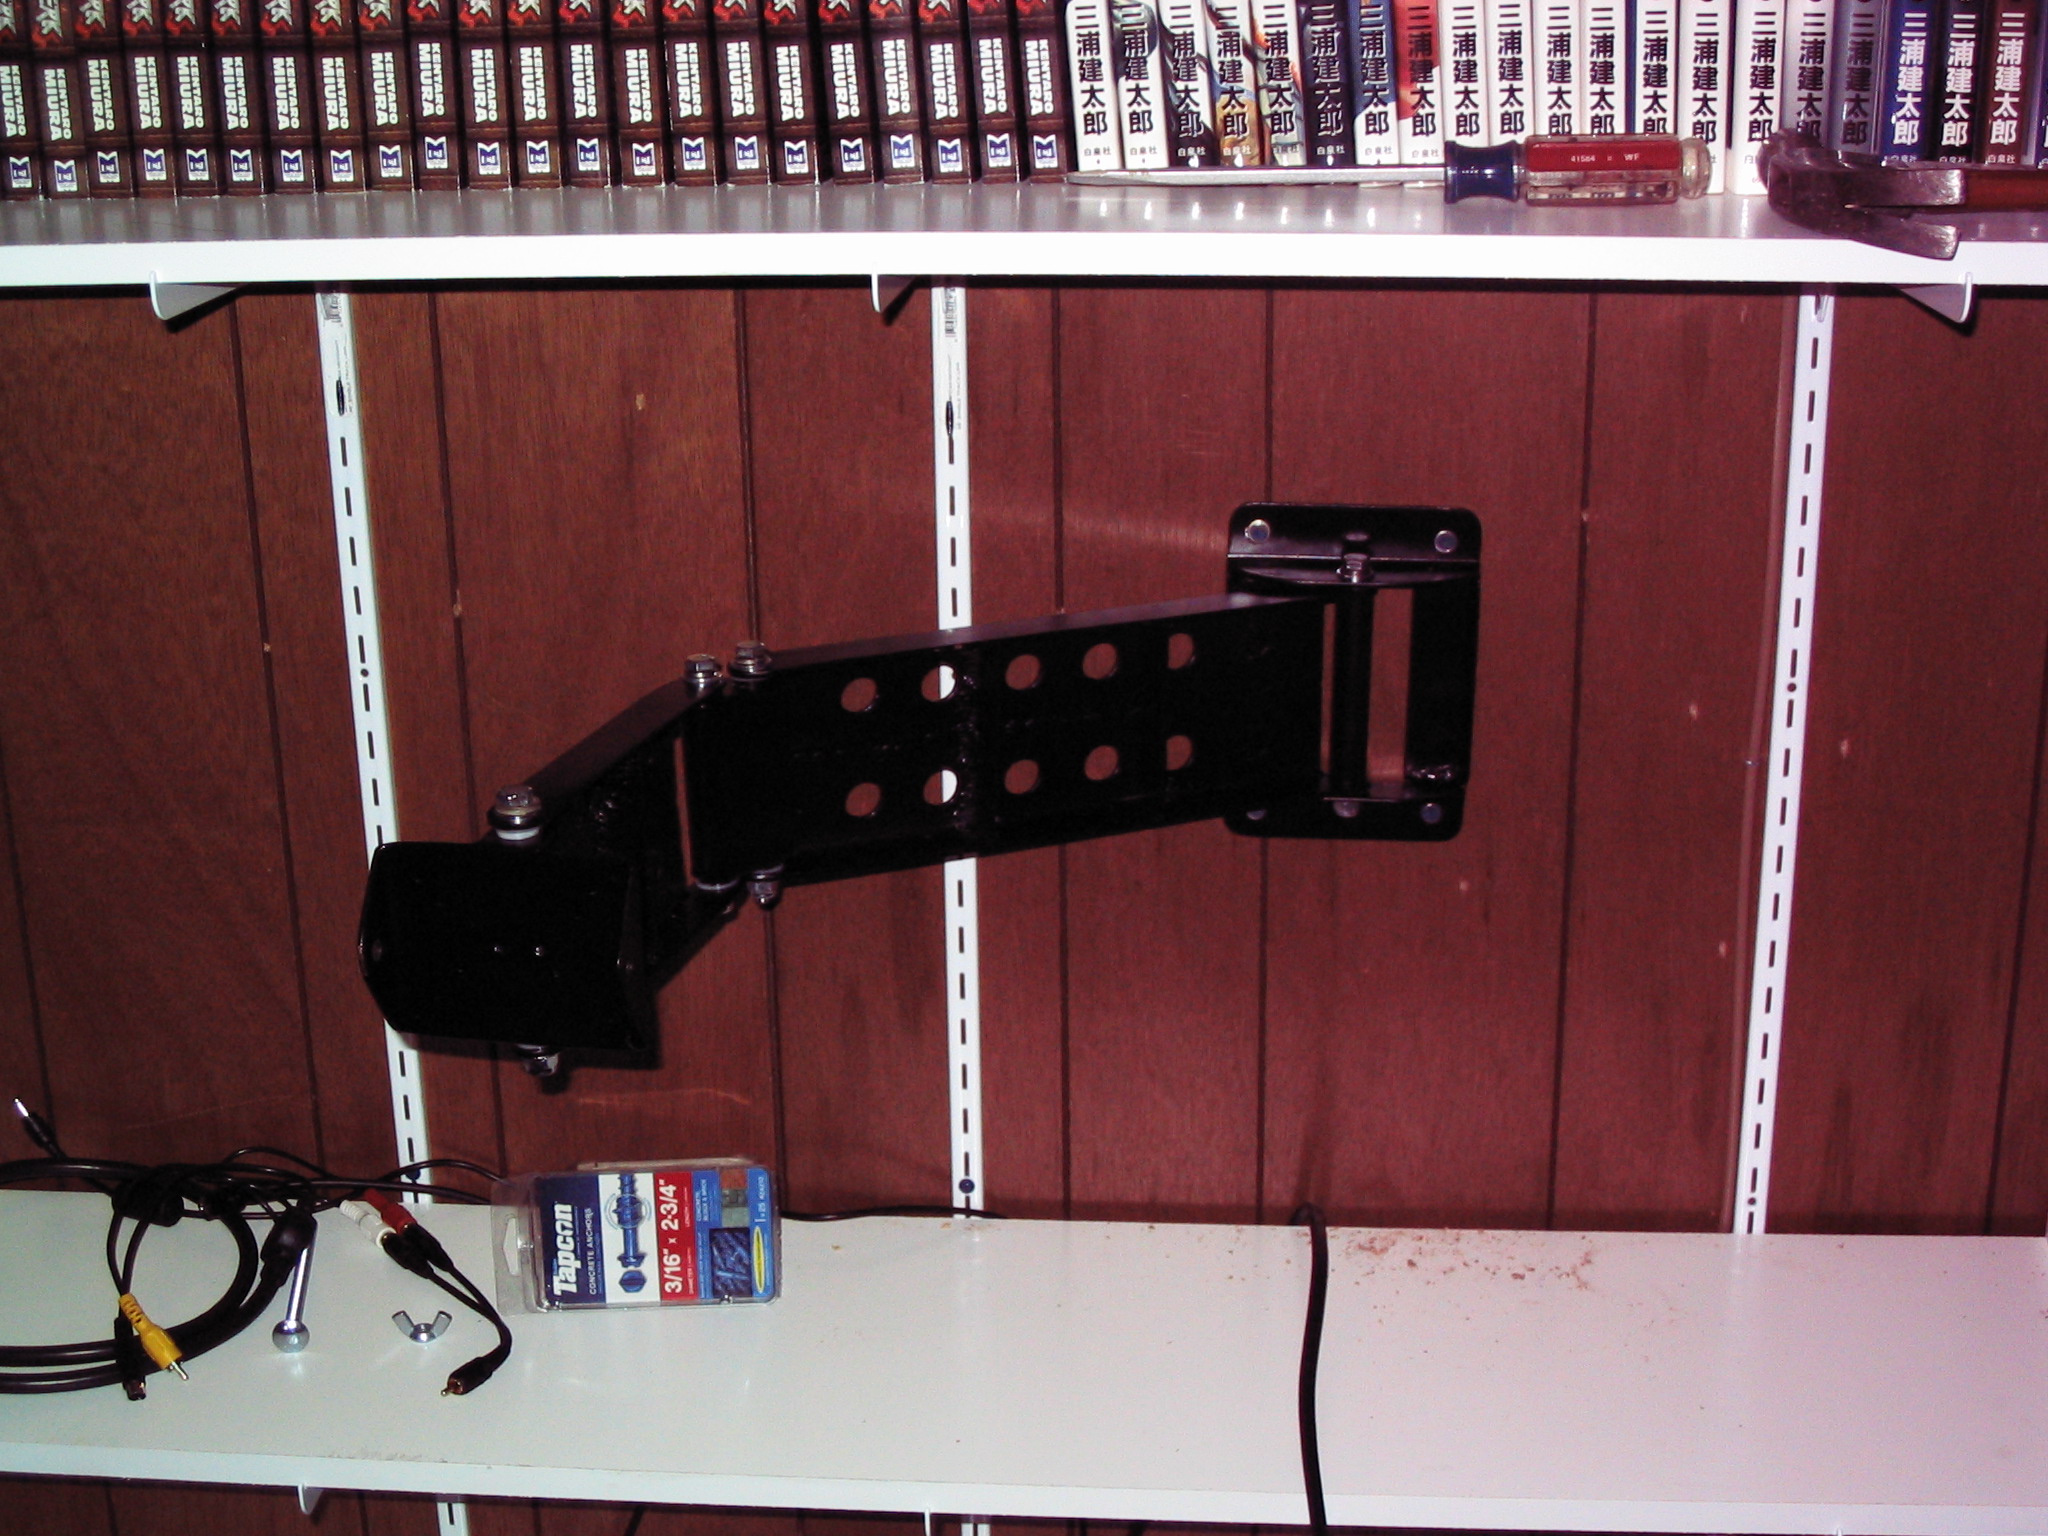
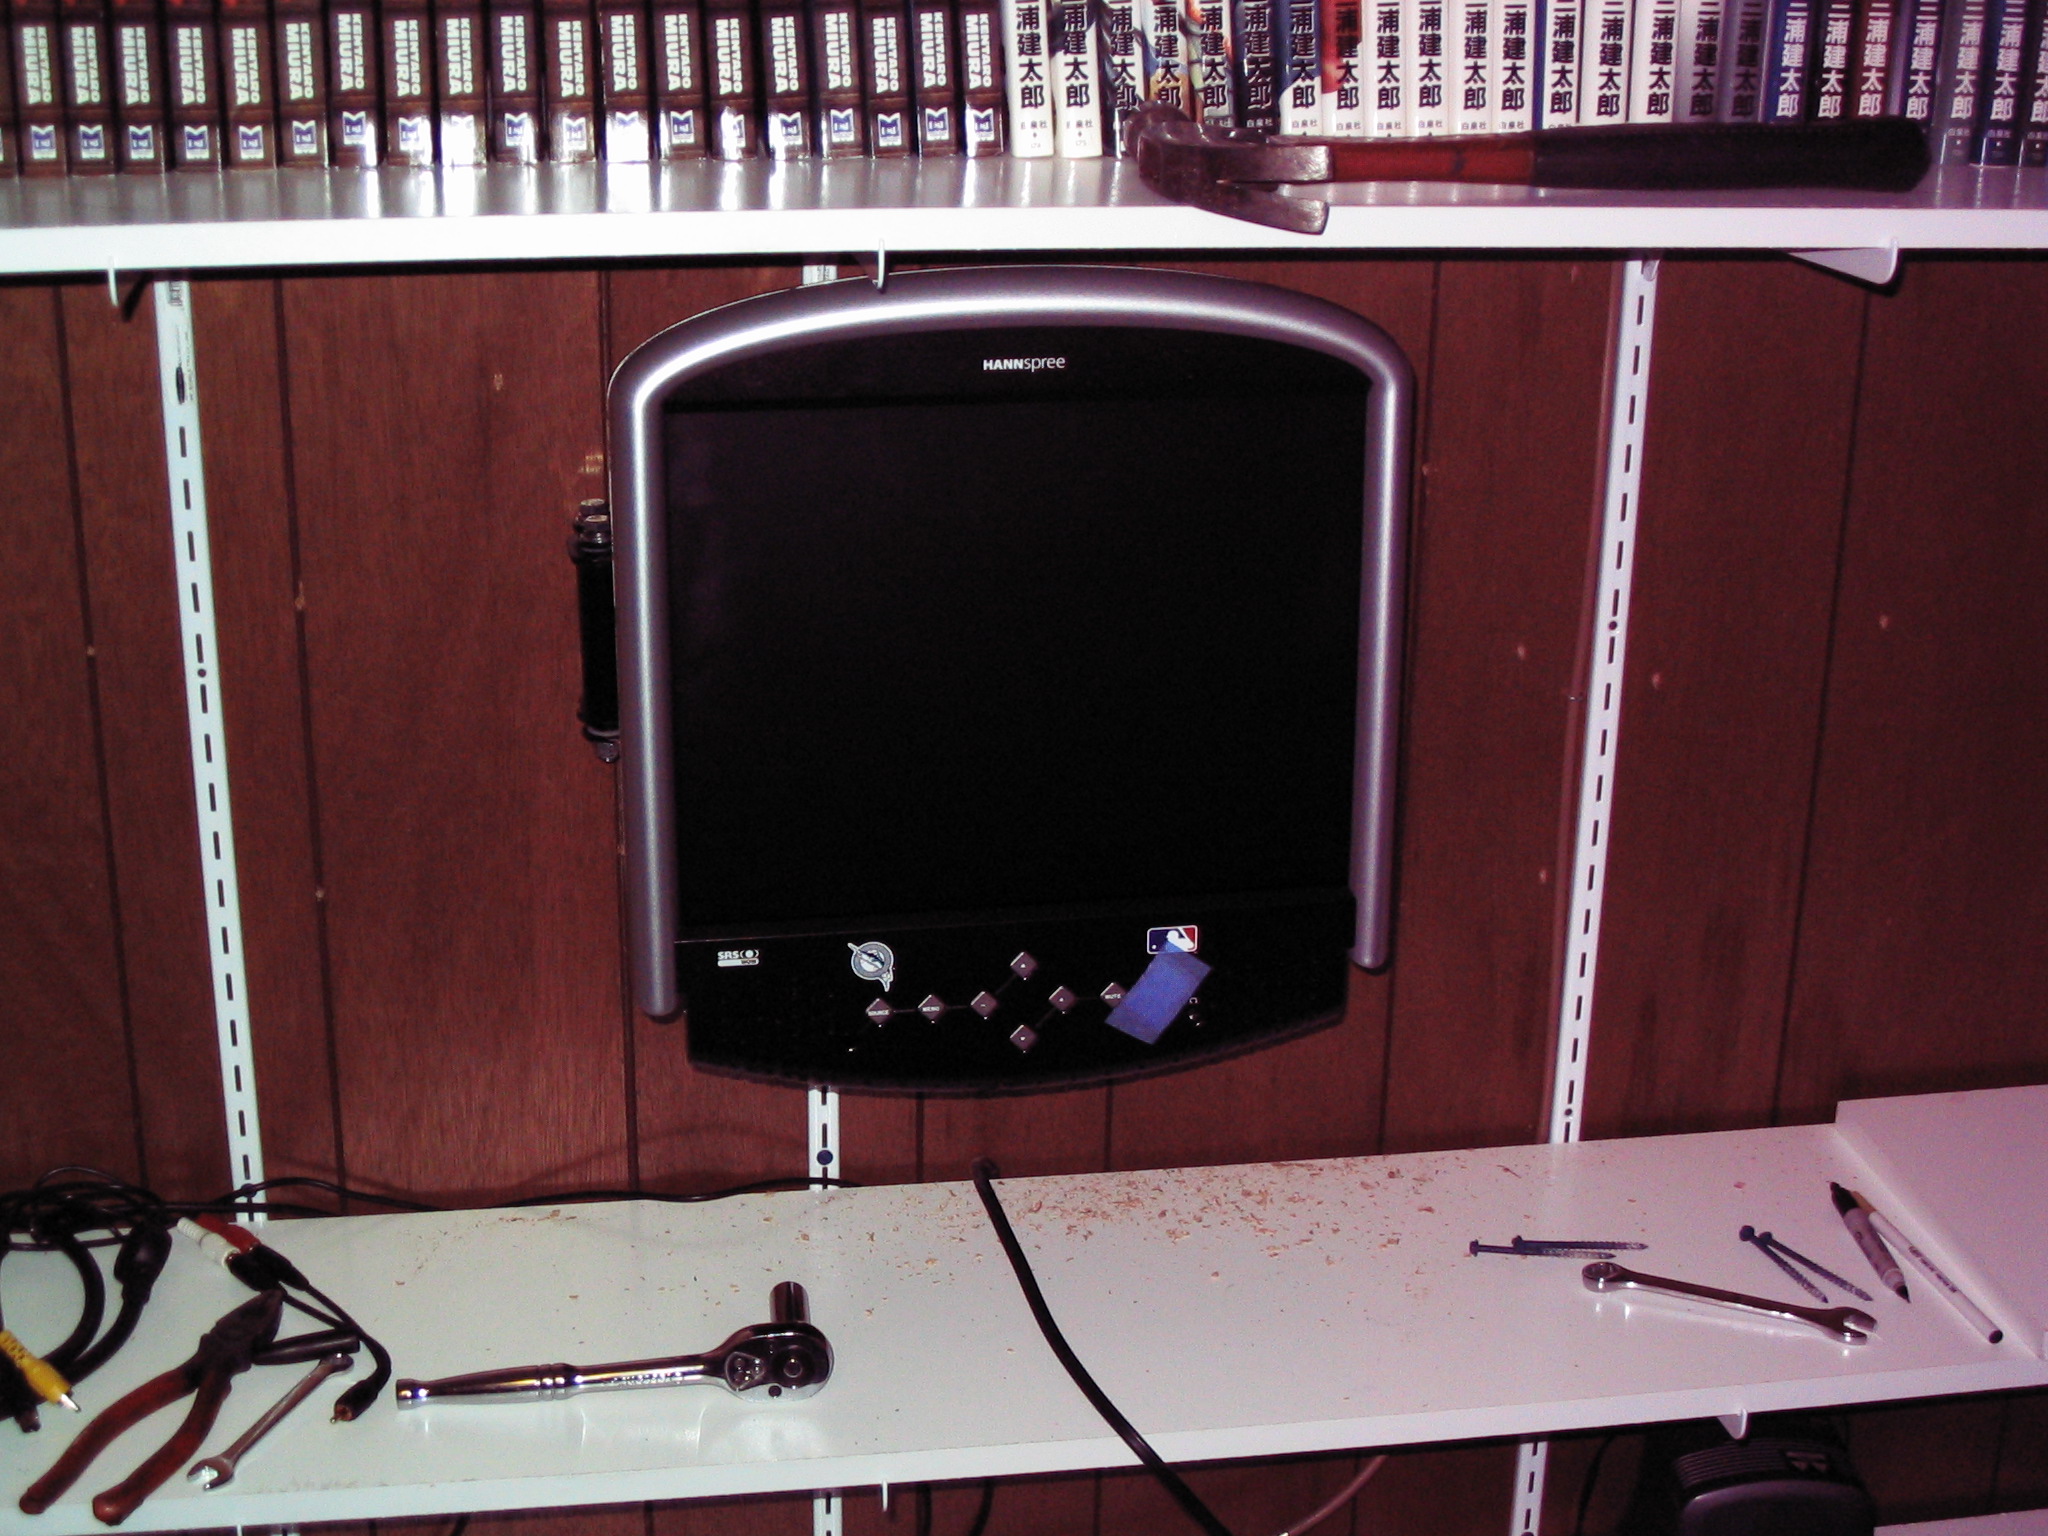
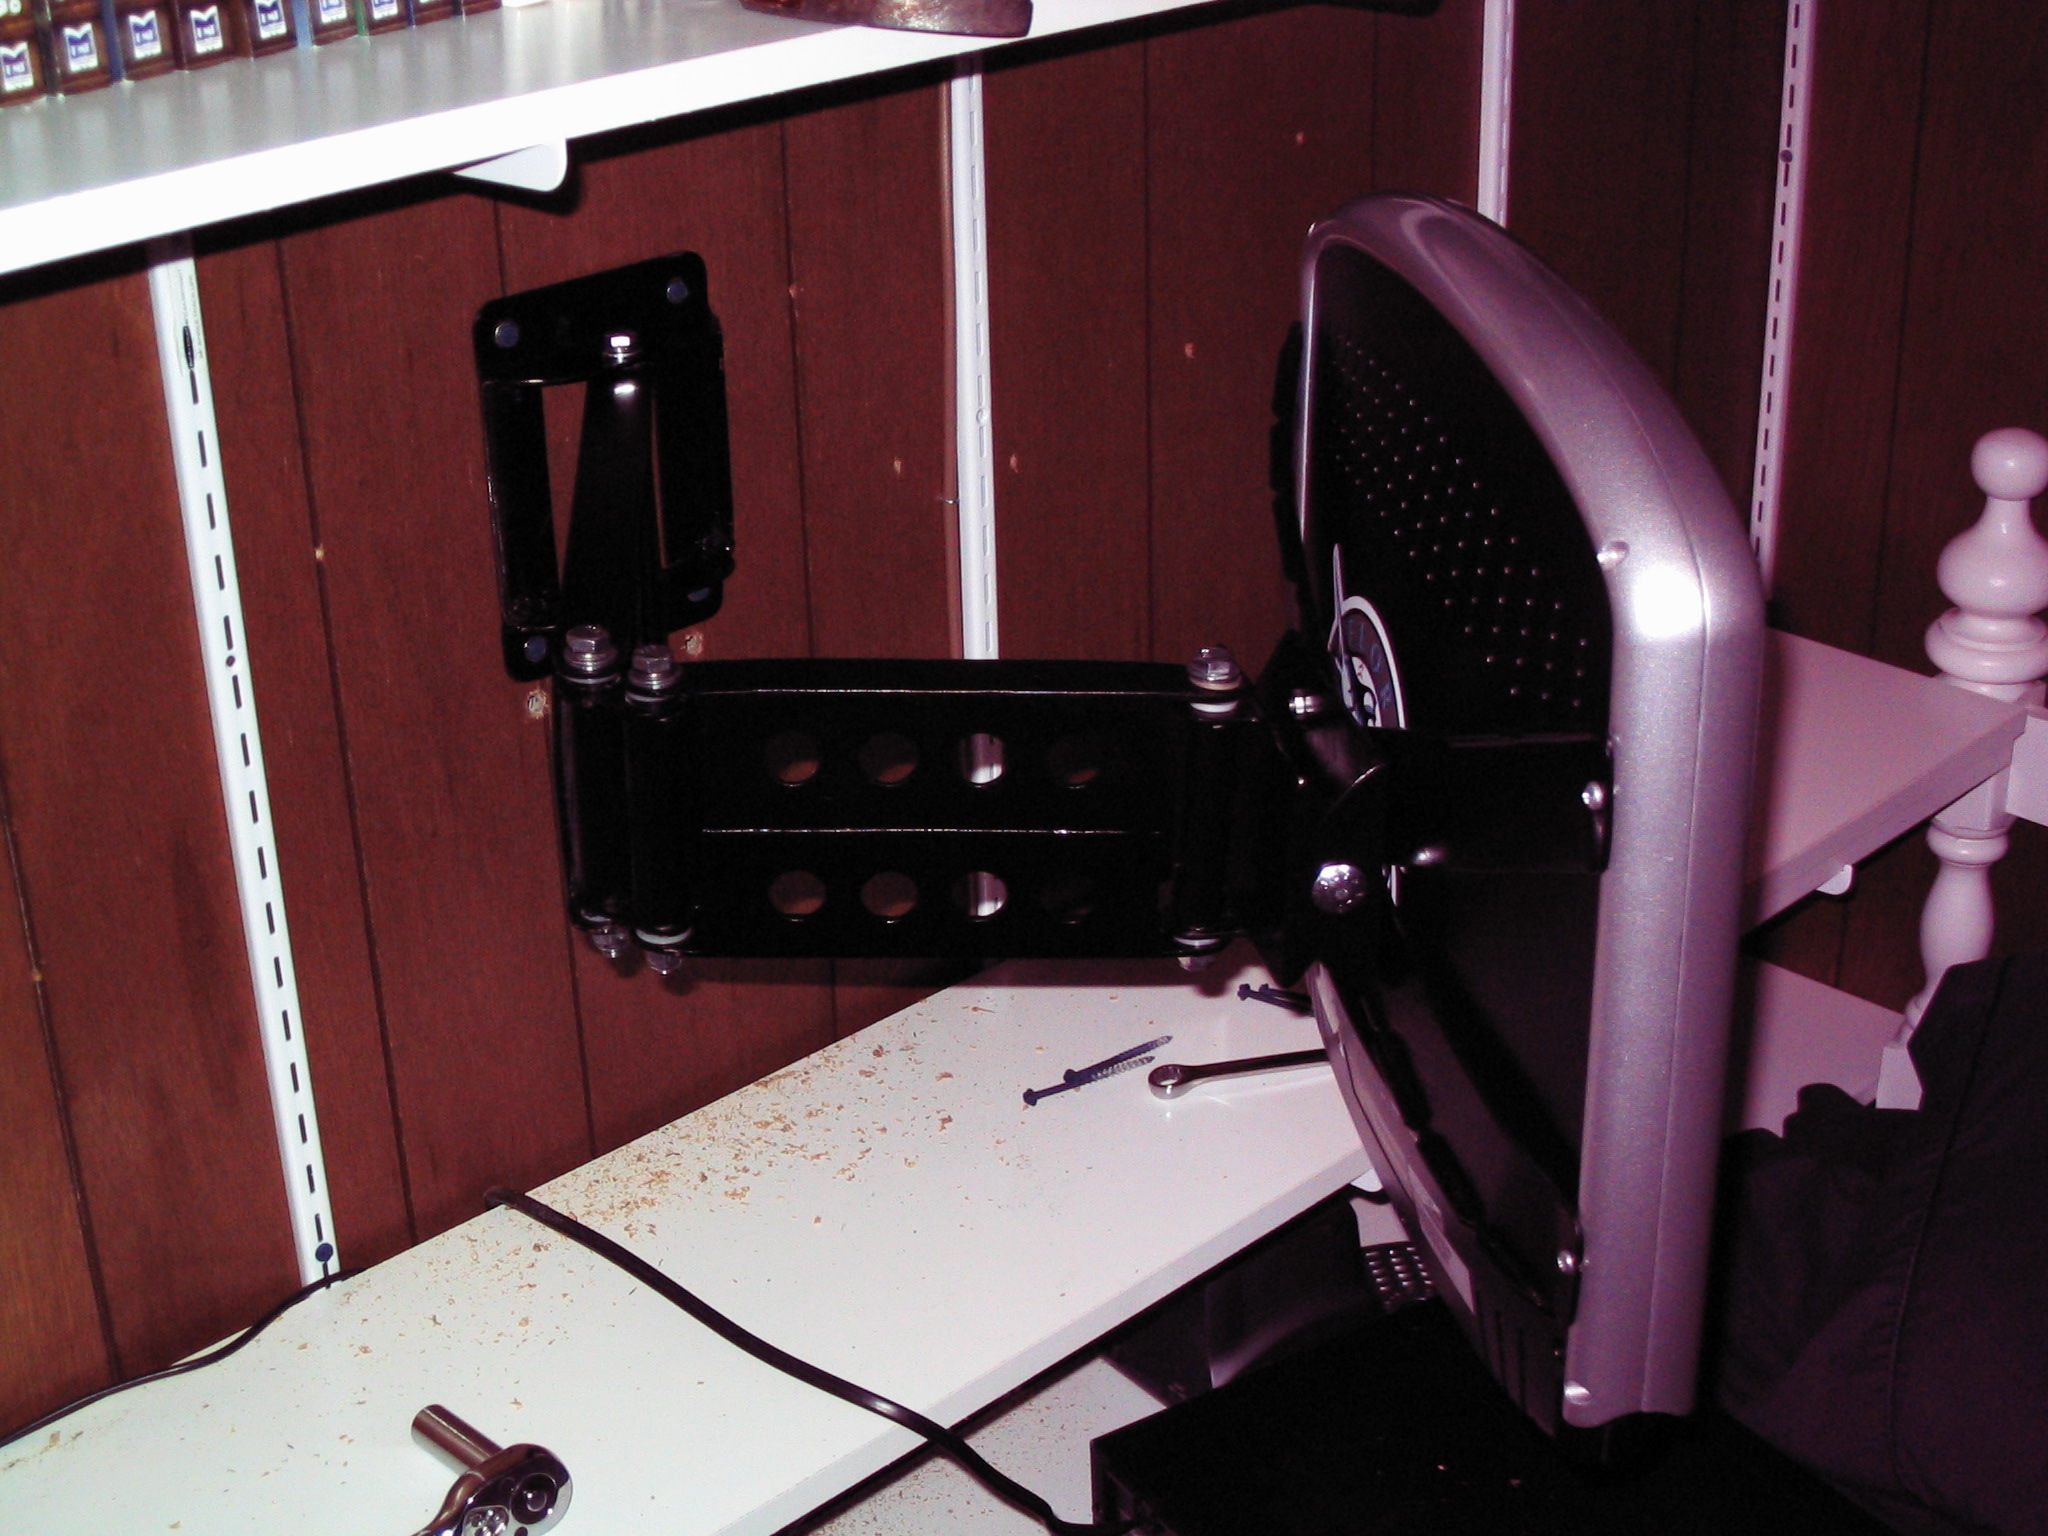
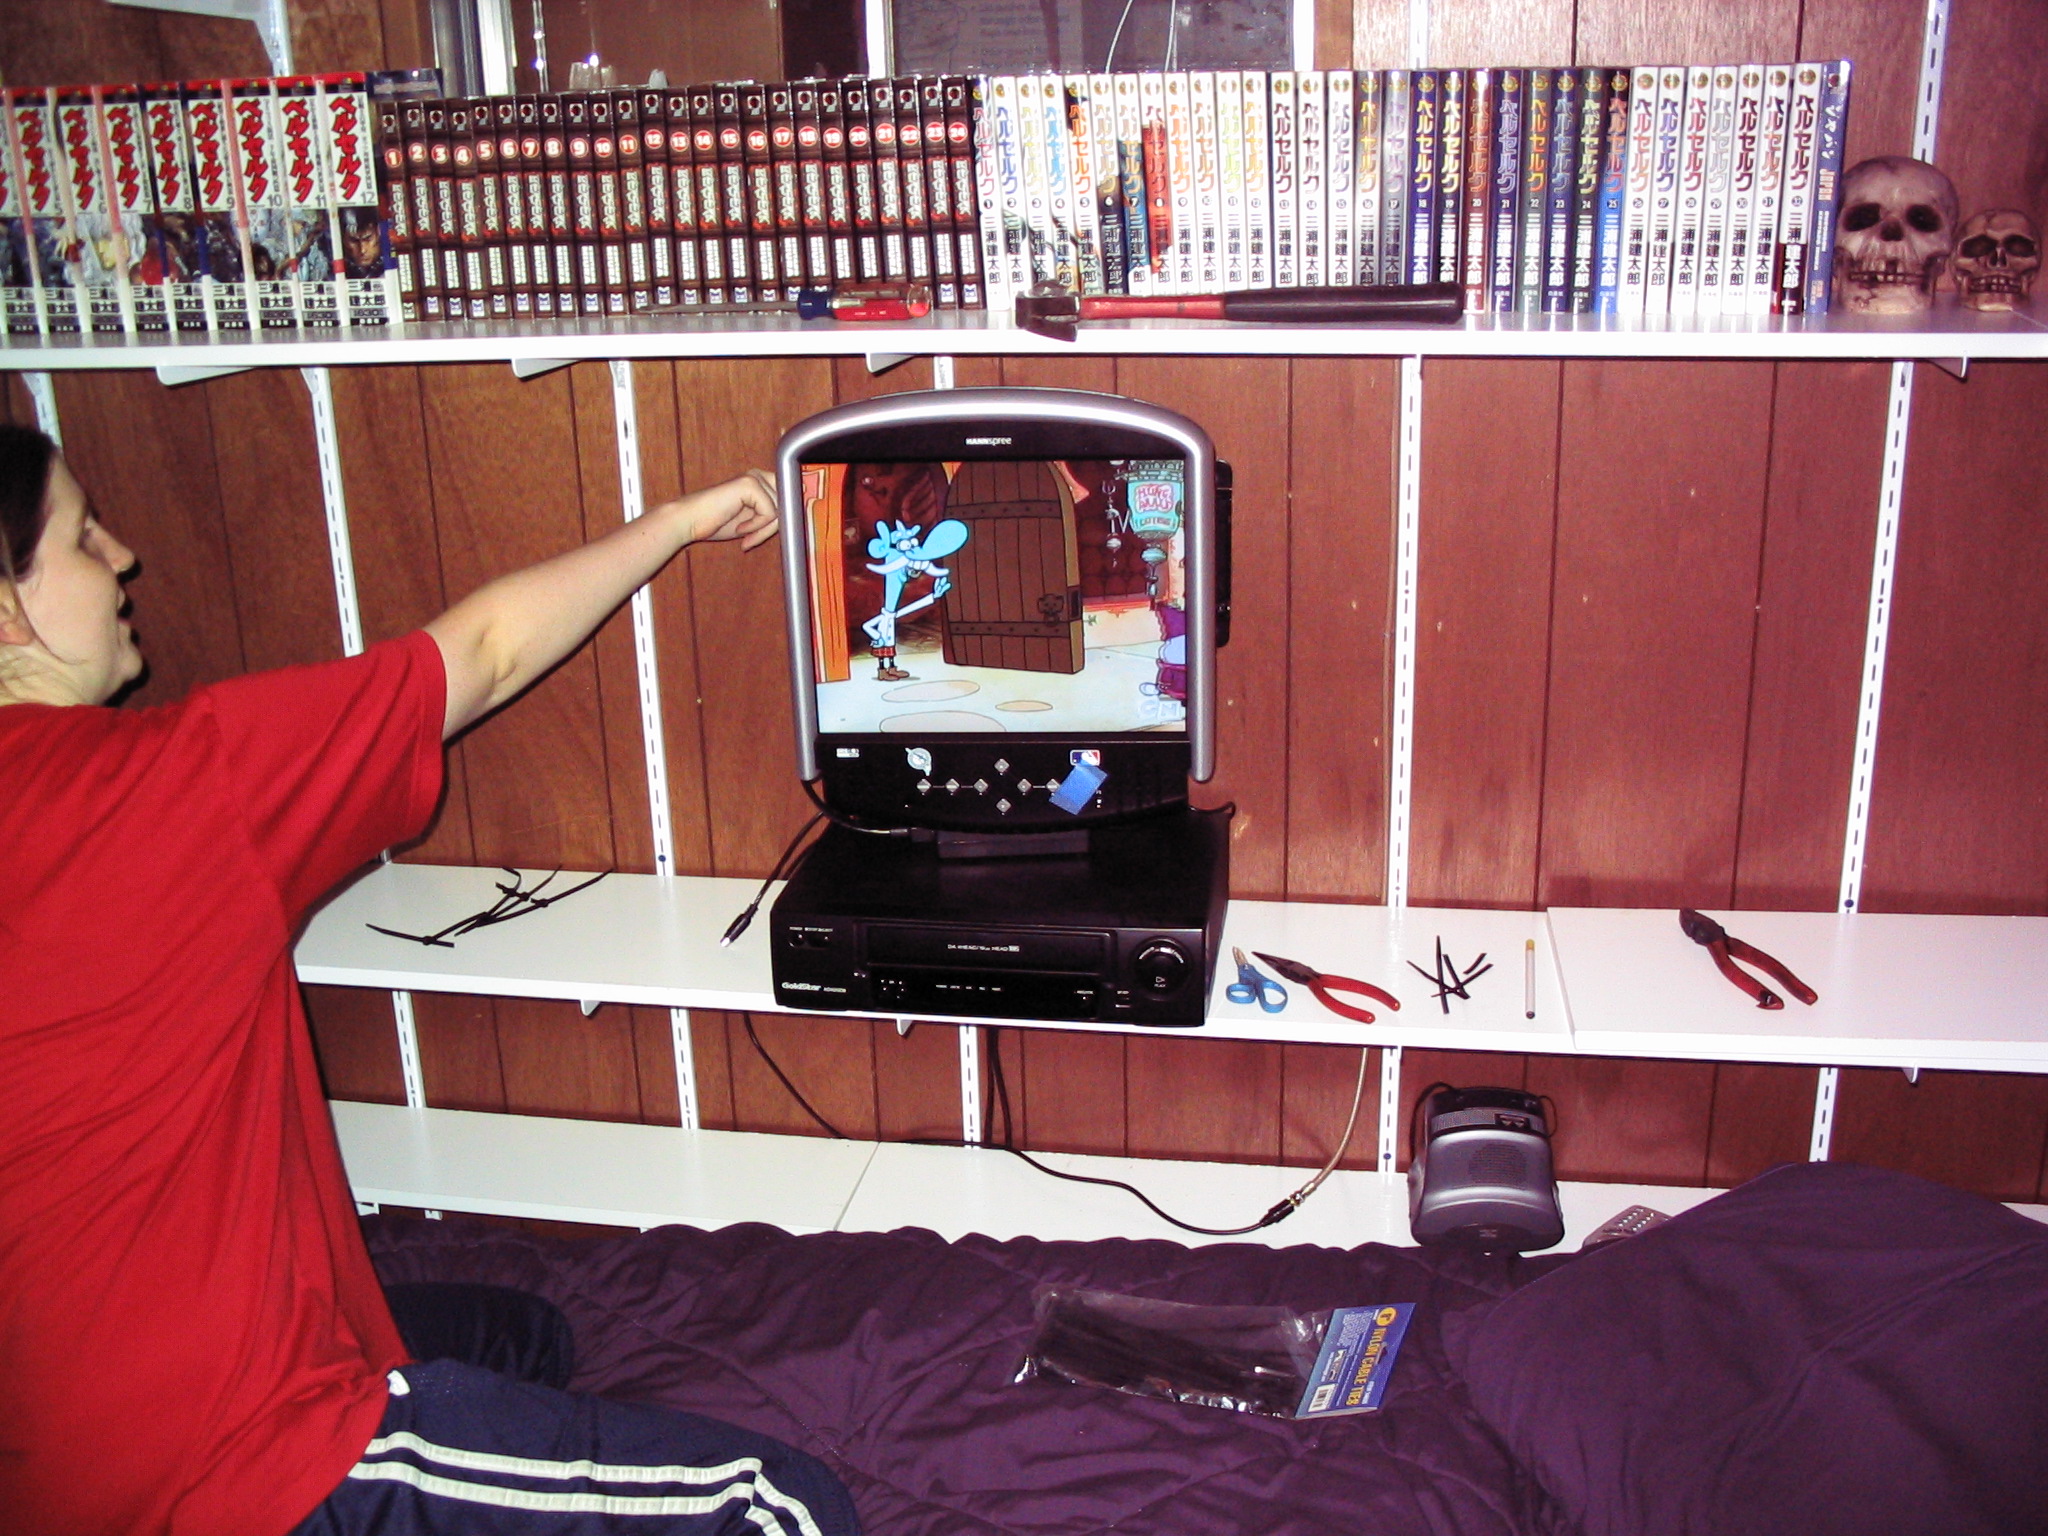
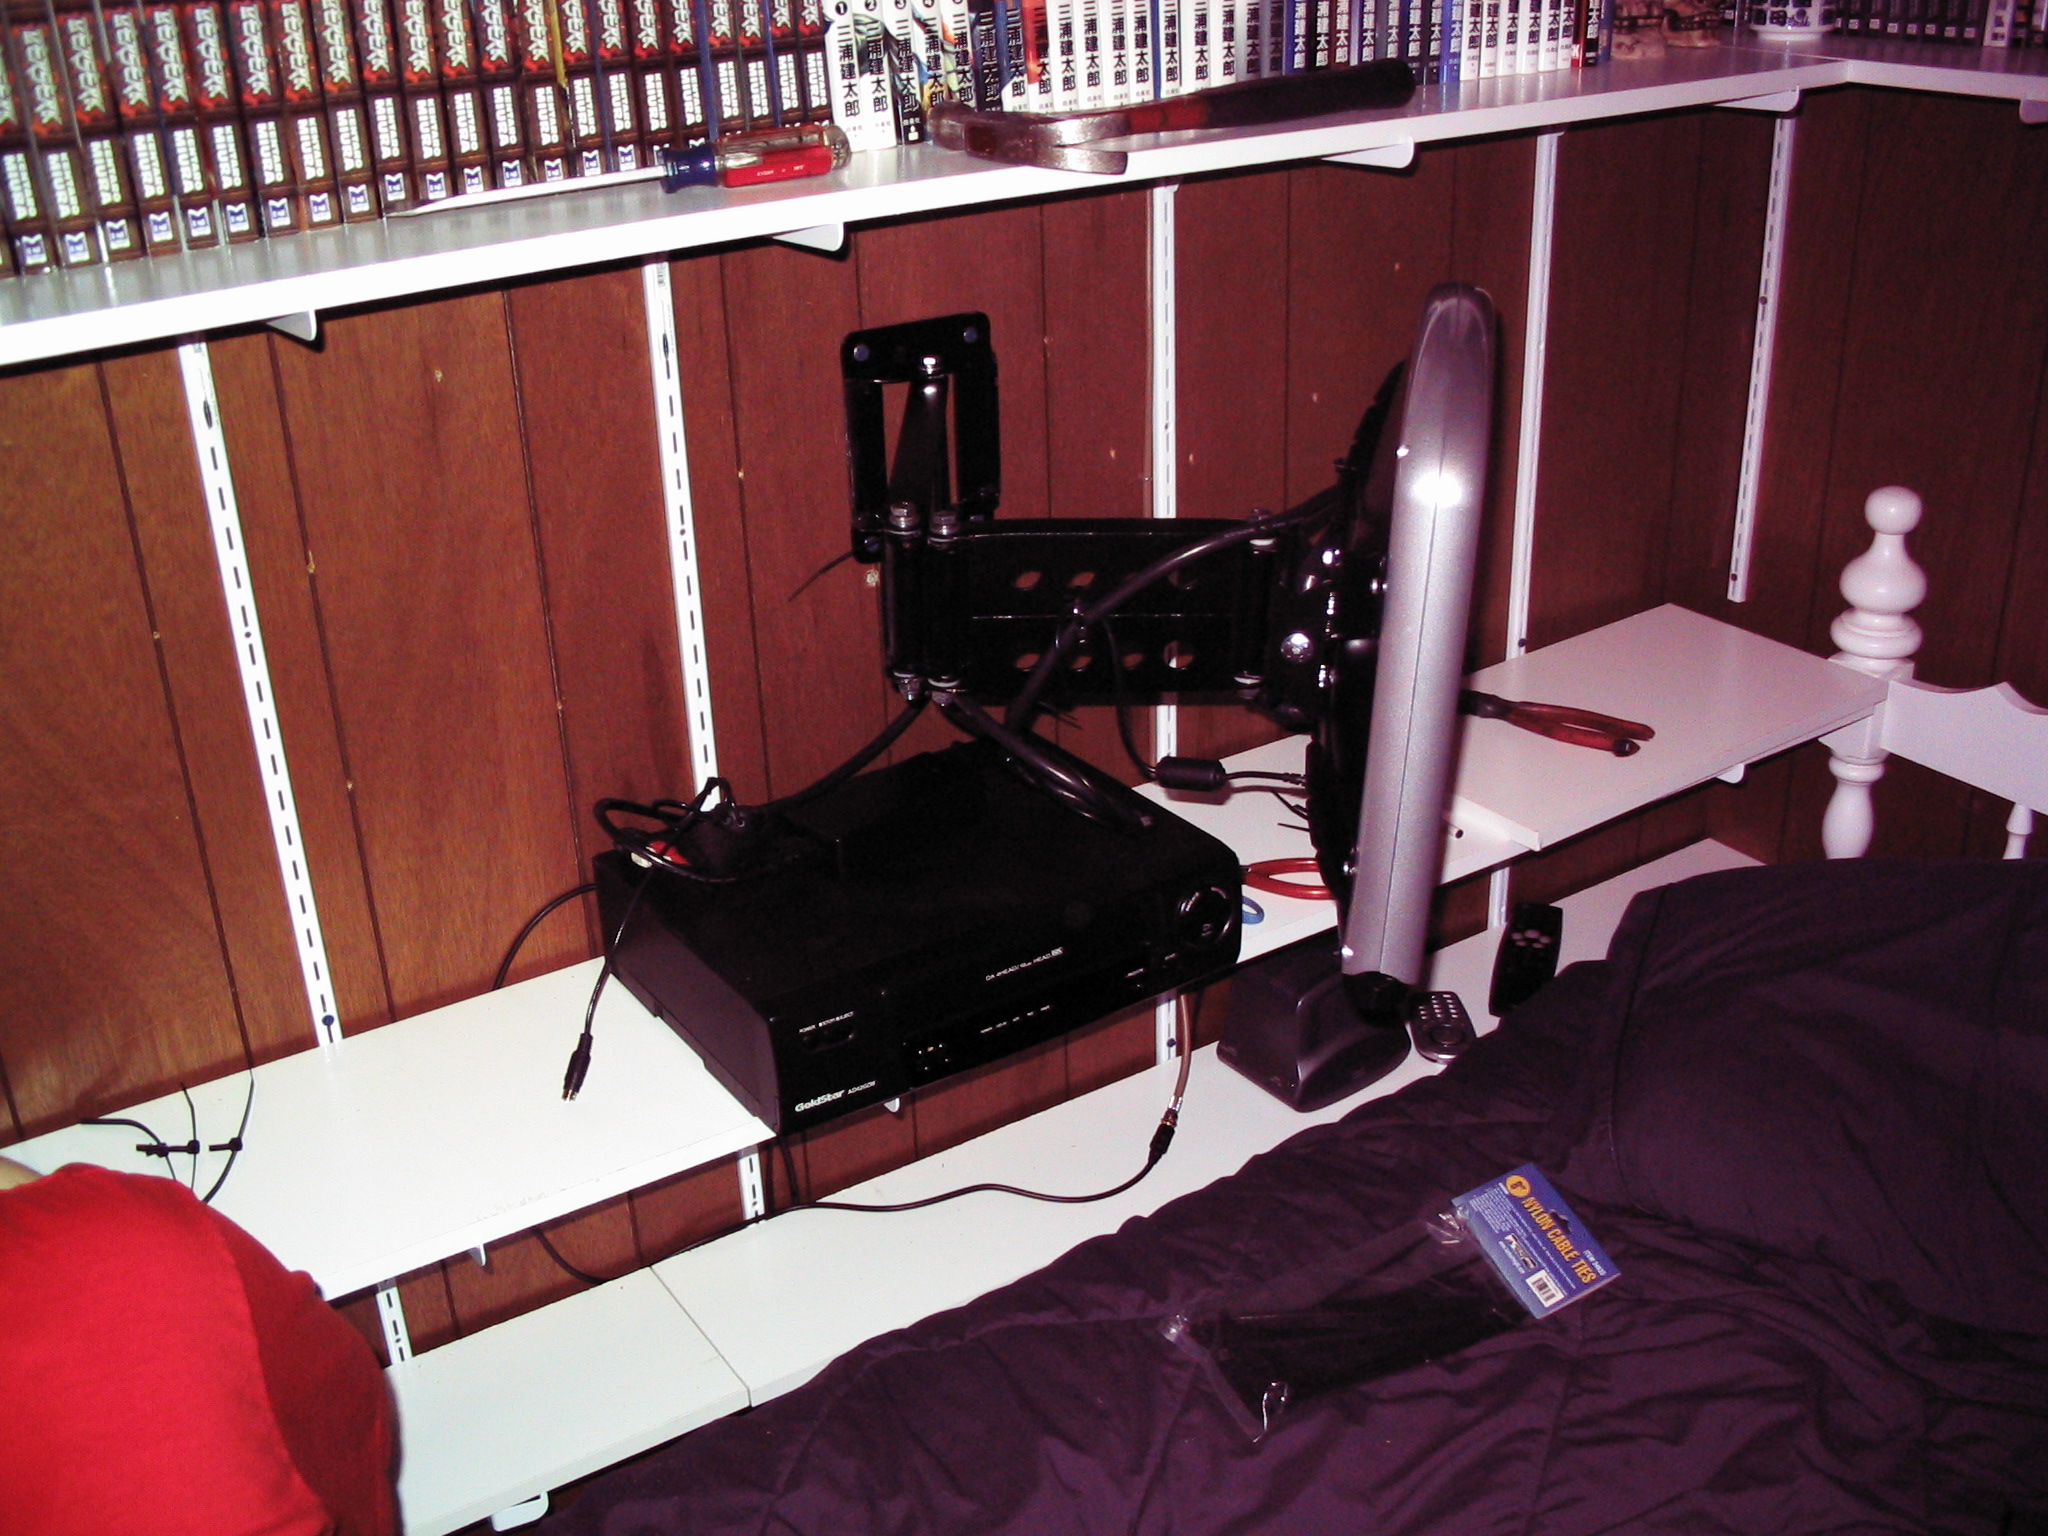
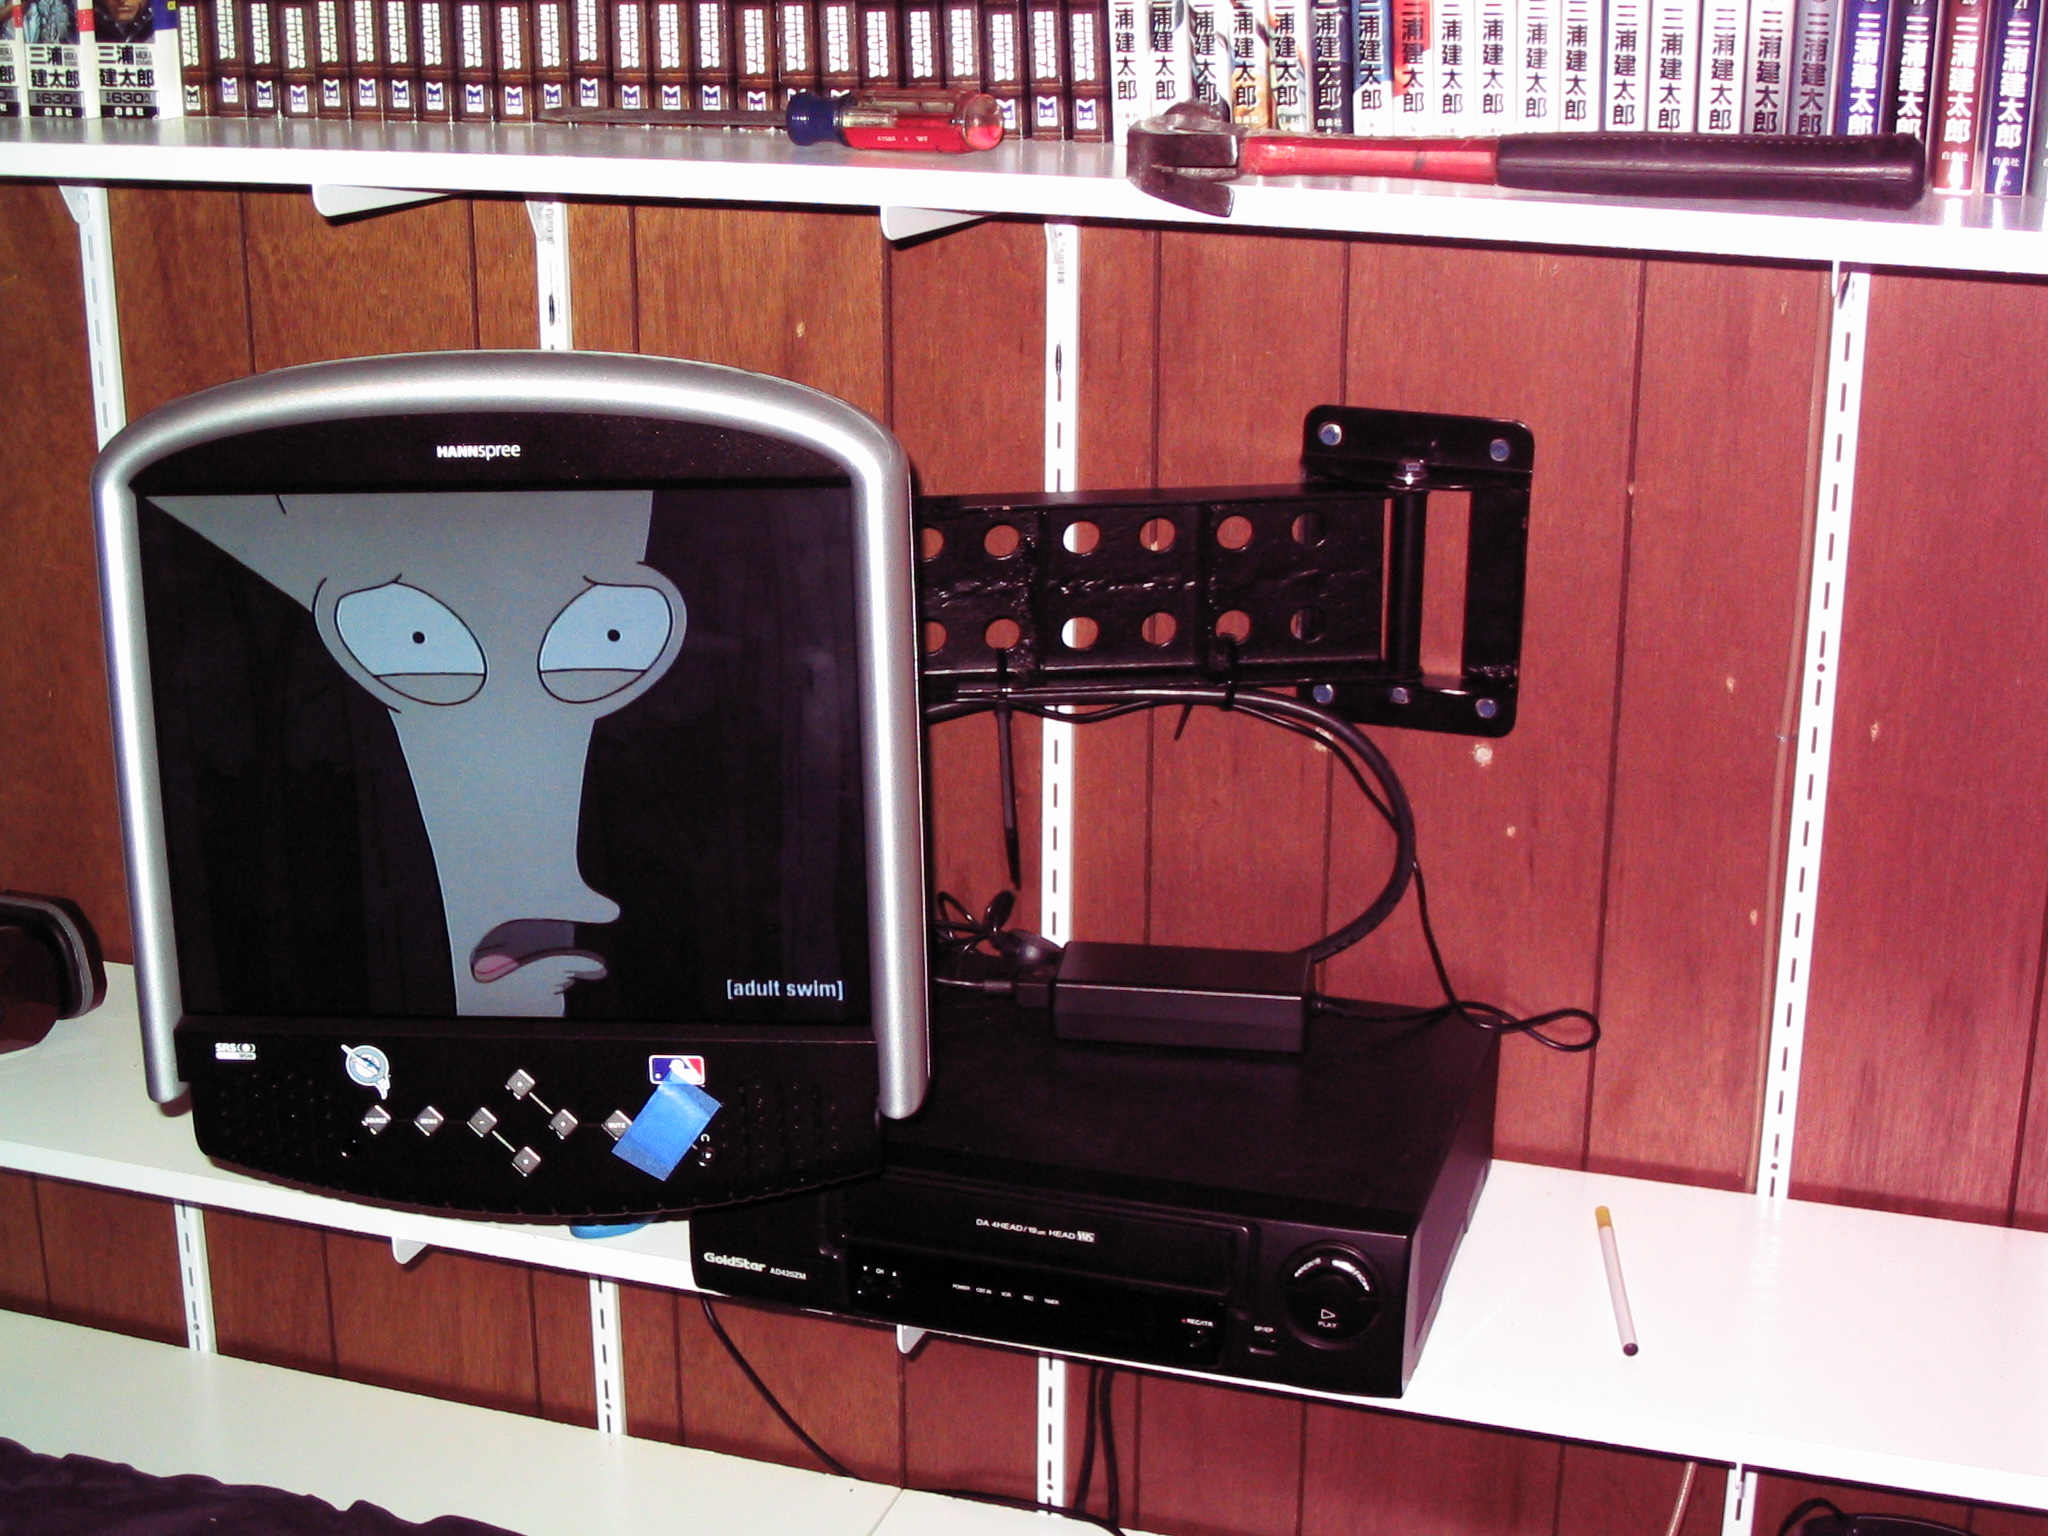
Jessica bought a flat panel TV, and wanted to attach it to the wall with some sort of swing-arm mount. The prices at the store were outrageous. Armed with my moderately-trustworthy arc welder and couple of discarded bed frames, we set out to construct one ourselves.
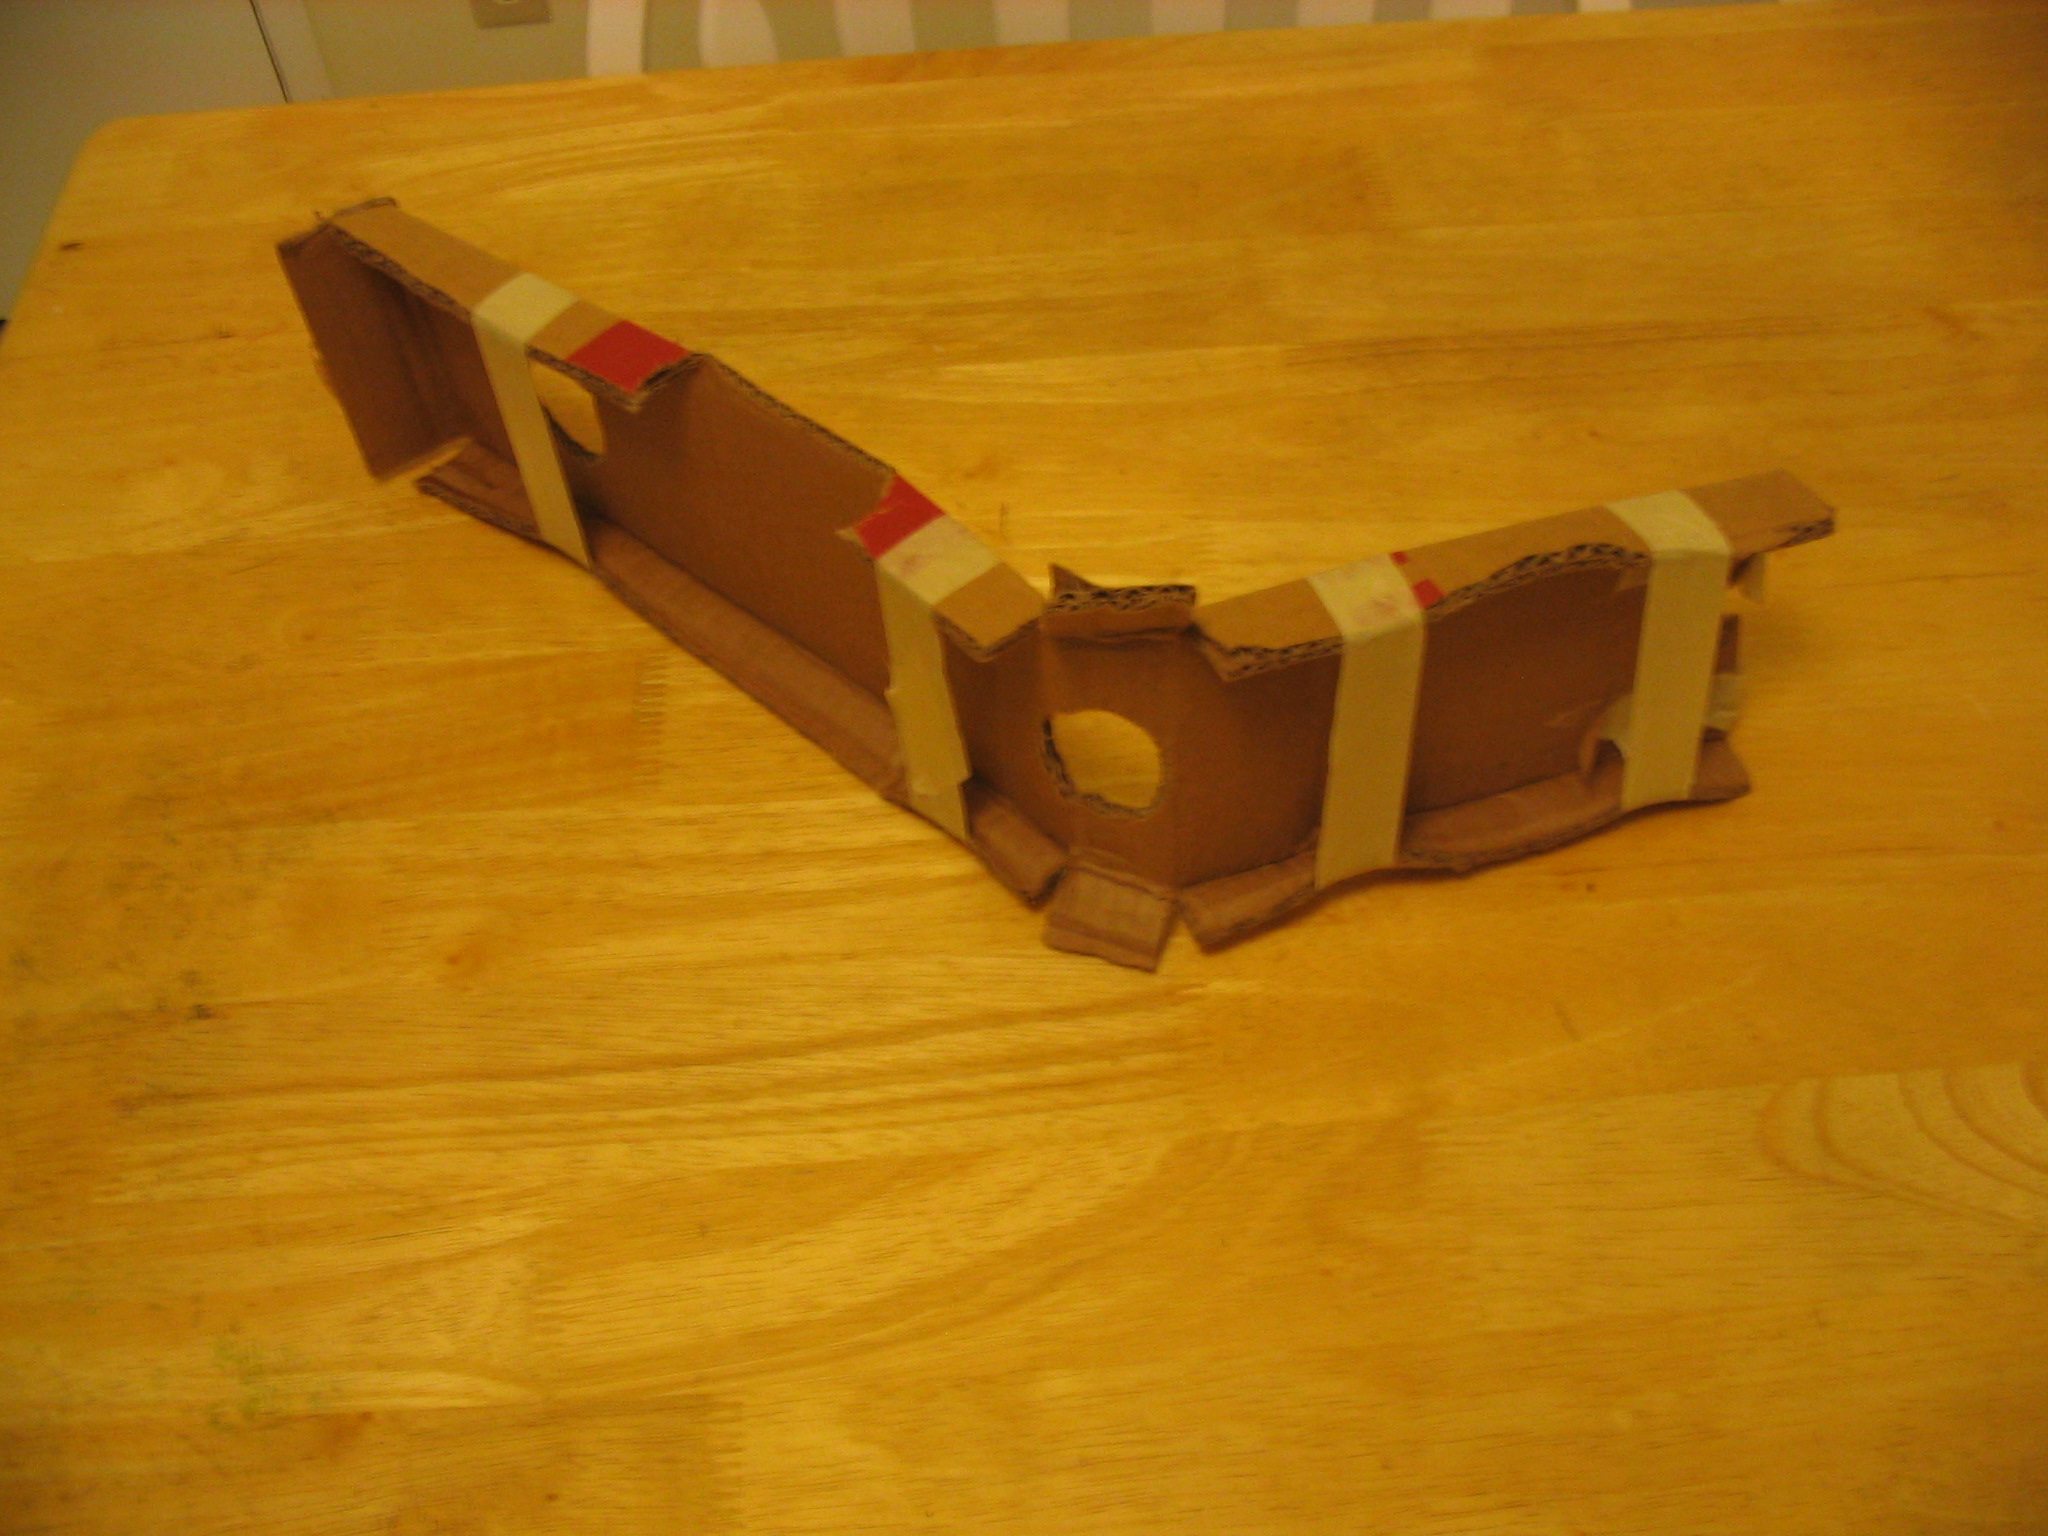
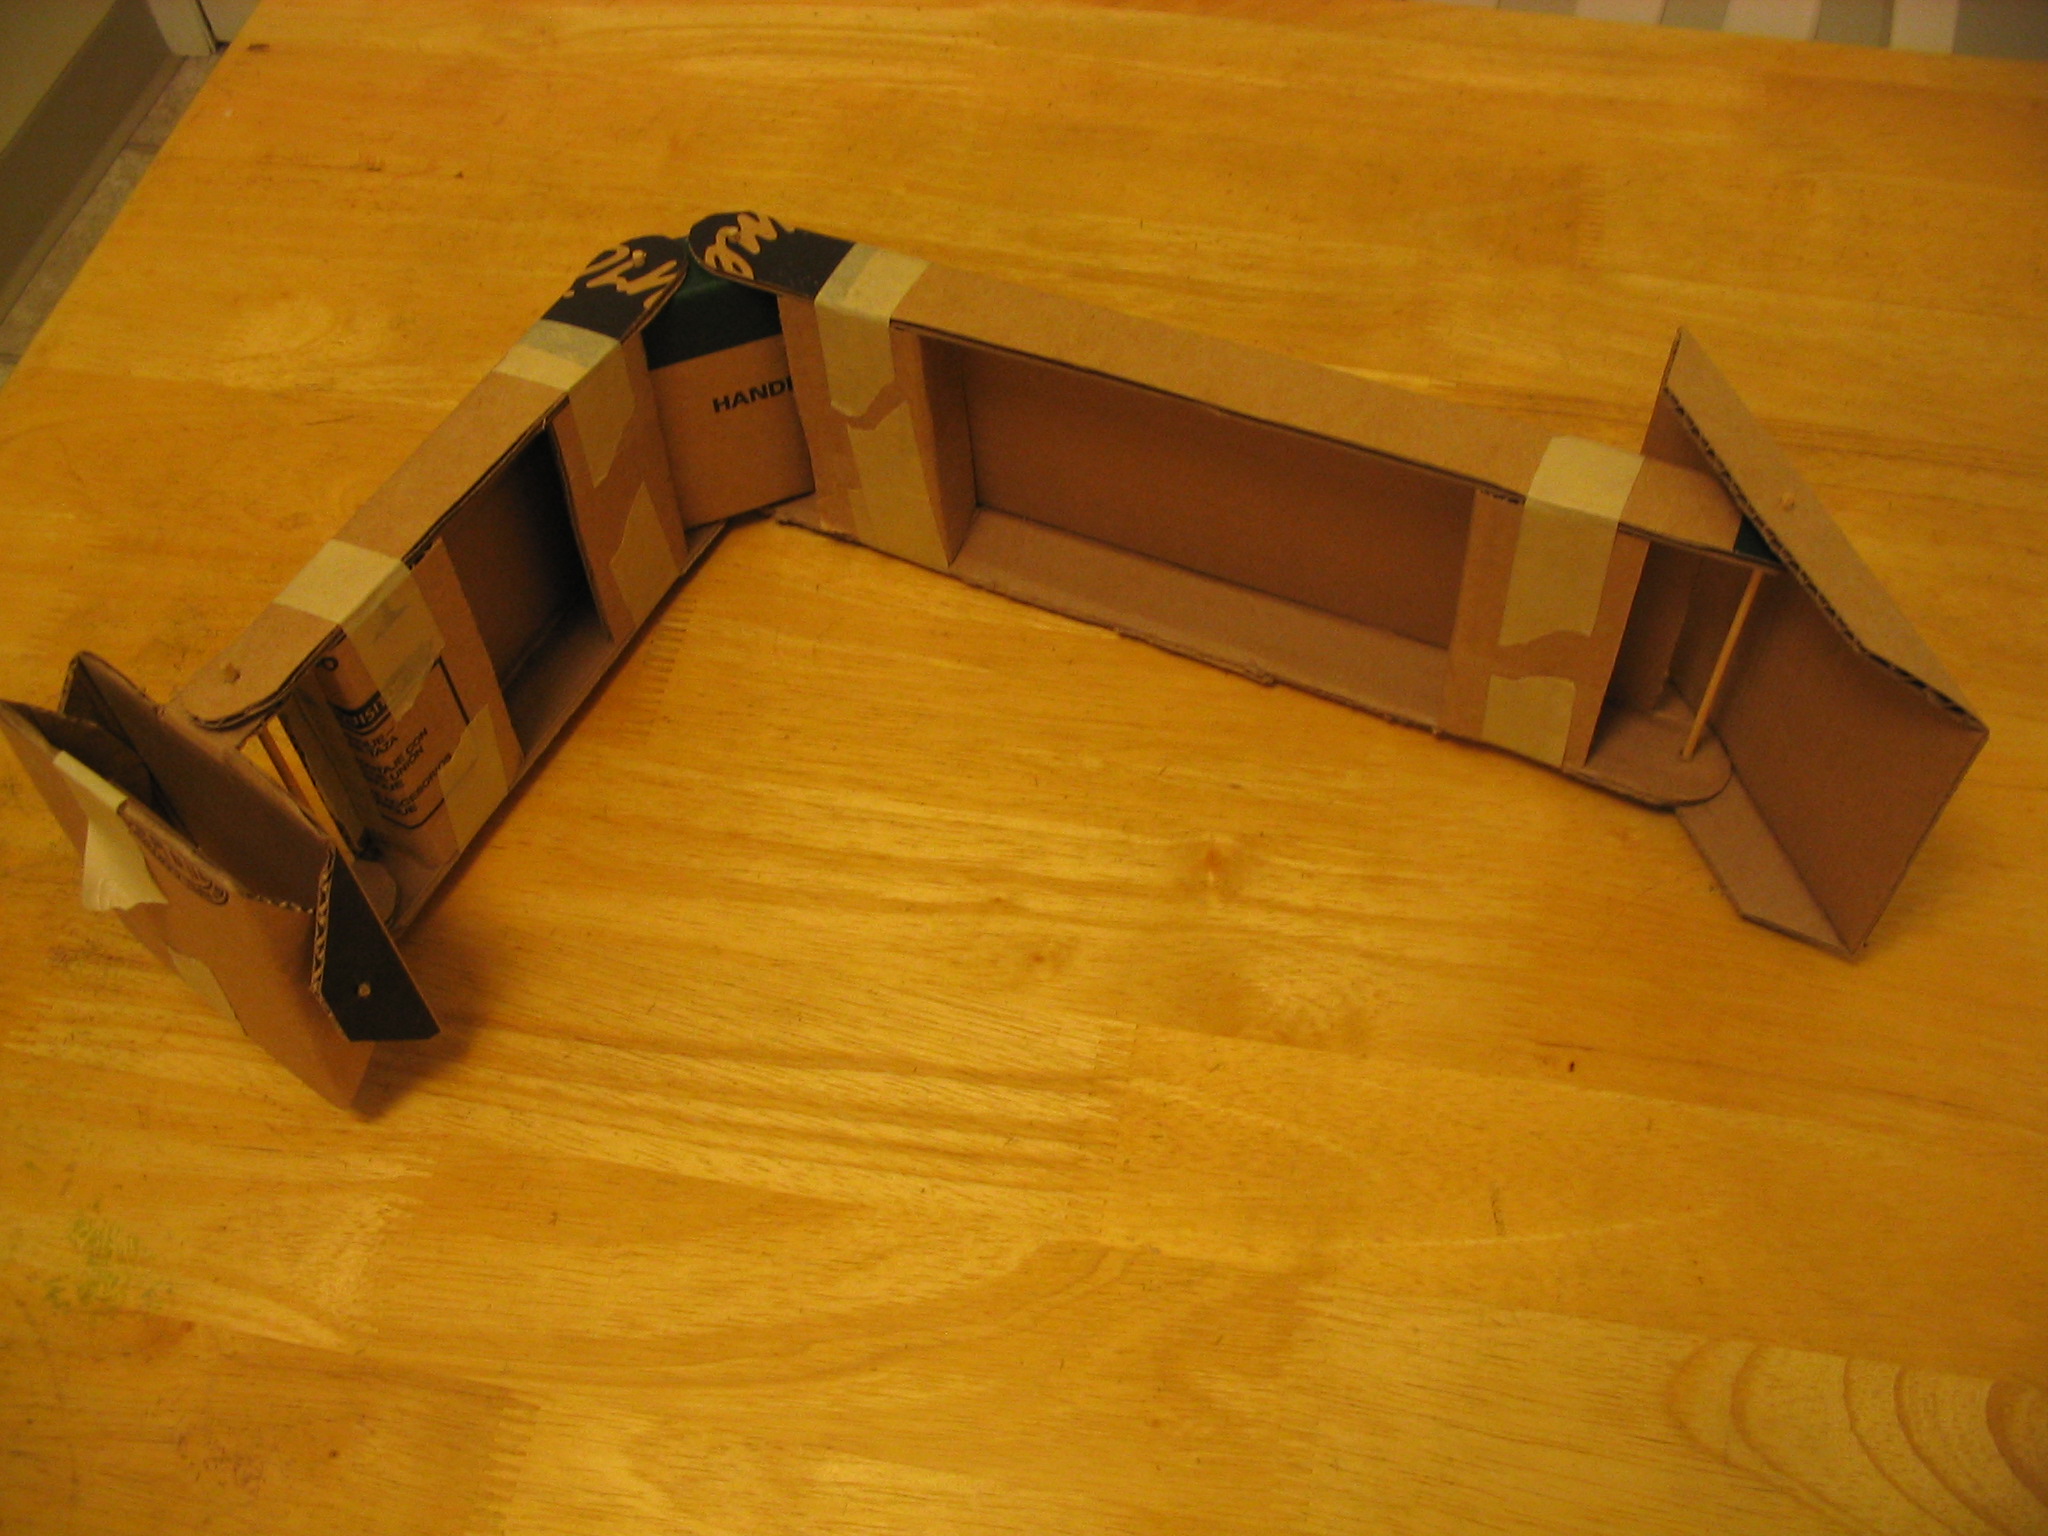
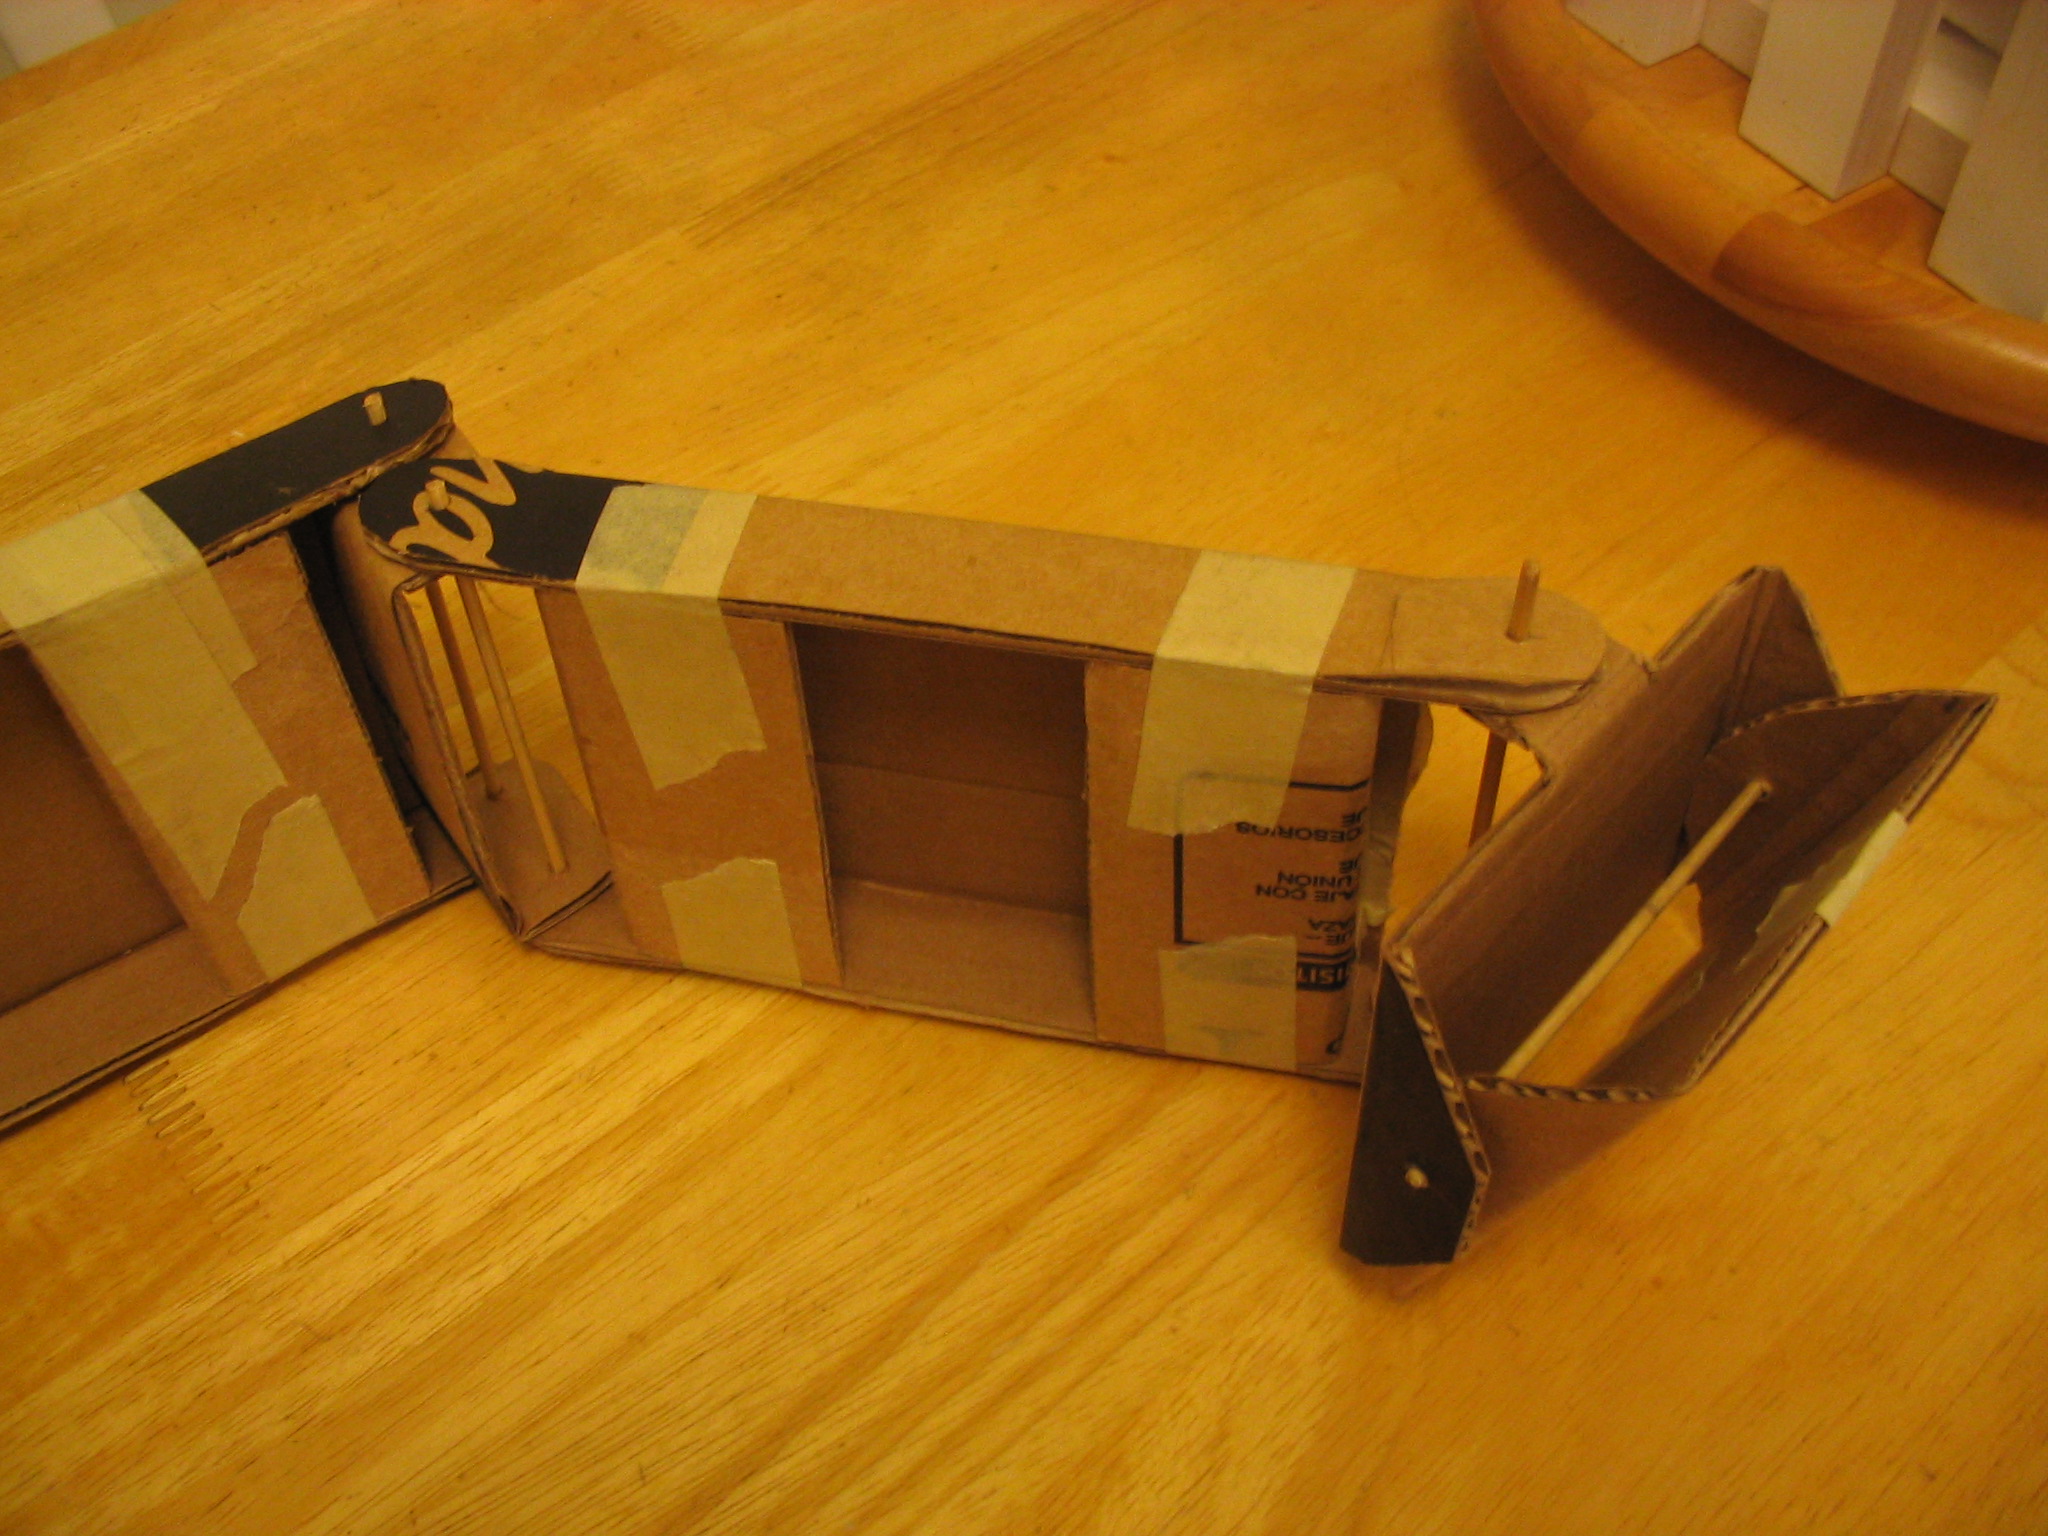
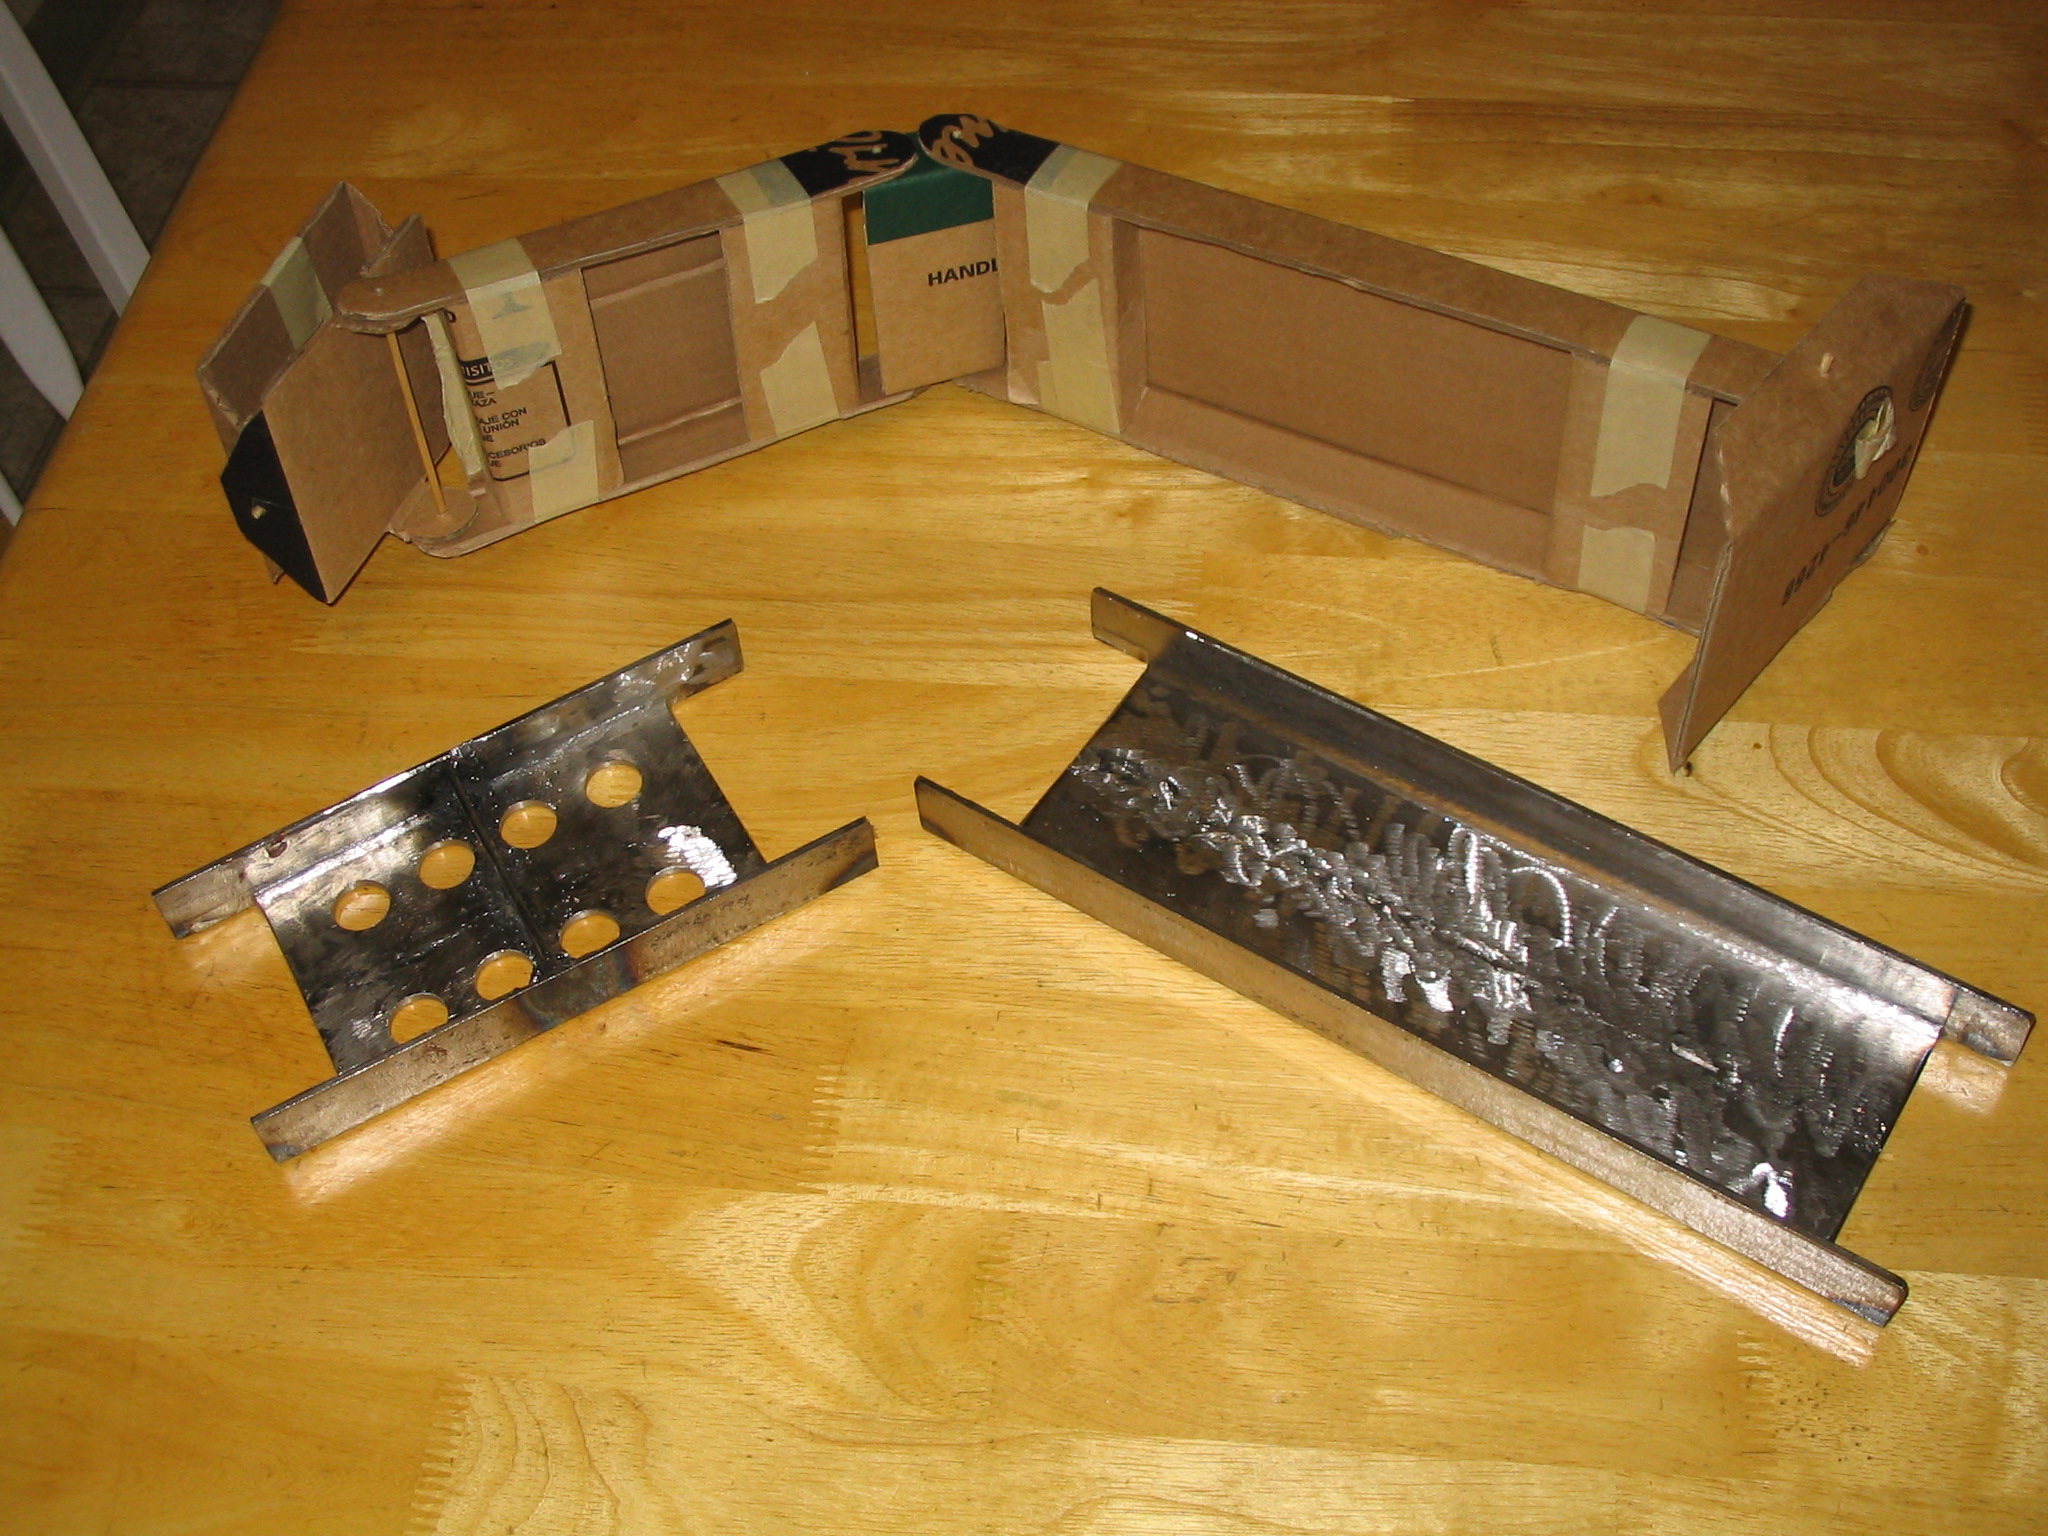
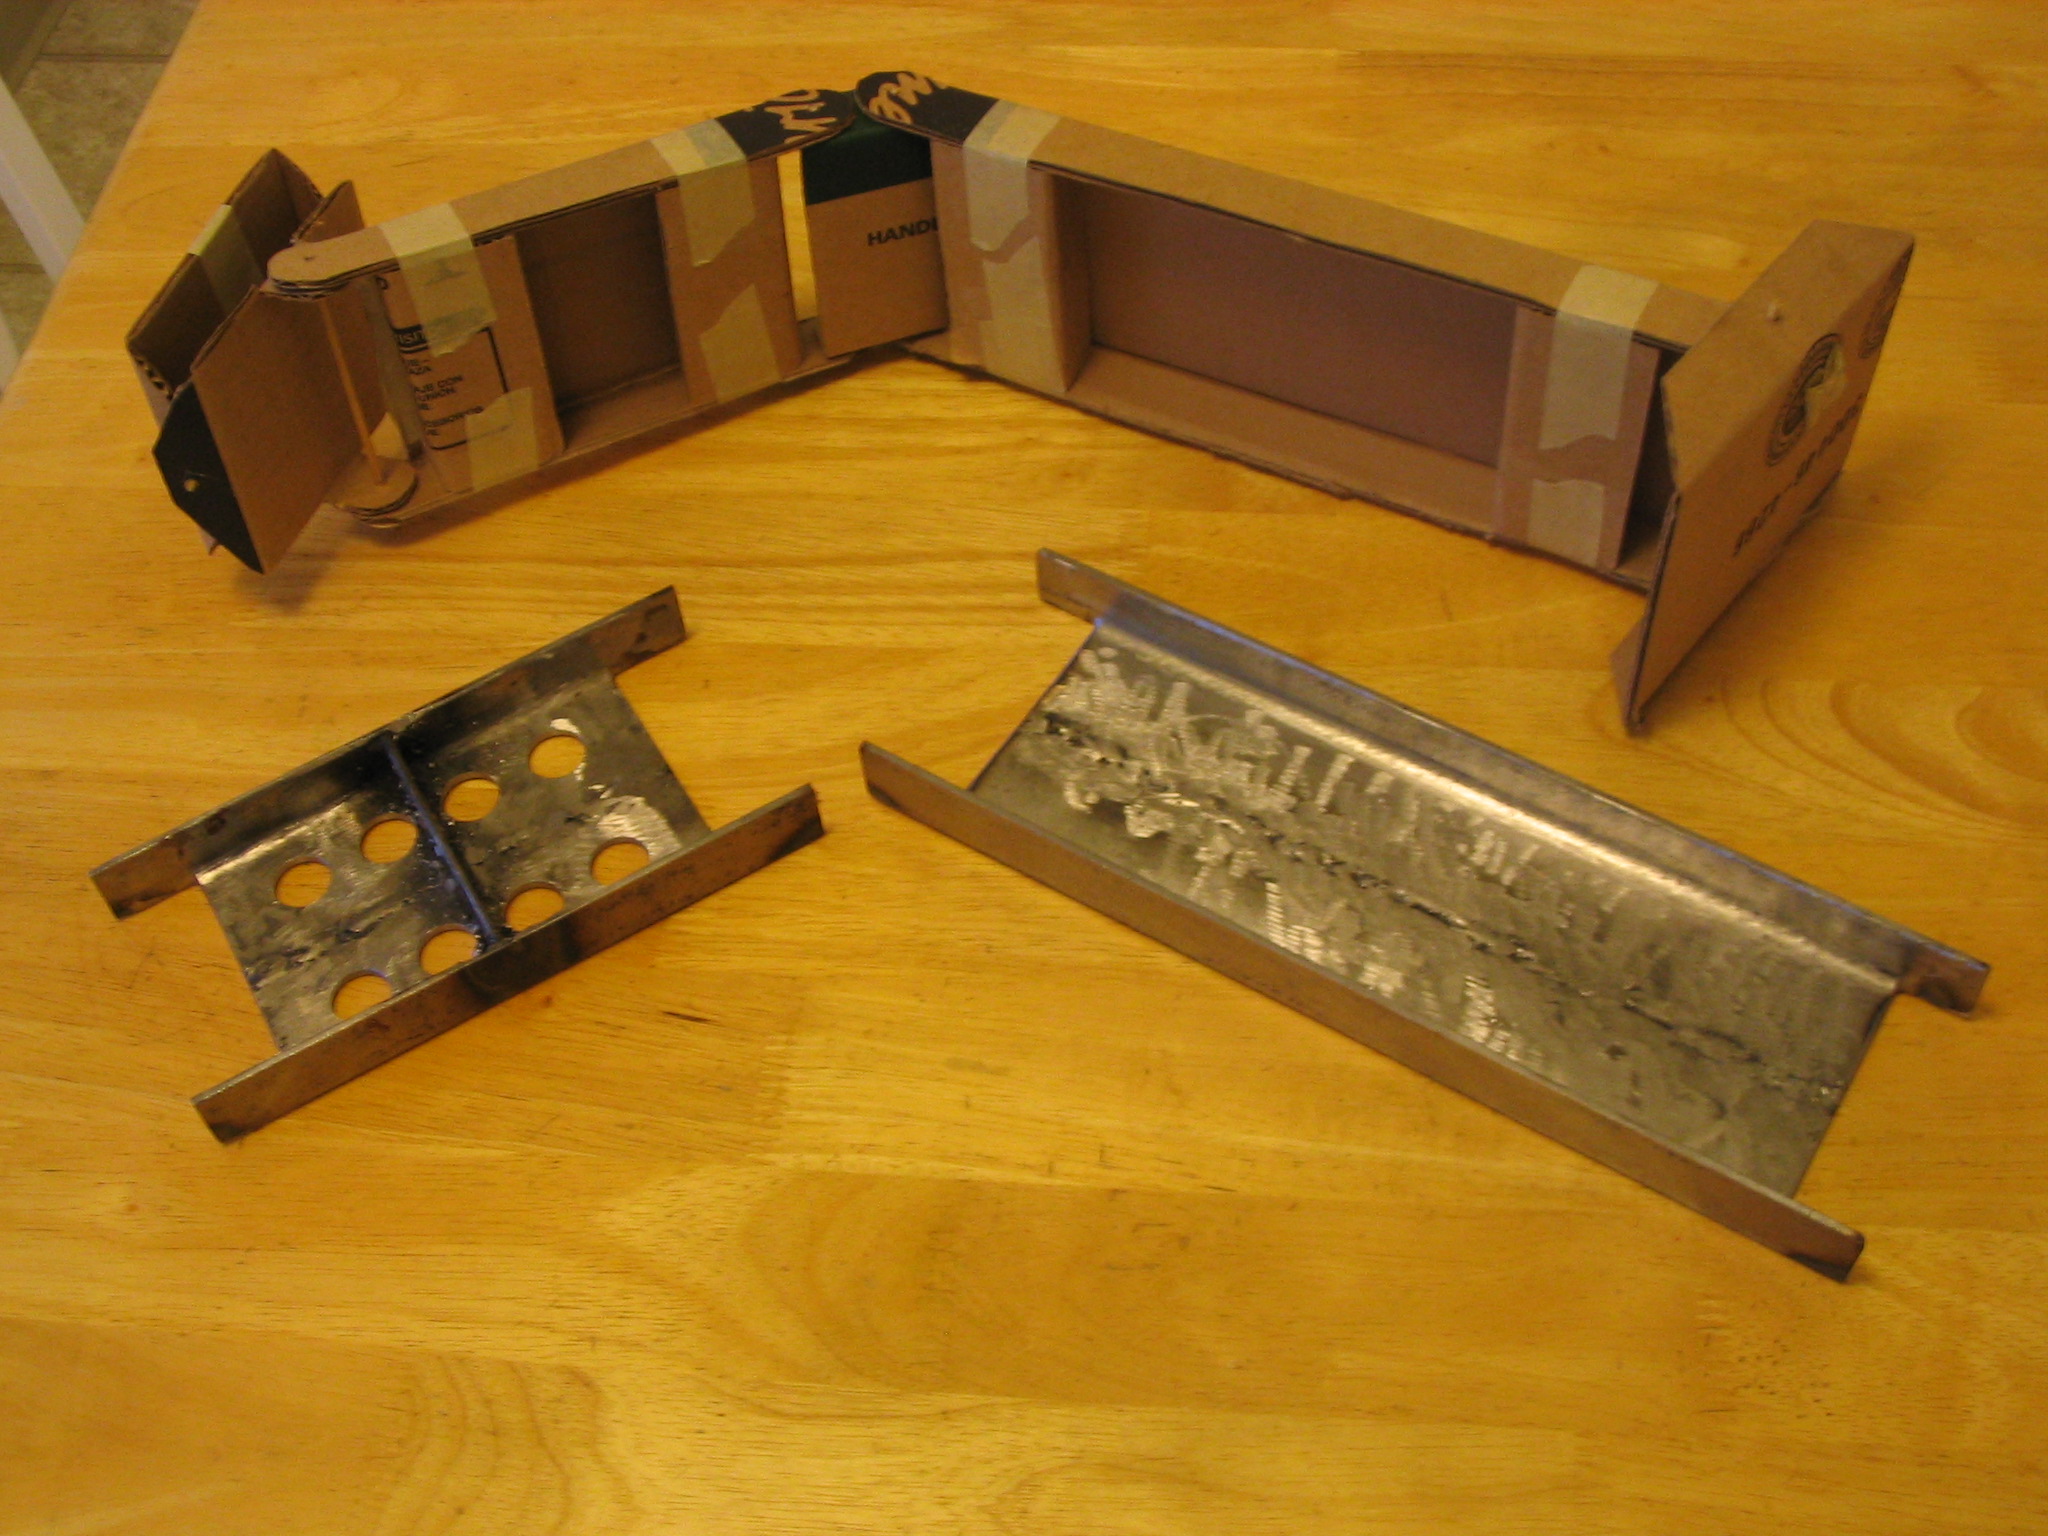
Mock-up
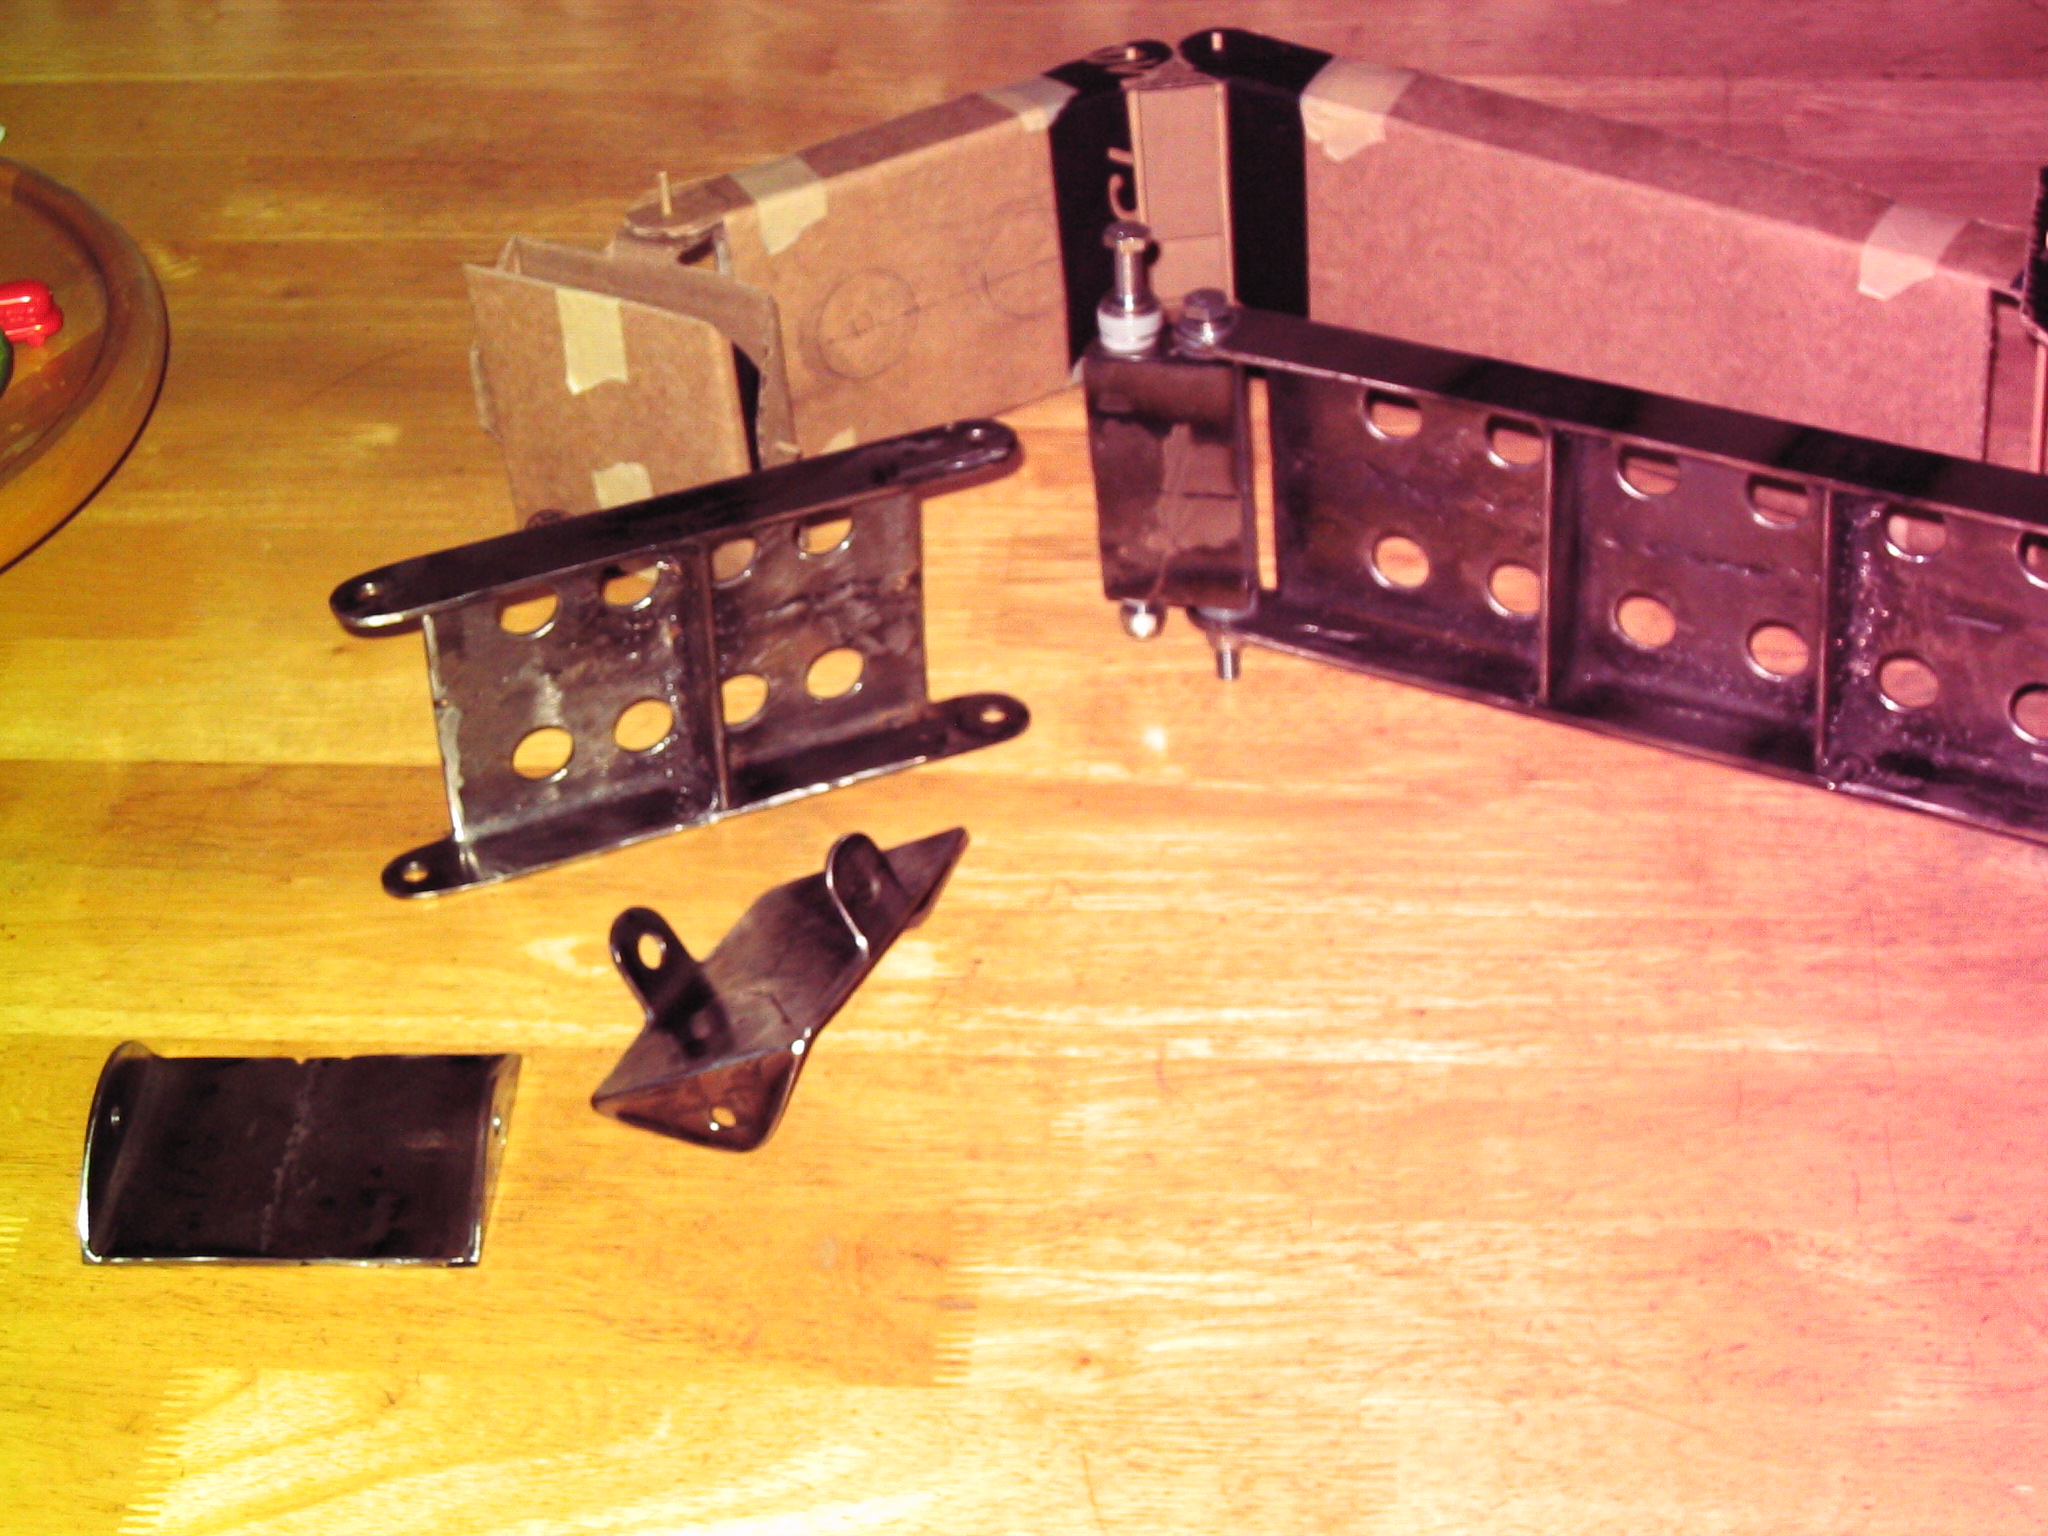
We started by building a cardboard mock-up model. We needed to determine the proper size and shape to fit the TV and wall. First we made a rough model by just bending the cardboard where we thought the joints should go. Then we made a second cardboard model which accurately fit the exact shape and size. We used bamboo skewers for the hinge pins. Once we had everything right, we were ready to build the real thing.
Construction
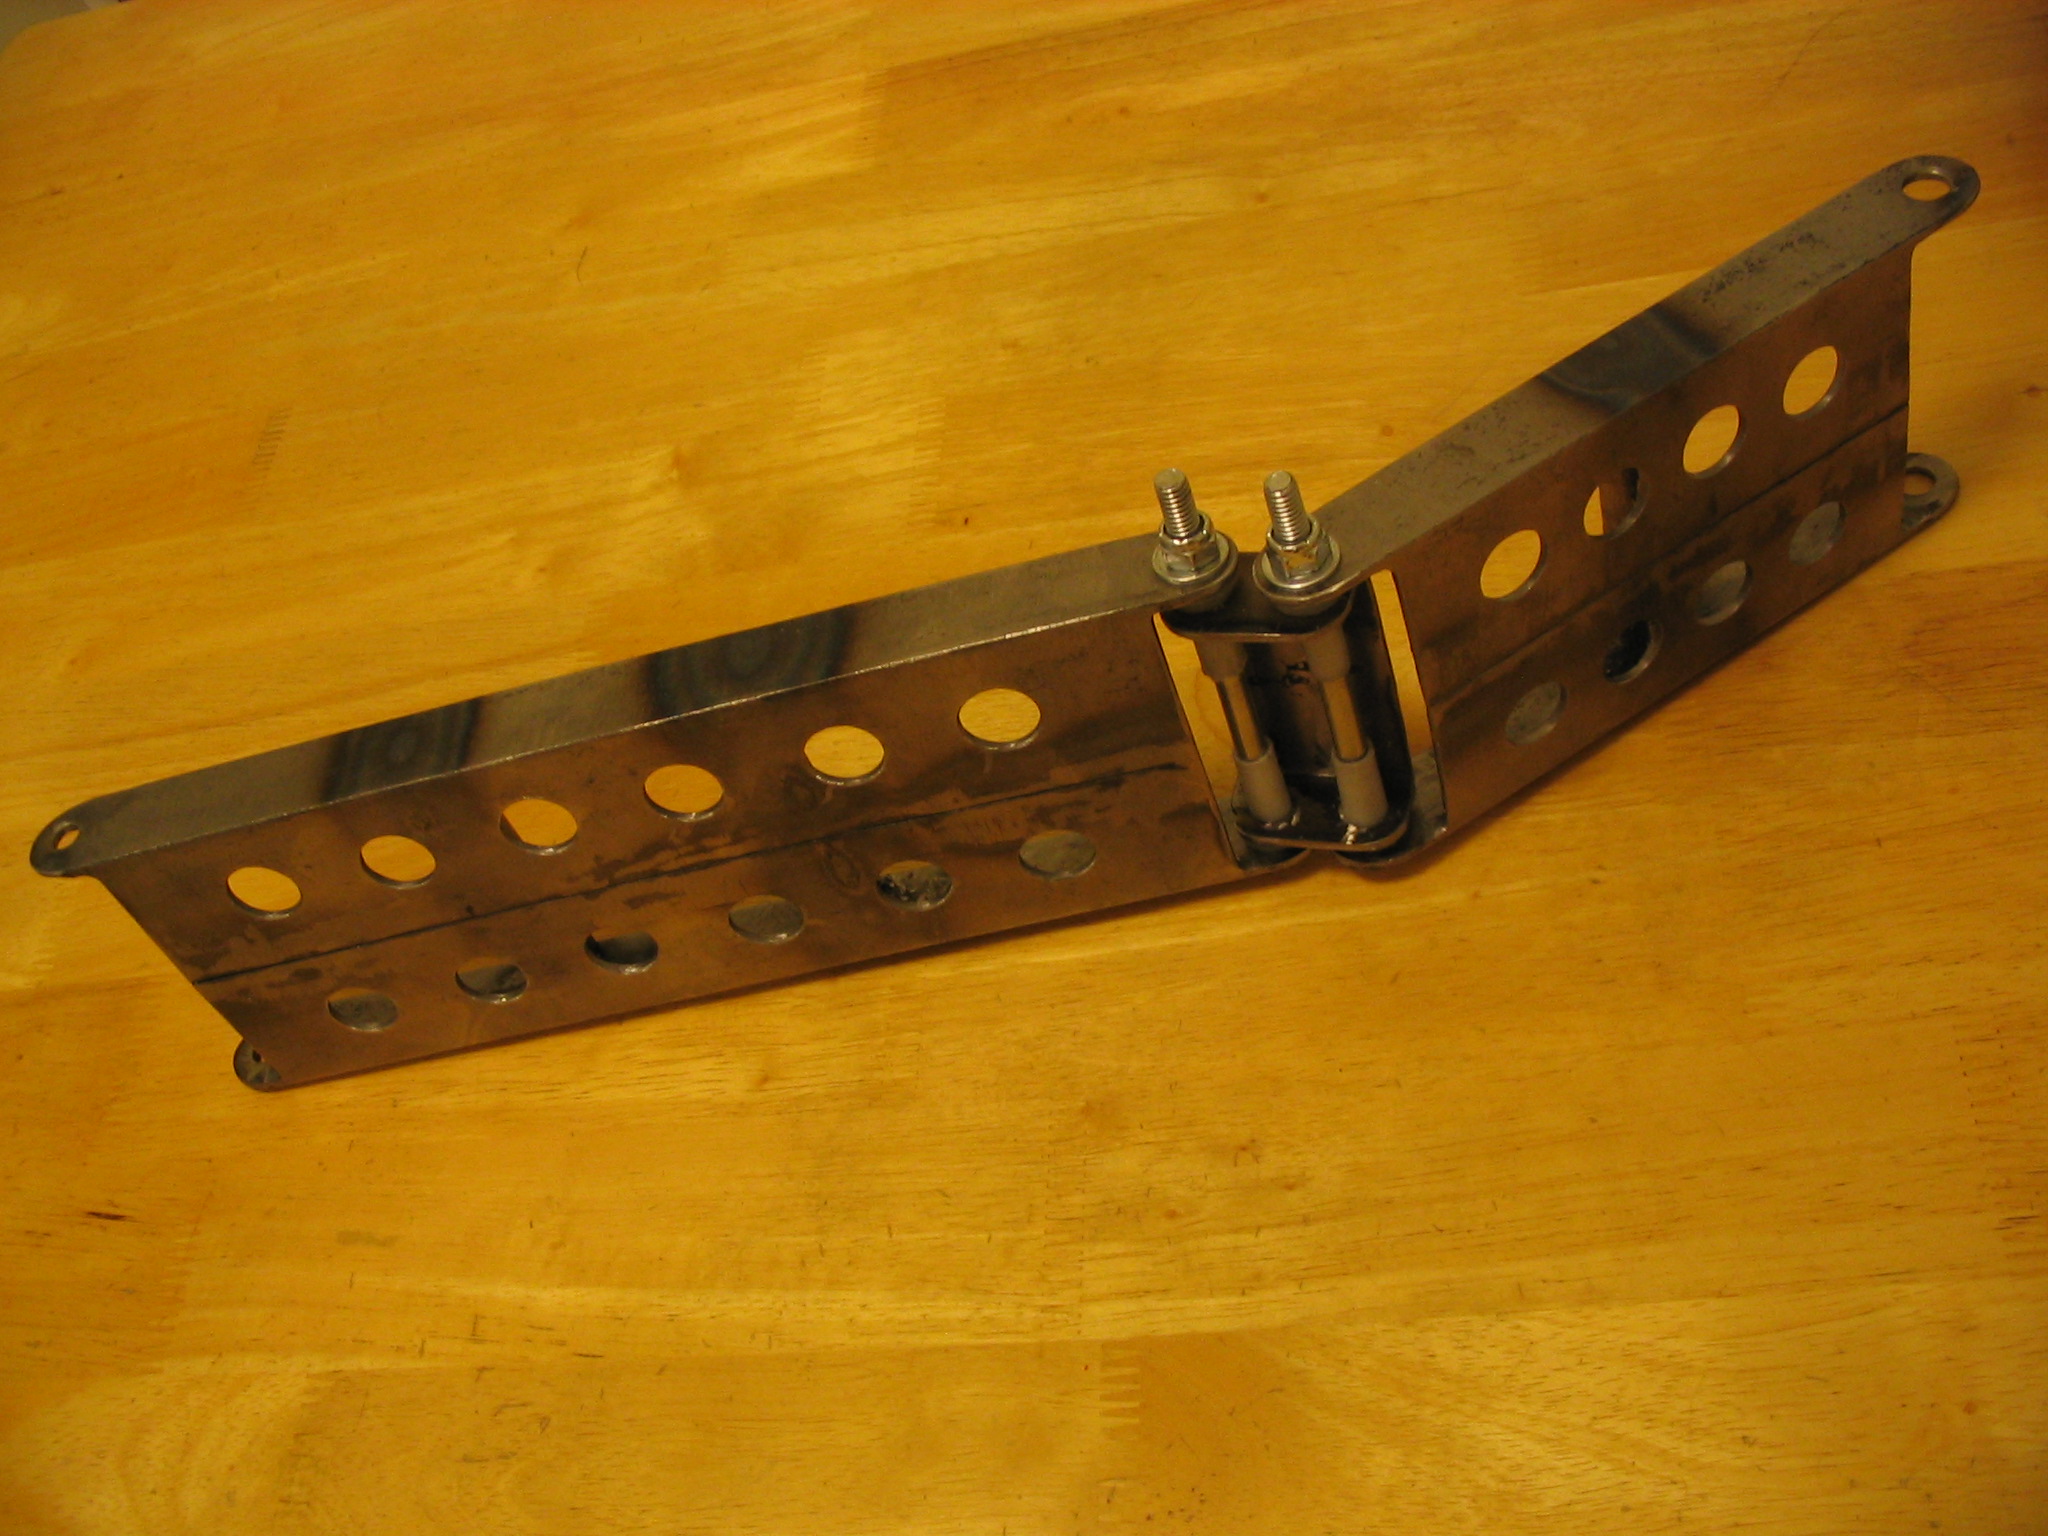
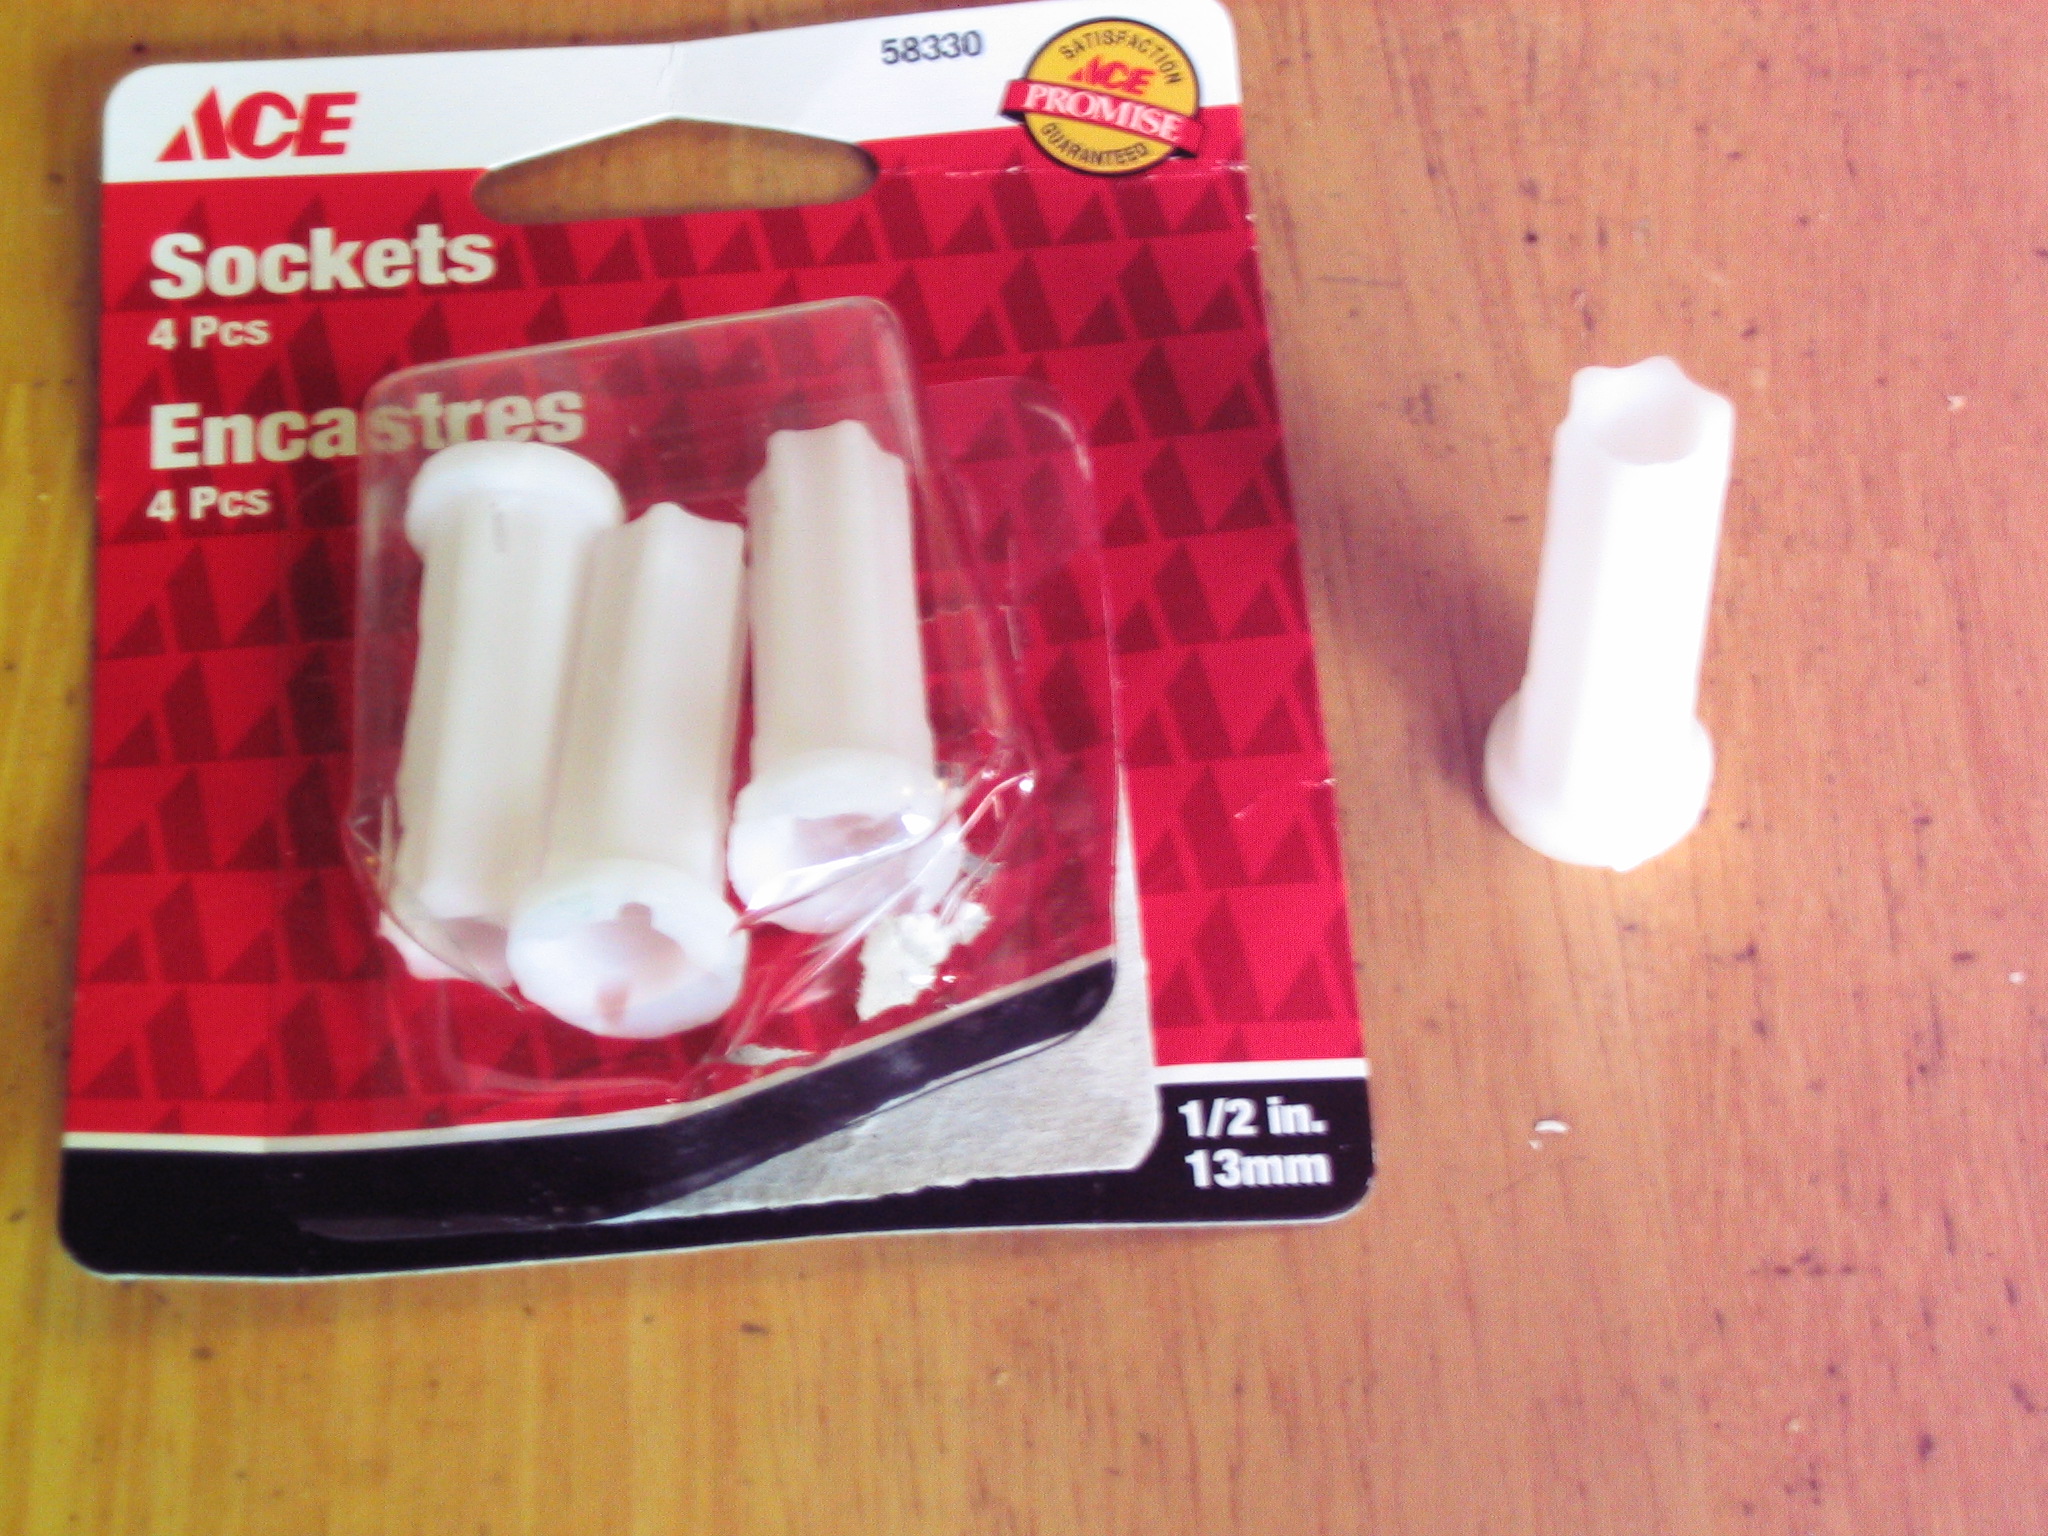
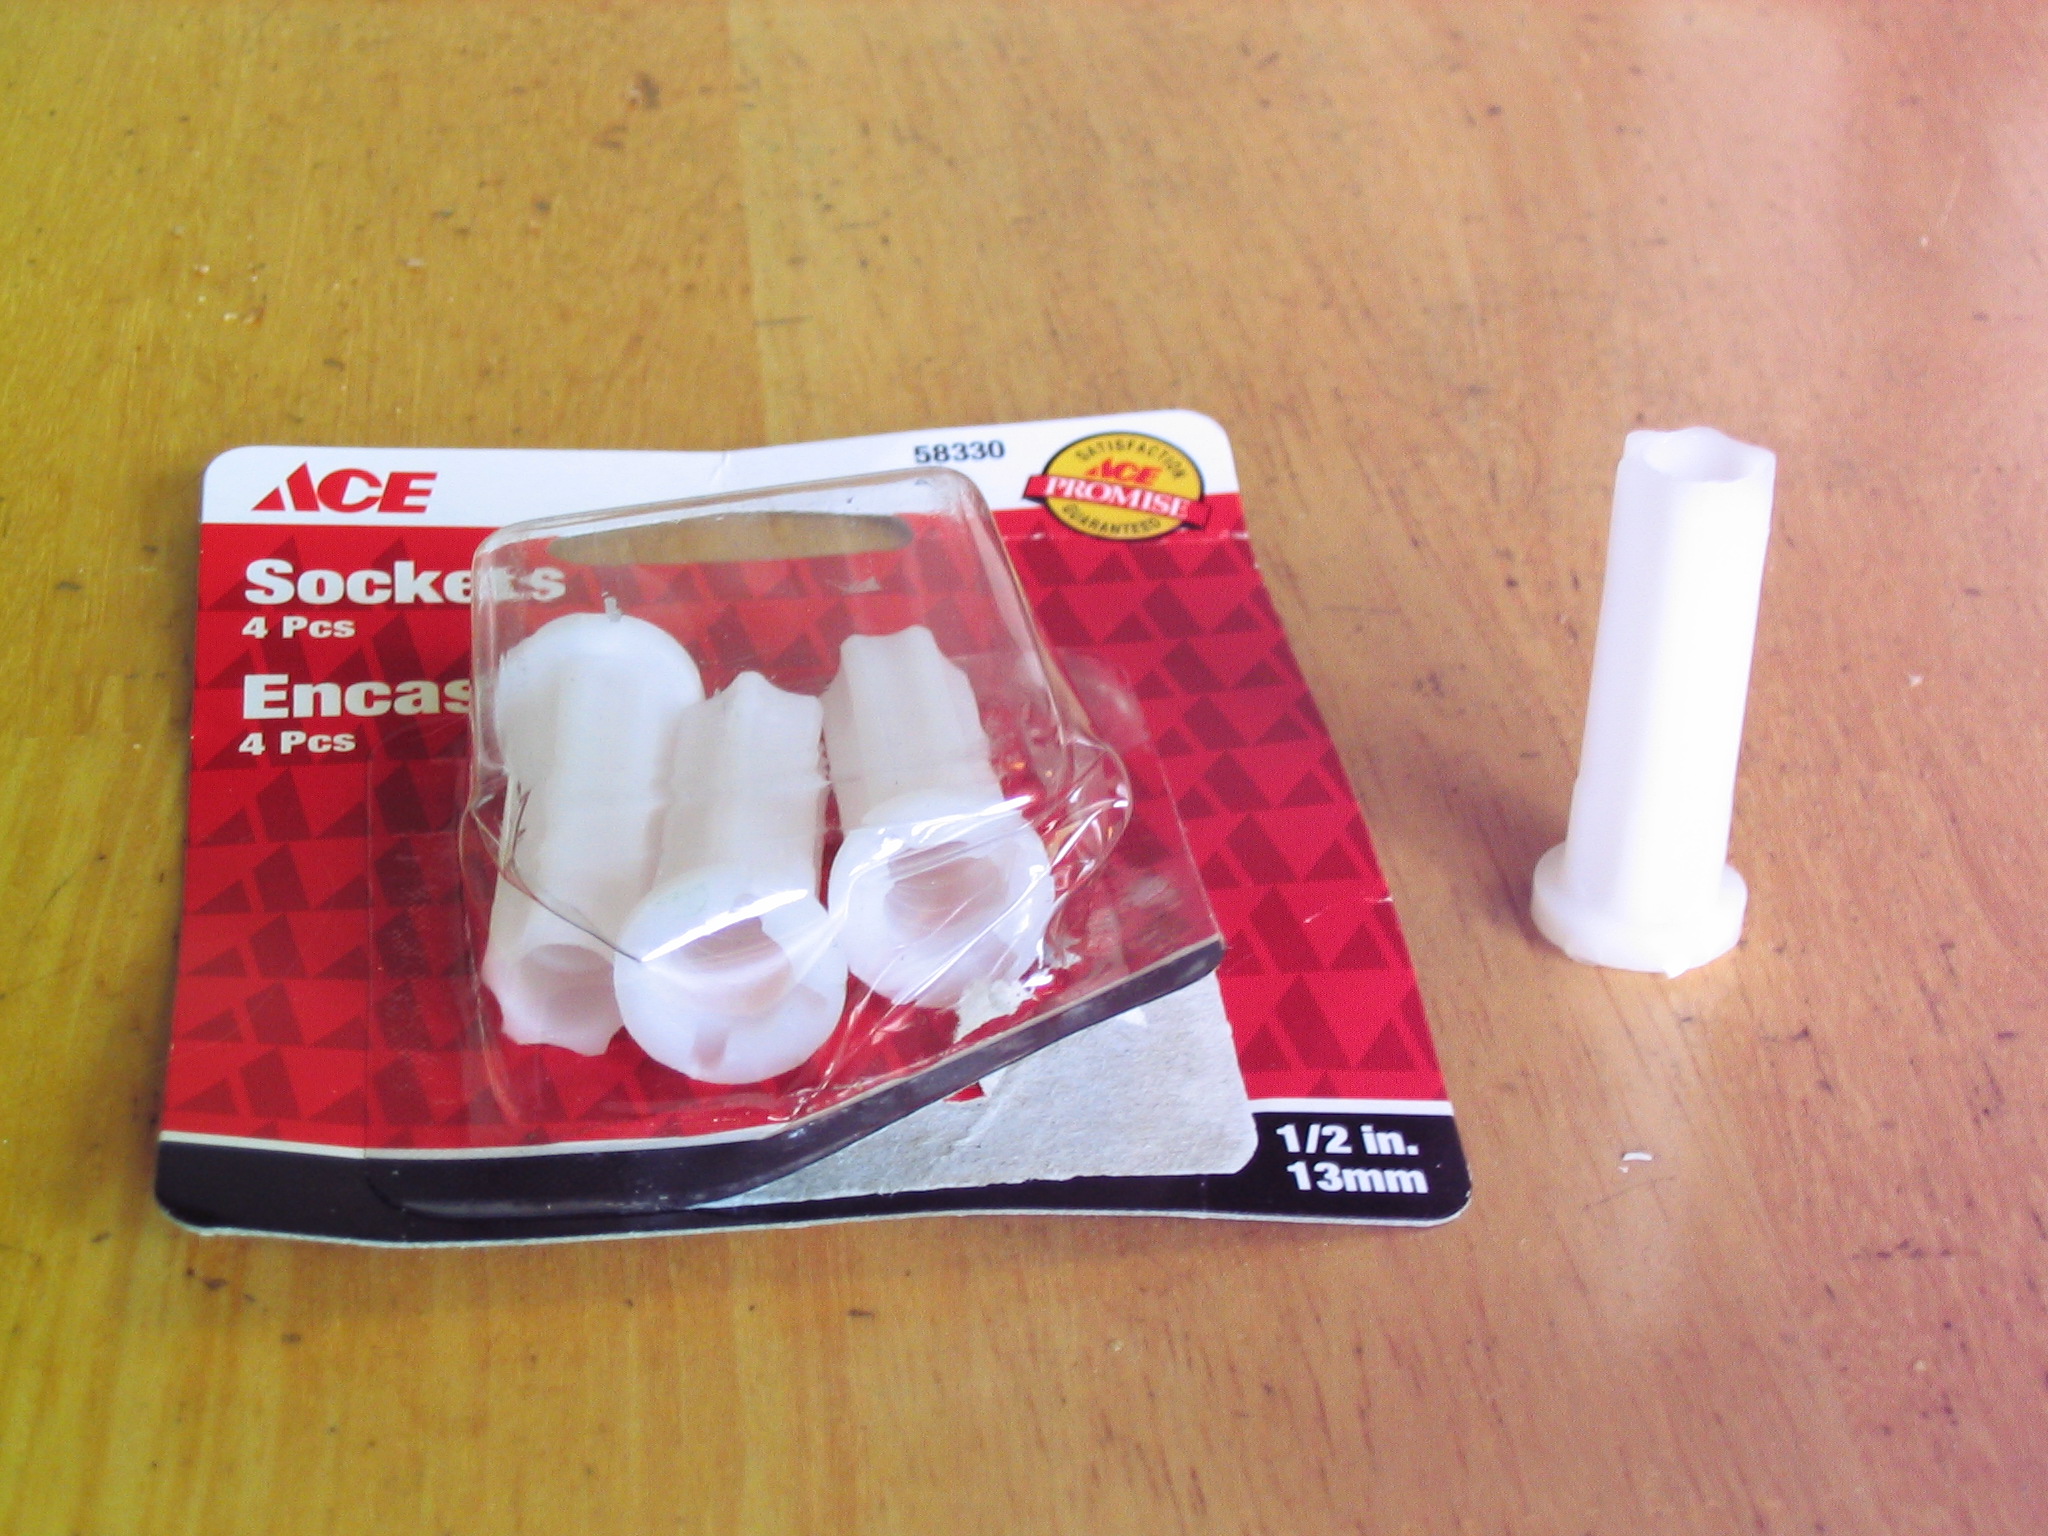
Construction mostly consisted of copying the cardboard pattern onto the angle iron. Most of the arm was fairly simple. The hinges were a challenge. I could not find nylon bushings at the hardware store to match the size of the bolts, so I used polyethylene sockets for caster wheels and trimmed them to fit.
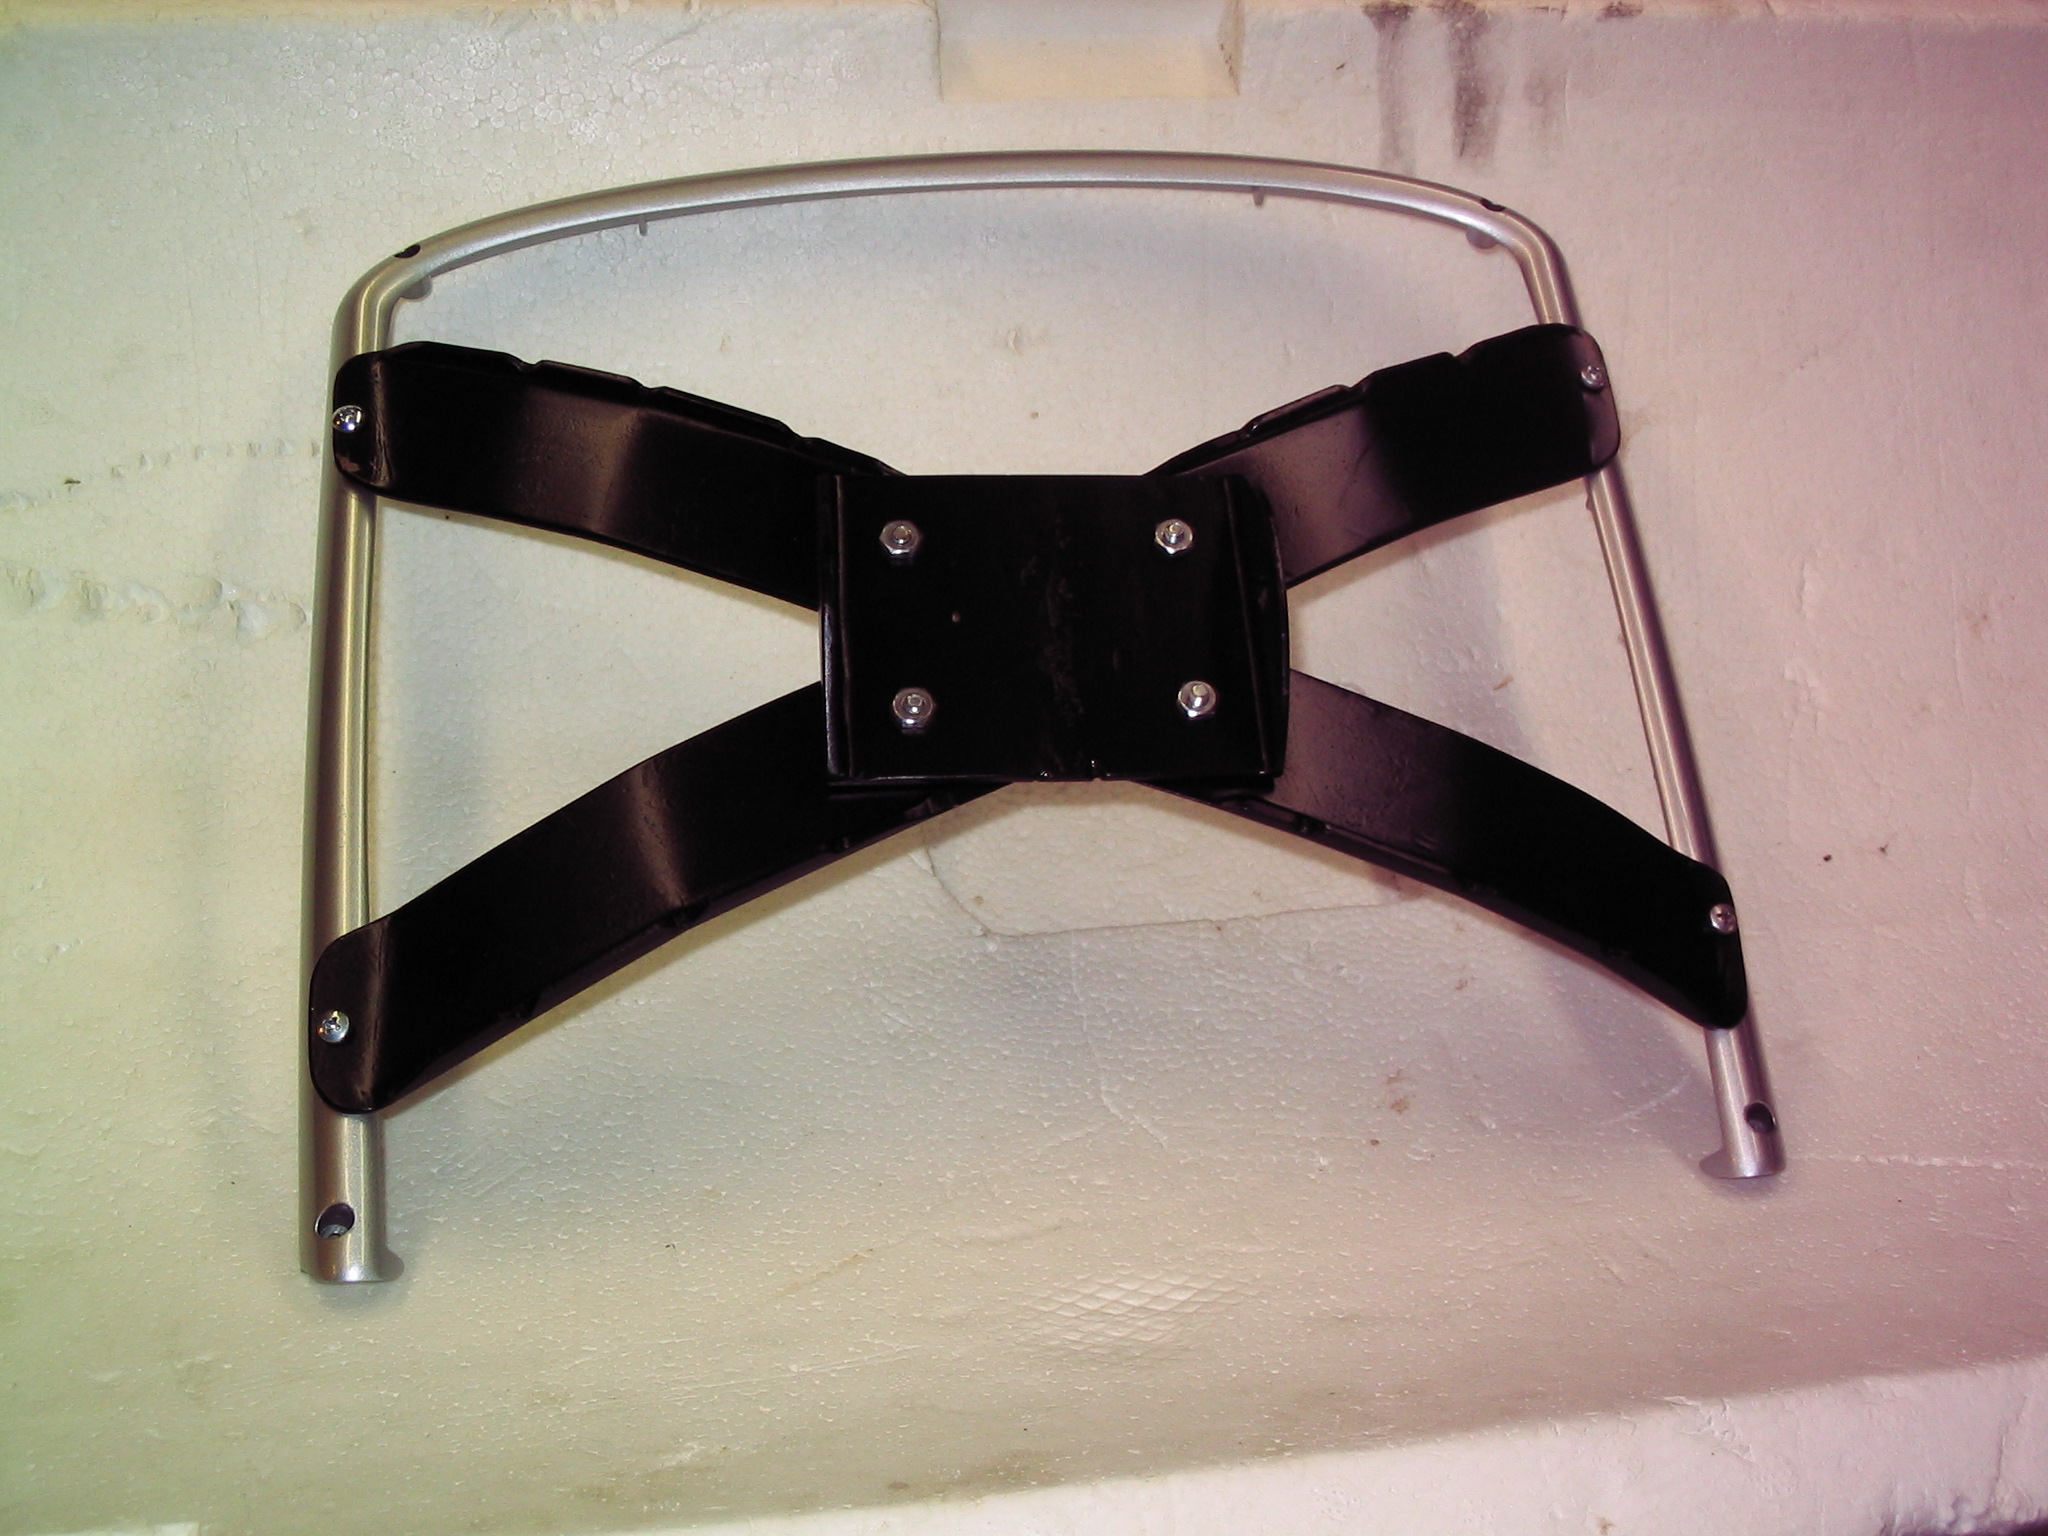
The TV was made to stand on a large foot; it did not include anything for a wall-mount bracket type of configuration. However, it was made with an aluminum frame around the perimeter. We removed the foot and made an X-shaped metal bracket, which we screwed to the frame at the outer edges.
After the sections were welded and filed down smooth, we painted it black with semi-gloss spray paint. We bolted it to the wall with concrete anchors (since this wall is a solid concrete wall behind the panelling) and it works great.
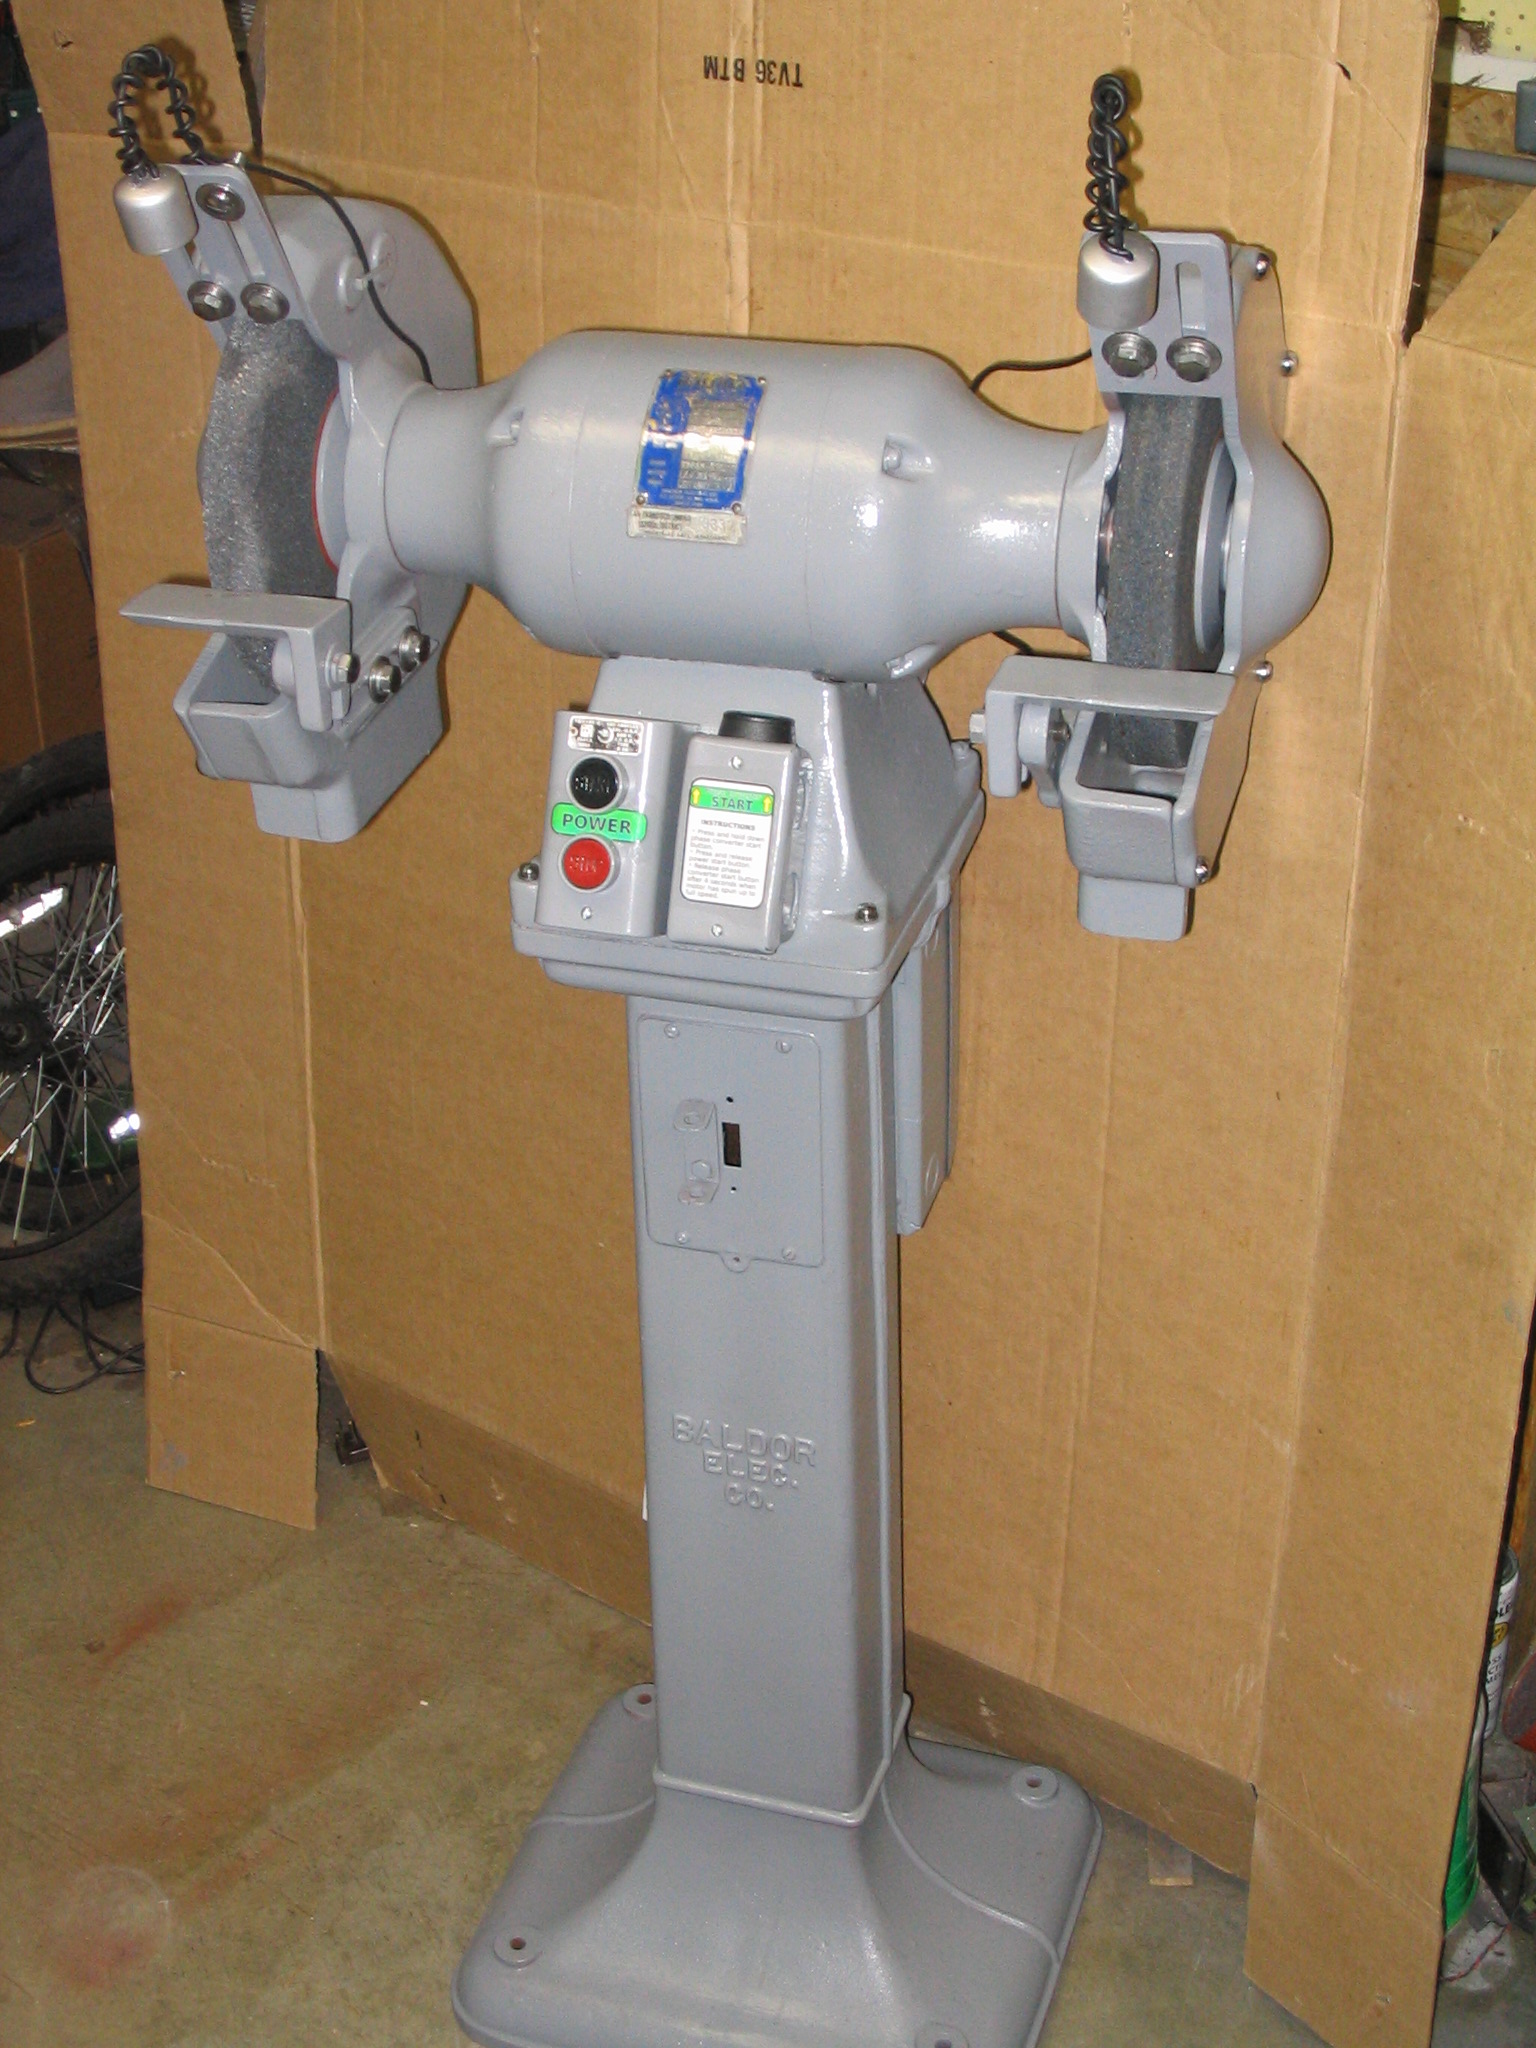
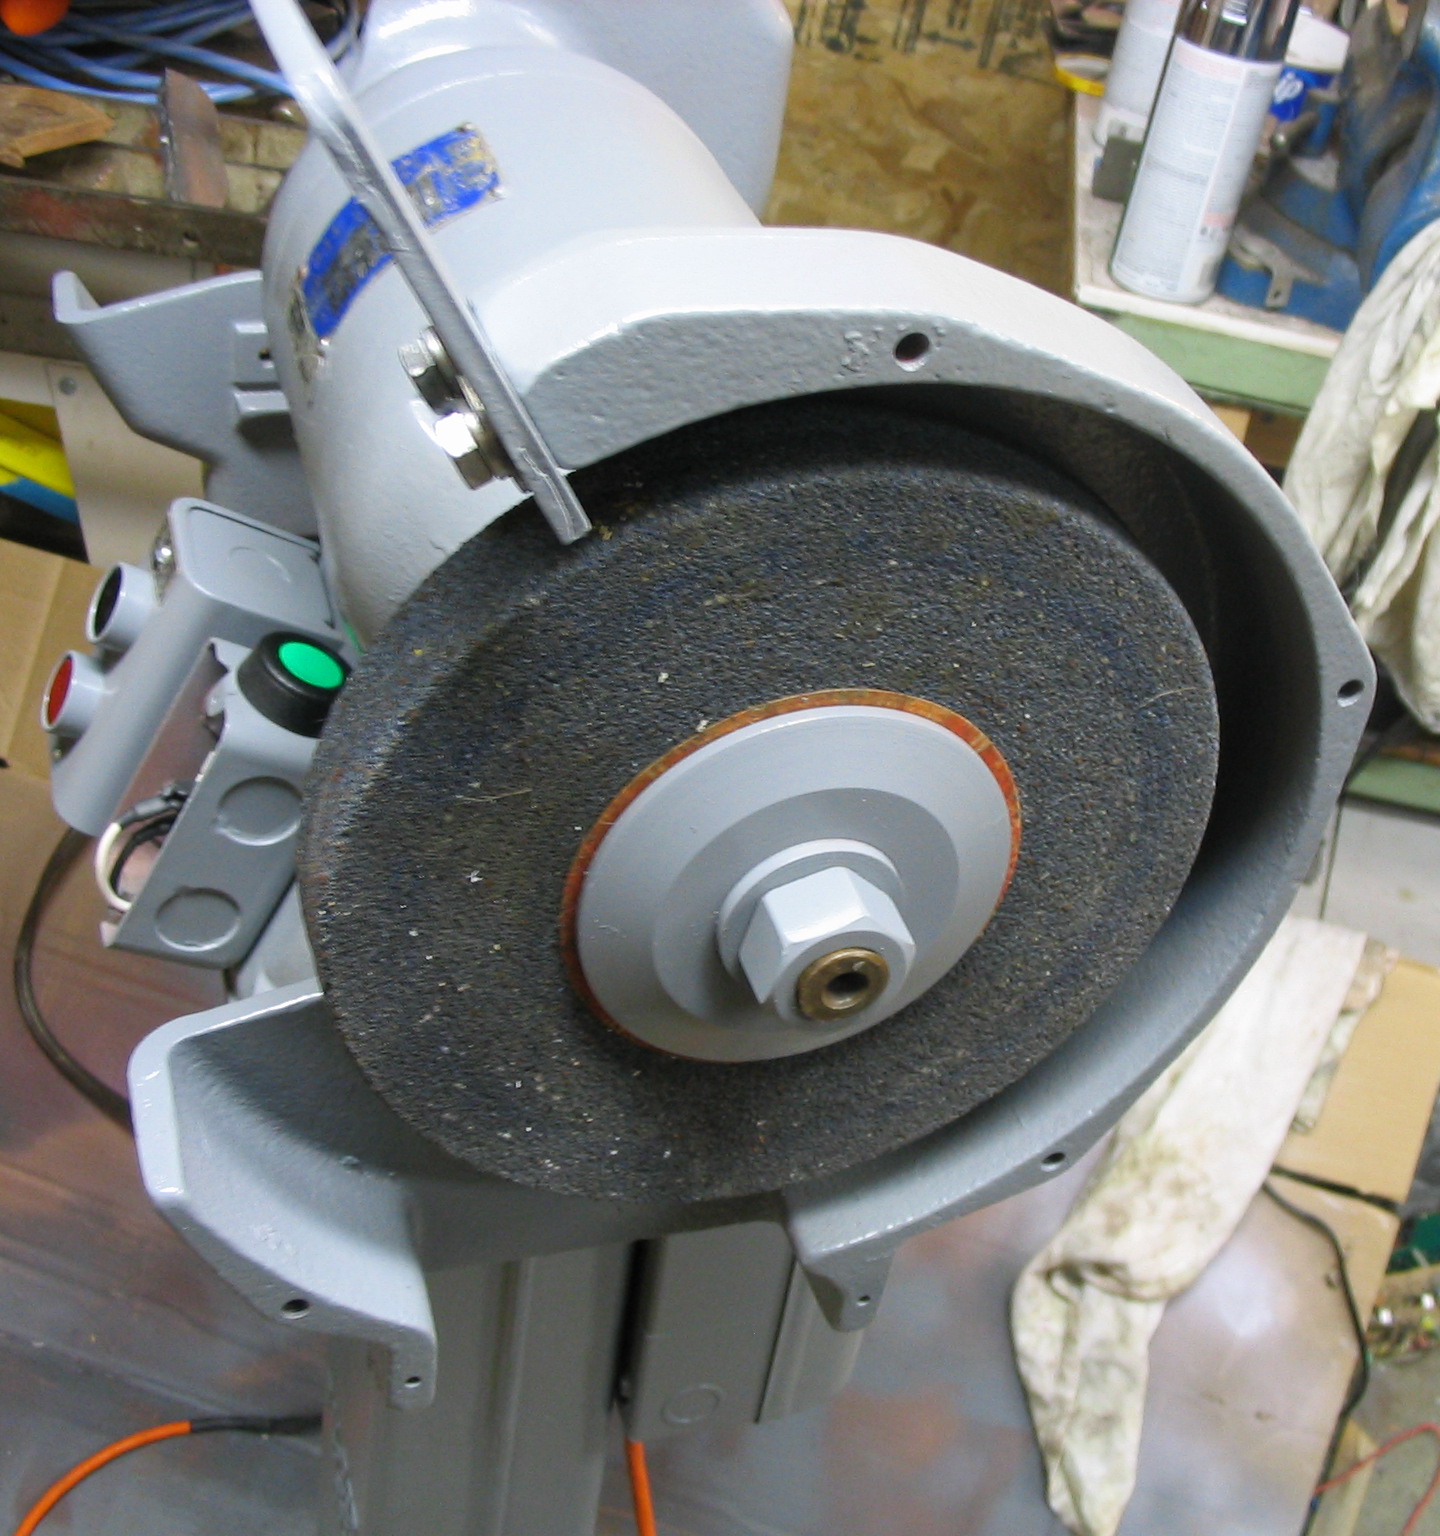
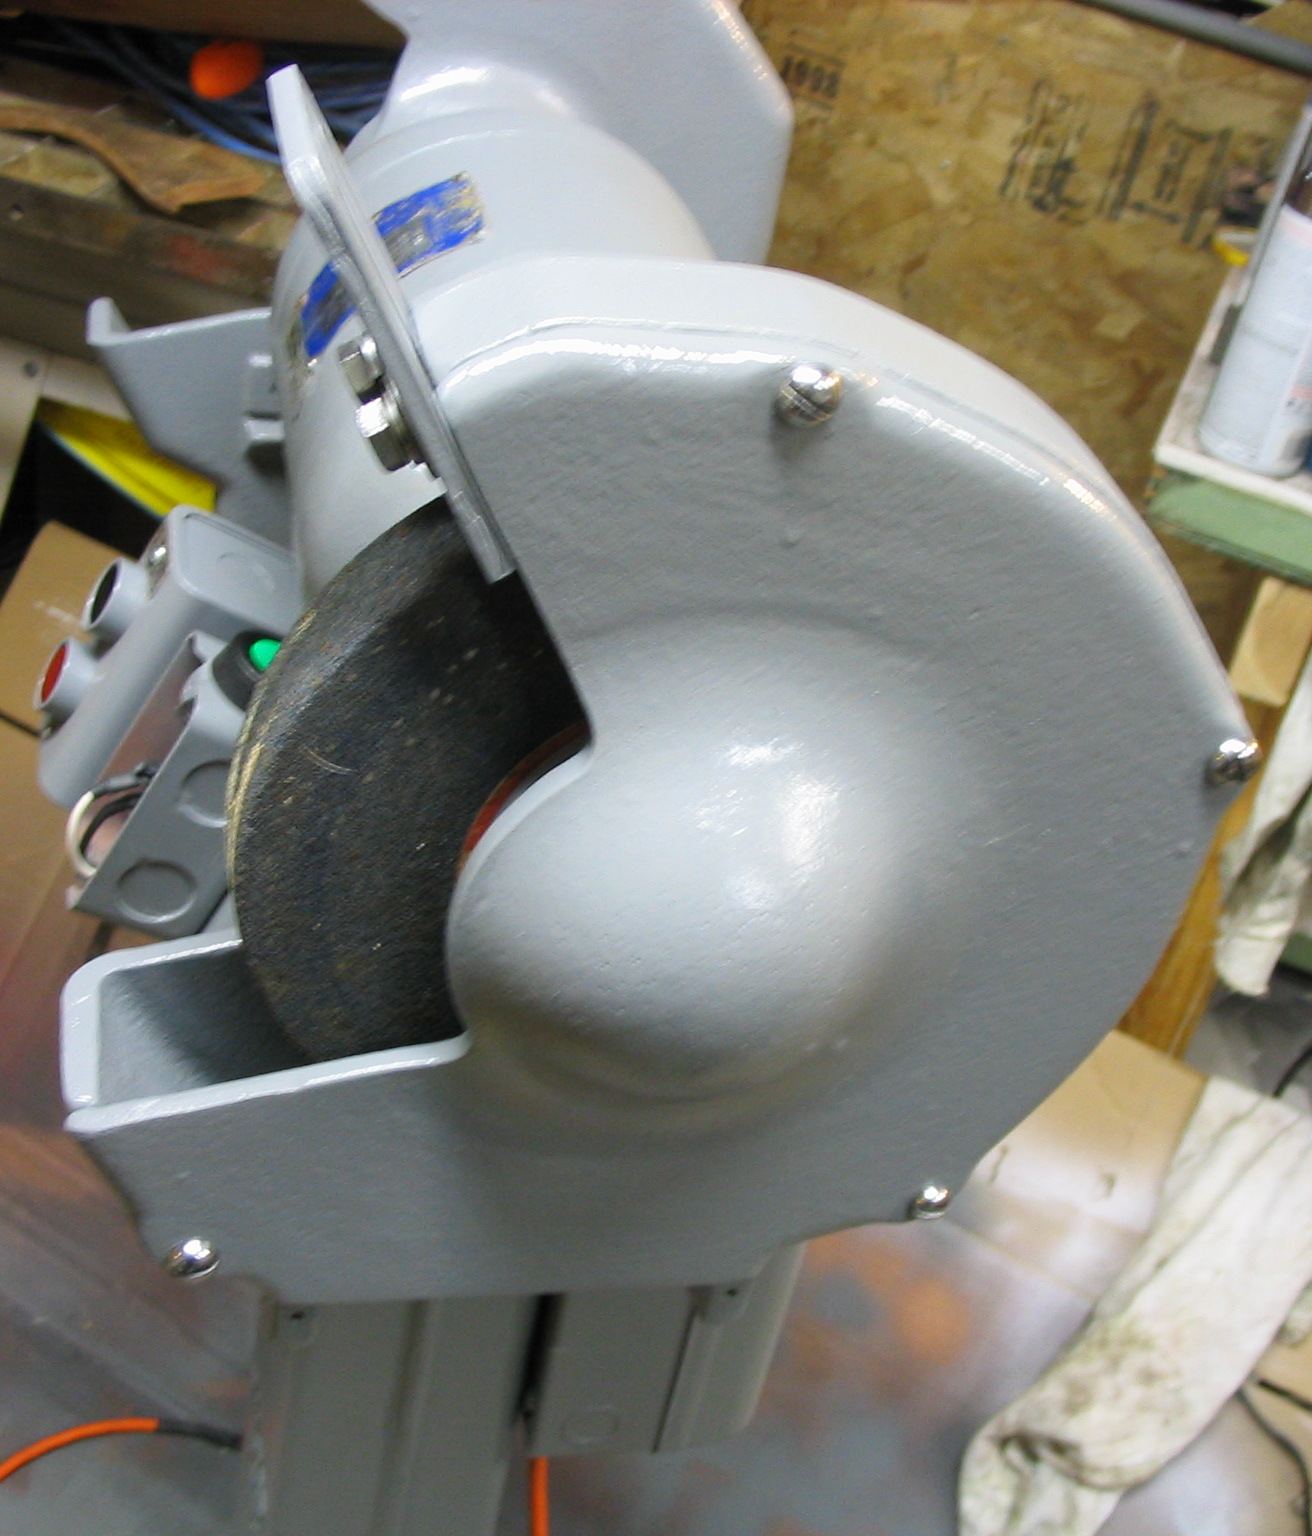
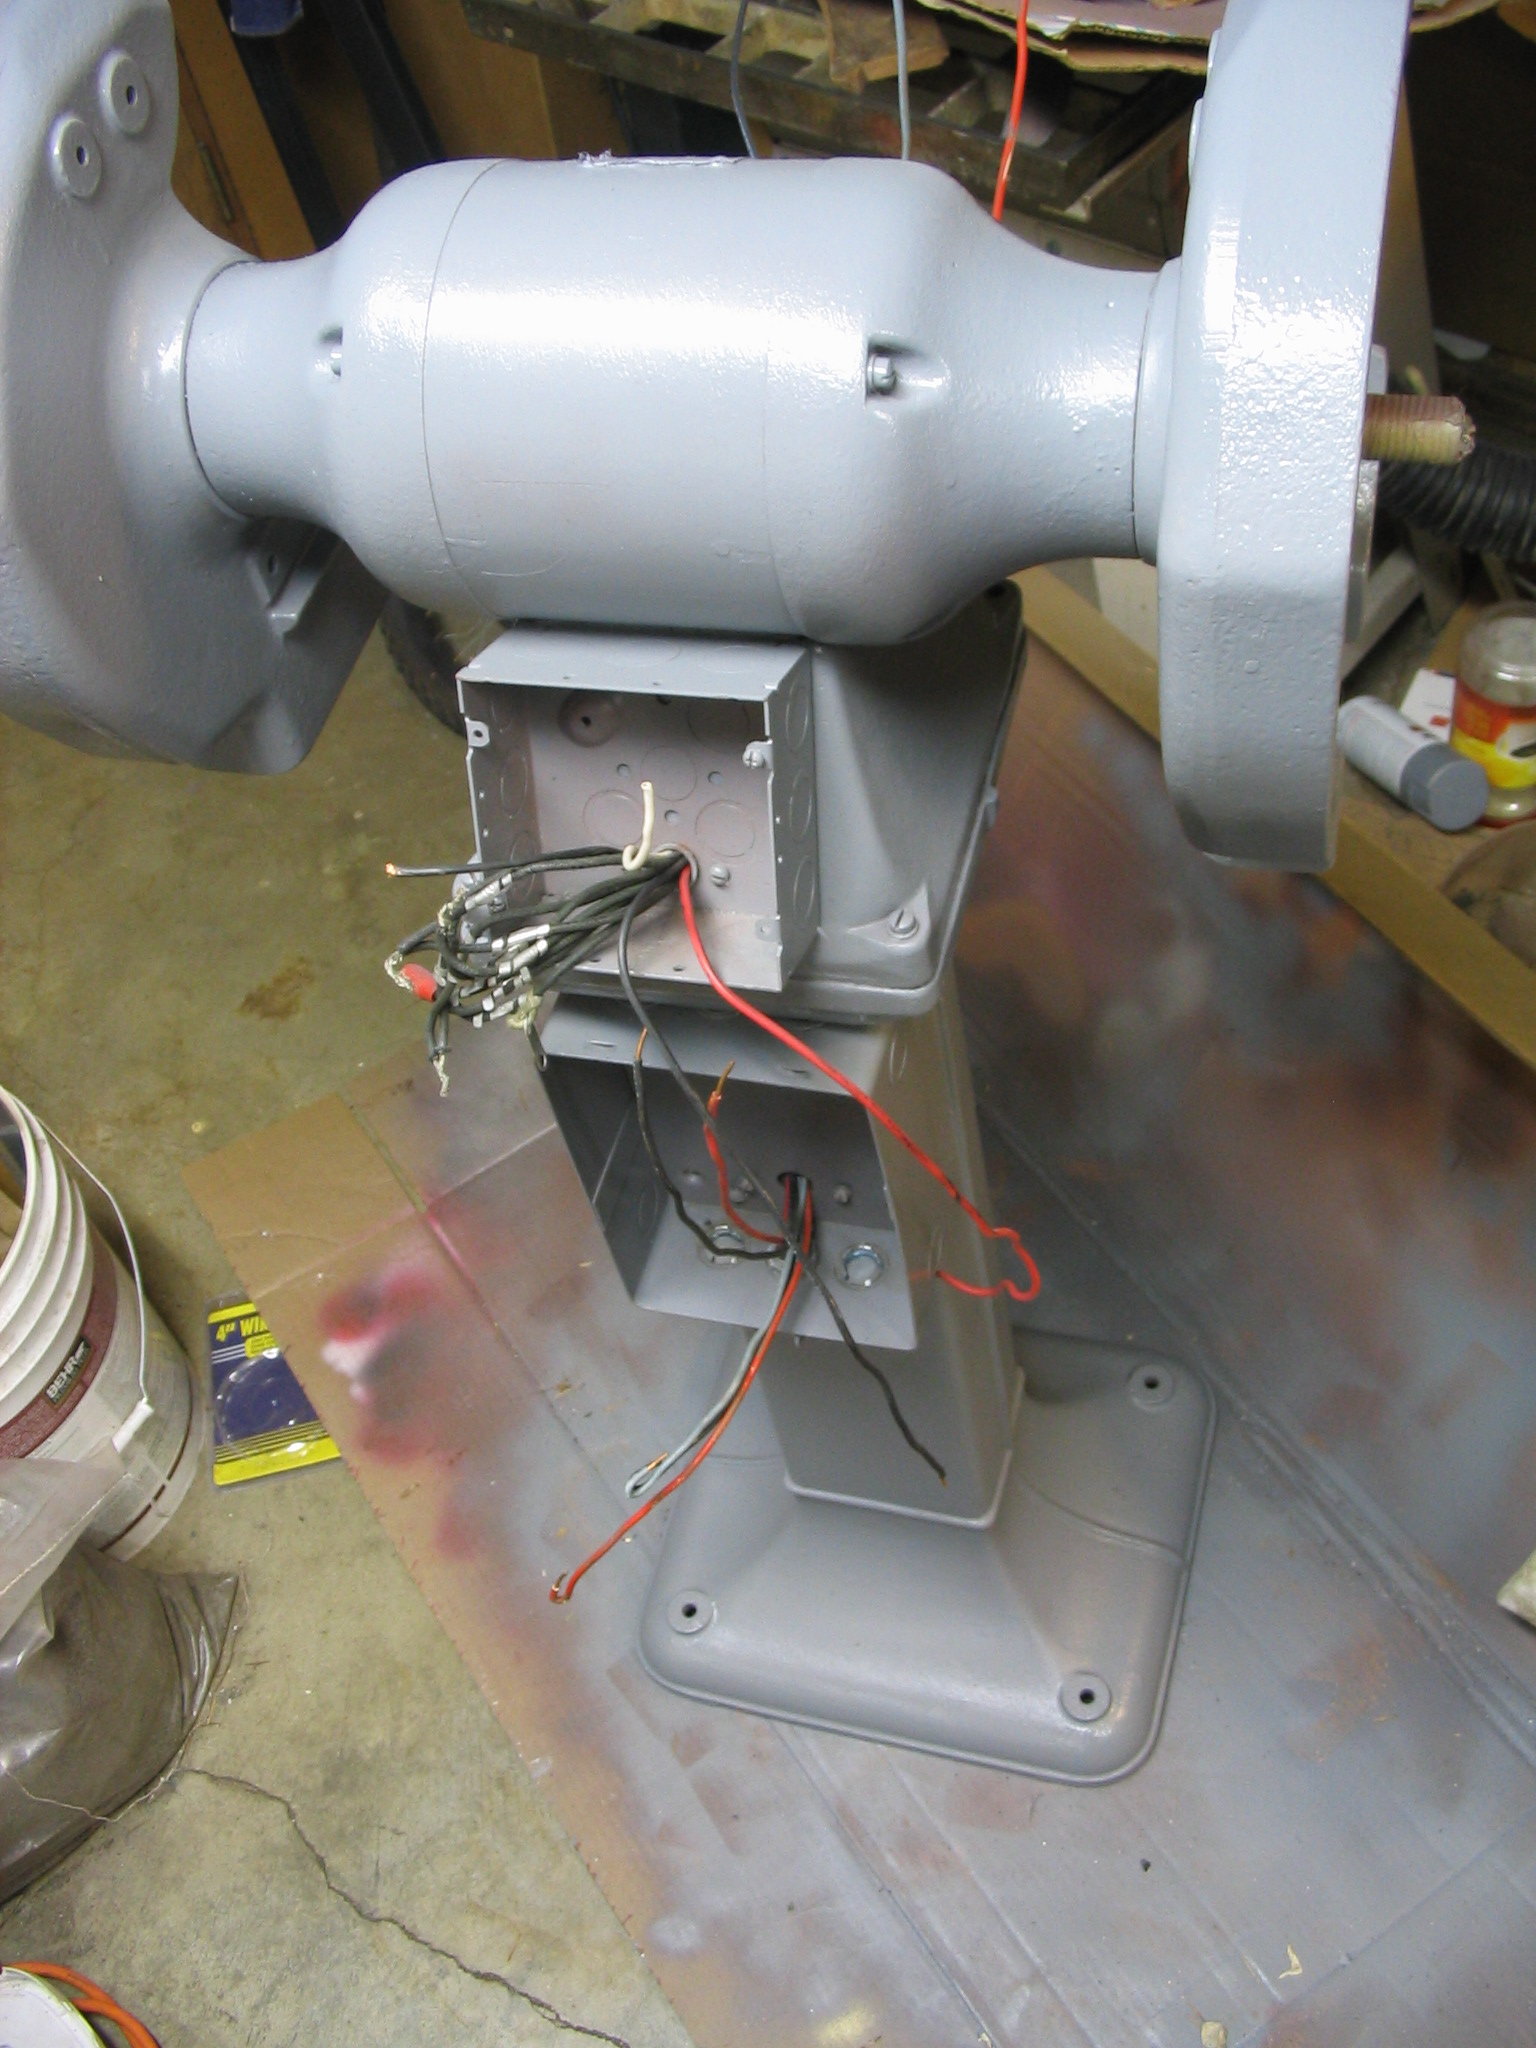
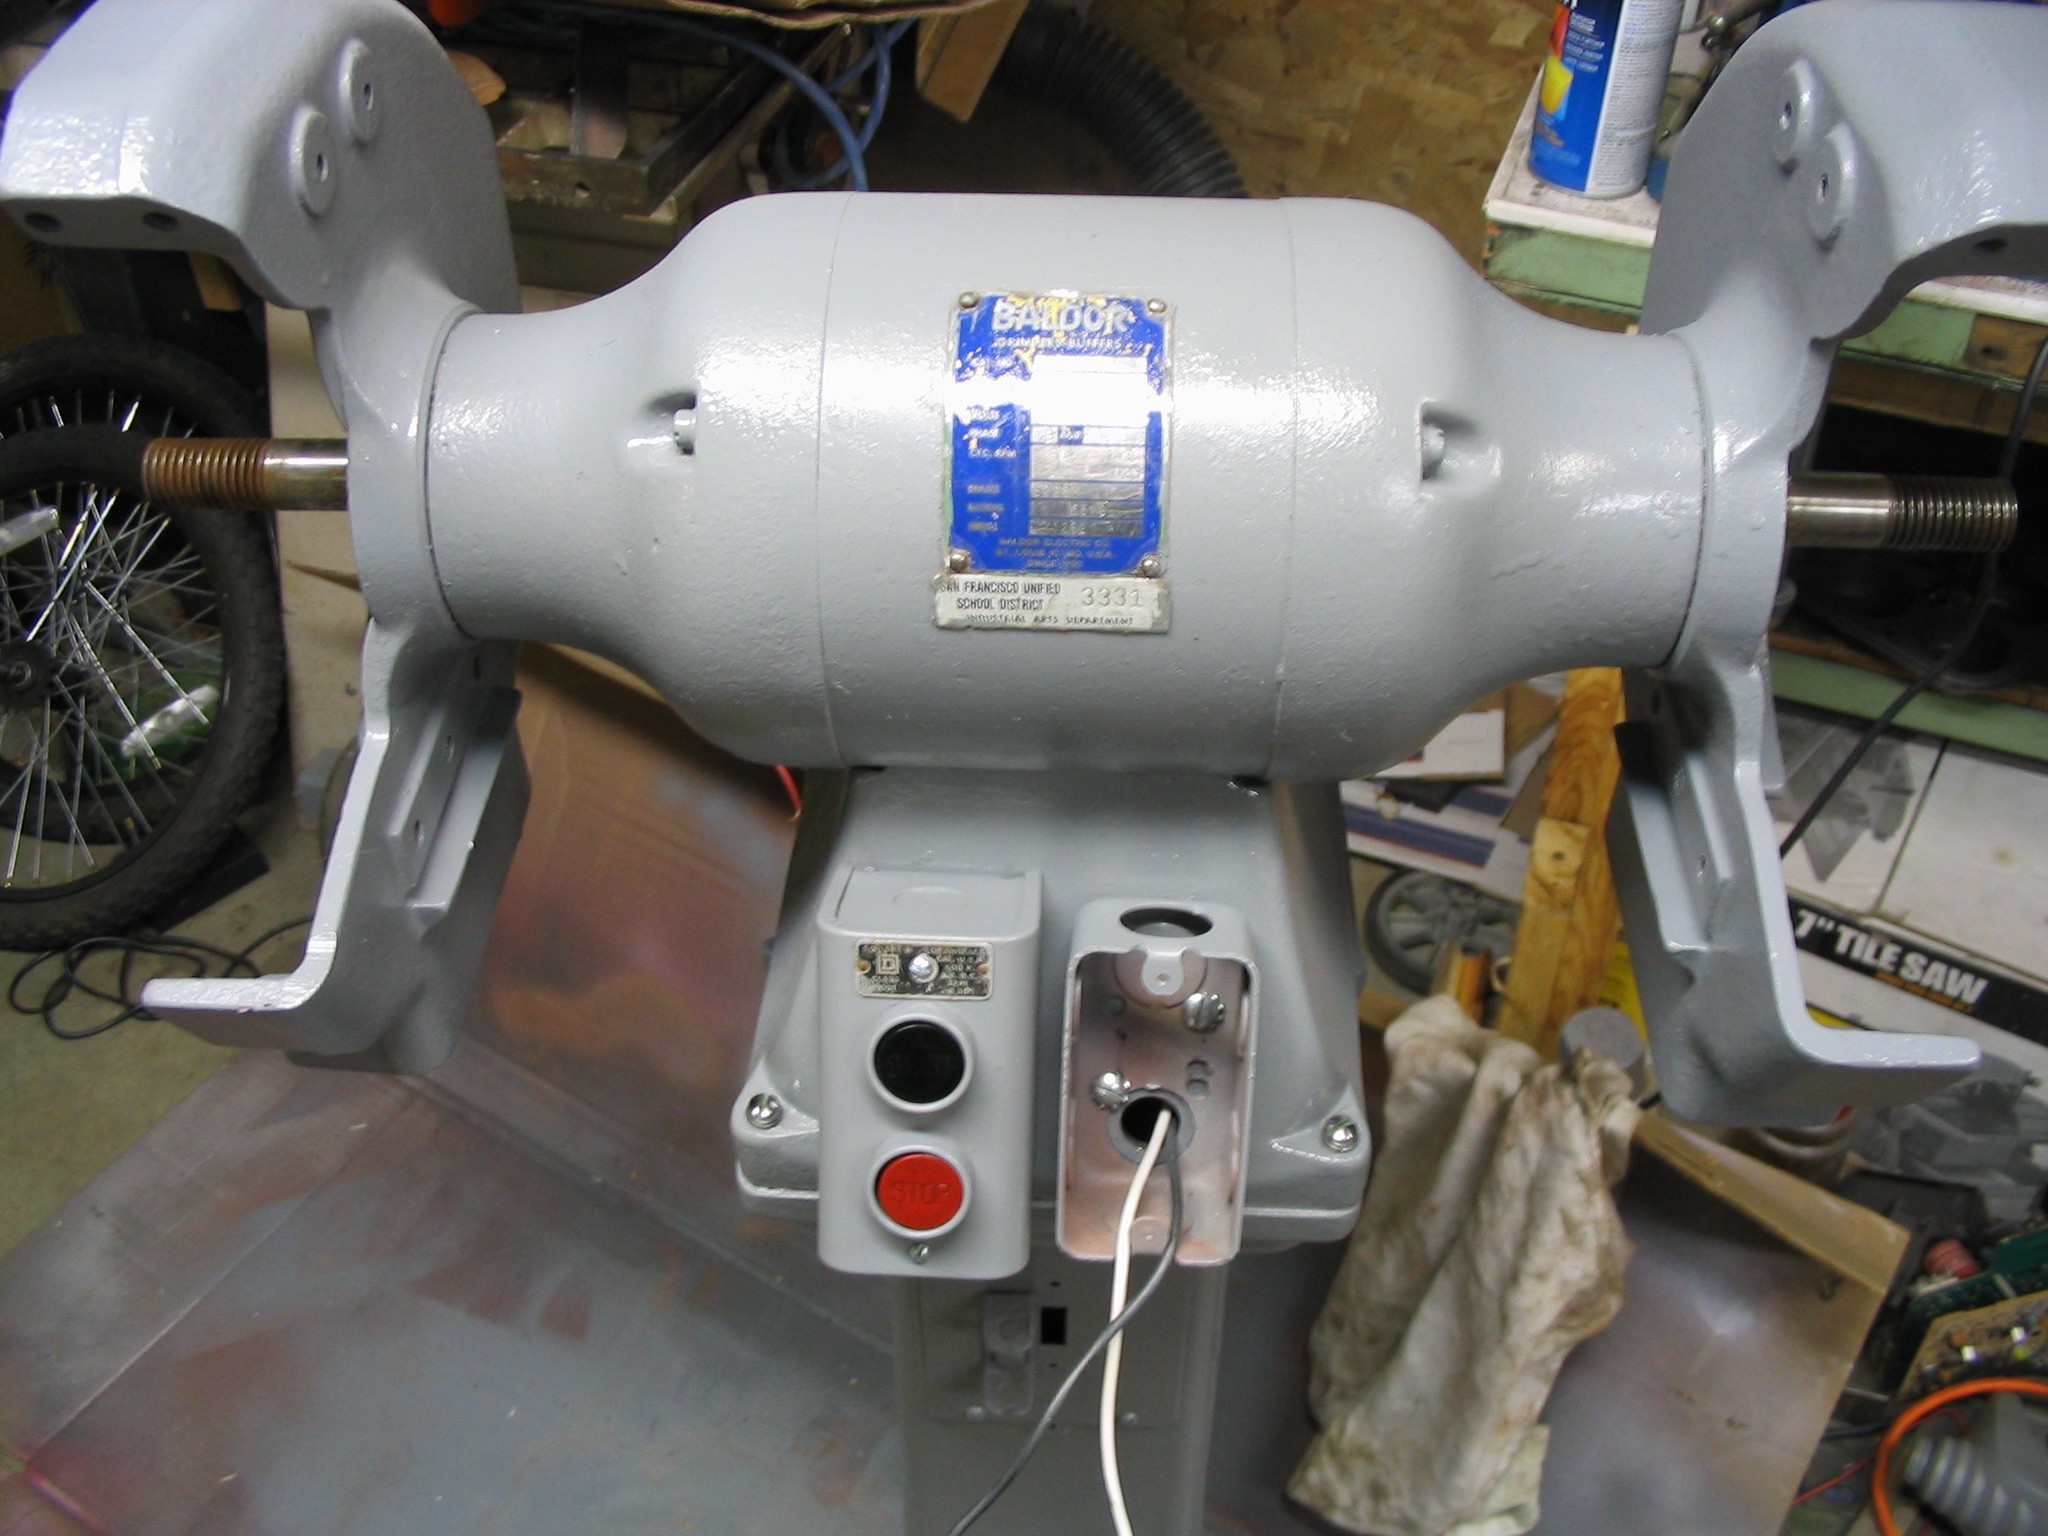
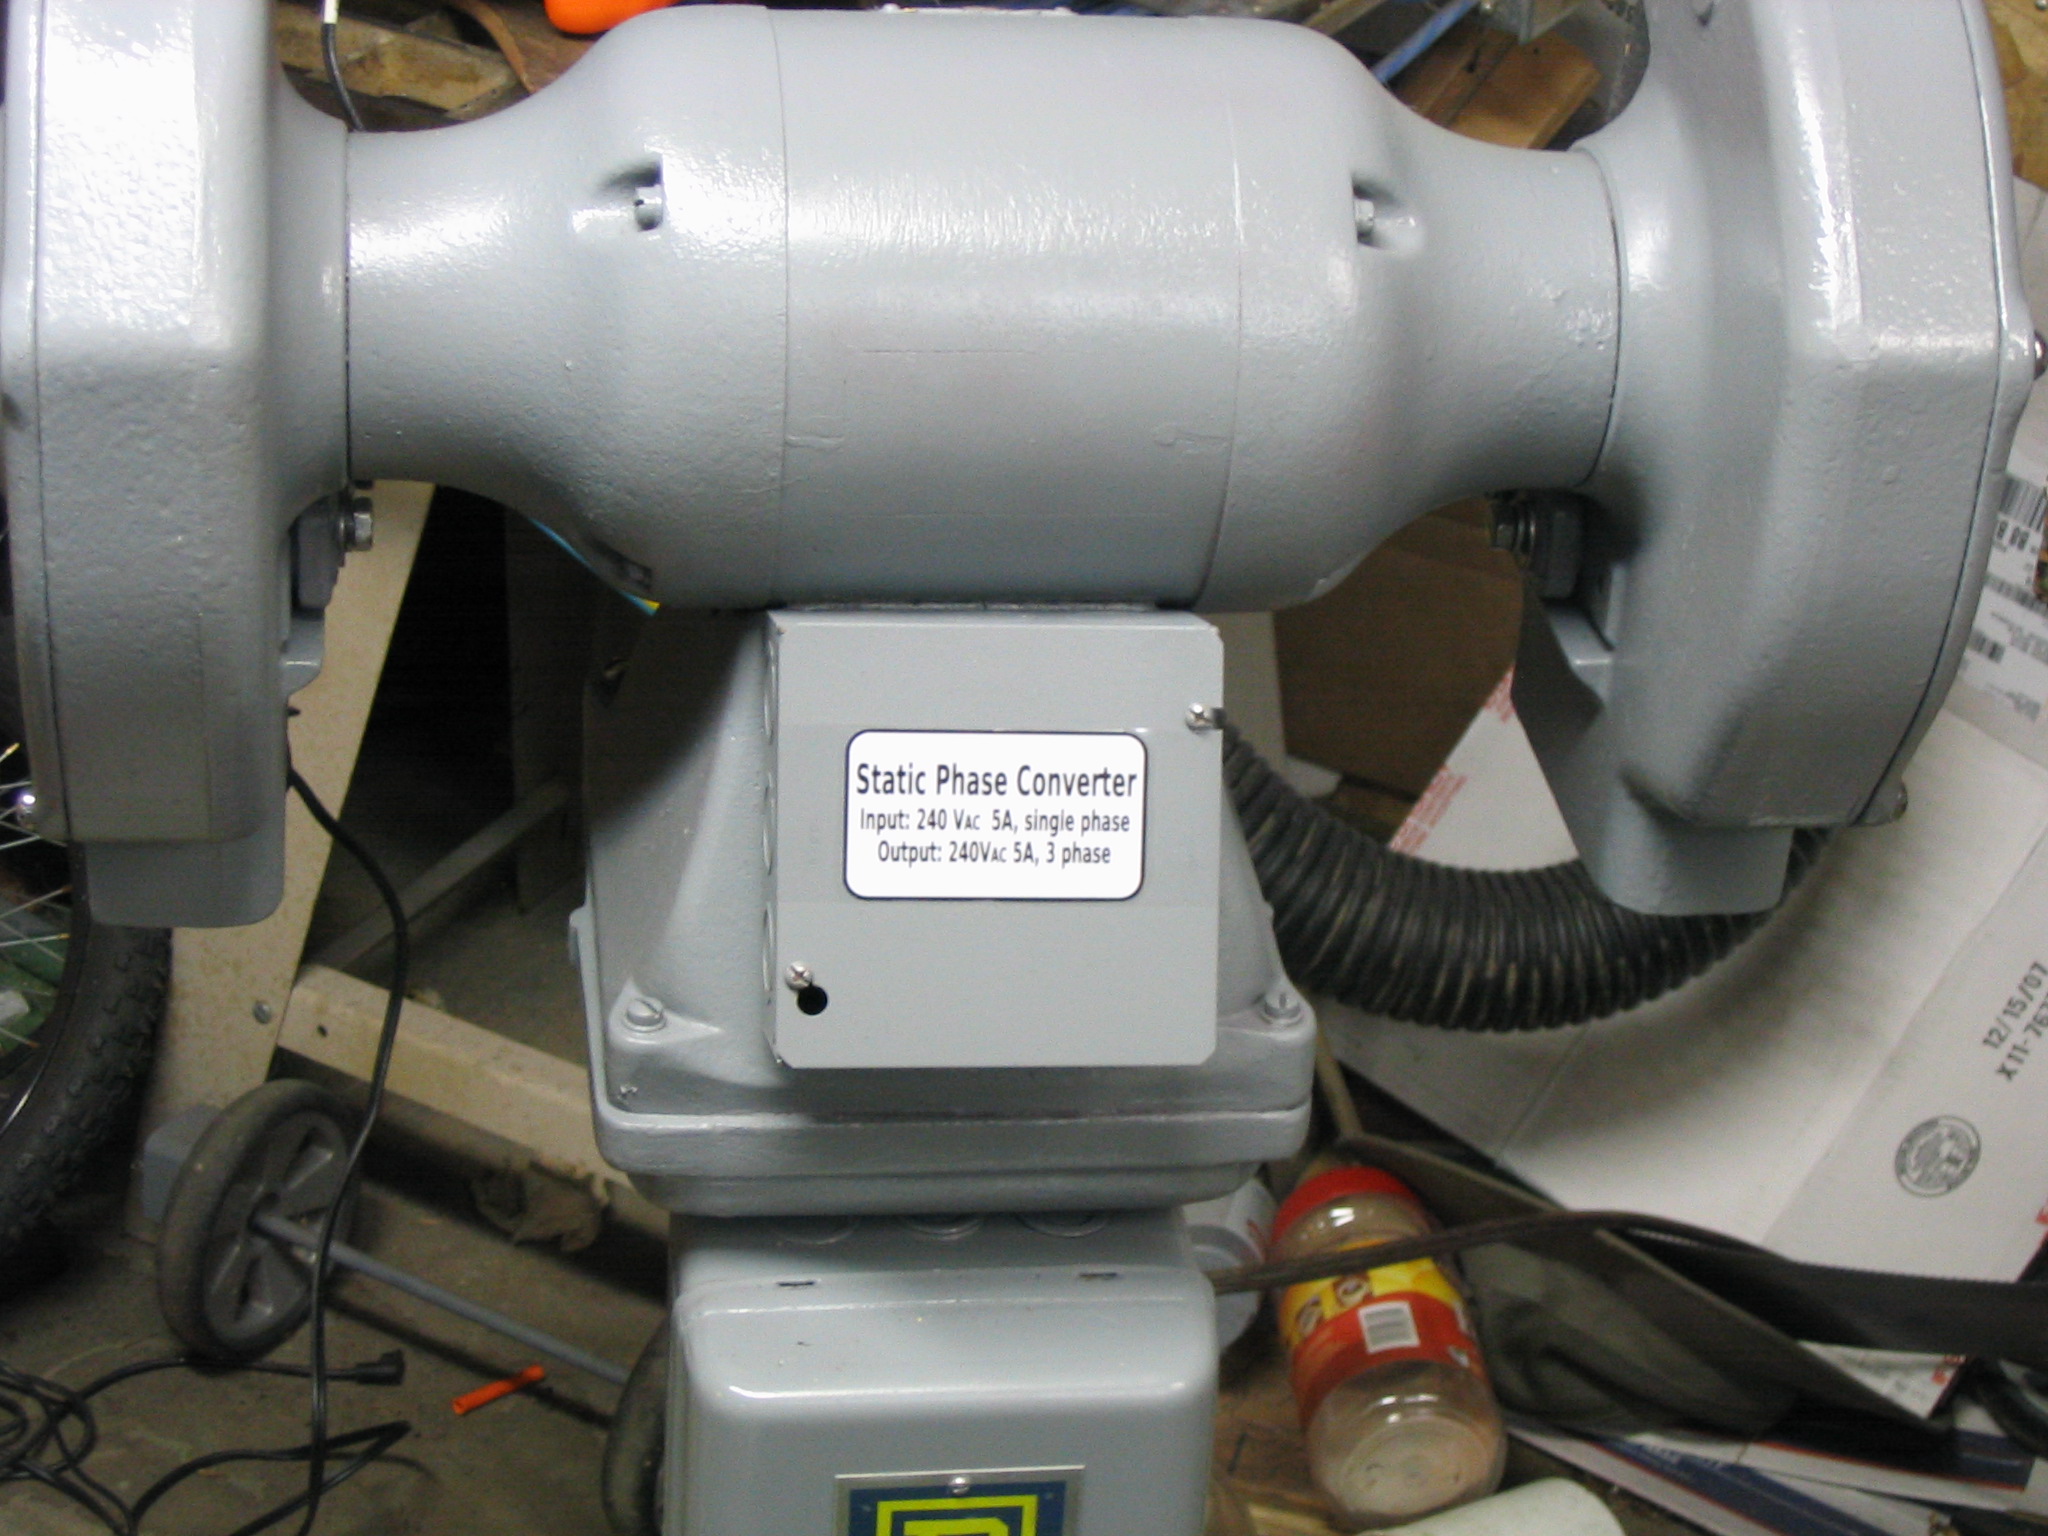
I received a Baldor metal grinder with 10-inch wheels, on its own pedestal floor stand, discarded from a school metal shop program. Several owners before me did not know what to do with it, mainly because the motor is wired for three-phase industrial power which is not found in U.S. residential homes. My job was to fix it up and get it working.
There were two major tasks to the restoration: cleaning/repainting, and making the three-phase motor work.
Cleaning and Painting
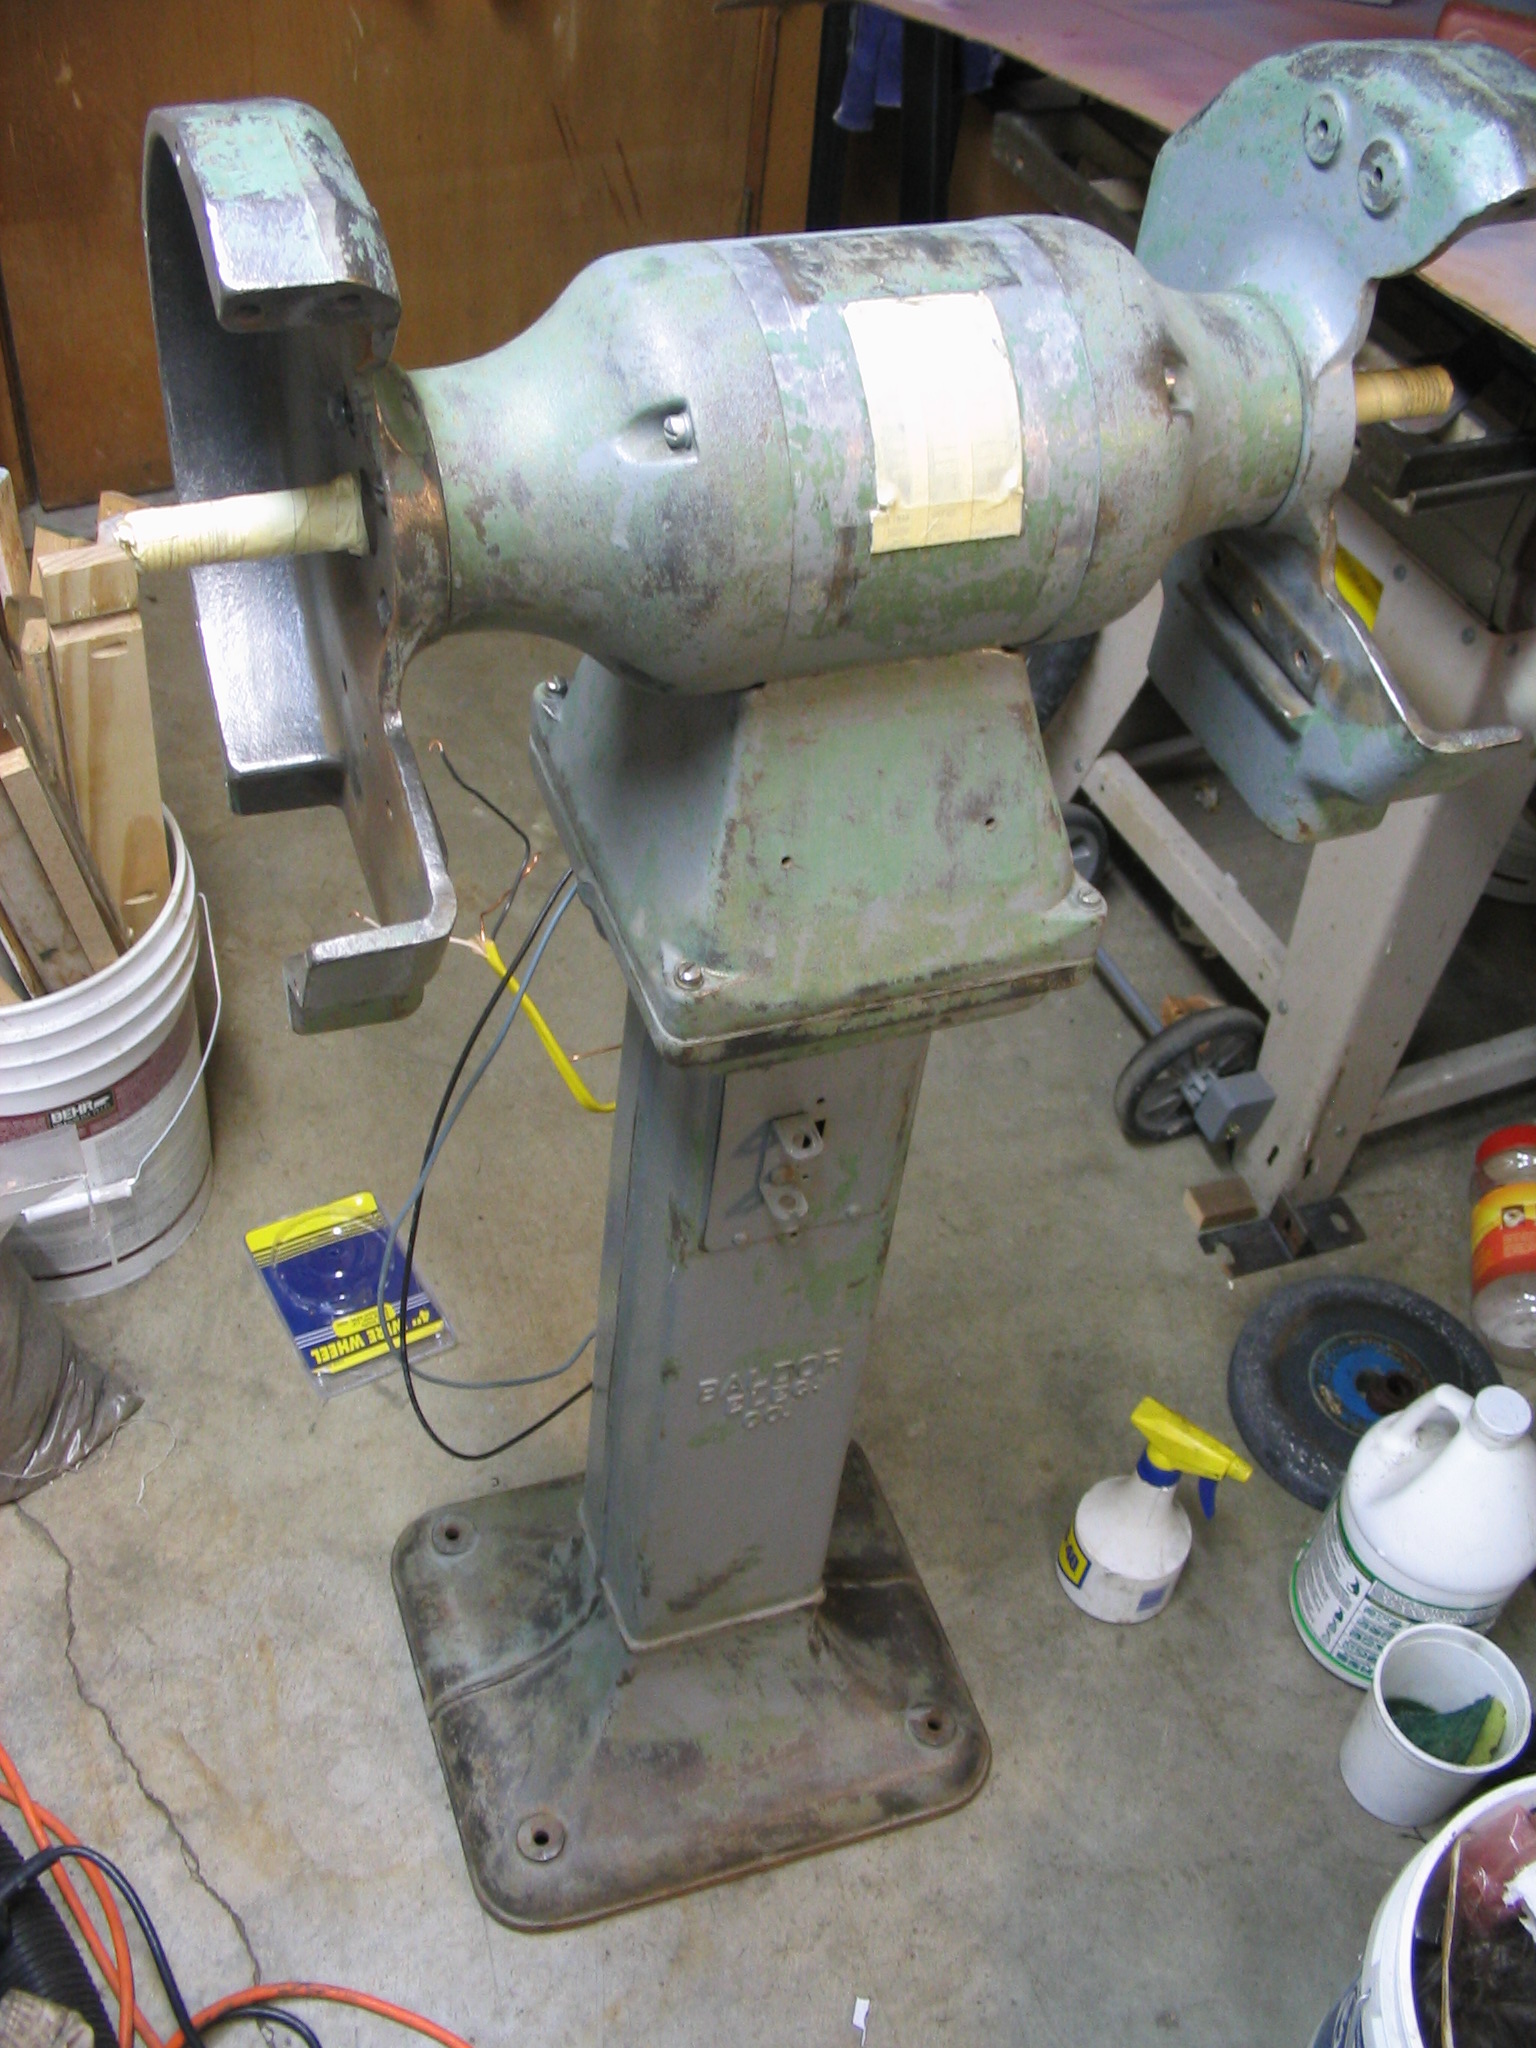
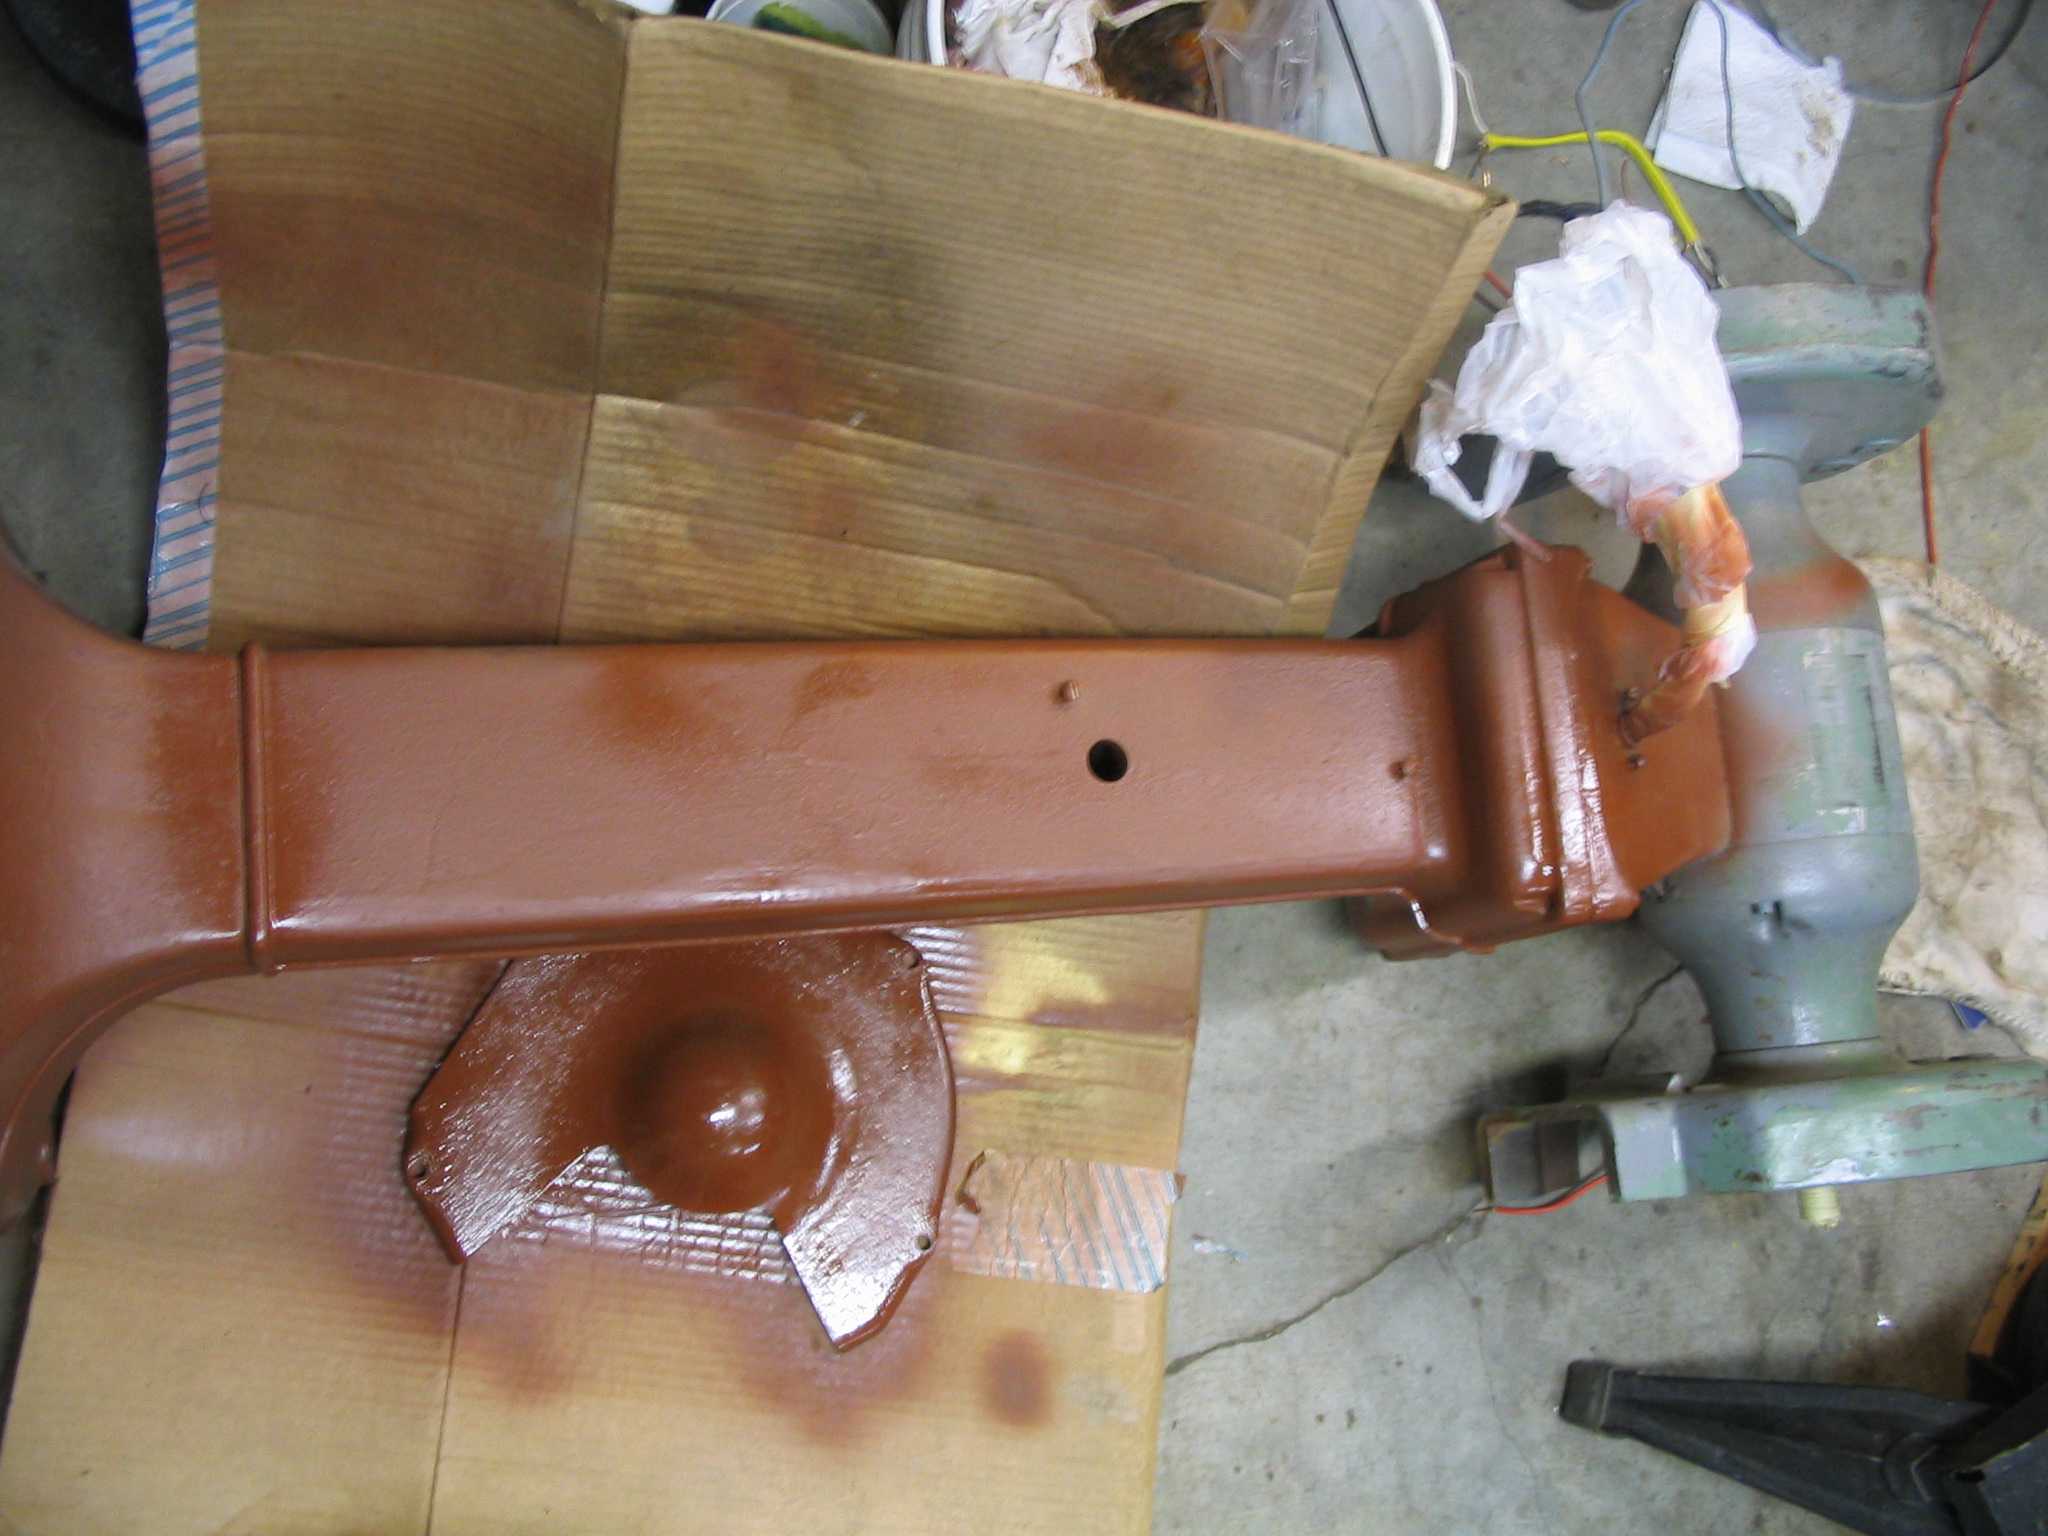
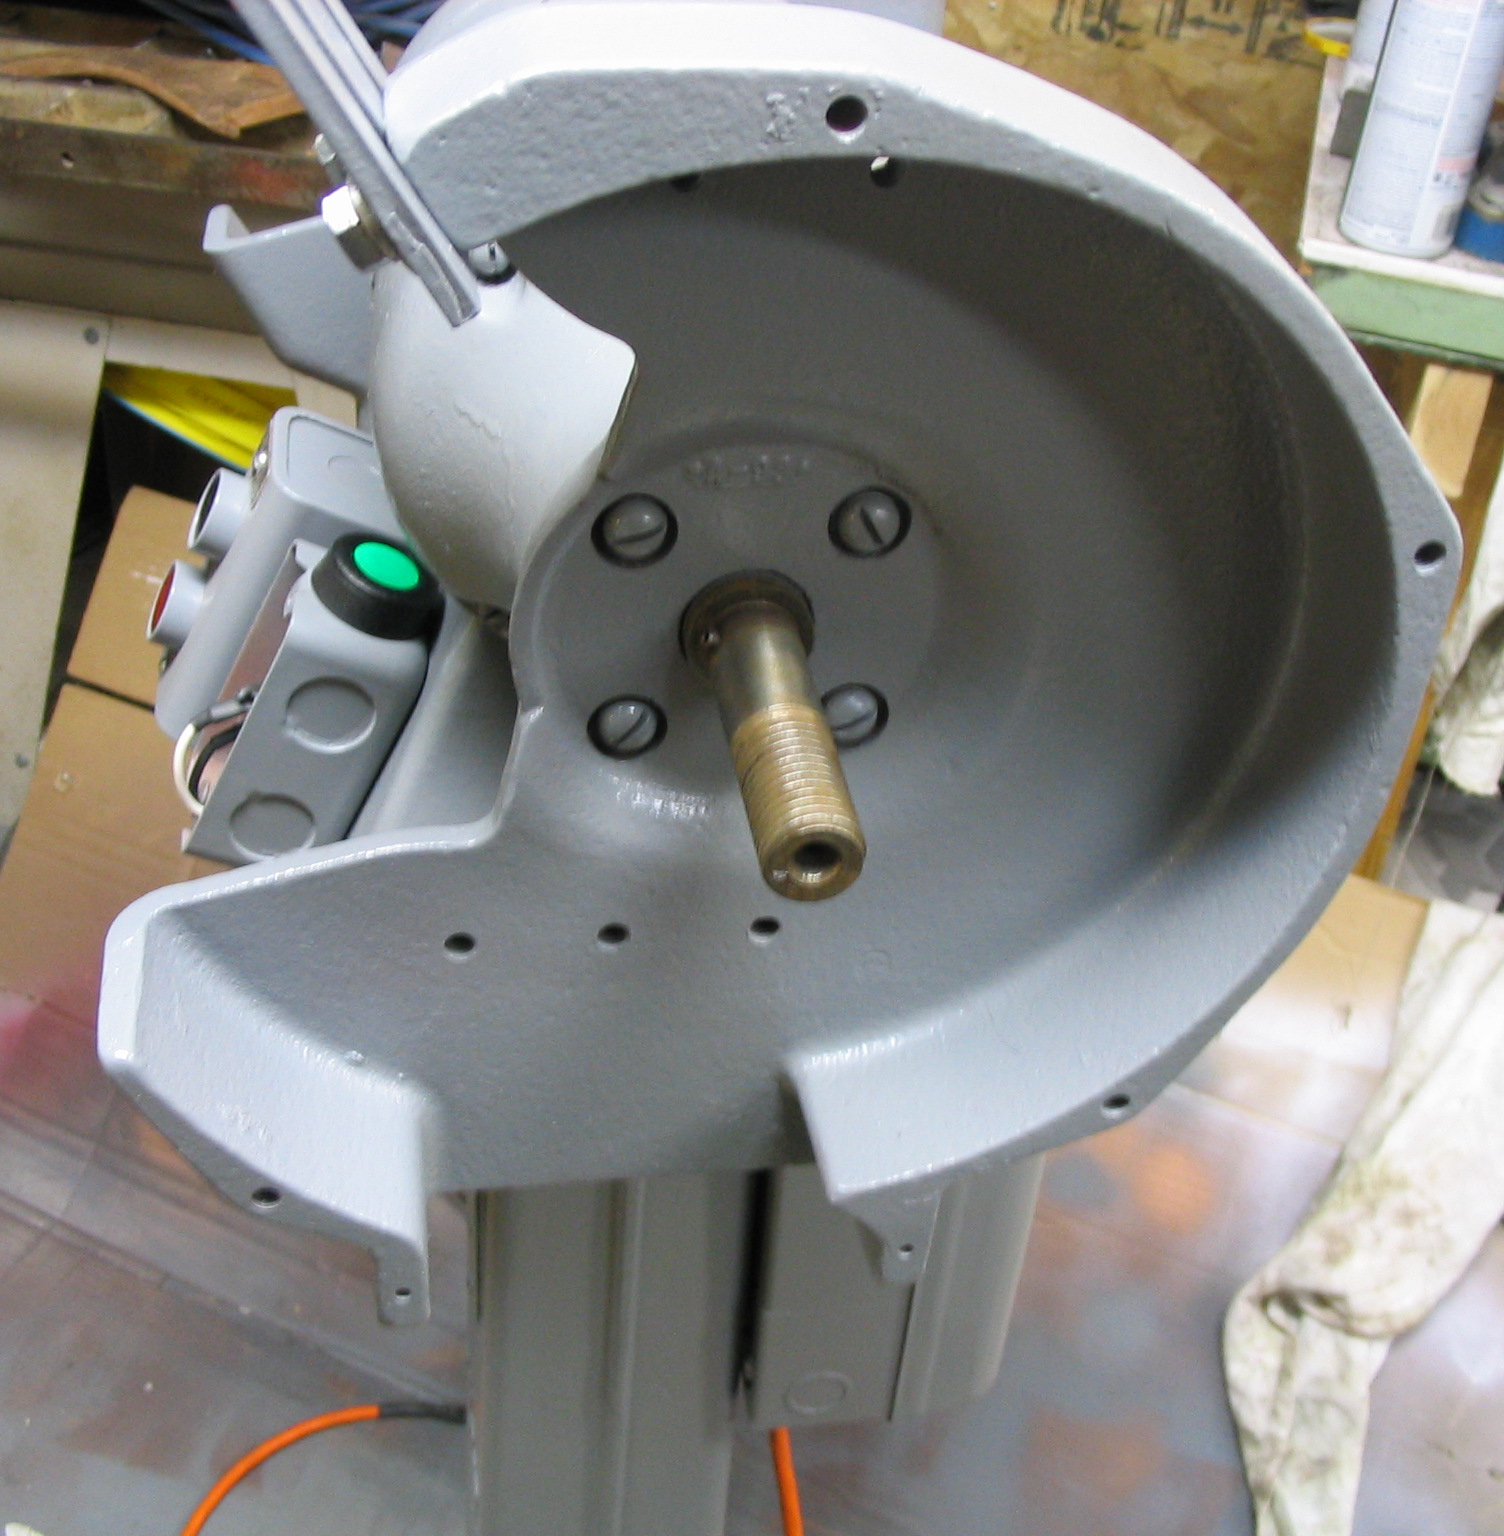
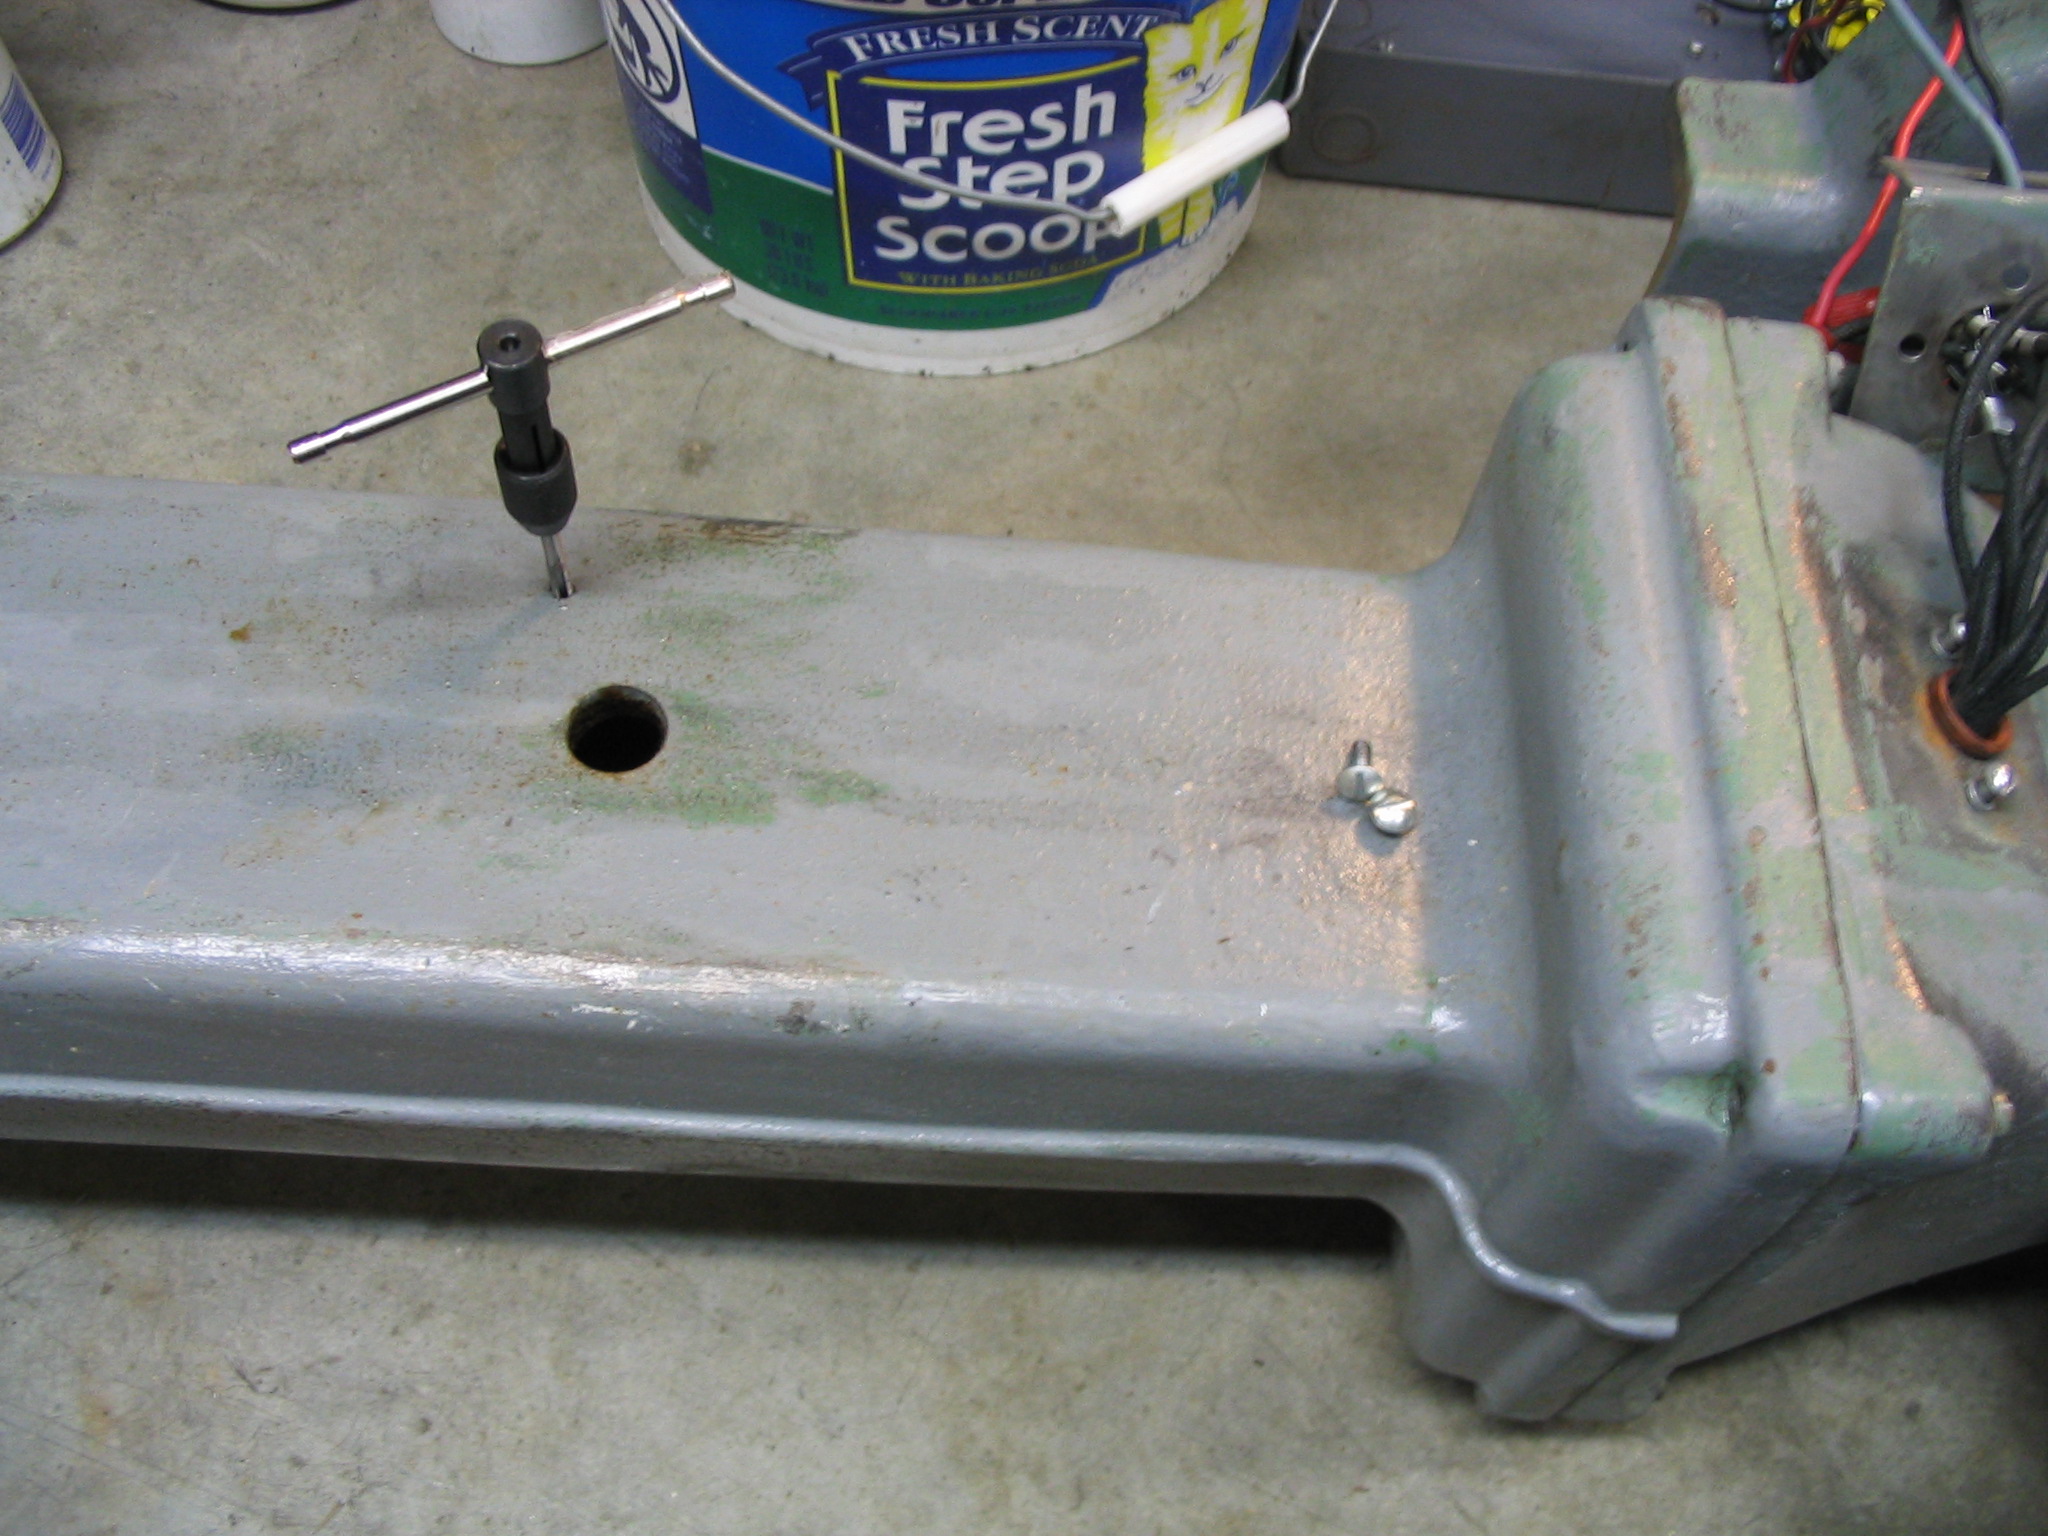
I started the cleaning process by removing all attachments that I could, including the wheel shroud side covers, the wheels themselves, and all electrical boxes and covers. I remove all of the old flaking paint and minor rust spots using a wire wheel brush on the electric drill. Some of the paint was still good, but much of it was stripped down to the bare metal. I could not remove the riveted-on motor label and didn’t want to paint the wheel axles, so I covered them with masking tape.
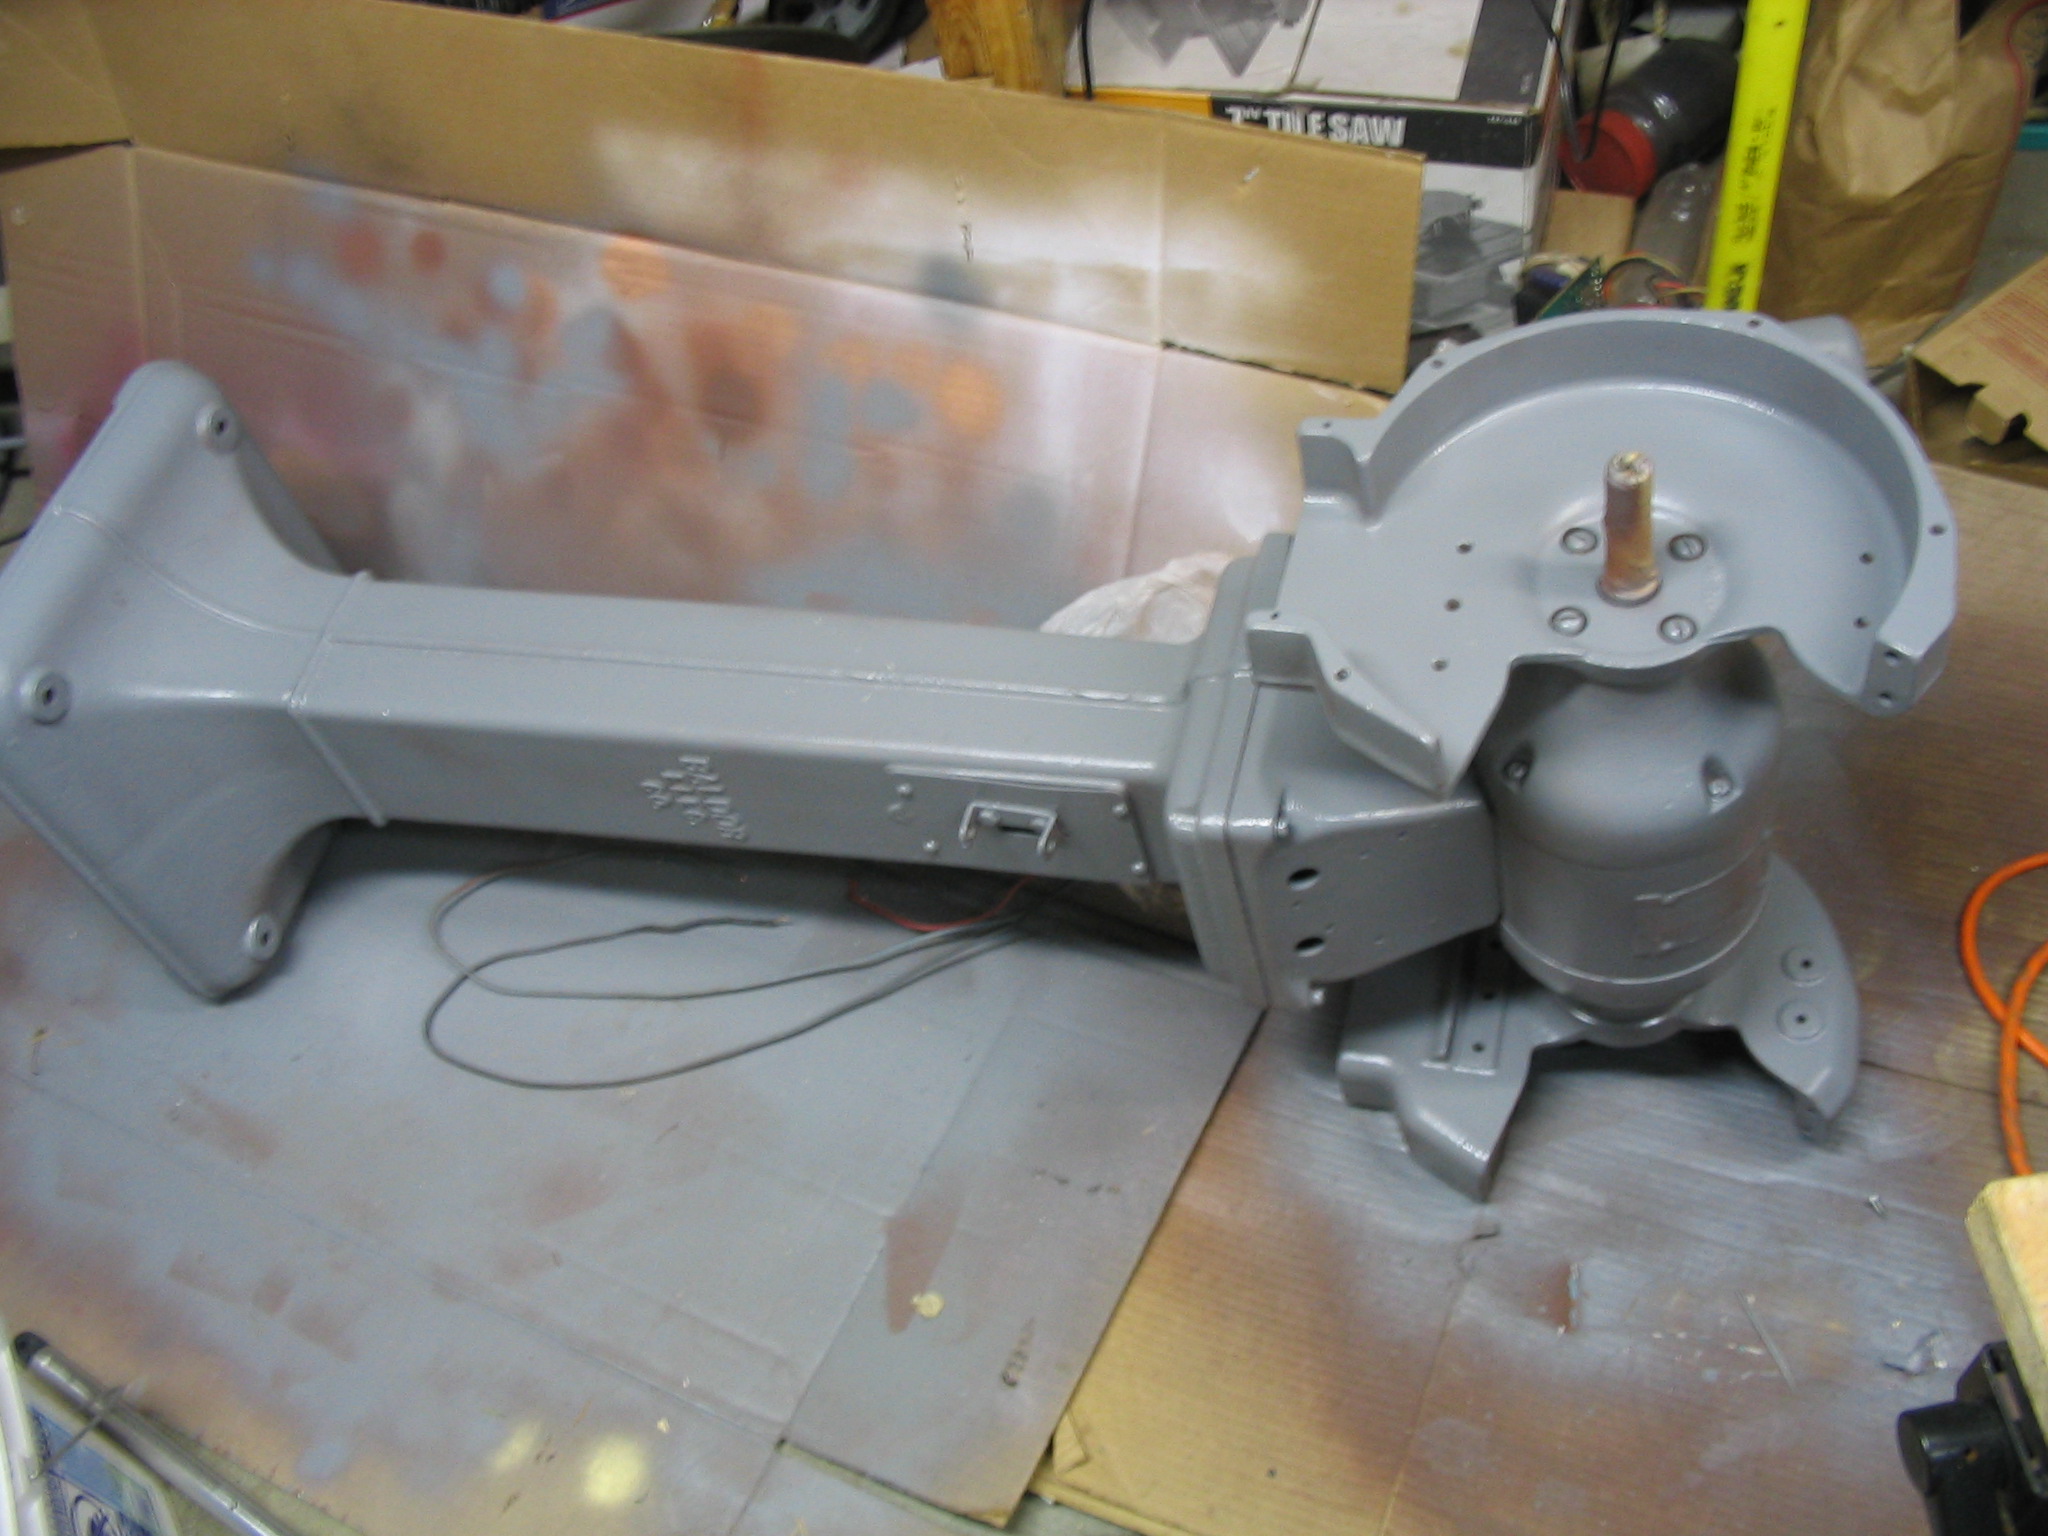
I spray painted the entire grinder and all the separate parts with primer for a good base coat. I followed it with a few coats of grey paint.
Stripping paint and rustPriming partsPainting partsPriming bodyPainting body
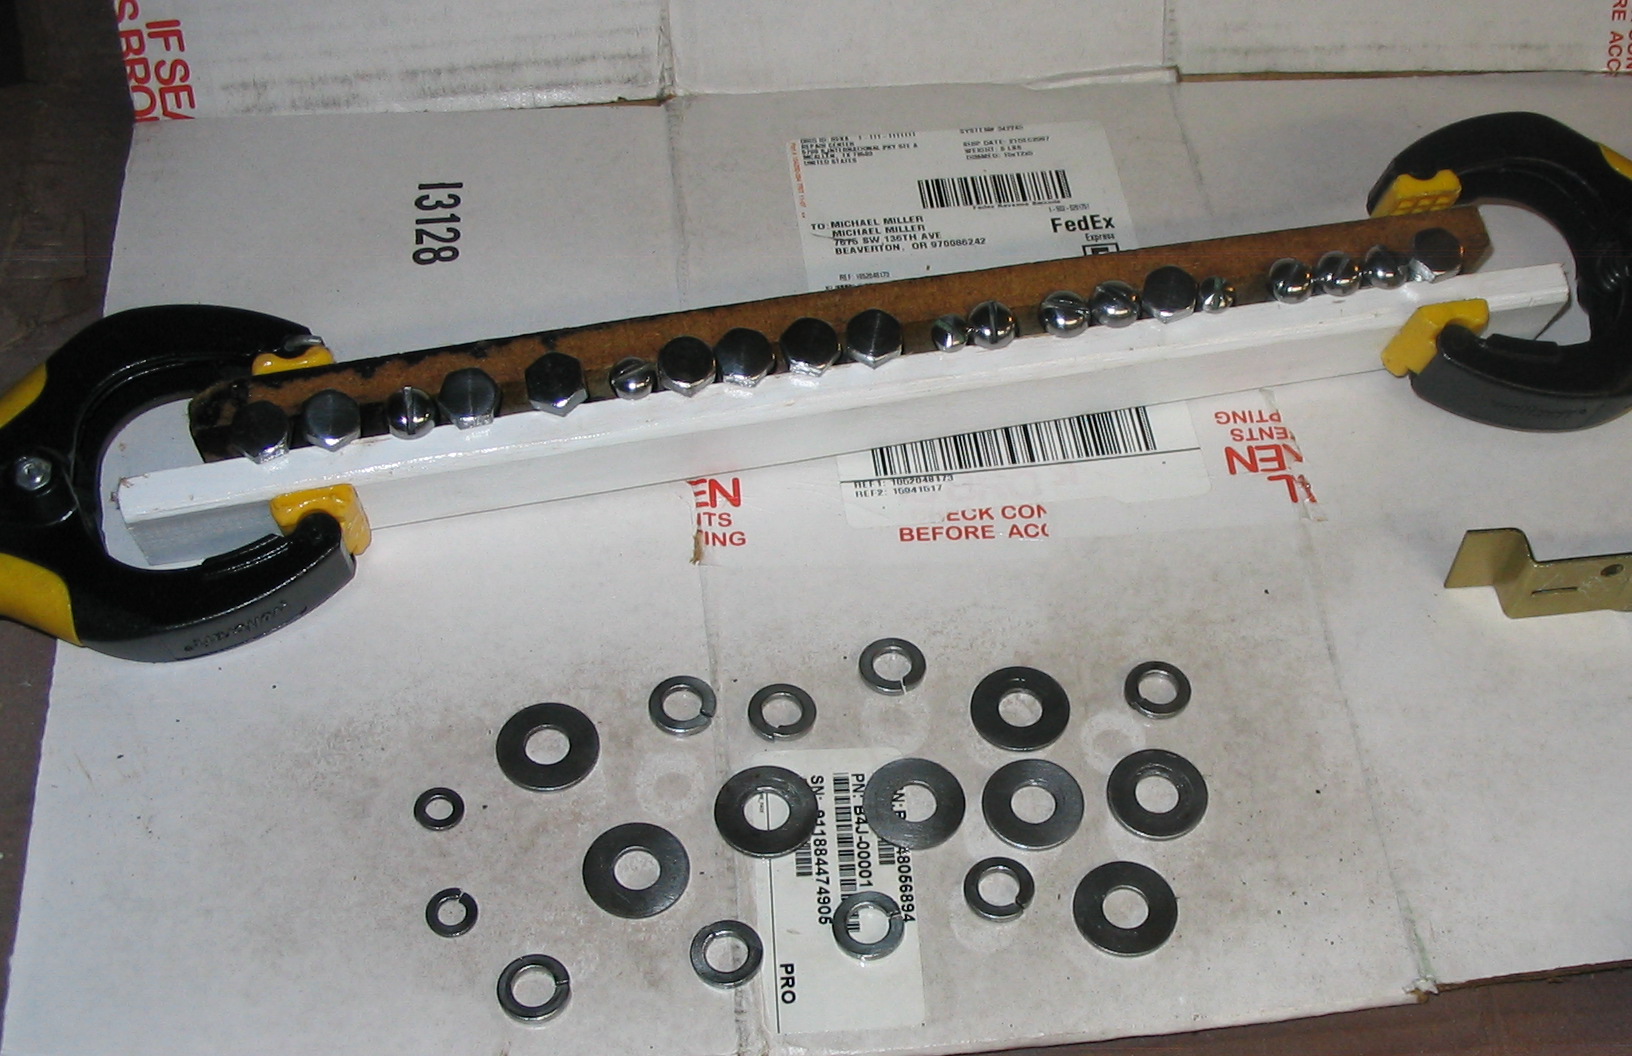
Polishing hardware
I cleaned up the hardware to make it look a little nicer. I filed and sanded the heads of the screws and bolts while spinning them in the drill press. I buffed all of them with a cloth wheel, which made them nice and shiny. I finished it with some clear spray varnish.
I reassembled all the pieces, back in the order they came off.
Painted wellwheel reinstalledShiny screws
Electrical
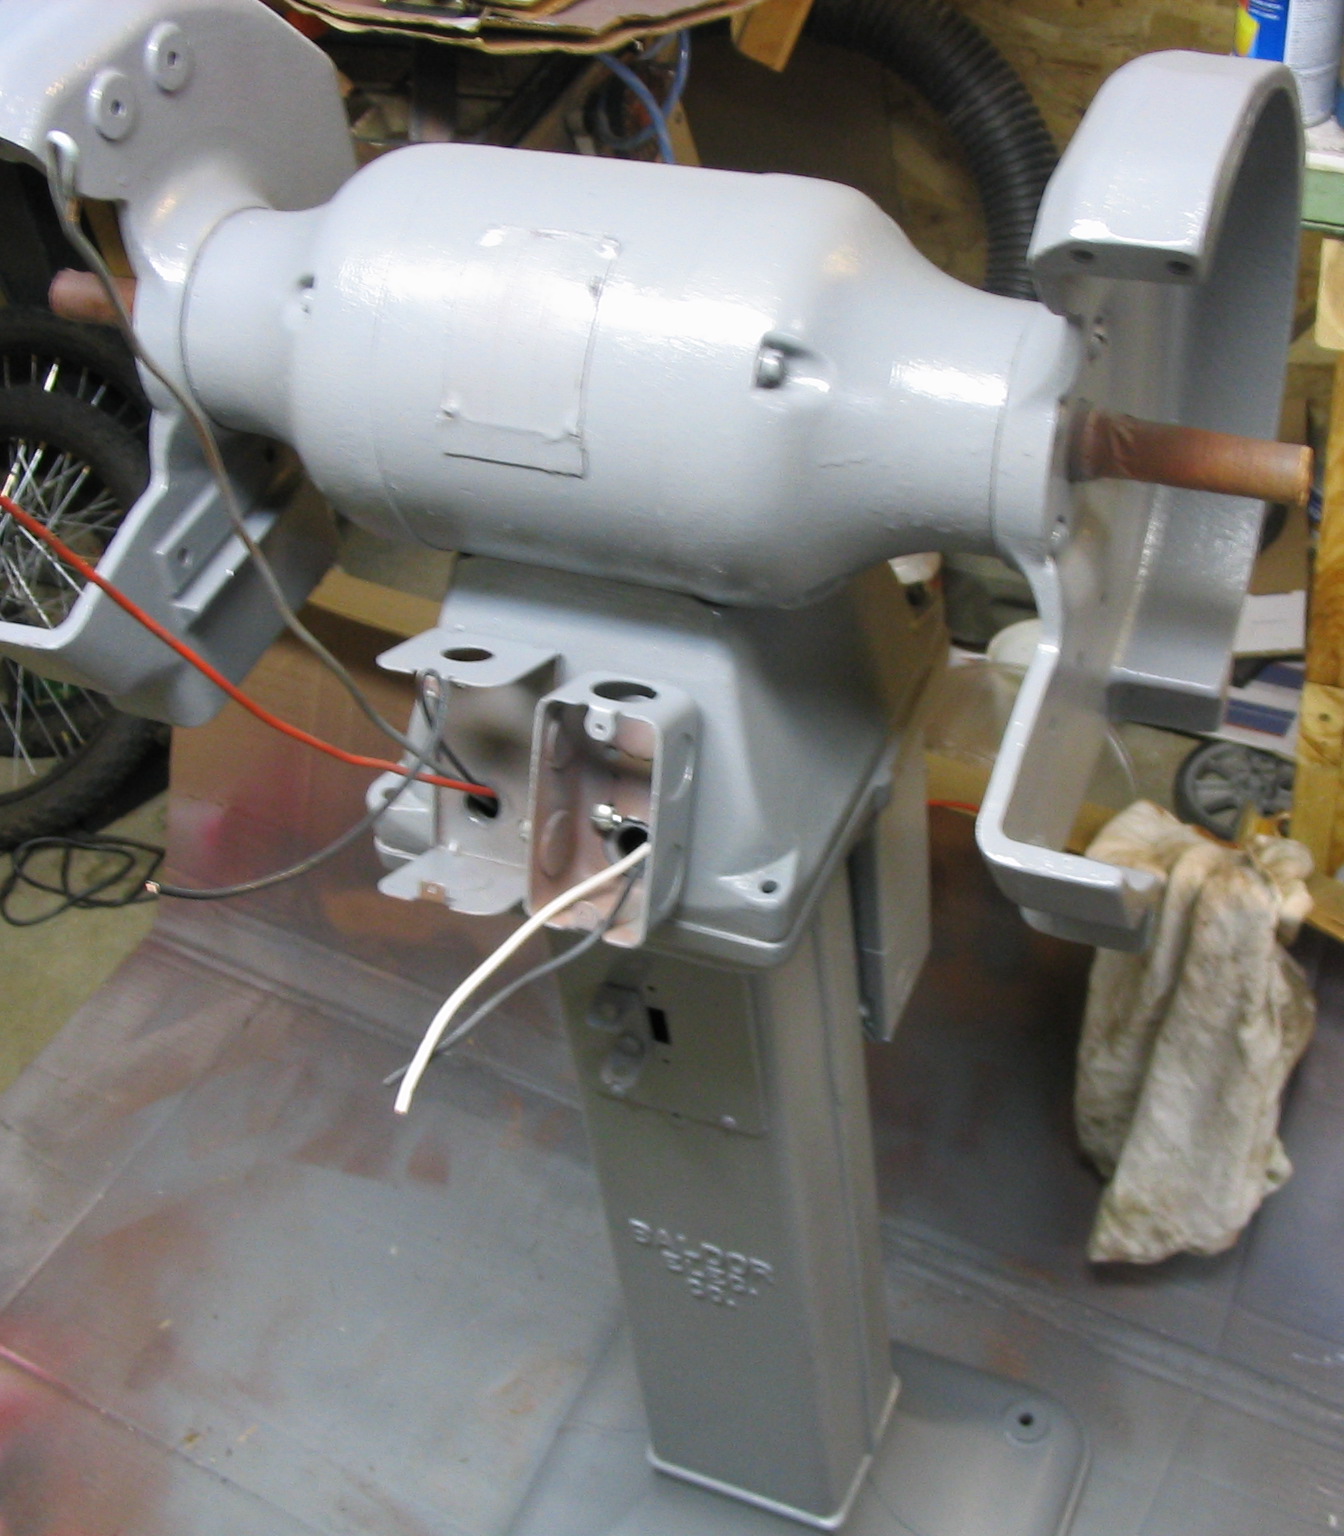
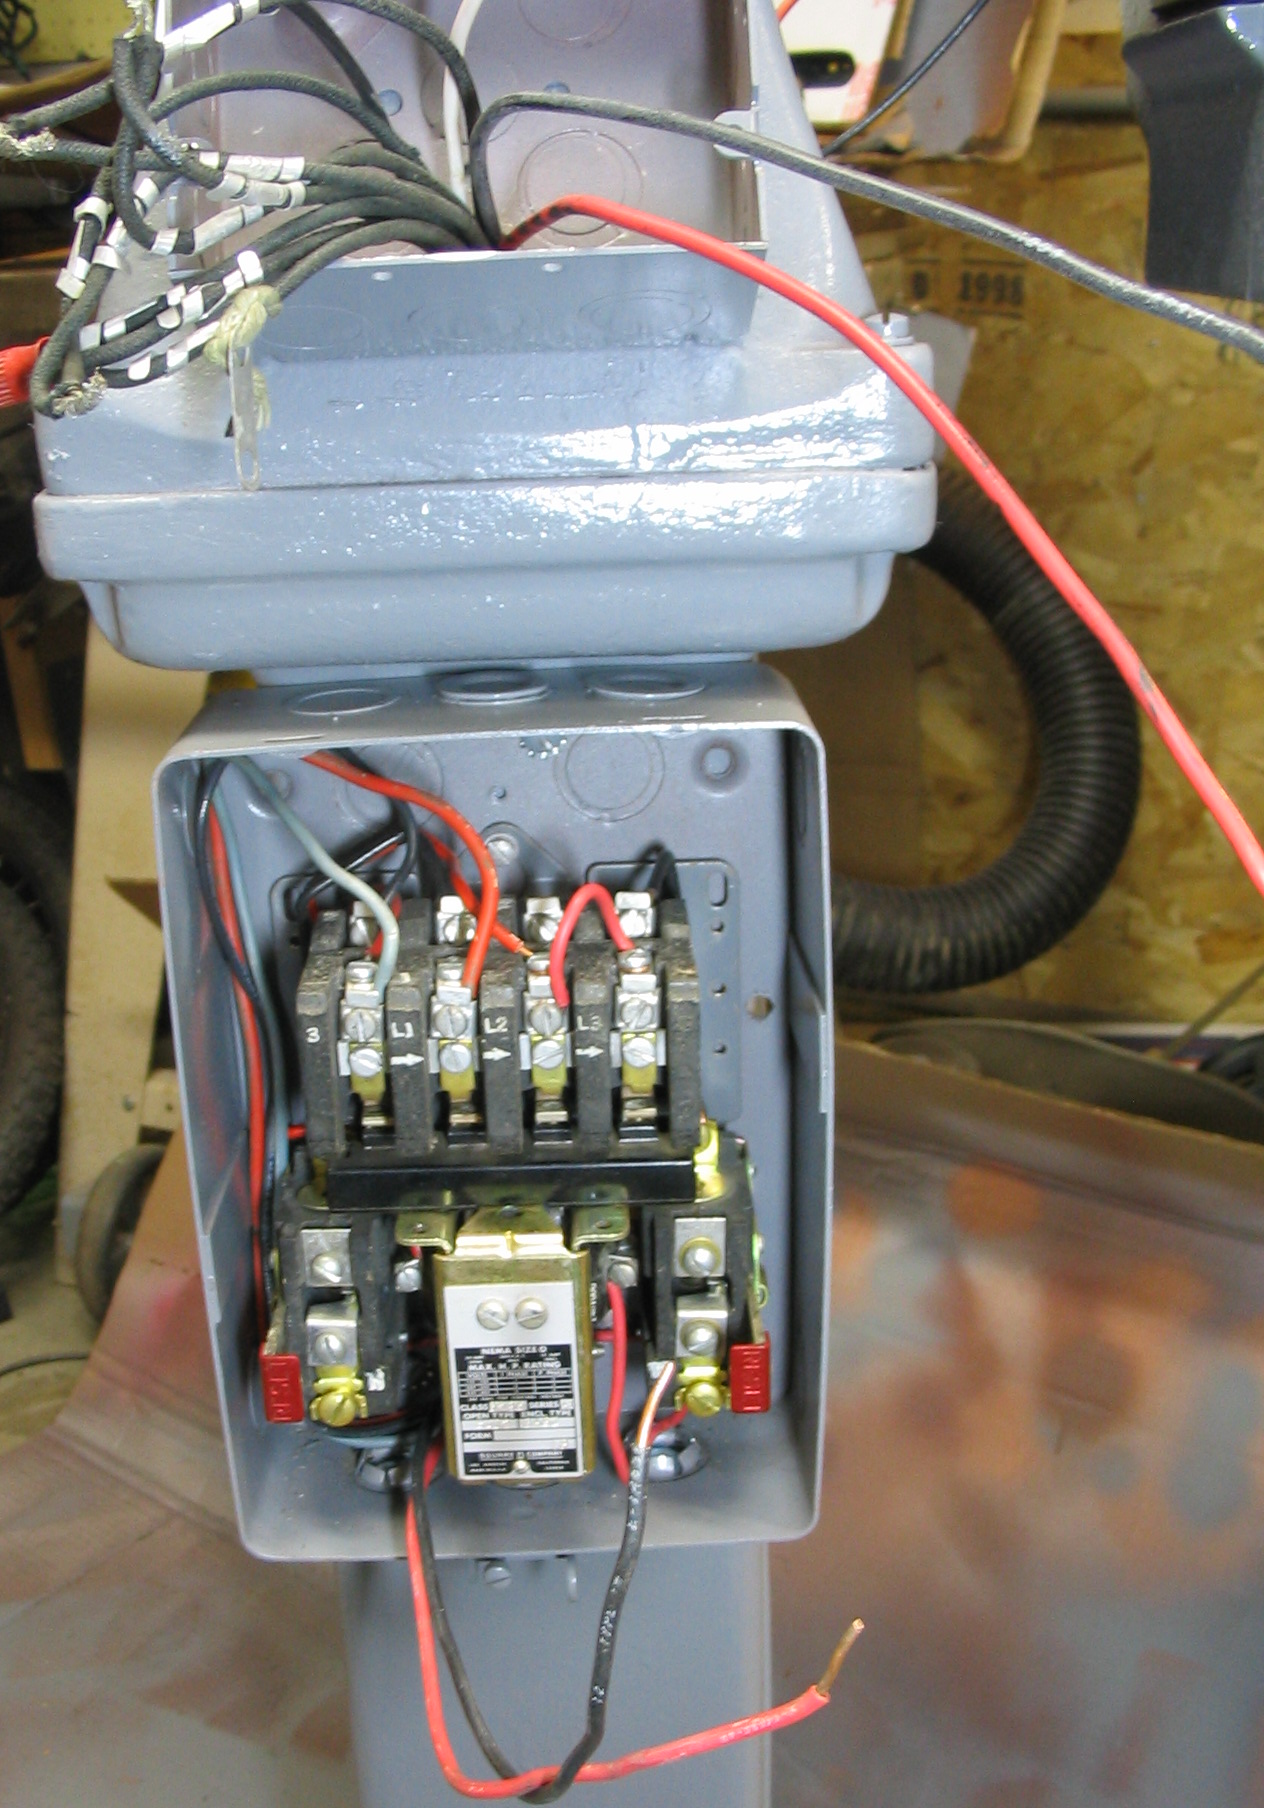
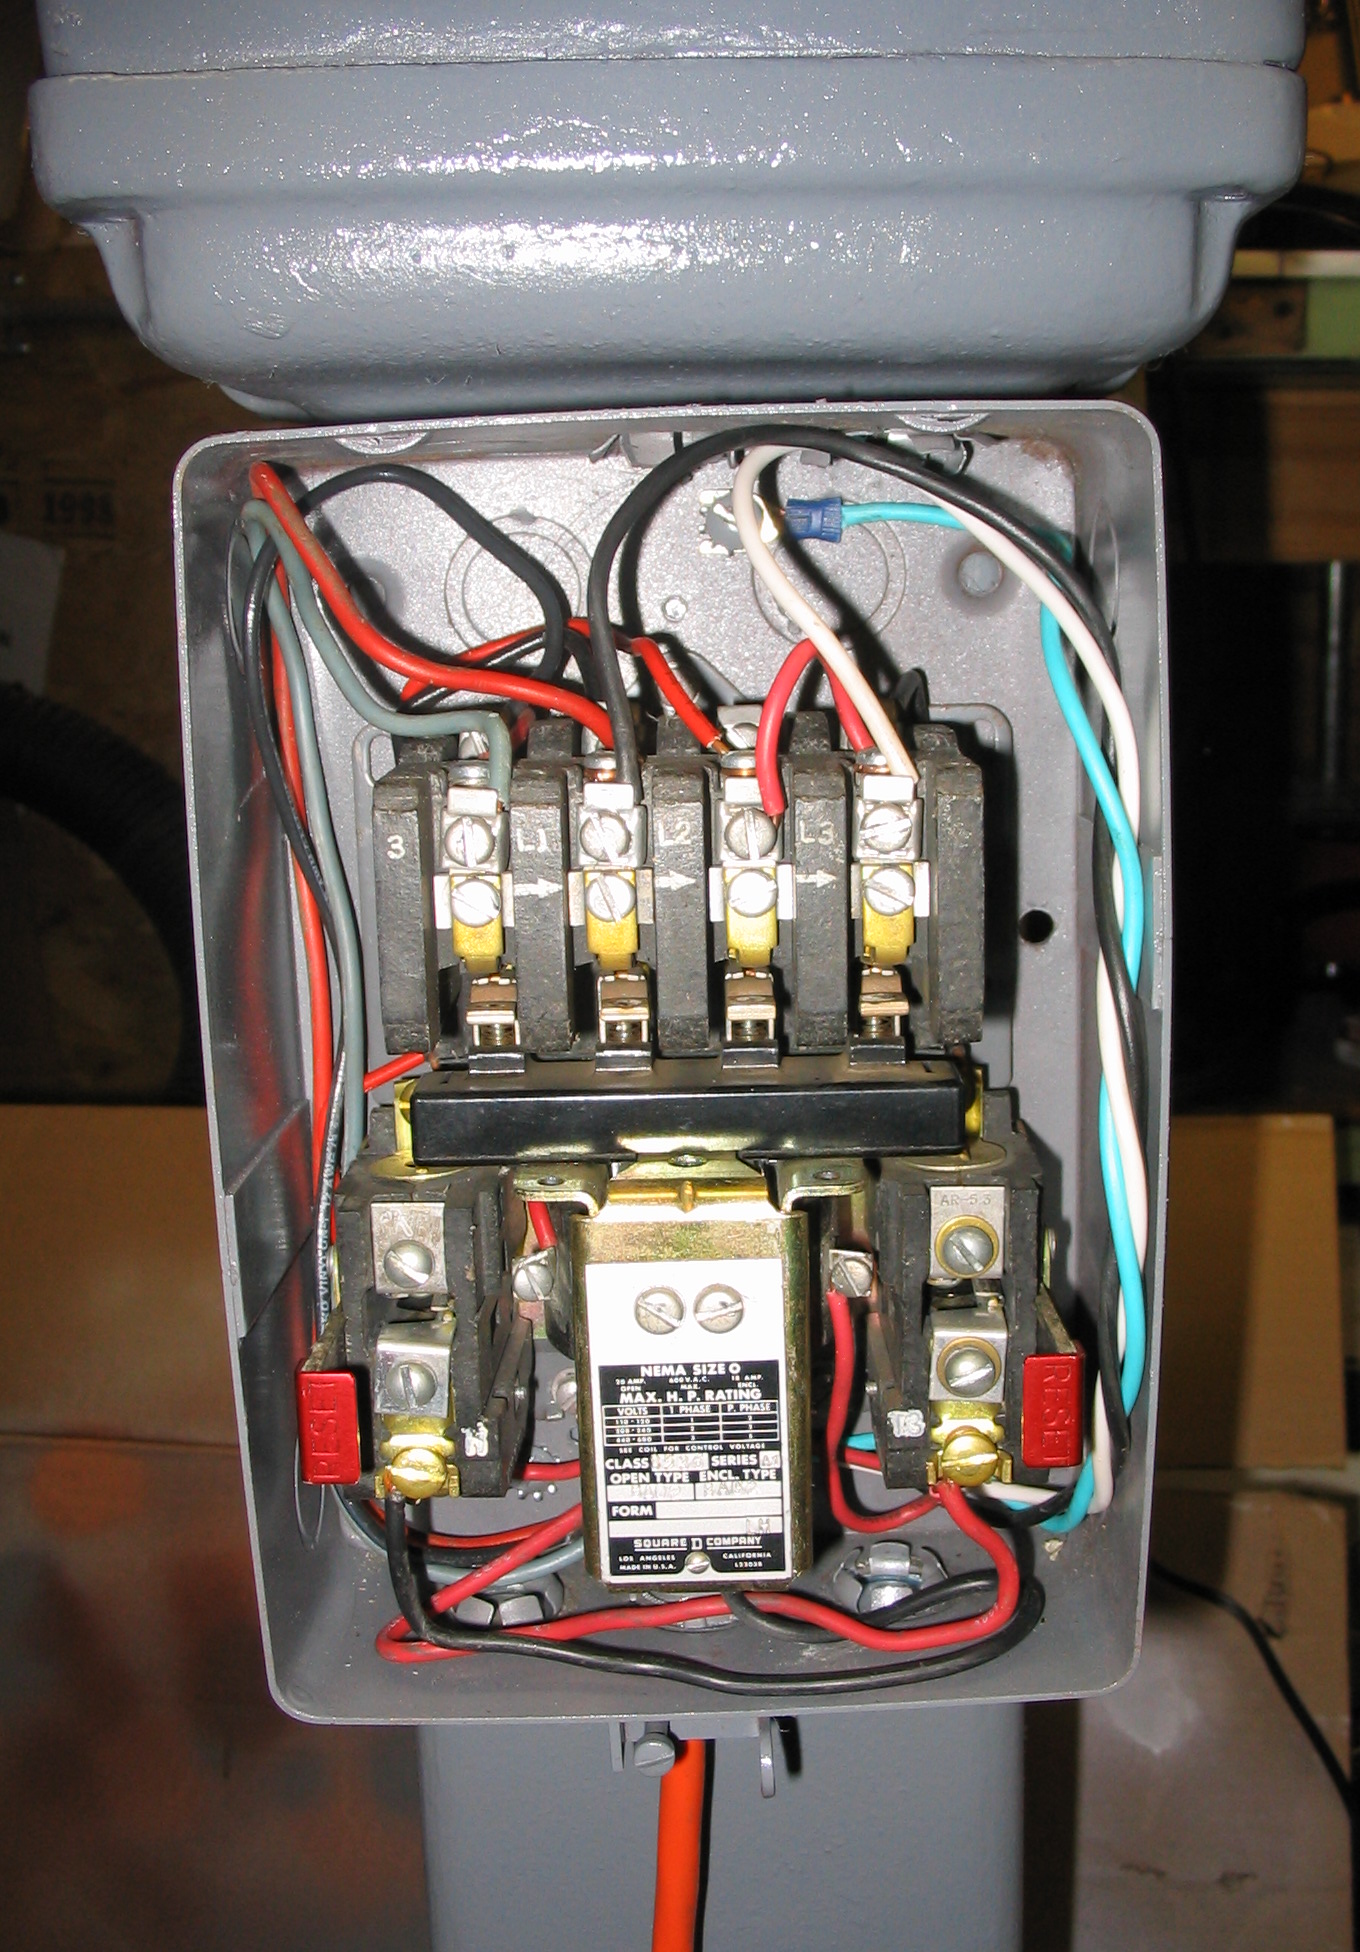
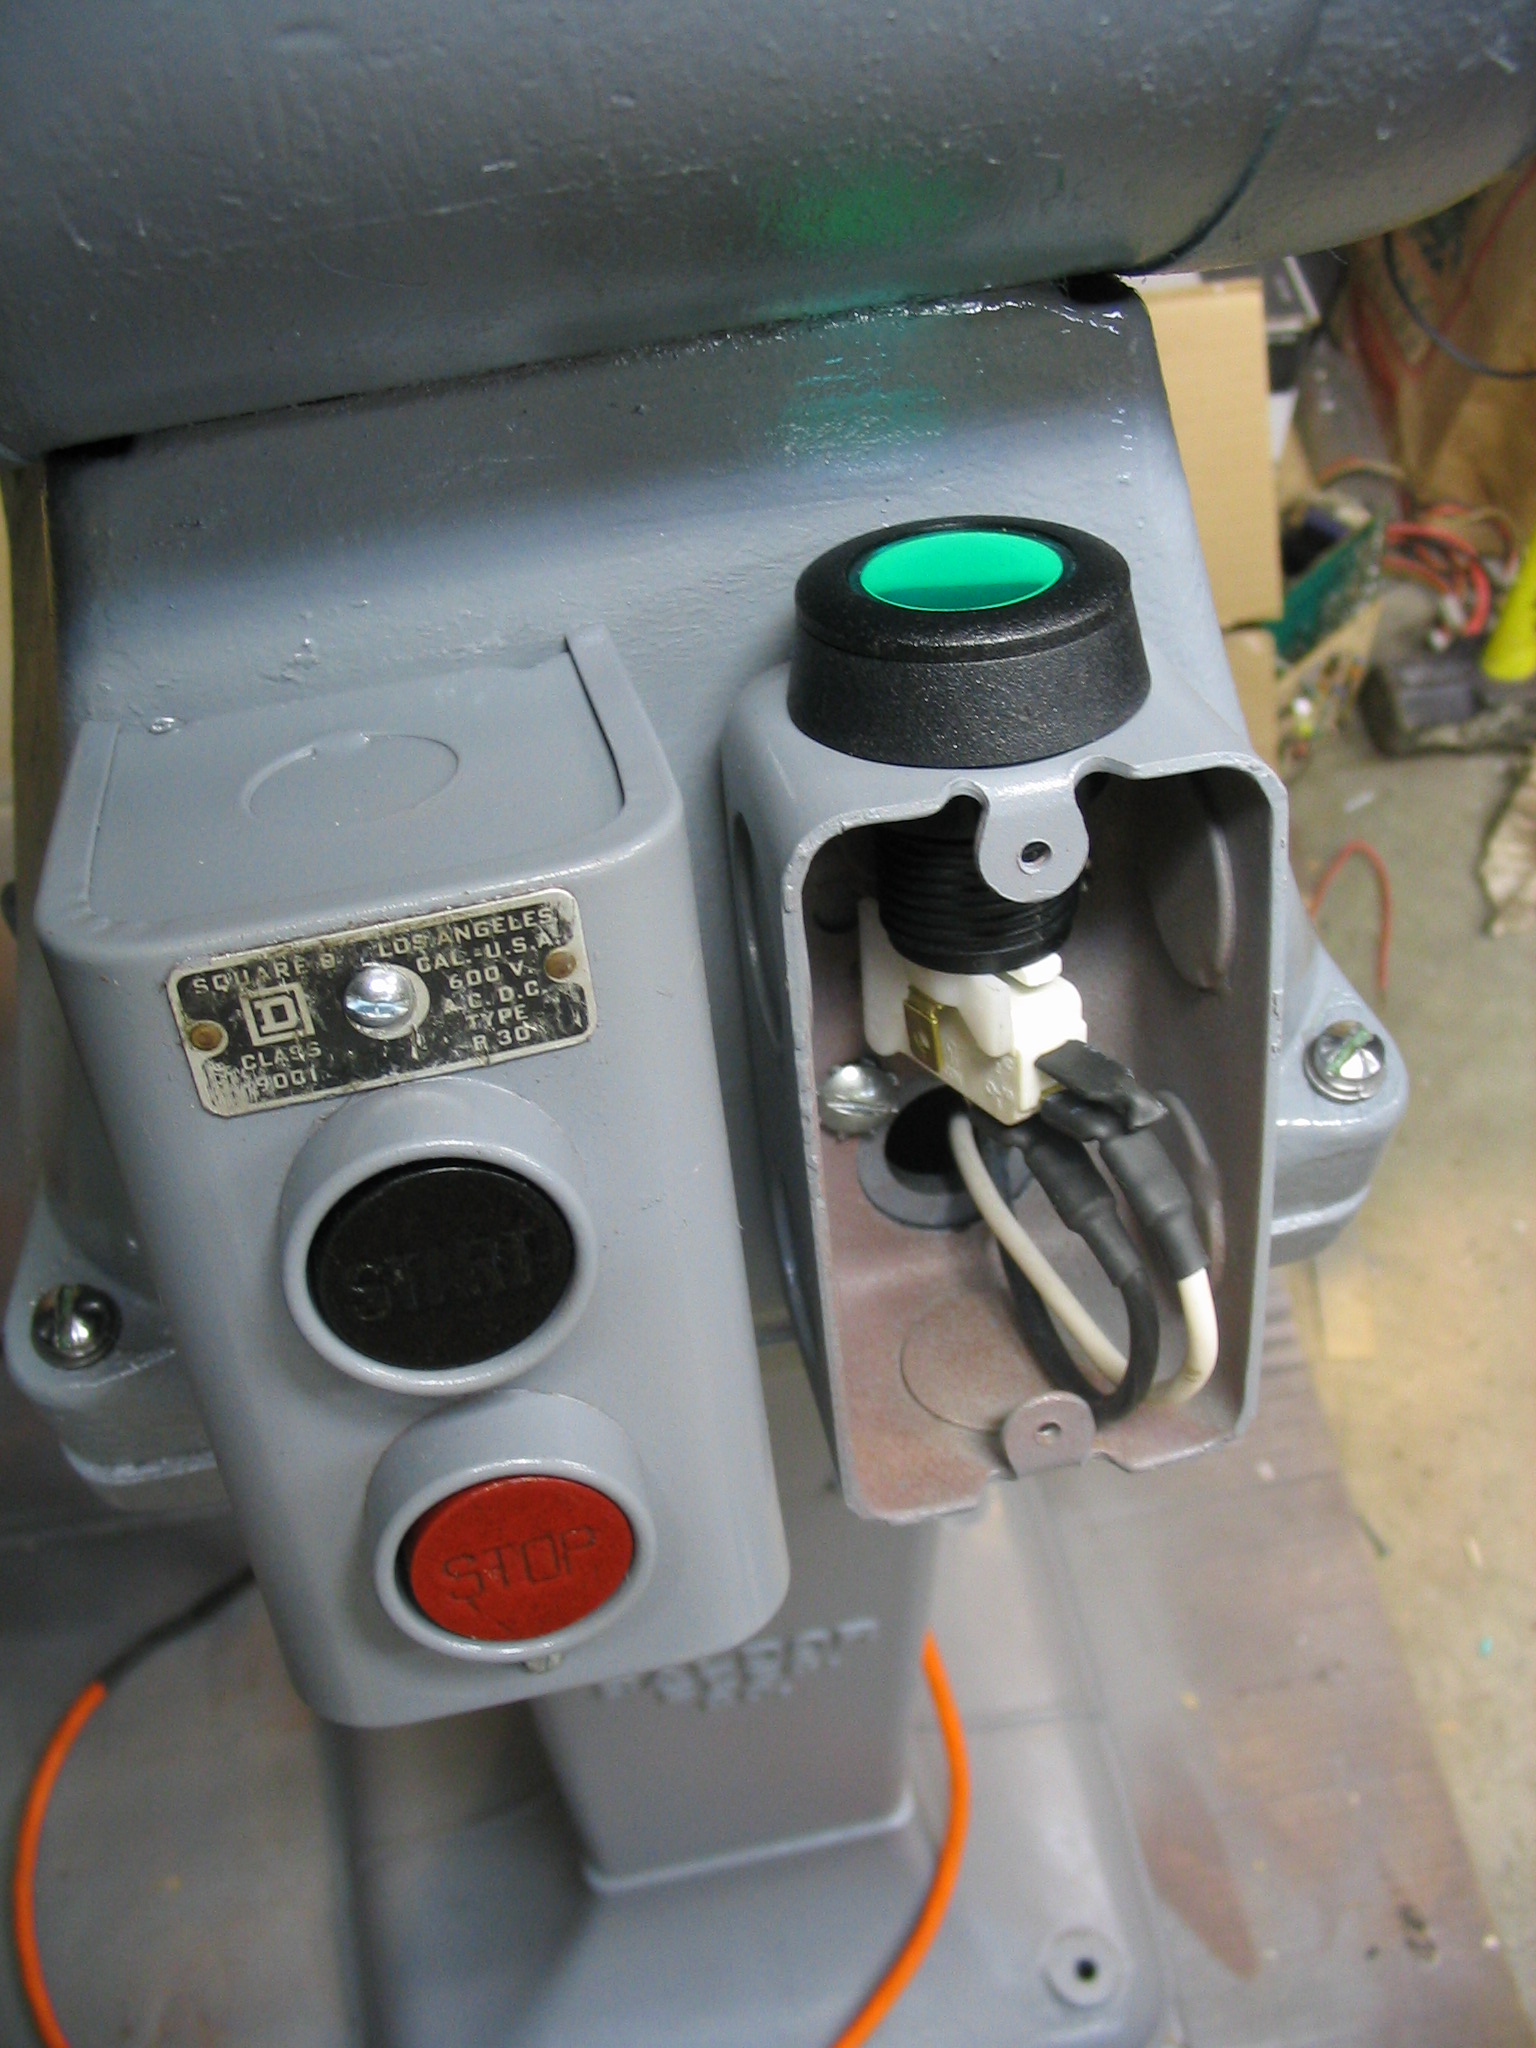
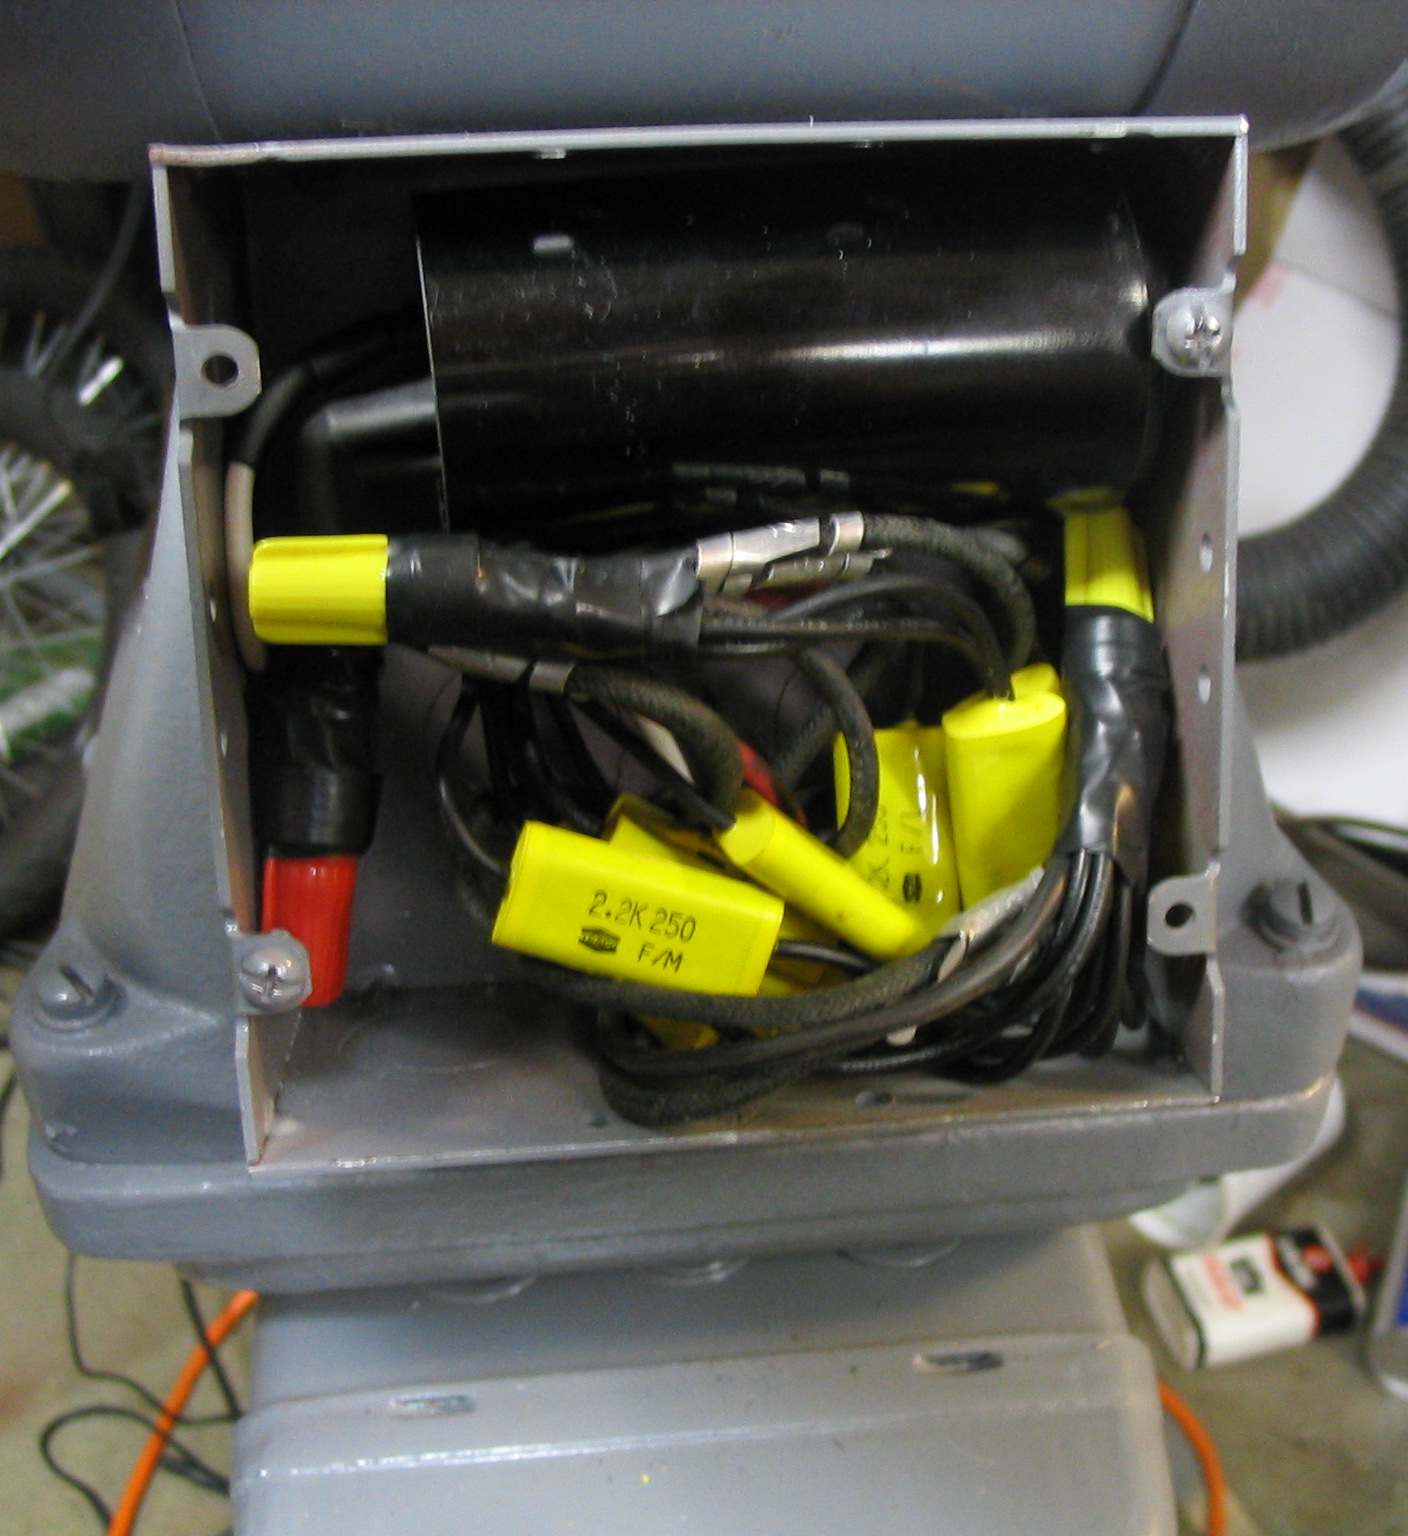
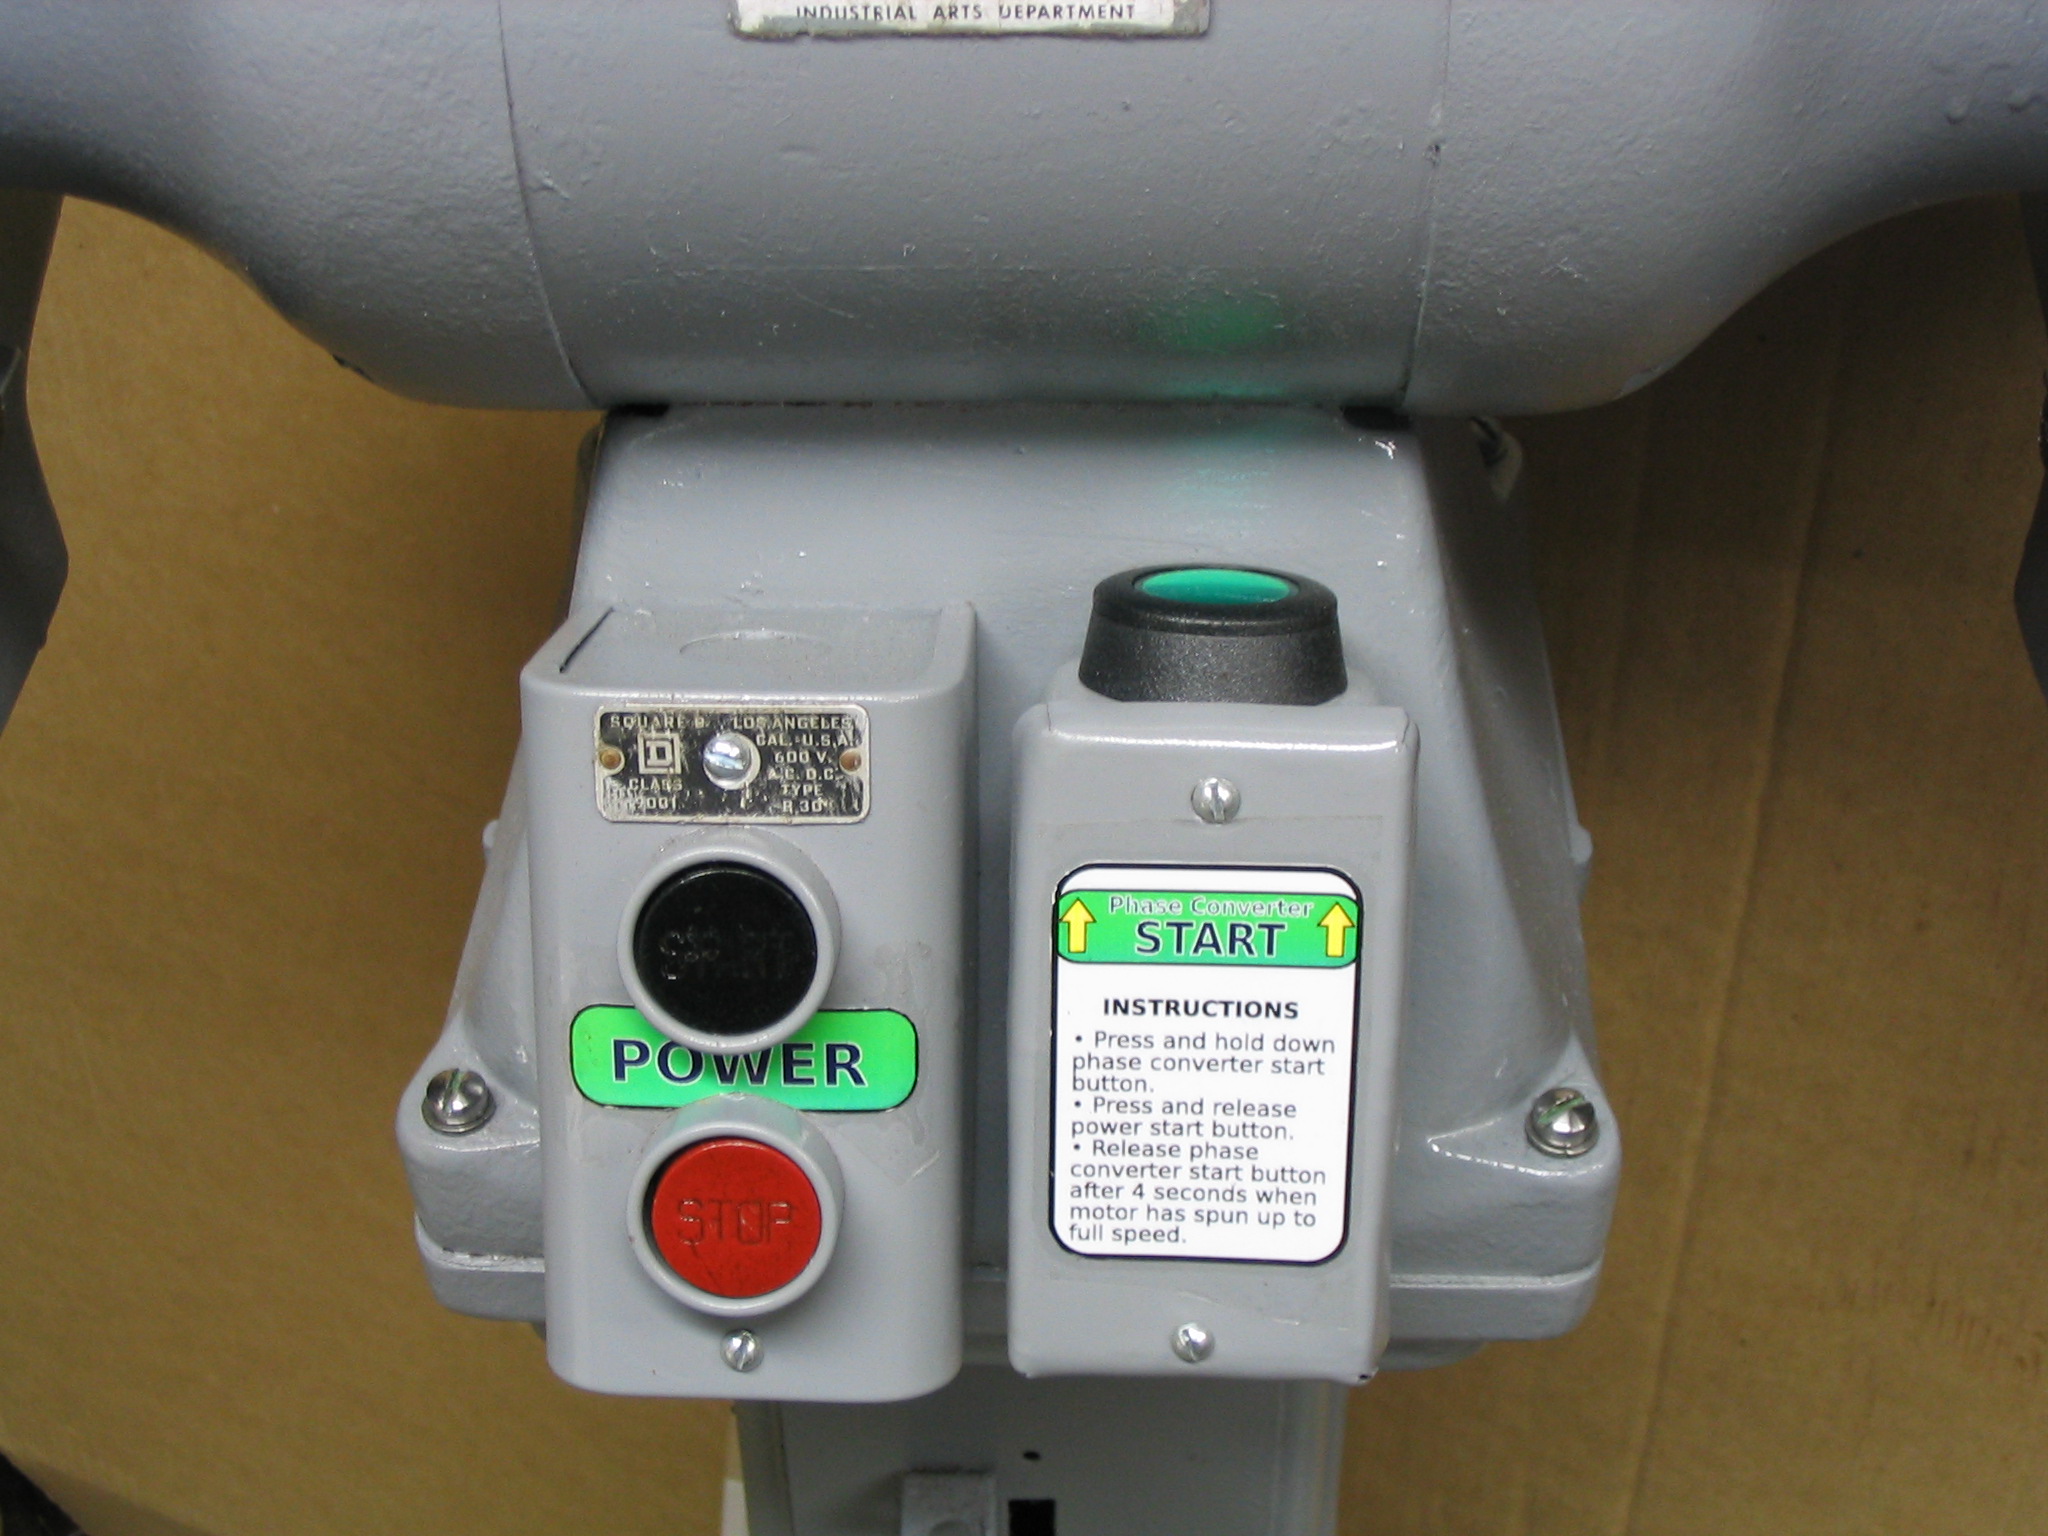
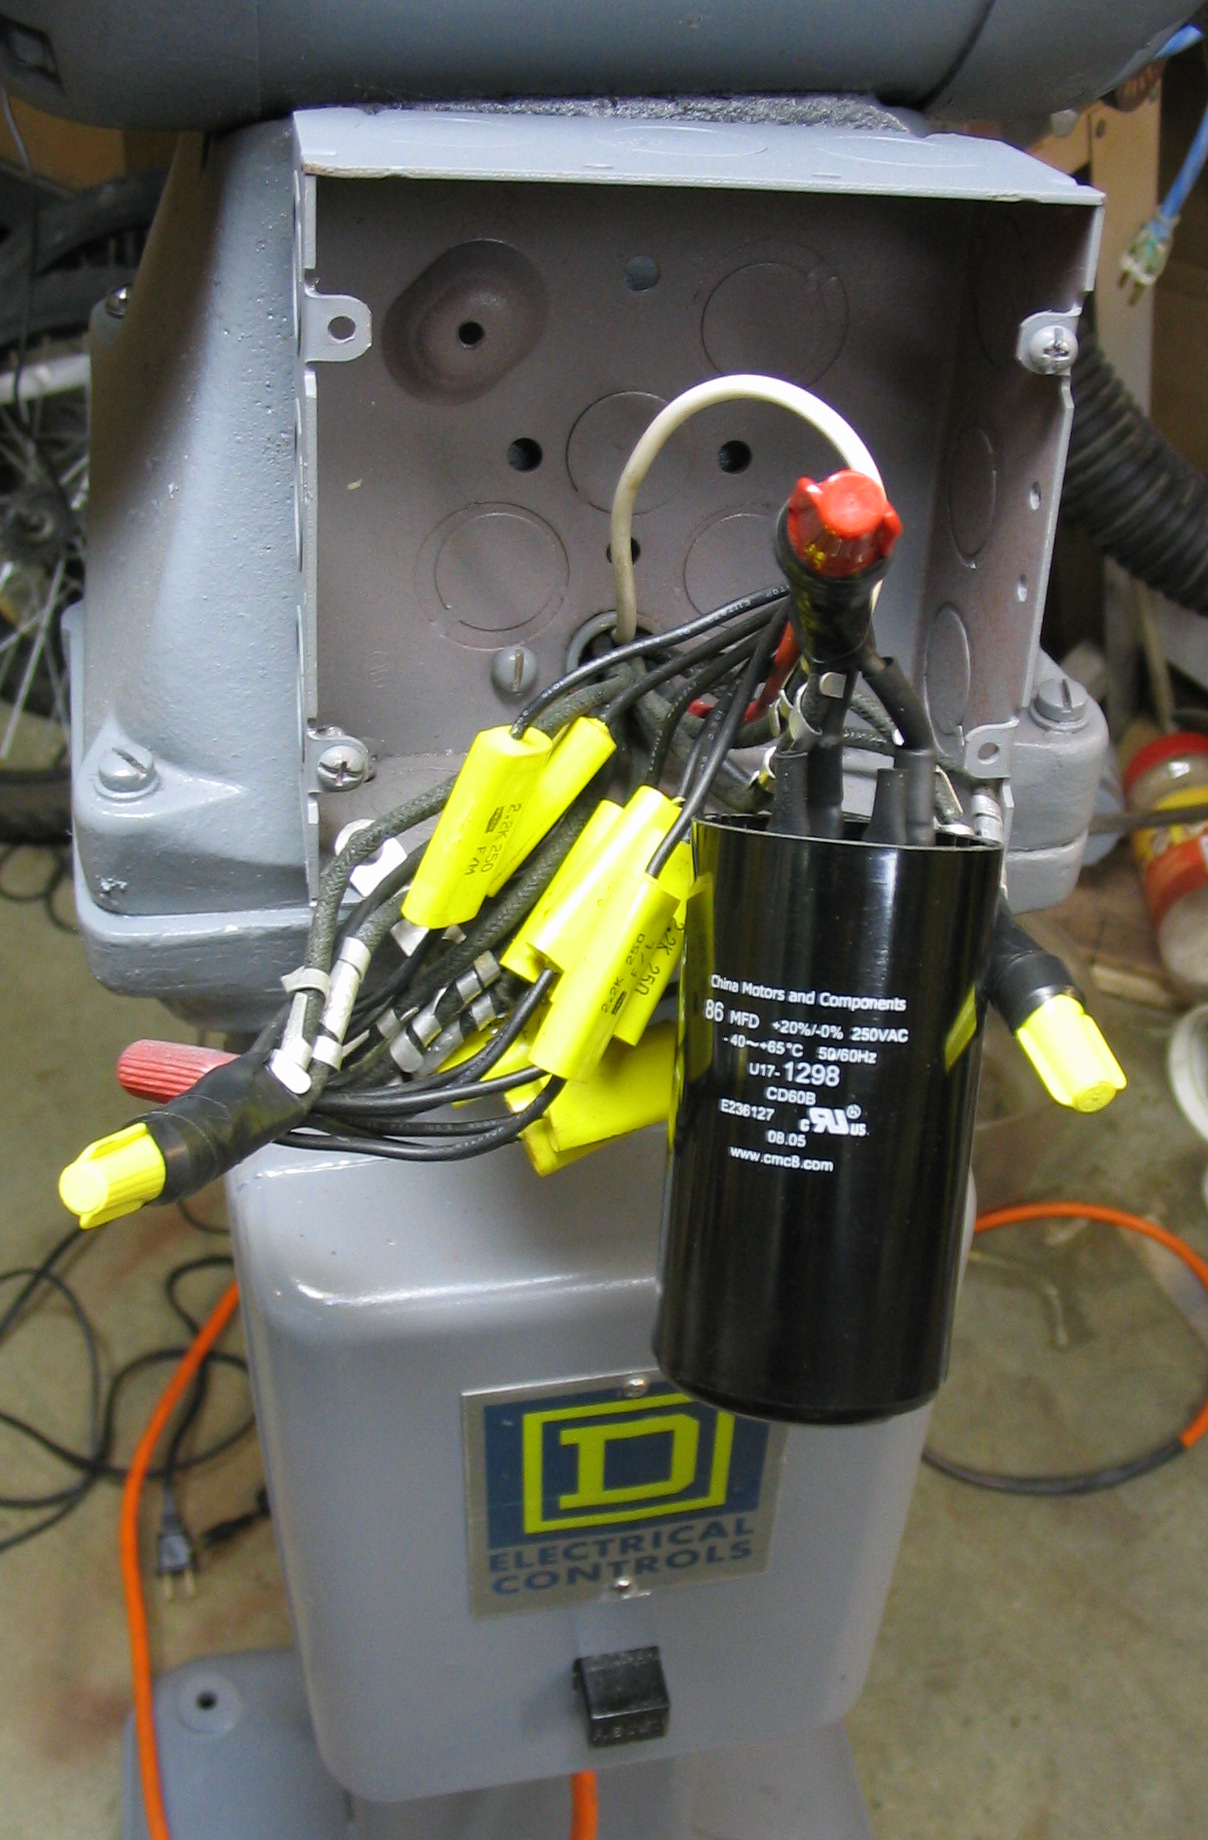
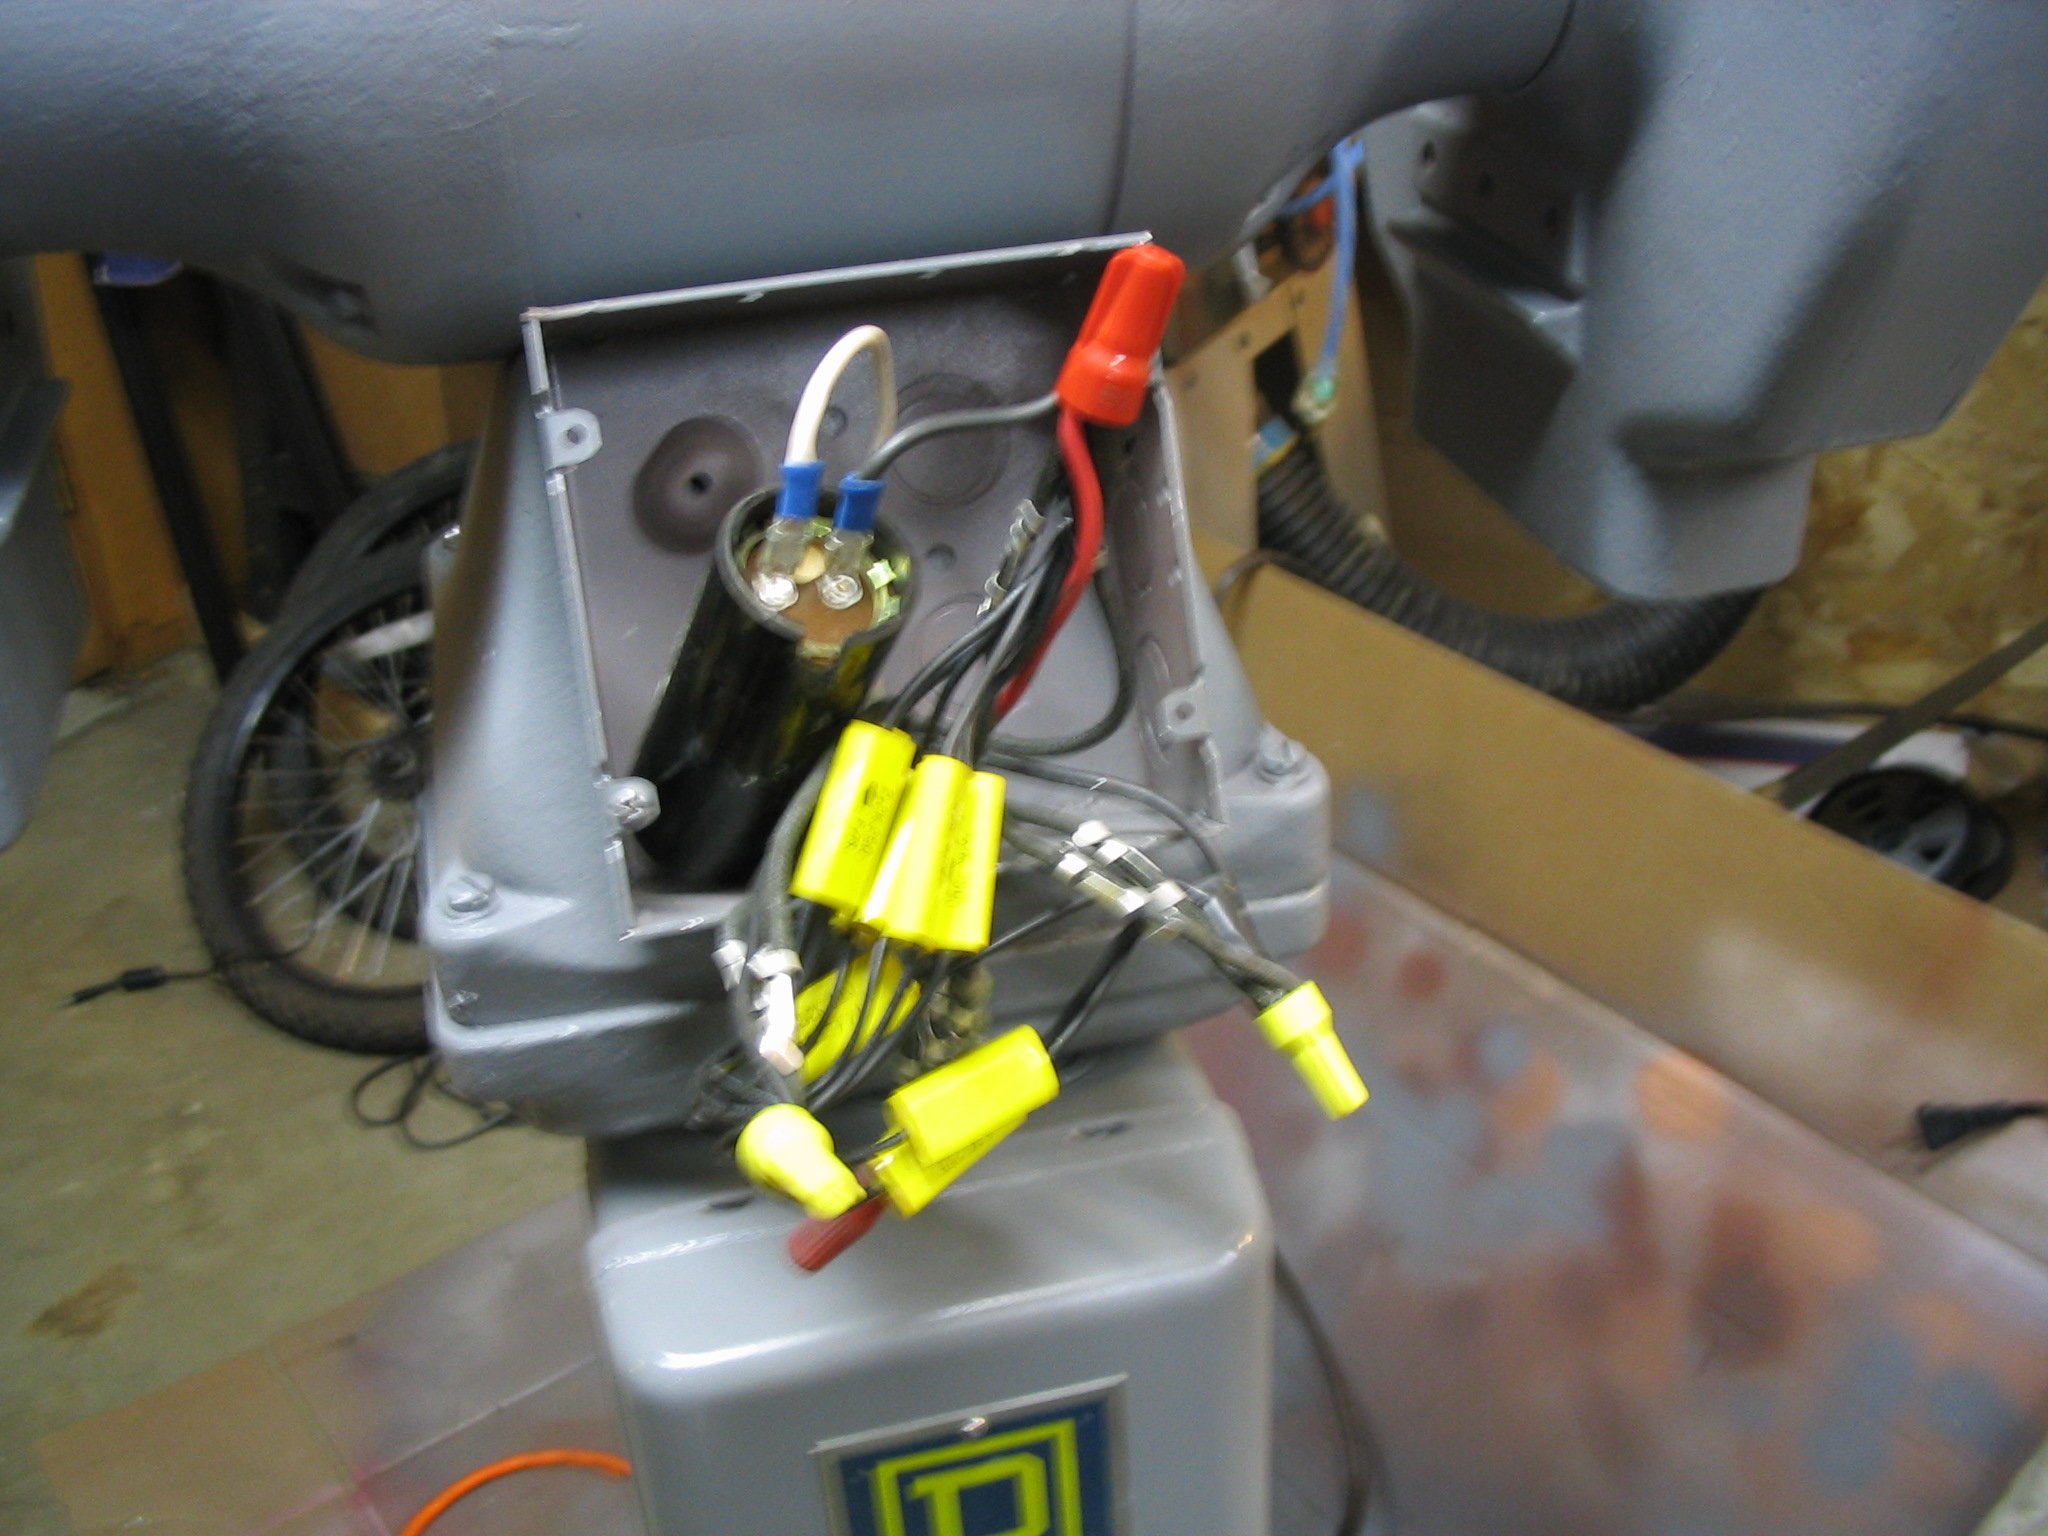
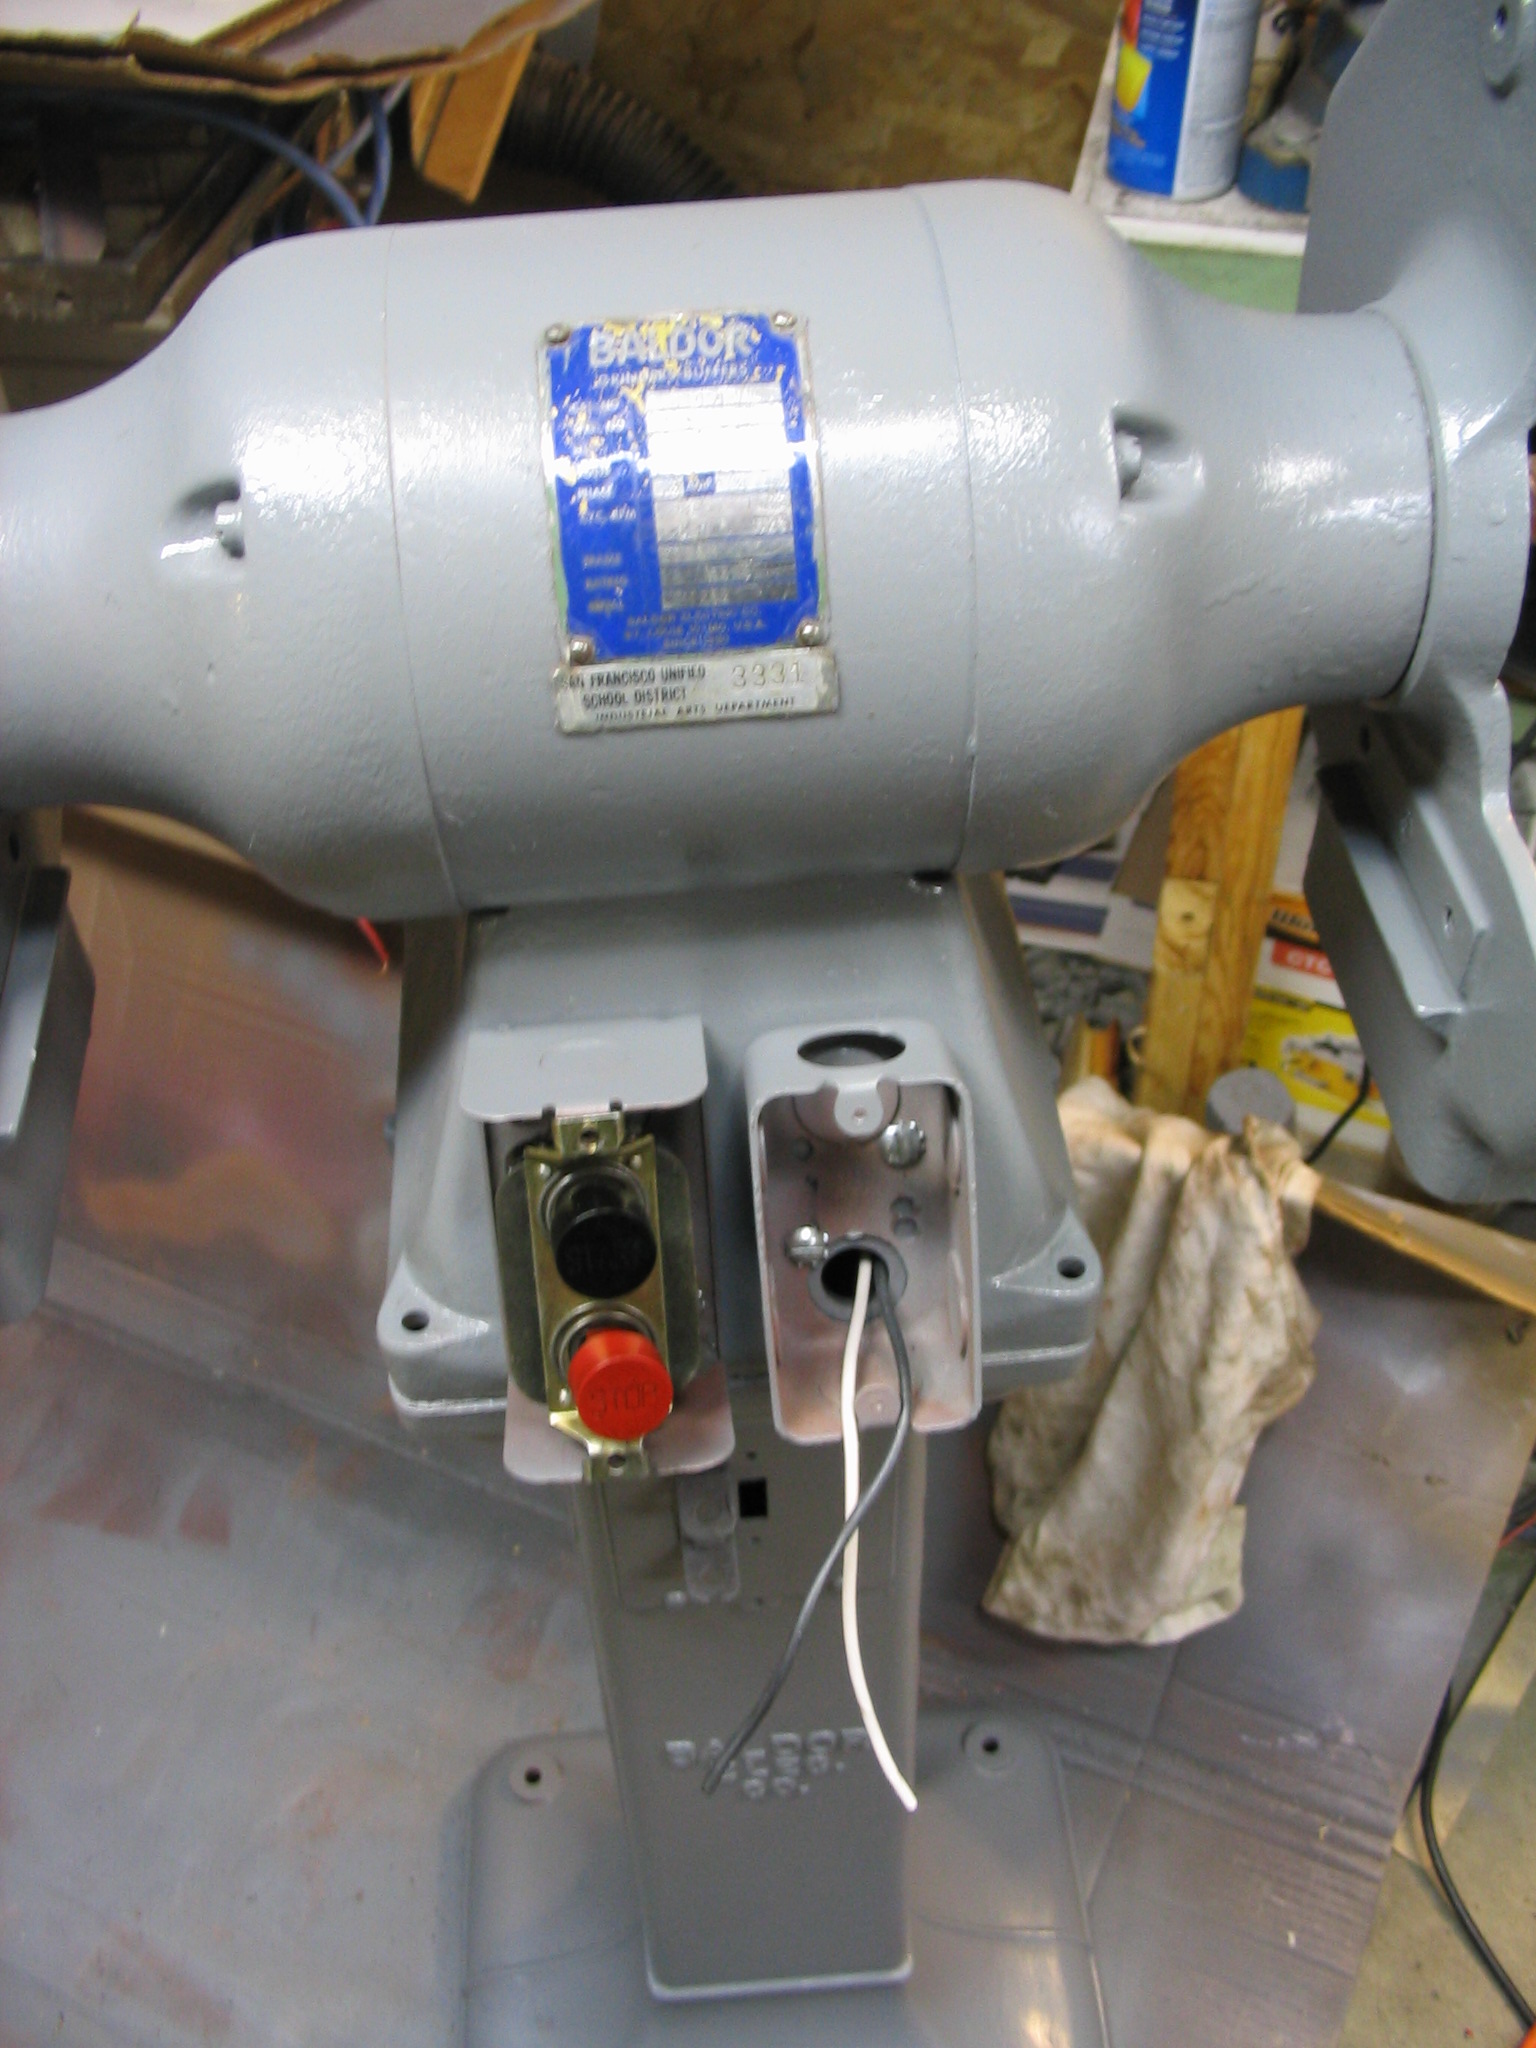
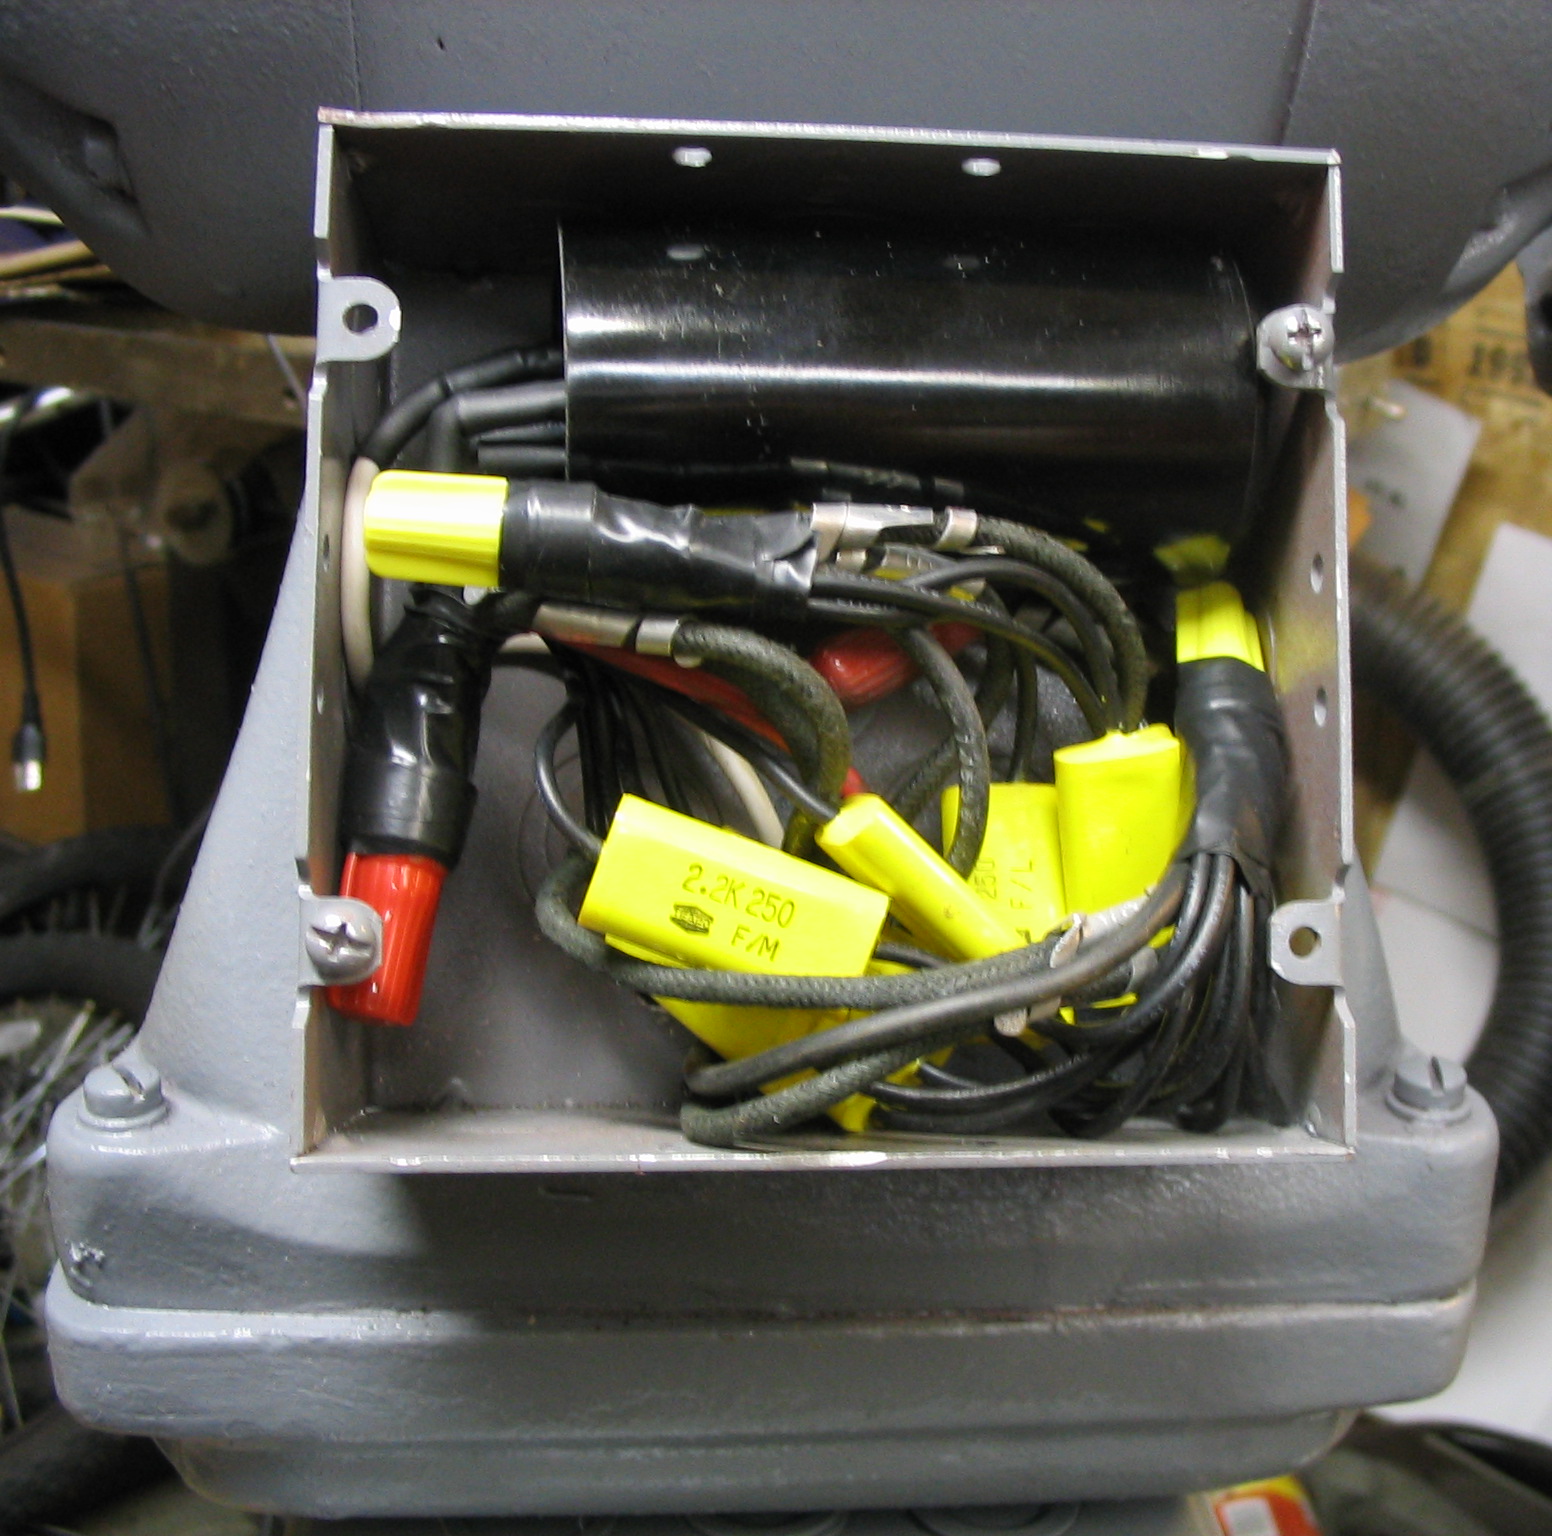
Originally this grinder was hard-wired to the wall using “BX”-style flex conduit. There was a power relay and circuit breaker box, which engaged and disconnected all three phases in sync, using start and stop push buttons.
For the 3-phase power, I built a
static phase converter using capacitors.
I rewired the relay box to supply single phase power to the phase converter. I attached it to the pedestal stand of the grinder. I drilled holes in the pedestal and tapped screw threads into them, and screwed the relay box in place. Instead of flex conduit for the power line, I added a standard power cord. Since it uses 240 volts, double the US standard, I used a different plug and outlet.
The phase converter needs an extra momentary push button to start the motor, so I added that to the front of the grinder next to the main on-off switch.
Tapping holesSwitch boxesConverter and relay boxesRelayPower to relayStart buttonConverter in box
I received a Baldor metal grinder with 10-inch wheels, with a motor wired for three-phase industrial power. Three-phase power is not provided in U.S. residential homes, so I needed to power it from normal single-phase power. My solution was to build a balanced static phase converter, requiring only a few relatively inexpensive capacitors. (Much less expensive than the nuclear reactor I was considering.)
I knew I had some homework to do, to figure out how to make this work. I had ignored much information on 3-phase motors in the past, thinking that I would likely never need it. When would I ever come across any 3-phase equipment that would fit my miserly budget? Well, now, it seems.
The first resource I turned to was Electric Motors in the Home Workshop by Jim Cox, my favorite book on the subject. This book is written specifically to address reusing various industrial and appliance motors for home-built tools and uses, which fits my crazy schemes. It covered the basics of 3-phase motors, but did not go into great details. It did describe a very common method of generating 3-phase power from single phase, which is called a rotary phase converter. In this method, you use a single-phase motor to mechanically drive a 3-phase “idler motor” which generates the other 2 phases. This is a robust and flexible method which can handle multiple varying 3-phase loads. It also takes up some room, and requires two large electric motors dedicated to it. If you had a variety of 3-phase motors to run, it is a good solution. But it seemed like overkill for just my one grinder.
I did some more Internet searching, and came across another idea: the static phase converter. This is a very simple converter which uses capacitors matched to the amperage draw of the motor to generate the extra two phases. As long as your amperage draw does not vary much (meaning you can only really use it for one motor), this is a simple and inexpensive solution to the problem.
I found the best explanation and description in Rick Christopherson’s page on building a balanced static phase converter. I used his guidelines to determine the likely capacitor values I would need for my converter.
There are two run capacitors for the extra two phases. The two capacitors create pulses 120 and 240 degrees out of phase with the primary, so the second capacitor is twice the size of the first. Based on his tables, I guessed that my motor would require about 6 uF and 12 uF for the two phases.
I went to a local surplus store, and was able to find smaller capacitors of 2.2 uF. My electricity textbook said that capacitors can be combined in parallel to add them up, so I just combined 3 for one phase and 6 for the other, providing 6.6 uF and 13.2 uF.
Just putting the run capacitors in the circuit would get it to run, but it would not start from a stand-still. With my dad helping me, we were able to spin the motor axle with a rope to get it started, and then turn on the power to make it continue running. It worked! I checked the power draw of all 3 phases with an inductive ammeter, and they were all nearly identical within 0.2 amps of each other.
To bring the motor up to speed under power, it needs a large starting capacitor, connected in with a momentary push button. They are readily available, sold simply as A/C start capacitors. I had a capacitor from an old washing machine motor, which worked to start it as a test. I ordered another one of 86 uF from an Internet mail-order surplus place. Holding the start button for about 3 or 4 seconds is all that is needed to bring the motor up to full speed.
Construction
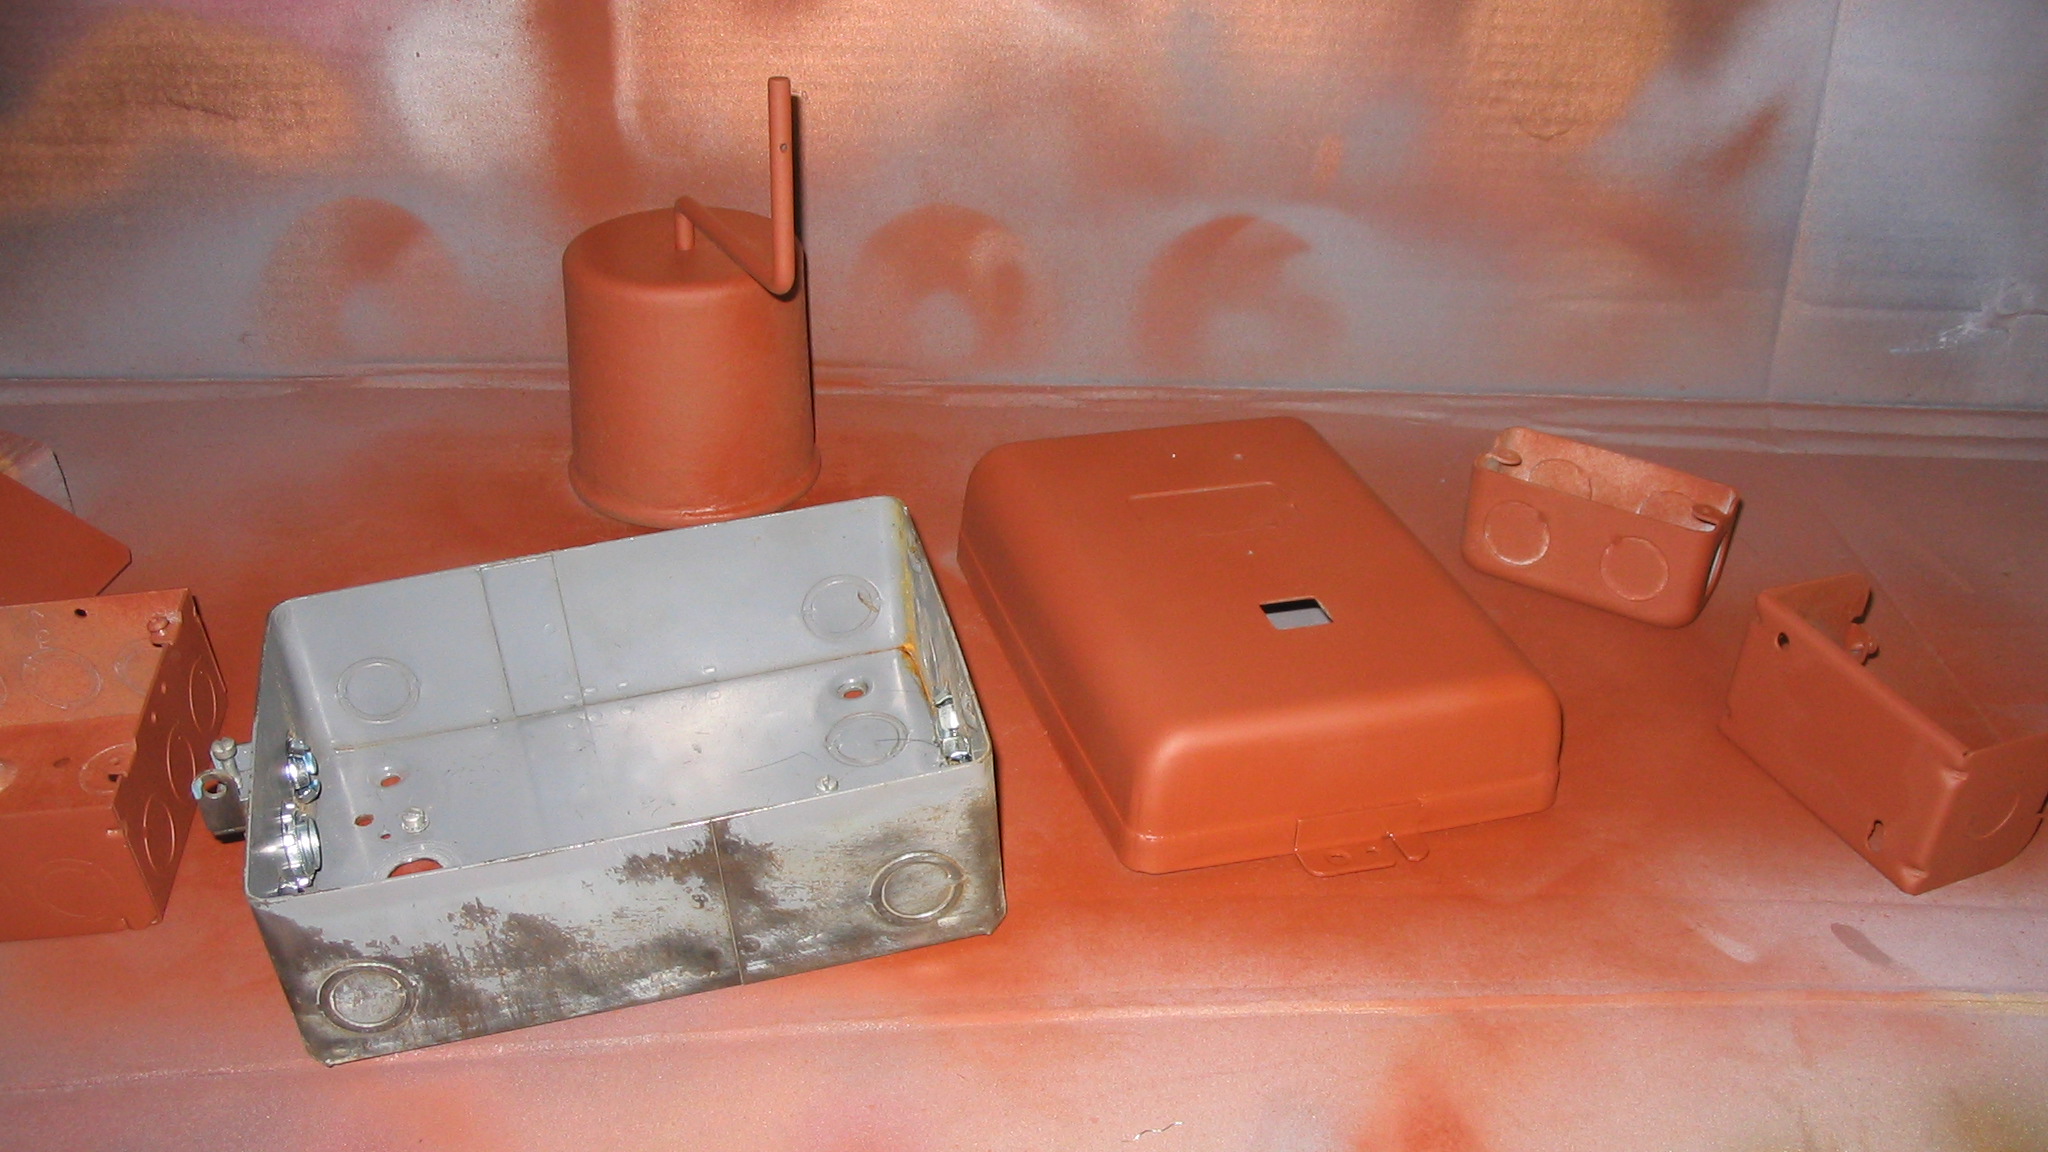
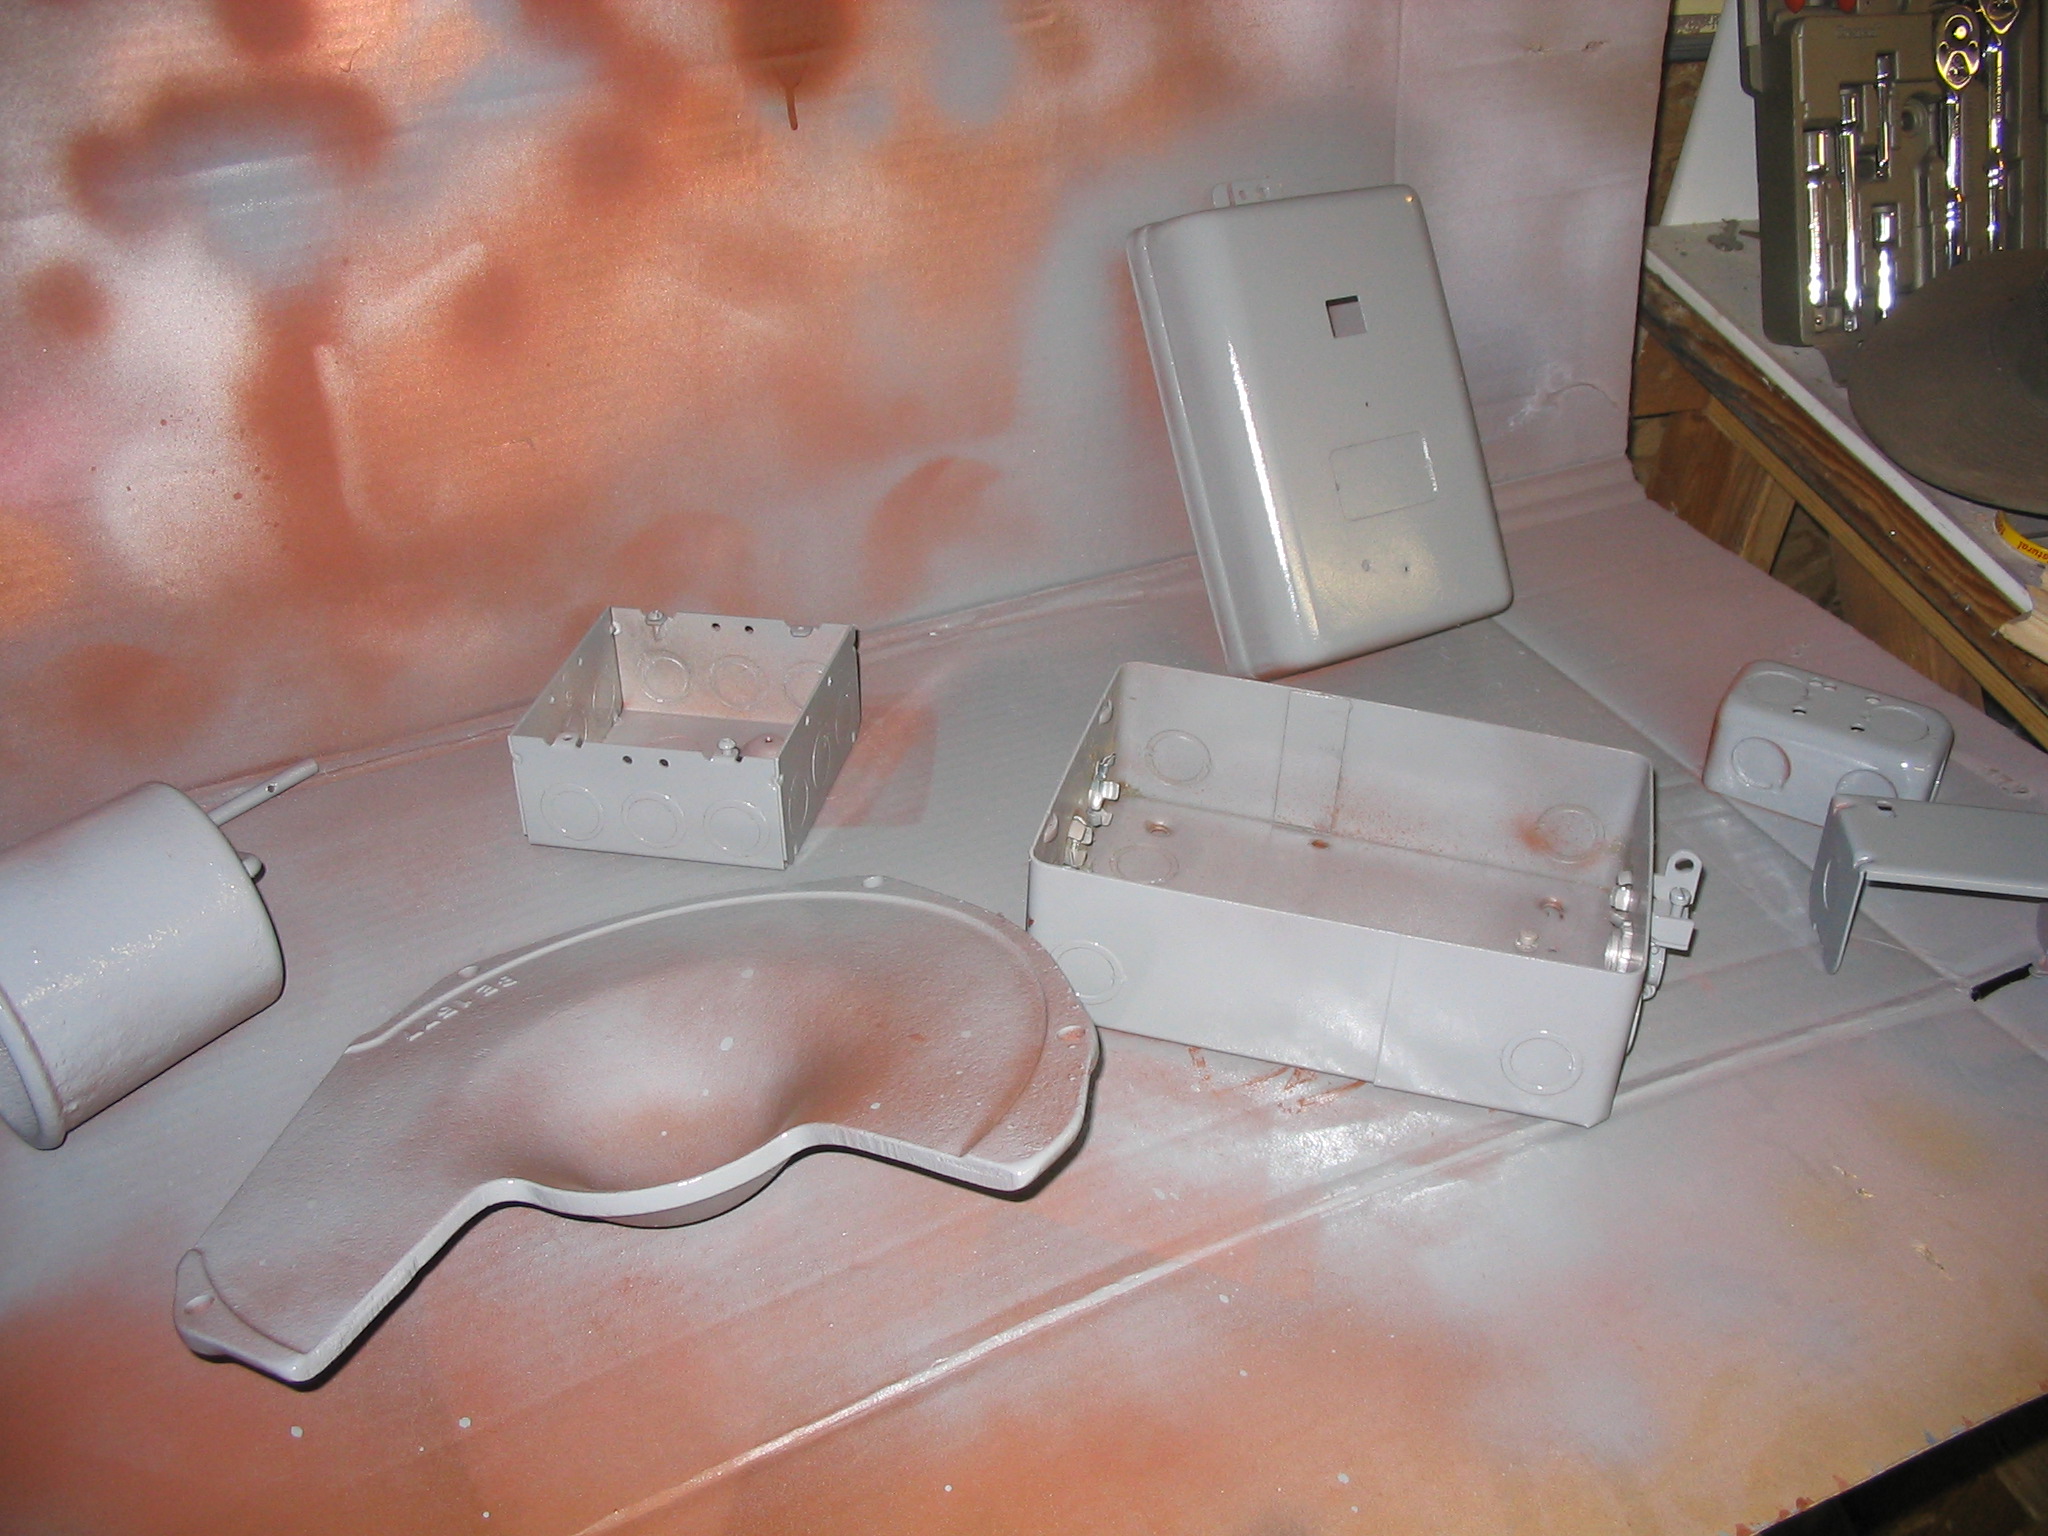
Figuring out the capacitor schematic and values was the hard part. The rest of the construction was relatively simple. The grinder already came with a large magnetic relay contact switch and circuit breaker, previously wall-mounted separately. I attached it to the back side of the pedestal stand, and put the push-button on/off switch on the front. I added two new electrical boxes: one on the front for the momentary start push button, and one on the back to hold the capacitors.
Since the voltage is double at 240v, I needed a different plug and outlet. But the amperage is low at 5 amps, so did not need a large super-heavy-duty power cord and plug like one might use with an electric clothes dryer or kitchen stove. I found a plug and outlet the same size as a standard US power plug, but with both prongs rotated at 90 degrees from standard, so neither side could be accidentally interchanged with a normal plug. Since the total amperage draw is only 5 amps, a 14-gauge power cord was adequate.
Result
I created some labels using Inkscape, printed them on photo paper, and attached them to the various boxes.
The end result was very satisfying. The motor only takes about 4 seconds to spin up to speed, and the grinder works great.
The handle broke off my manual lawn aerator. It had been welded in place, and since I have an arc welder, I figured I should weld it back on. This was the first time I attempted to arc weld something with a real purpose to it. There were a few details to work out, such as the fact that I don’t know if the welder works right, and I don’t know if my welding rods are any good, and what was the other one? Oh yeah, I don’t know how to arc weld. Well OK then, time to get started.
Actually, I do know the arc welder works, at least nominally. I got the arc welder from my friend Tim when he got a better one. It is your typical “stick” AC arc welder, with no fancy features. He used it at least once. I think. It’s a solidly-built big old monster with a giant transformer inside and a hand crank to turn the amperage up or down. The amperage indicator needle was missing; I replaced it but don’t know how close it reads to reality. My dad helped me make a few practice welds with it last year, so someone who knows what they are doing should be able to make it work. Ahem.
I got the welding rods from my dad, who had a bunch of these sticks left over from his previous job. I’ve heard you have to keep them dry and in good condition for them to work right. They’ve been inside in a plastic bag to keep them dry, and they don’t look obviously bad to me. That’s pretty easy since I don’t know what a bad welding stick looks like.
Then there’s that knowing-what-you-are-doing part. I did some oxy-acetylene welding back in the dark ages, I mean the 1980’s, but not arc welding. So last year when I got this beast from Tim I figured I should learn a little and read up in I Can Do It All By Myself: My So-Big Book of Arc Welding or maybe it was called Introduction to Arc Welding, I forget which.
My dad bought me a cool welding helmet which automatically darkens in bright light and lightens again in normal light. If you don’t know what you are doing, it really helps if you can see it. I think.
I did read up on the safety stuff, and made sure to wear boots, long sleeves, and thicker denim jeans, along with proper welding gloves. Hot molten metal, no matter how small a splat, is not fun to feel. I also turned on a big box fan right next to the work, because these fumes stink! Oh, and they’re toxic too, I hear.
I put some protection around to keep the splattering metal from flying onto everything else. (Don’t weld over a pile of sawdust.) When I first tested the welder last year, we set up a shield using cement backer board, the kind you use as an under-surface for tile counters. This time I used some scraps of “HardieBacker”, which has cement in it but is a little more like sheetrock, so it is easier to cut and shape. Works great for a welding shield. And for laying tile, too.
So it was time to melt metal with fire using a blazing lightning bolt of electricity. Can you do anything cooler than that? Of course not. I figured I should do some practice welds on a piece of junk steel before mangling the lawn aerator. I grabbed some scraps from a discarded bed frame (awesome source of free angle iron) and set to work. I spent a long time getting the rod stuck to the piece, over and over, without getting an arc. Clearly I was not getting this arc thing figured out right.
I gave up after half an hour. Something wasn’t right. Either the welder was bad, the rods were bad, or I didn’t know what I was doing. Hmm. It could be any of the three, so I went into standard cheapskate troubleshooting mode: which of these variables can I improve or eliminate for almost no time or money? Buying another welder would not be cheap, unless I wanted to take forever, so that was out. Despite being the highest probability culprit, learning how to weld properly was not going to happen within the weekend, and would likely require known-good equipment, so that was out too.
Fortunately, a box of arc welding sticks was only ten dollars at the big orange home improvement store, and they were open. With new rods in hand (or rather a new one in the electrode holder), I had an arc and an acceptable weld on my test piece within a few minutes. The new rods were smaller than the ones I already had, and the box had a recommended amperage range for them which worked fairly well. That makes me think that the old rods may not have been bad; I just may have been using them with the wrong amperage setting. There’s that know-what-you’re-doing thing again; curses!
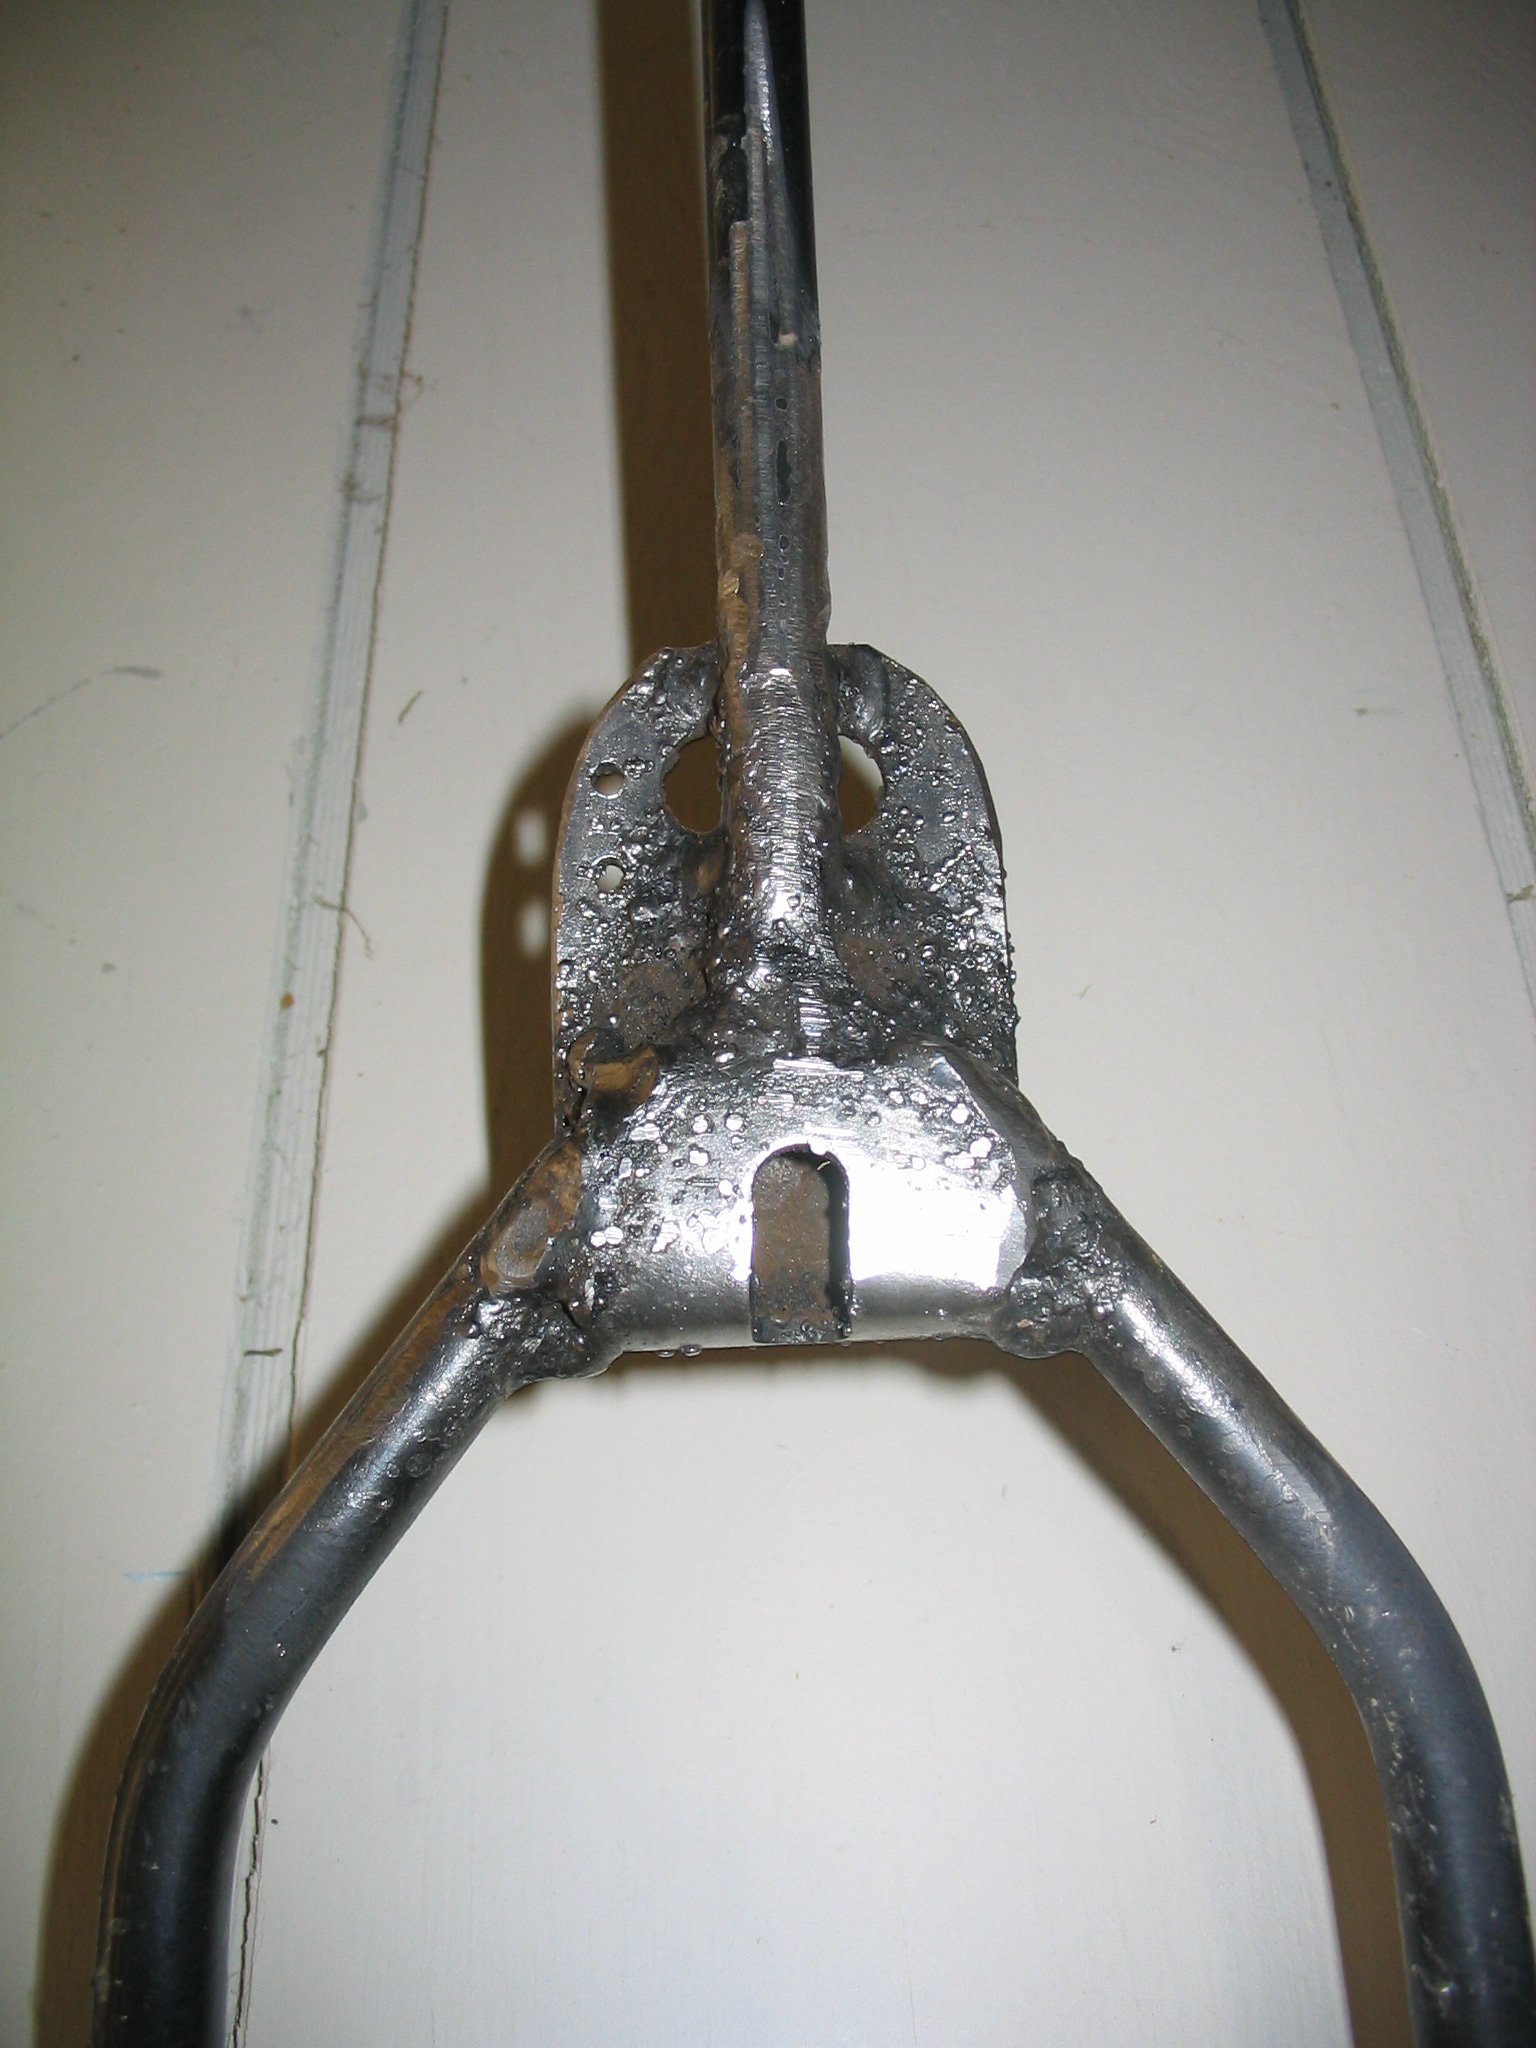
Welded joint with bracket
I cleaned up the broken parts of the lawn aerator on the grinding wheel to make a clean face and bevel the edges. After all the prior drama, it actually welded pretty easily. I also added a steel bracket to the joint, to reinforce it. I don’t know whether my new weld in the joint itself is a strong as the original factory weld (probably not), but I expect that the new bracket makes the whole thing stronger than before.
Once it was welded, I cleaned it up with the grinder and a wire-wheel brush on the electric drill. Success. I finished aerating the lawn, and it worked just fine. I melted metal using a white-hot electric arc, and I did it without burning down the house or injuring myself. You can’t beat that.
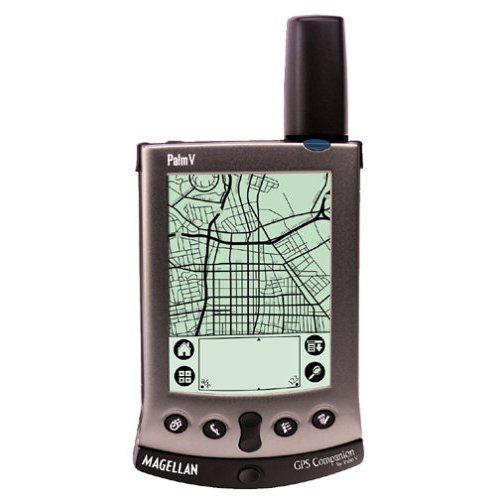
I bought a cheap GPS on EBay. I got a Palm Vx with a Magellan GPS Companion attachment for ten dollars. By PDA standards the Palm Vx is completely obsolete, but it works fine as a GPS data logger.
The accuracy is pretty good. I don’t know how to measure it explicitly, but it usually matches Yahoo aerial photos and Google Earth within a few feet. That is for open skies, either from my jacket pocket while bicycle riding or on the dashboard of the car. Looking at my tracks in Google Earth, it does correctly match the parking space in which I parked the car at the shopping center. Scary.
It didn’t come with any software, so I’m using cotoGPS as the track logging software and converting it to GPX with gpsbabel.
It appears that all the Palm-related GPS or map commercial software companies are no longer selling the products now. I would like to find a map viewer that will work with it, but I don’t know what I will find at this point.
Still, as a simple data logger for 10 dollars, it is a fun toy.
 Copper shade
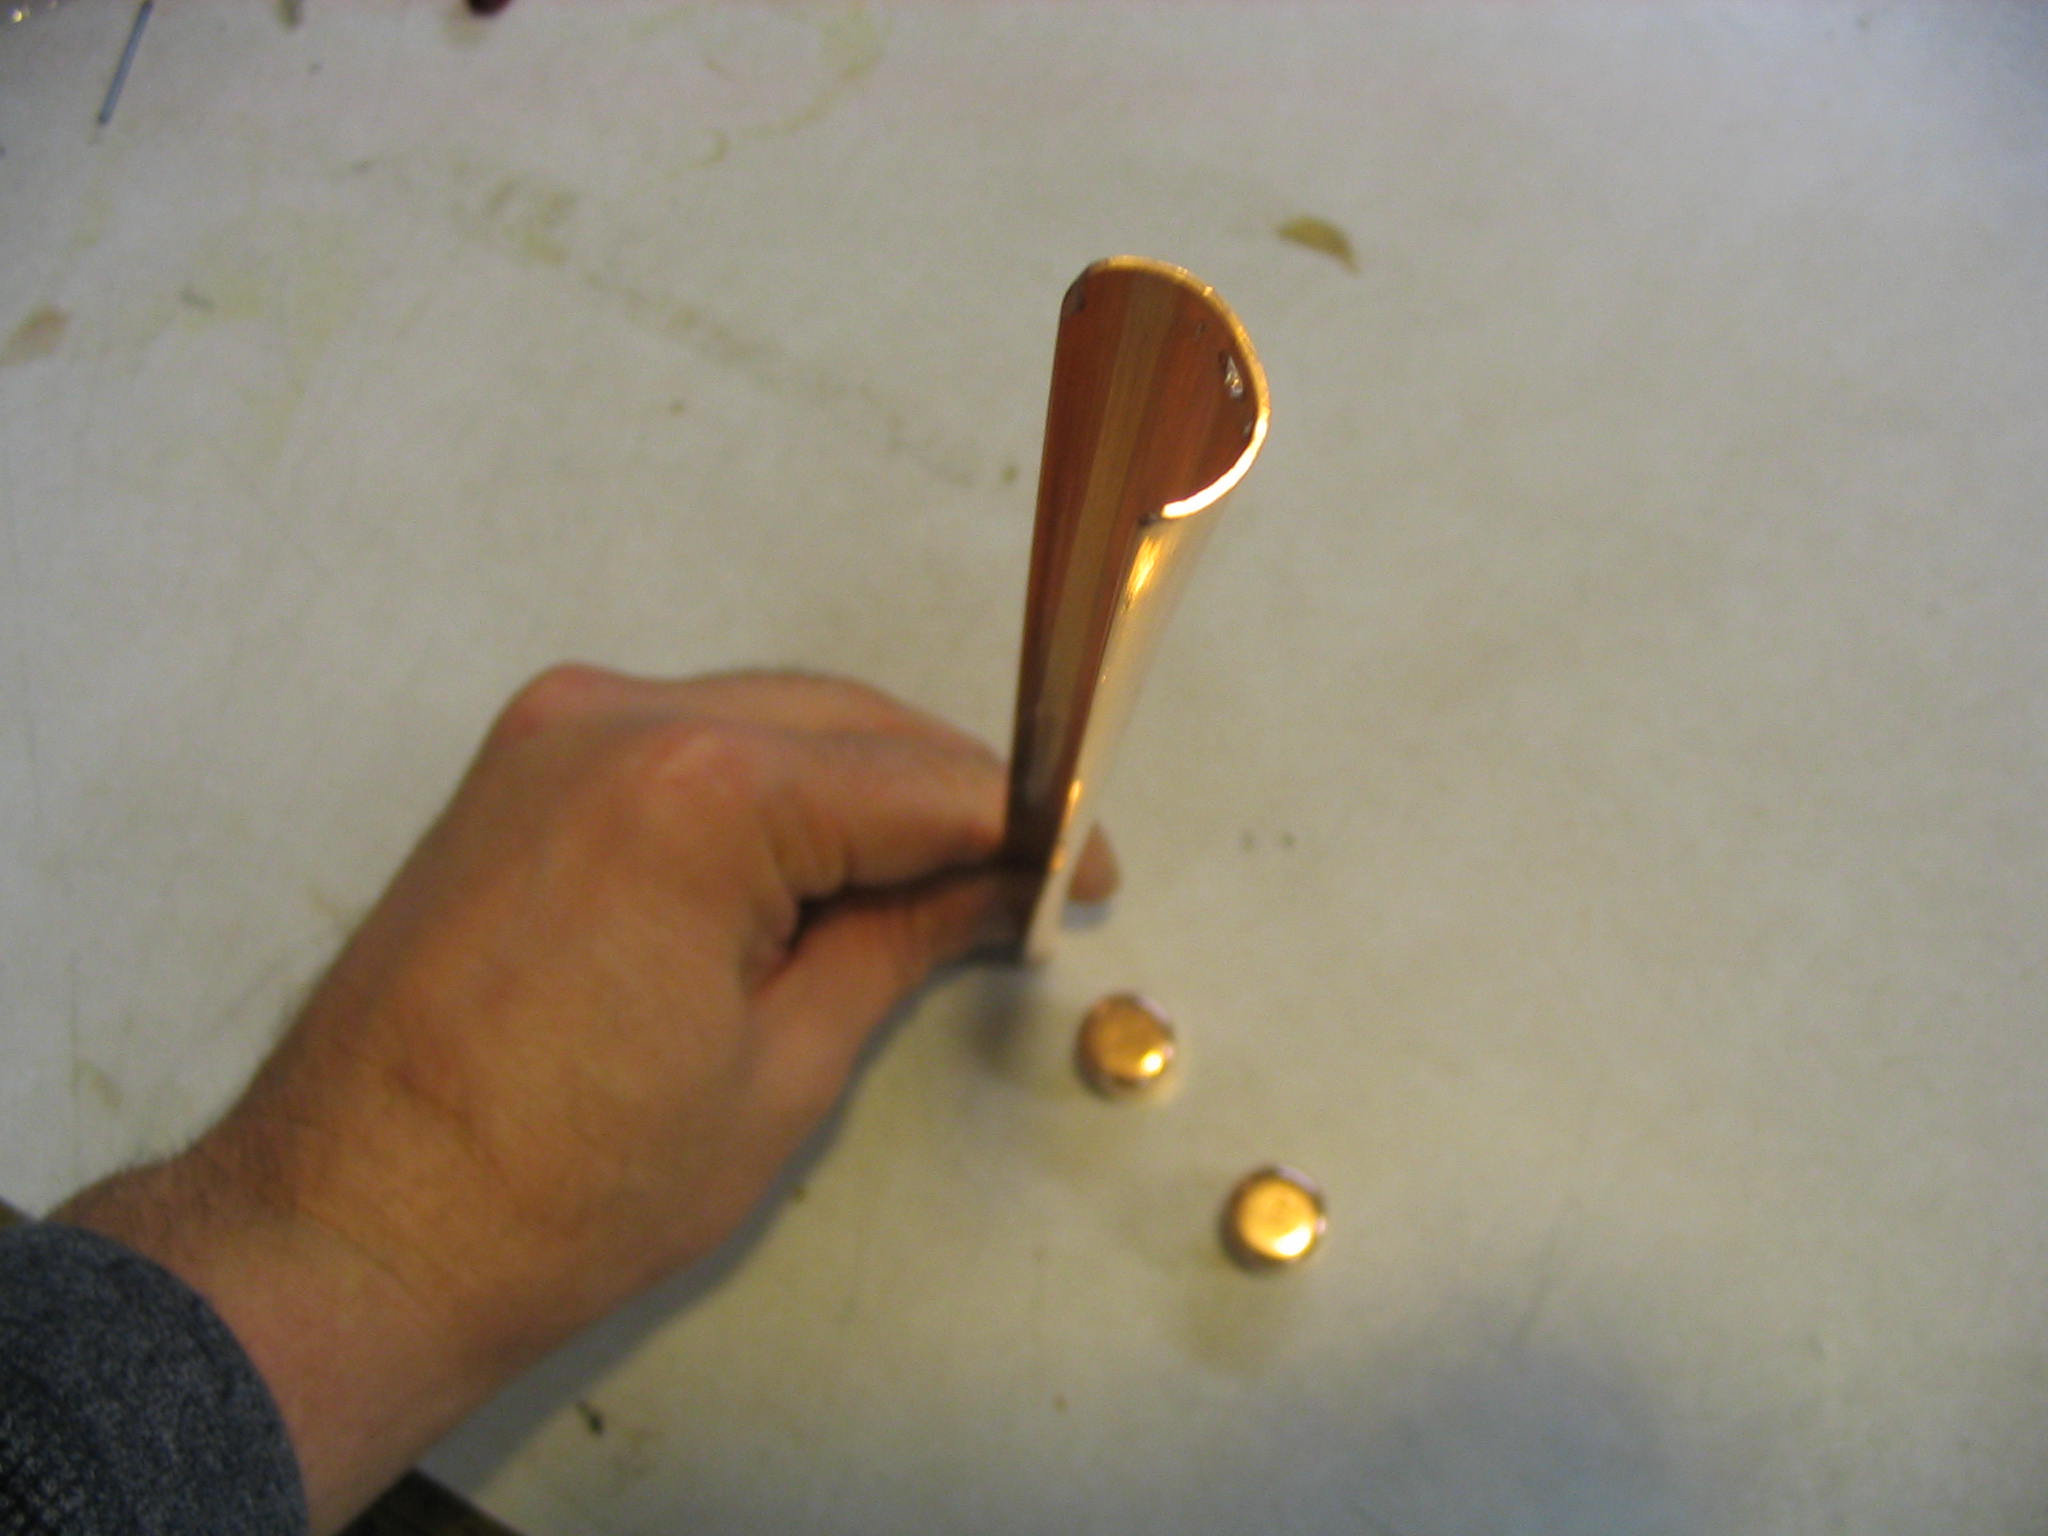 Copper shade
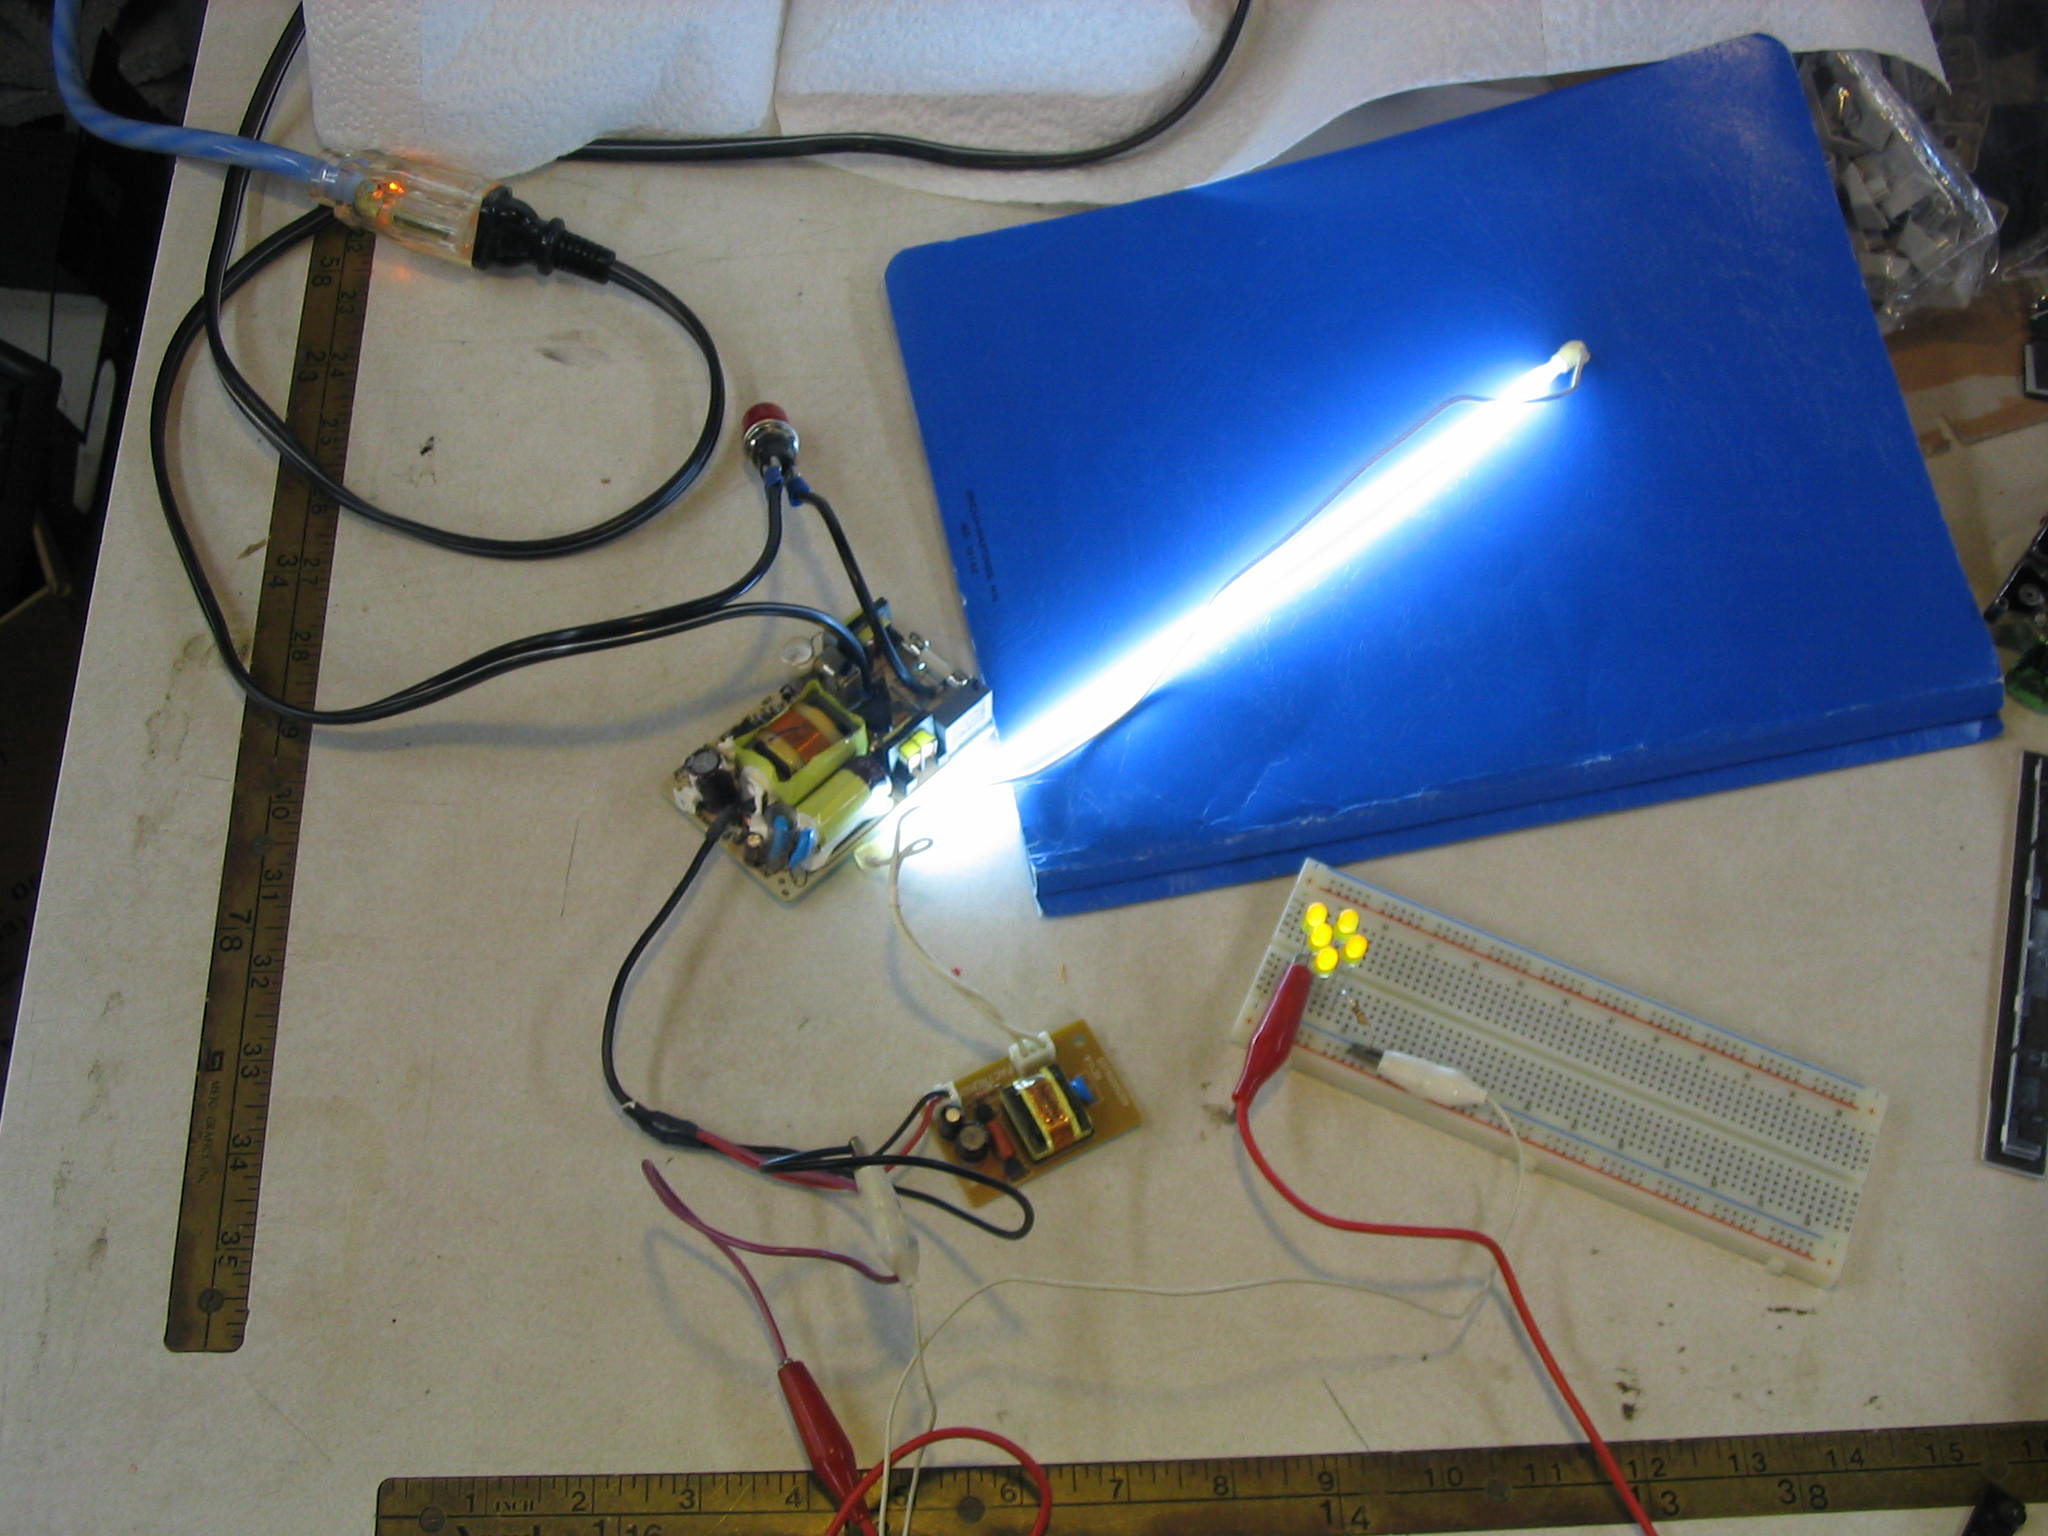 light test


 Jessica bought a flat panel TV, and wanted to attach it to the wall with some sort of swing-arm mount. The prices at the store were outrageous. Armed with my moderately-trustworthy arc welder and couple of discarded bed frames, we set out to construct one ourselves.
 I received a Baldor metal grinder with 10-inch wheels, with a motor wired for three-phase industrial power. Three-phase power is not provided in U.S. residential homes, so I needed to power it from normal single-phase power. My solution was to build a balanced static phase converter, requiring only a few relatively inexpensive capacitors. (Much less expensive than the nuclear reactor I was considering.)
 I did some more Internet searching, and came across another idea: the static phase converter. This is a very simple converter which uses capacitors matched to the amperage draw of the motor to generate the extra two phases. As long as your amperage draw does not vary much (meaning you can only really use it for one motor), this is a simple and inexpensive solution to the problem.
 To bring the motor up to speed under power, it needs a large starting capacitor, connected in with a momentary push button. They are readily available, sold simply as A/C start capacitors. I had a capacitor from an old washing machine motor, which worked to start it as a test. I ordered another one of 86 uF from an Internet mail-order surplus place. Holding the start button for about 3 or 4 seconds is all that is needed to bring the motor up to full speed.
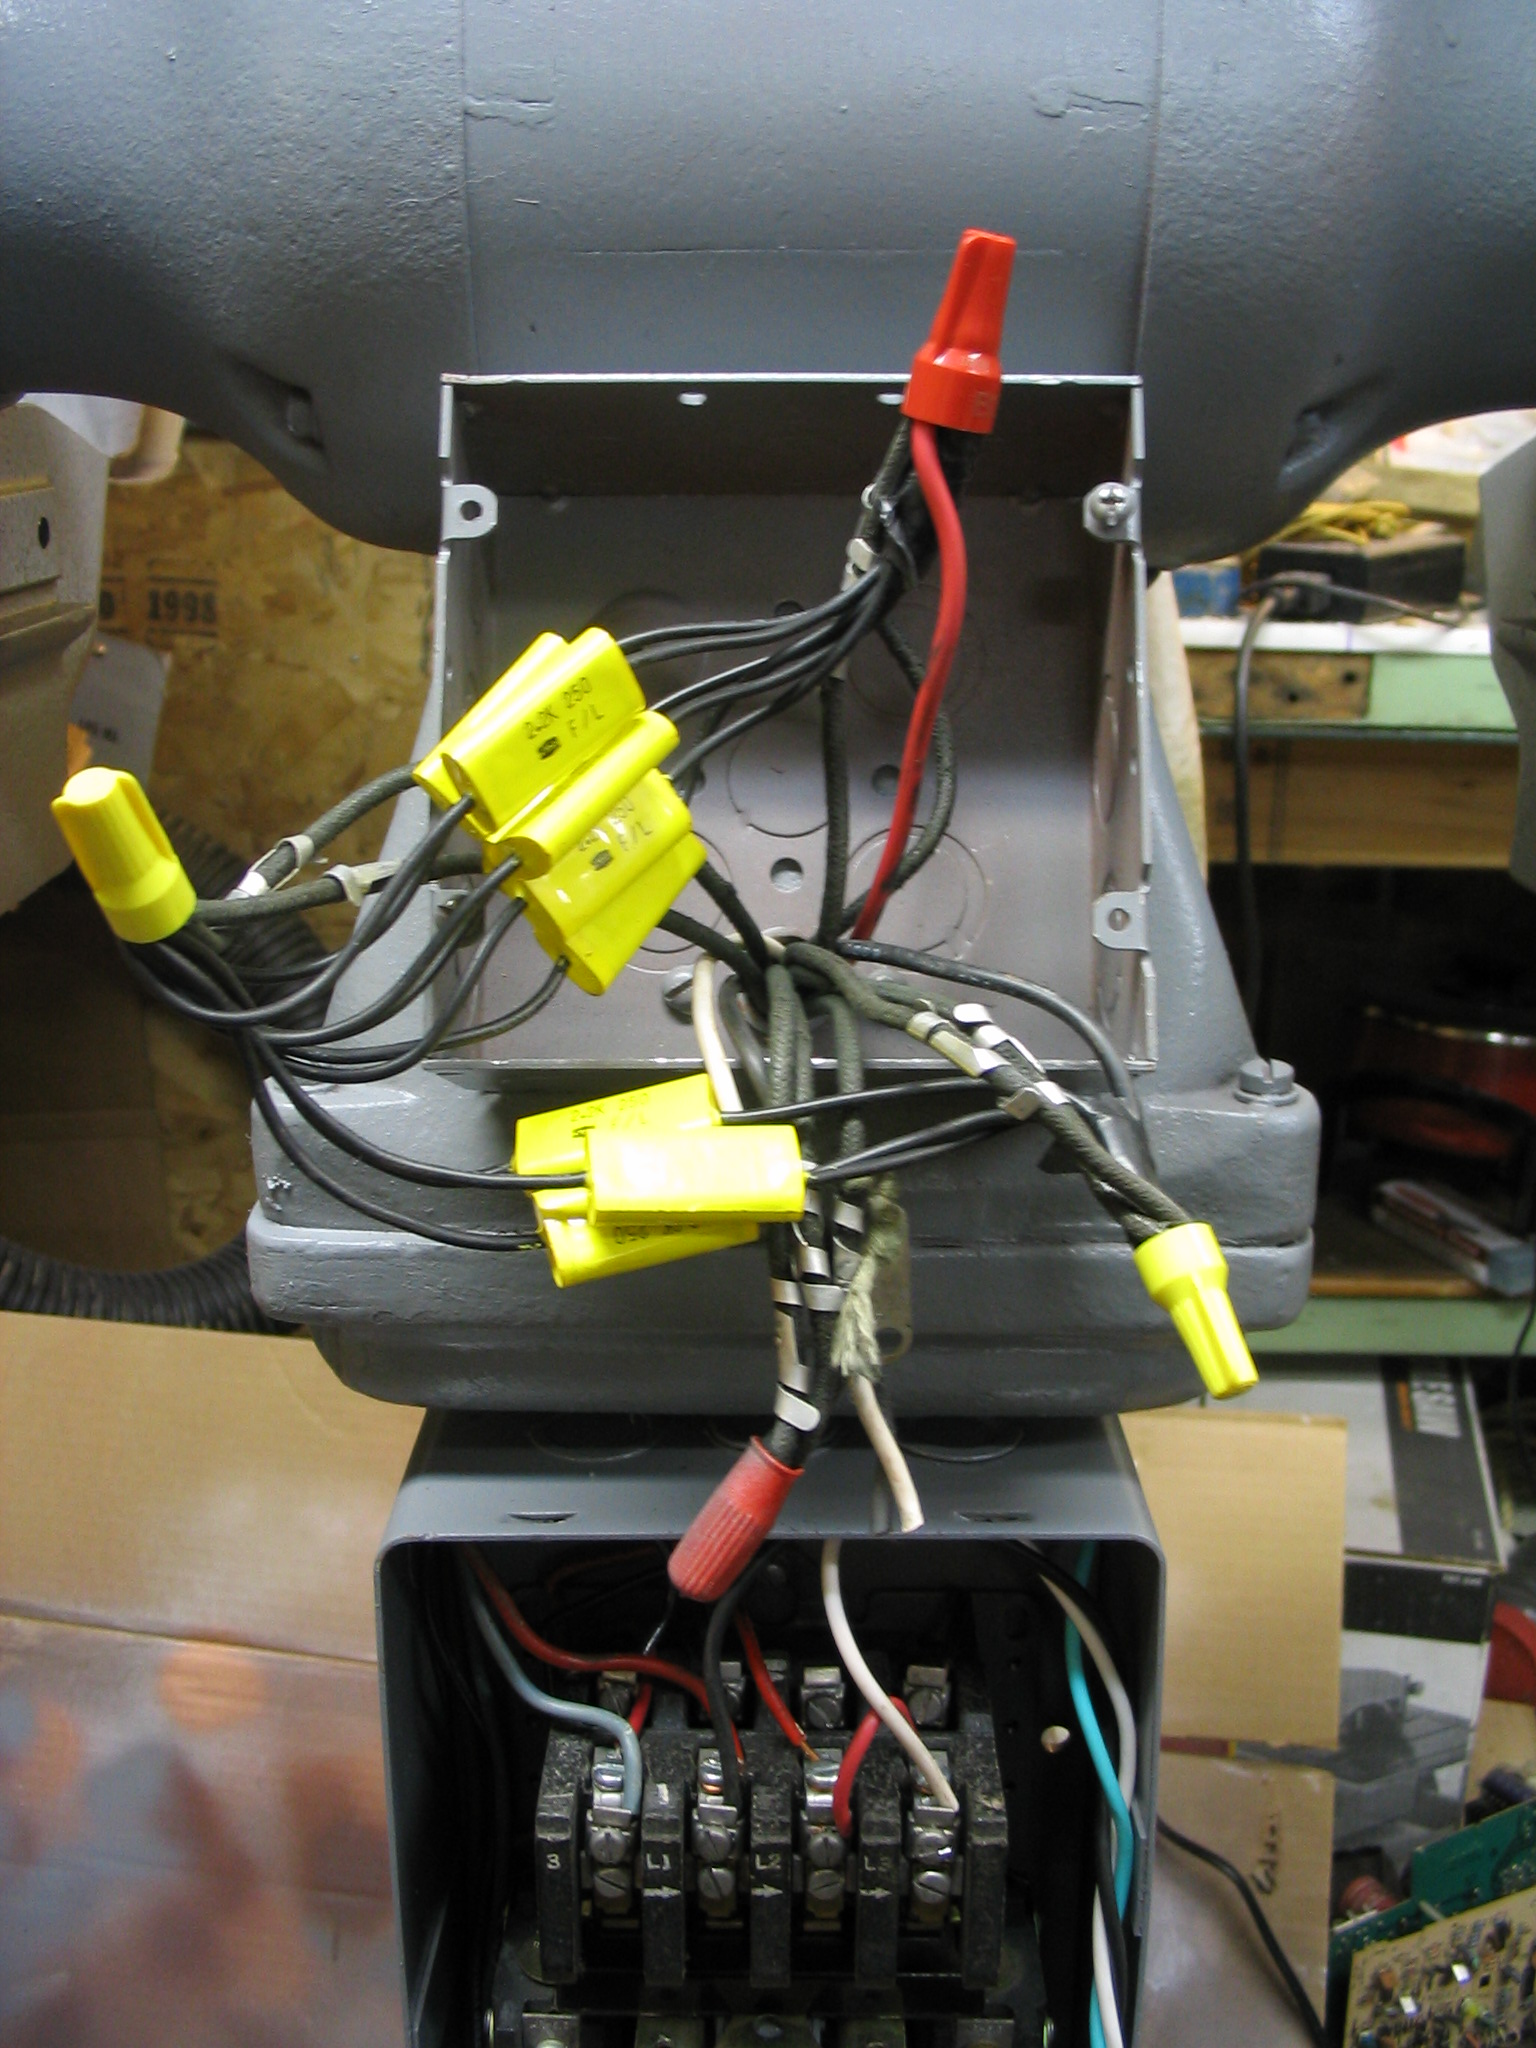

 I created some labels using
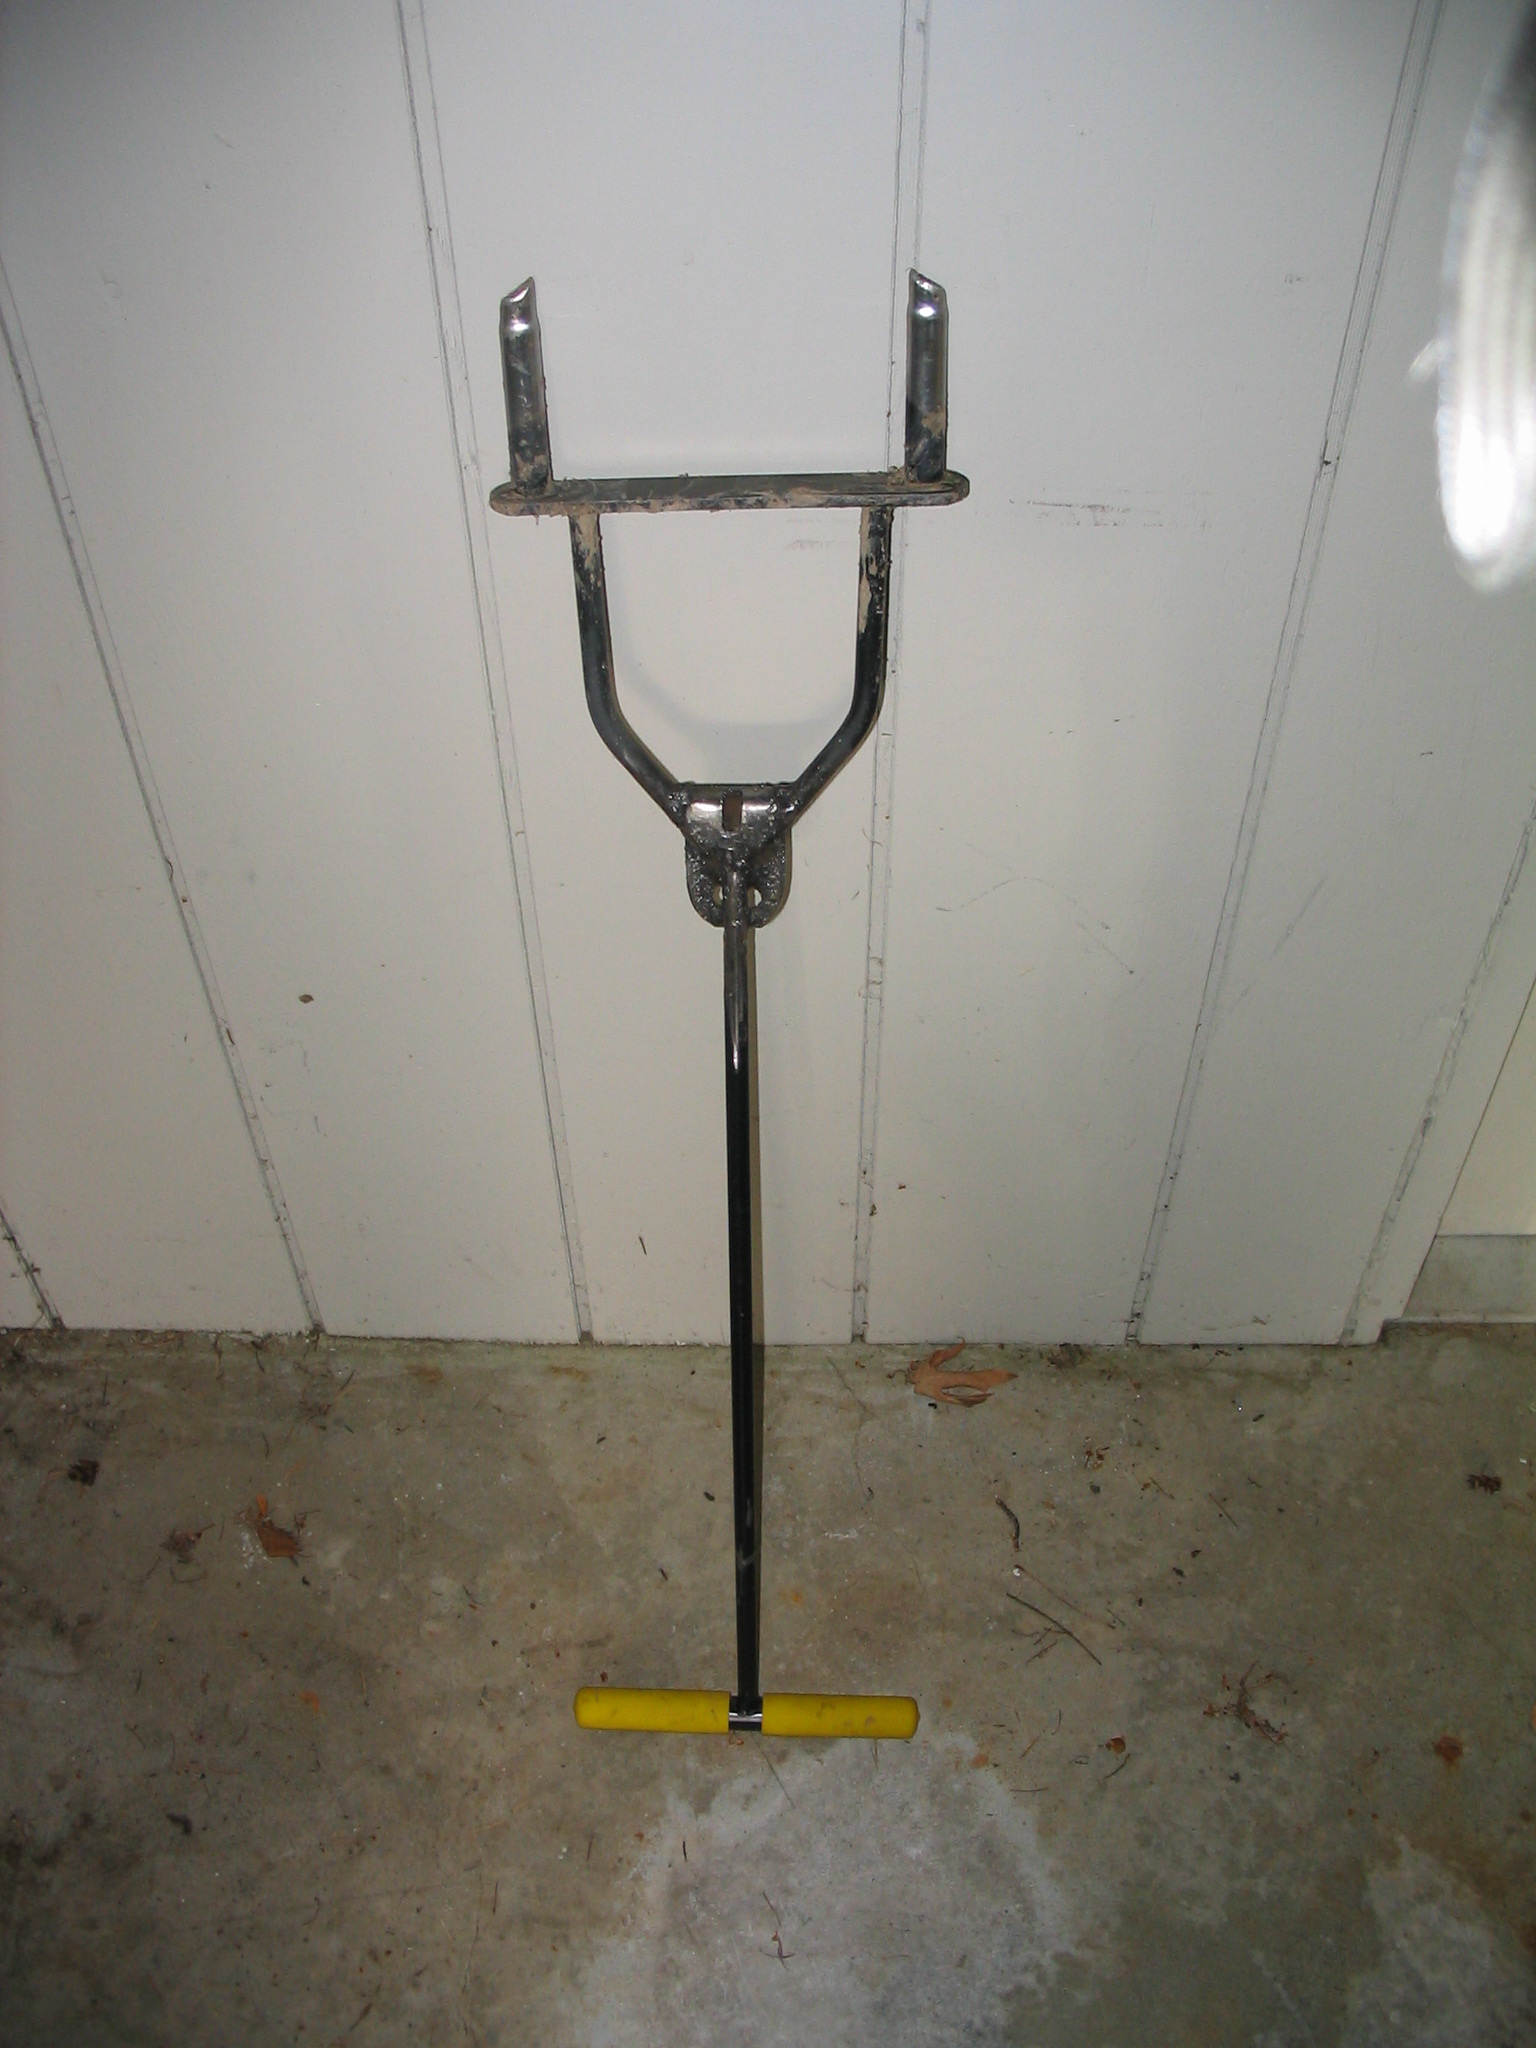
 I bought a cheap GPS on EBay. I got a Palm Vx with a Magellan GPS Companion attachment for ten dollars. By PDA standards the Palm Vx is completely obsolete, but it works fine as a GPS data logger.