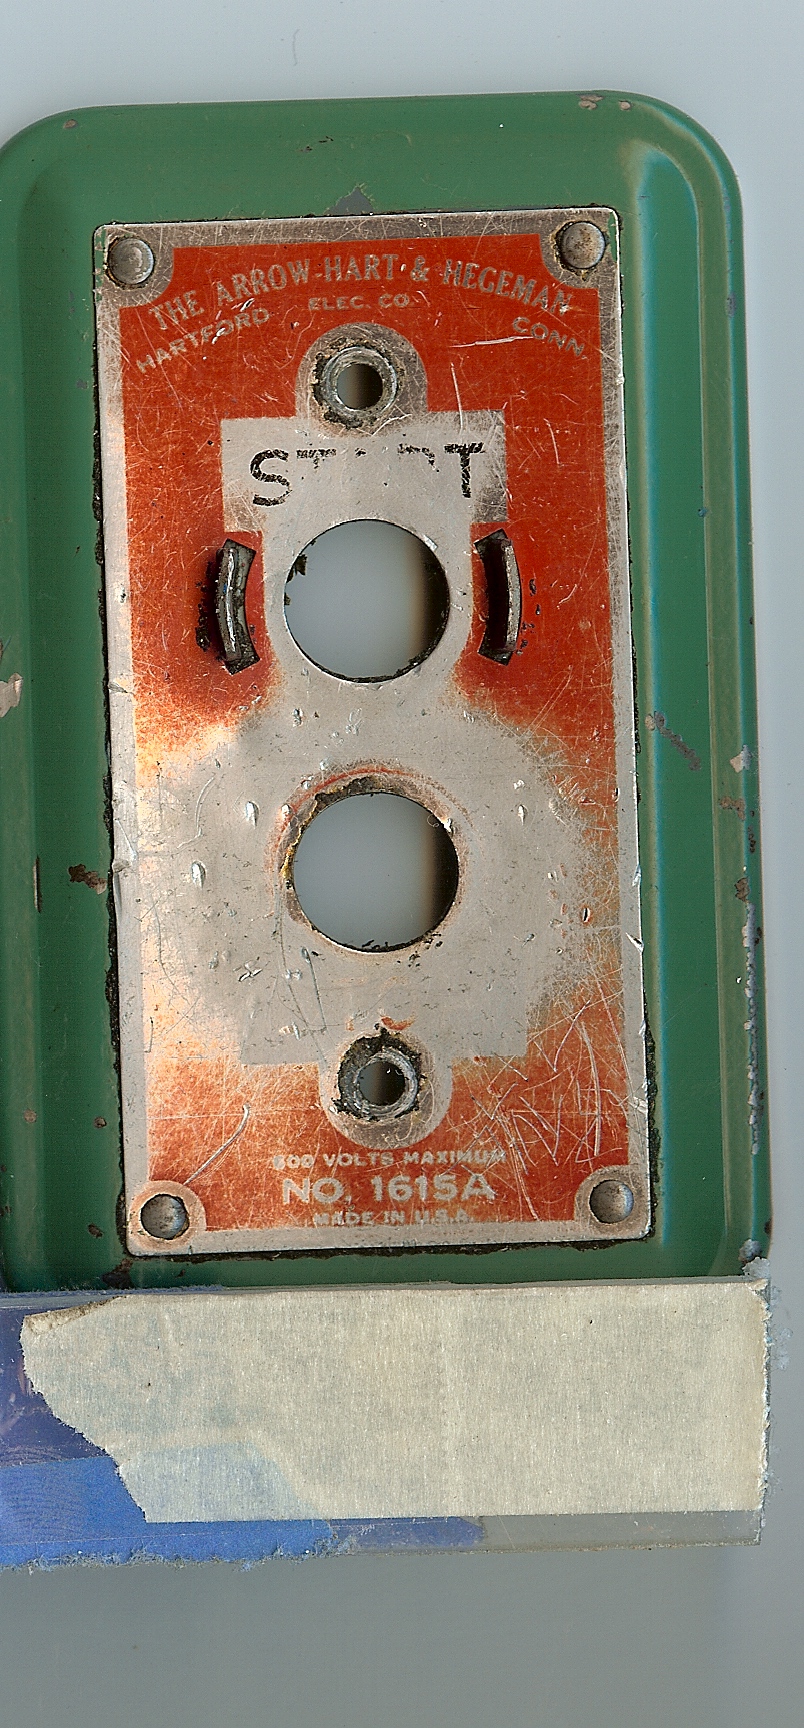
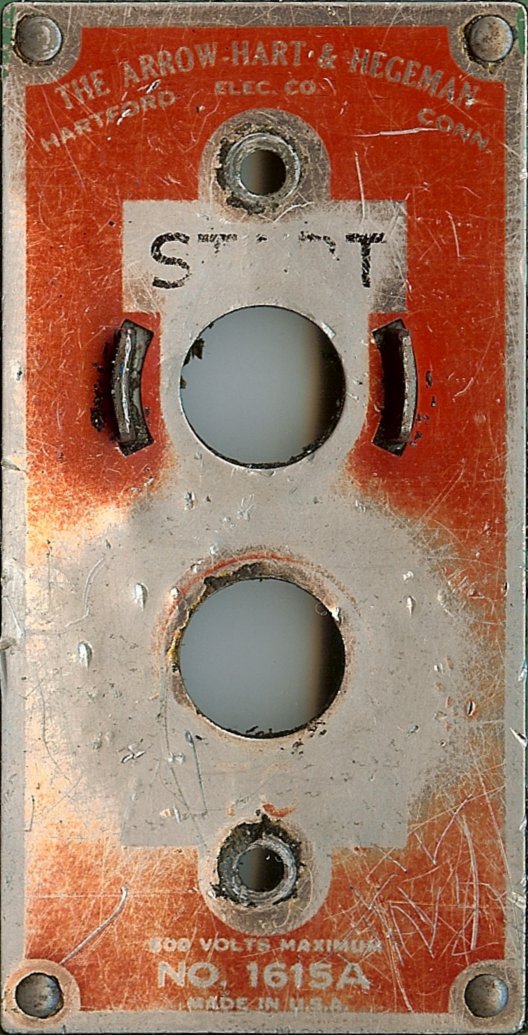
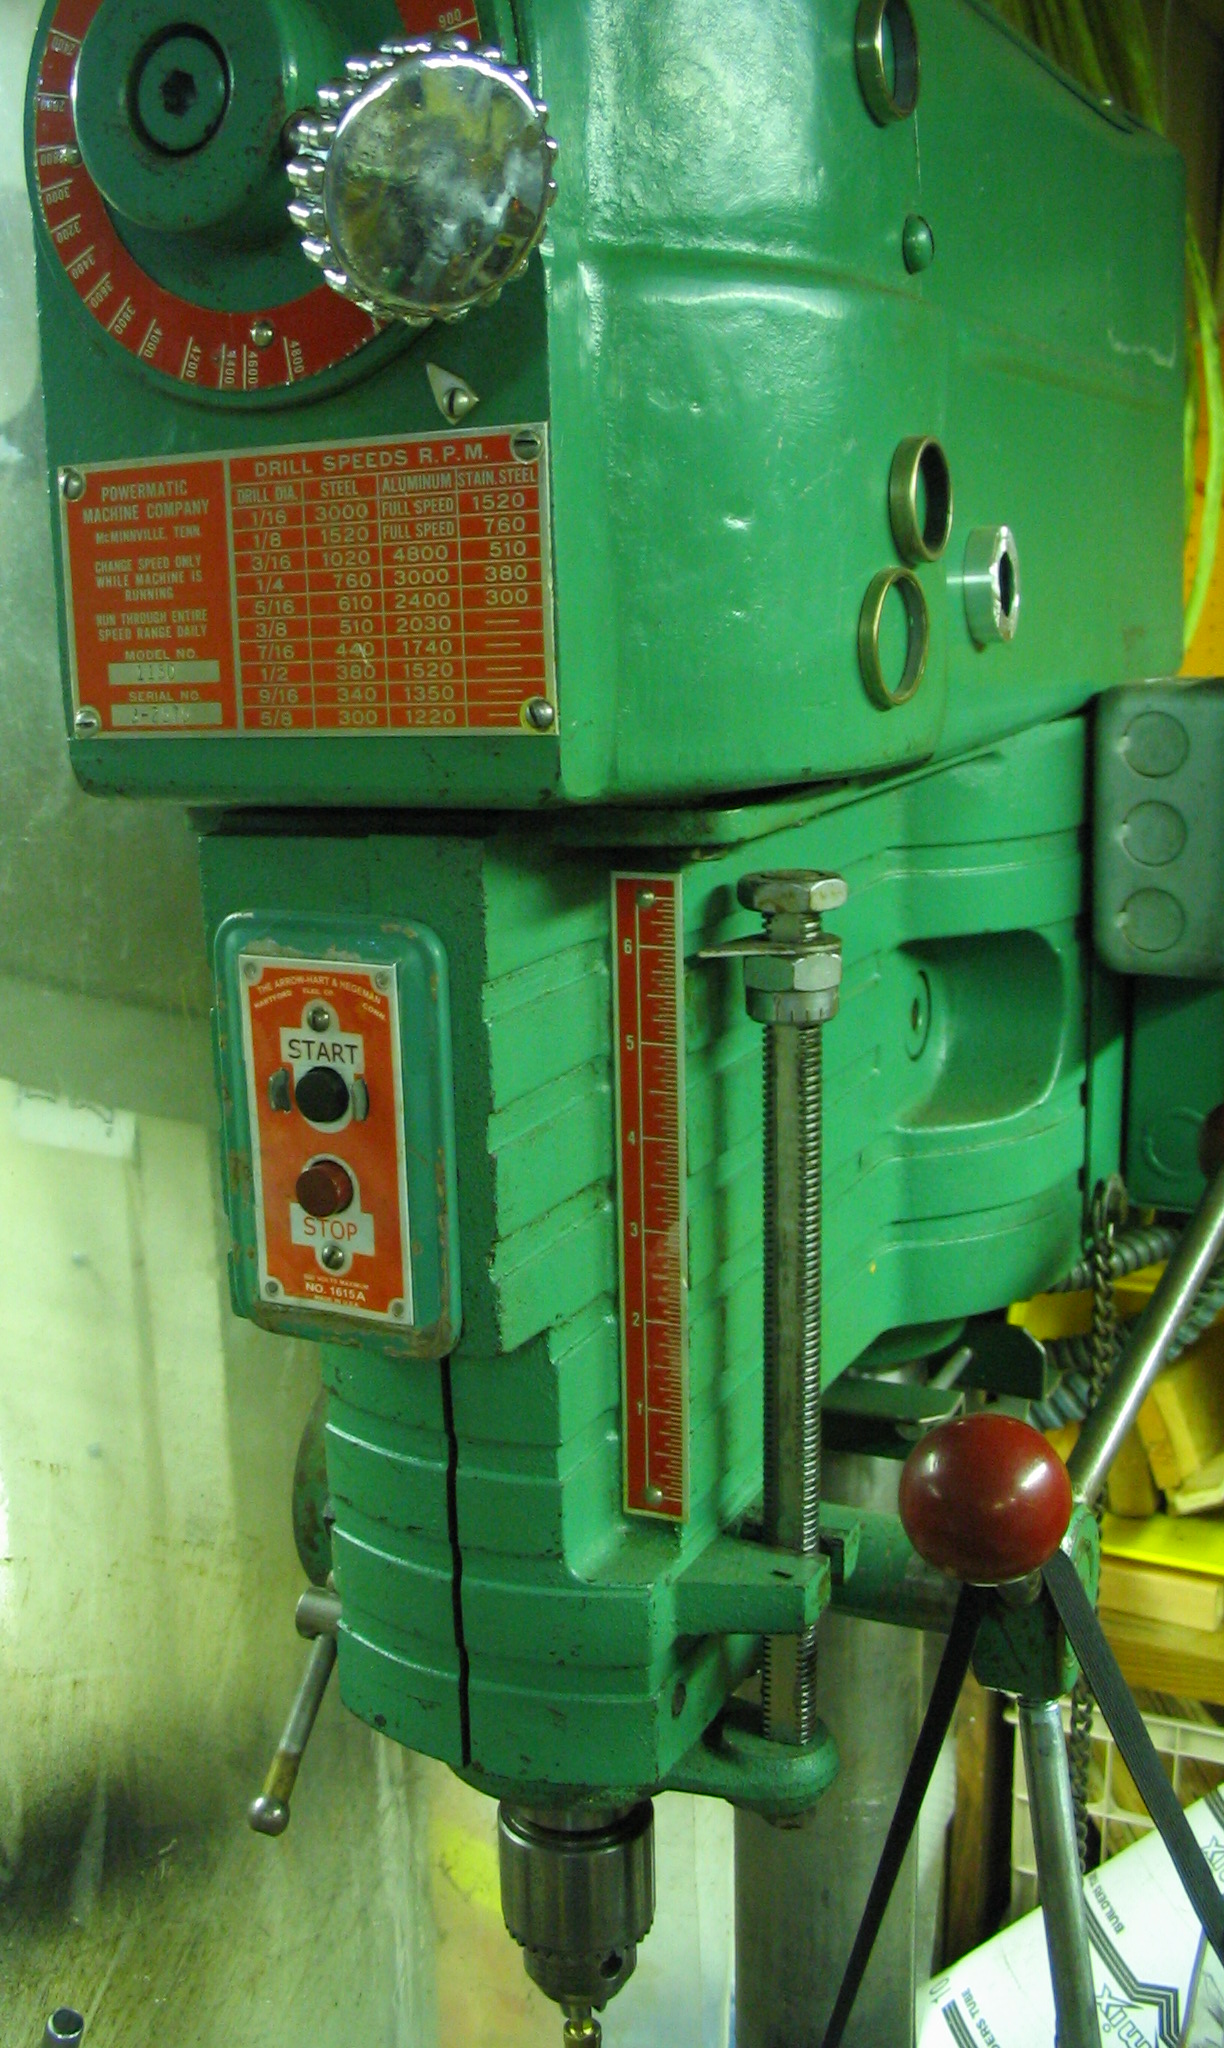
When I fixed up an old drill press, I found that the switch plate for the on/off switch was fairly worn. The original paint and lettering was worn away, so that the start/stop wording was almost unreadable. Even though I am clever enough to figure out that the big red button means “stop”, it needed a clearly readable switch plate label.
The basic process is fairly simple:
- Photograph or scan the original label
- Edit the picture on the computer using free software
- Print the new picture on glossy photo paper
- Trim label and cut out holes
- Place over original label and cover with clear packing tape
For those of you who need more details (or just can’t get enough of my snarky comments), read on for more.
Photograph or scan the original label
First you need an accurate picture of the original label. You can take a close-up photo with a digital camera. Take the picture directly above the label, as perpendicular as possible to the label surface. Holding the camera farther away and zooming in with the lens may work better than holding the camera up close. Try several shots and see which comes out the best. You’ll want the clearest picture you can get, with no glare or shadows. Unless you want those in the final label for that artsy look; I didn’t.
If the label is flat, you’ll probably get better results using a flat-bed scanner. I tried it with the drill press switch plate, but it didn’t work. The label is riveted to a switch plate, with prongs that stick up on each side of the start button to guard the button from accidentally being pressed. They moved the label too far from the surface of the scanner, putting it out of focus. Darn safety features. Oops, I mean, hey, good thing for those safety features, huh?
Make sure you get a good picture before doing too much cleaning on the original label. I did, but only because I was lucky. I mean, good thing I planned it that way. After I took the picture, I thought it would be a good idea to clean off the dirt, grease and oil from the label plate. I soaked it in citrus cleaner, and it cleaned it all right. It removed nearly all of the rest of the paint right off the label plate. Ooops.
Edit with free software
Once you have the picture, it’s time to edit it. You’ll need some graphics software for that. I like using free, open source software, because I dislike the Evil Empire to the North in Redmond and their predatory strangle-hold on the computing industry, and I support freedom with liberty and justice for all. Oh yeah, and I’m a cheap tightwad too. I mean frugal.
For photo editing, my tool of choice is the GIMP. It does nearly everything the big expensive commercial programs do, like that well-known one that everybody pirates at home. I also use Inkscape for drawings. Both GIMP and Inkscape are freely available on Mac, Linux, and that other operating system I have to use at work because the man says so.
The first thing to do is crop the picture and straighten it out. It is easiest to rotate it first so that you have straight horizontal and vertical edges, and then crop it.
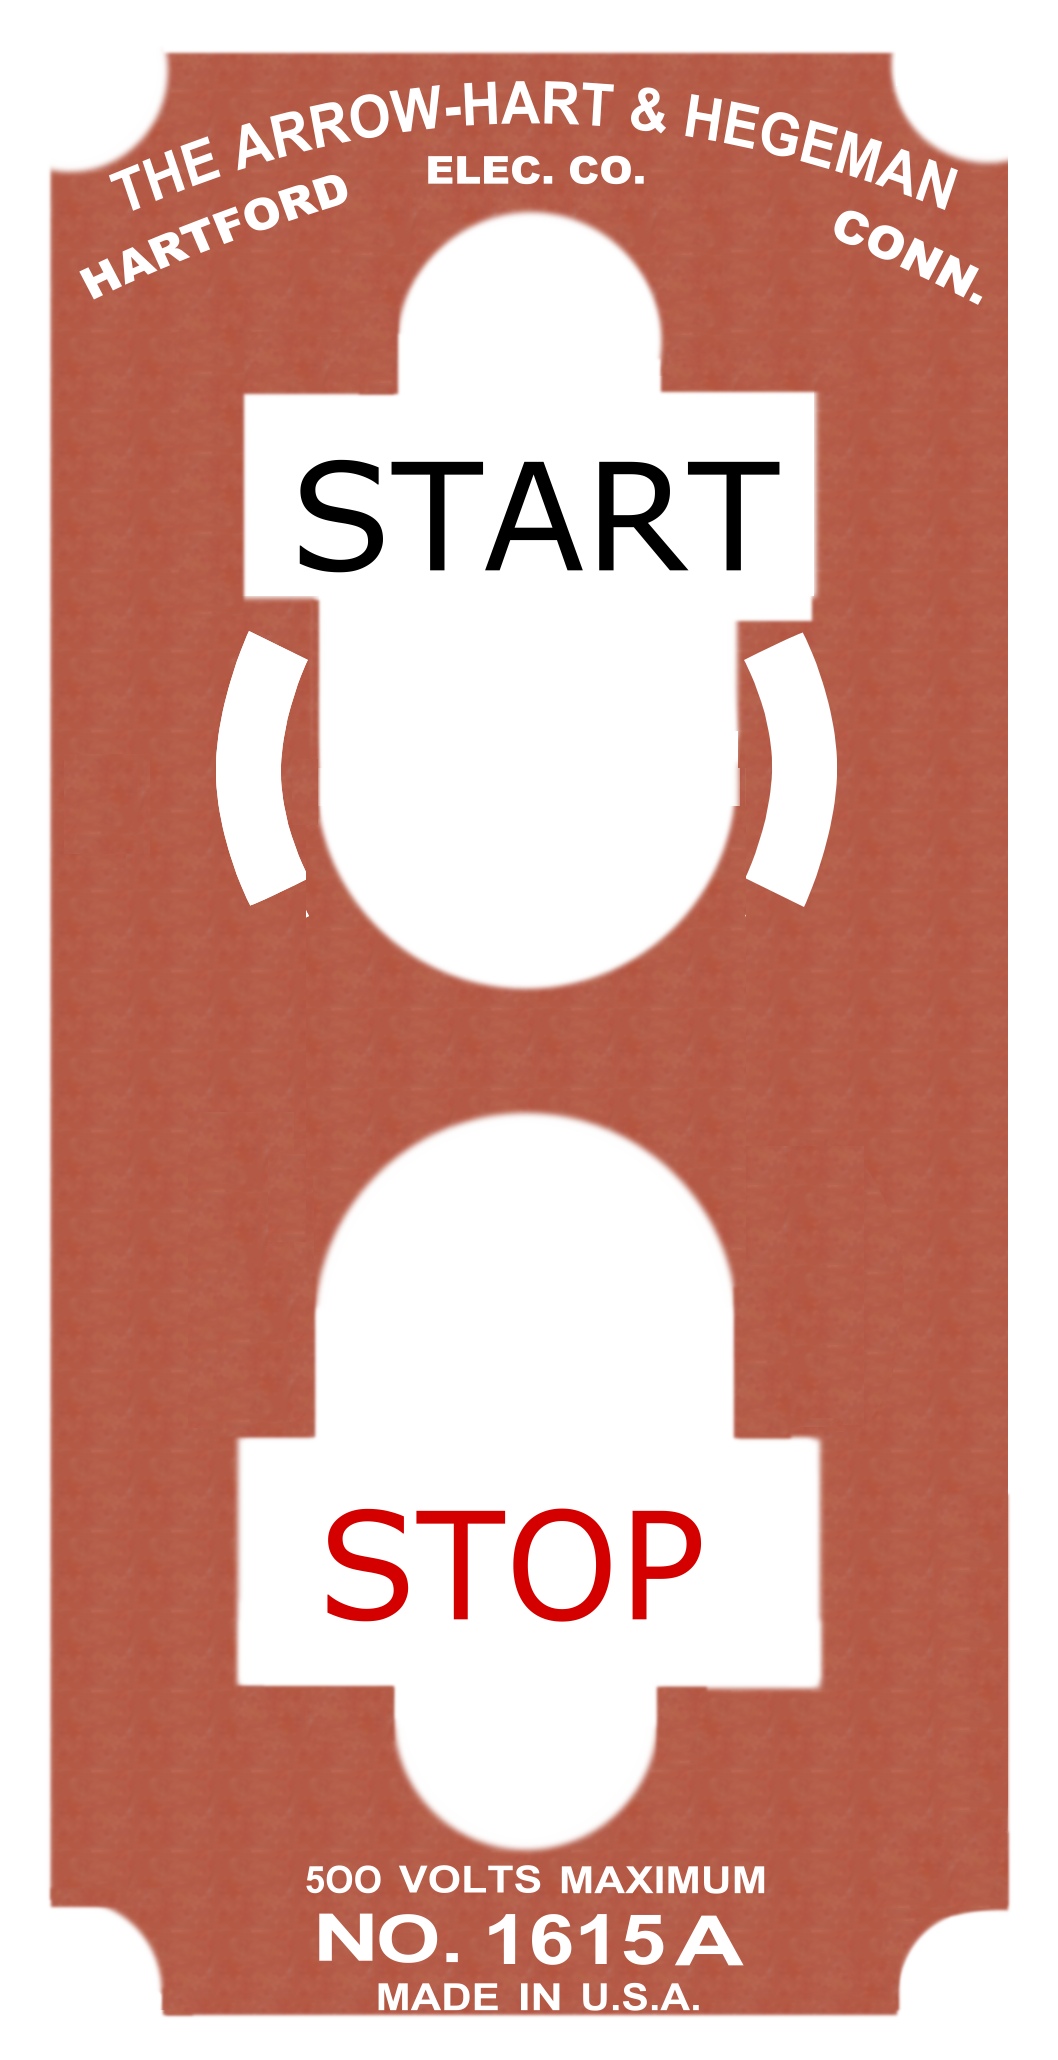
Now you need to touch it up. That was the whole point of this, remember? This is where I use the “layers” feature in GIMP. I put the original photo in the bottom layer, and then create a new layer or two for the changes. That way I can easily switch back and forth between the original view and the new retouched result and admire the improvement. I have a fragile ego and I need that constant affirmation, you know.
I did not completely restore and refinish this drill press, so I thought it would be interesting to leave a little of the original character of it in the new label. The switch plate was pretty scratched and worn from years of use. It is quite easy in the software to use the orange color of the label body and draw shapes to completely cover those sections, masking all of the original scratches and character. But with one little adjustment, the new section can be made partially transparent. The parts of the old label which were still orange in good condition will look the same. The parts that were scratched and worn will show through just a little bit, in a subtle way. (So much for not wanting that artsy look. Hey, it’s my project, OK? OK.)
The remaining part is the lettering. I used another layer in GIMP for the lettering, to place it on top of the orange mask layer. The “START” and “STOP” wording is easy enough, but the manufacturer name presented a difficulty as it curved along a smooth arc.
There may be a way to fit text along an arc and easily adjust it to line up properly in the GIMP, but I couldn’t find it. So instead I used Inkscape. Inkscape has feature exactly for that, fitting text along a path. It also has easy adjustments for the height, width, and spacing of text, to line up exactly with the original.
I loaded the photo into Inkscape, and drew a curved path along the base of the original lettering. Then I put in new text along the path, and lined it up on top of the original to match. Once I put all of the text for the label in place, I deleted the photo, leaving just the new text, and I saved it as a PNG bitmap image.
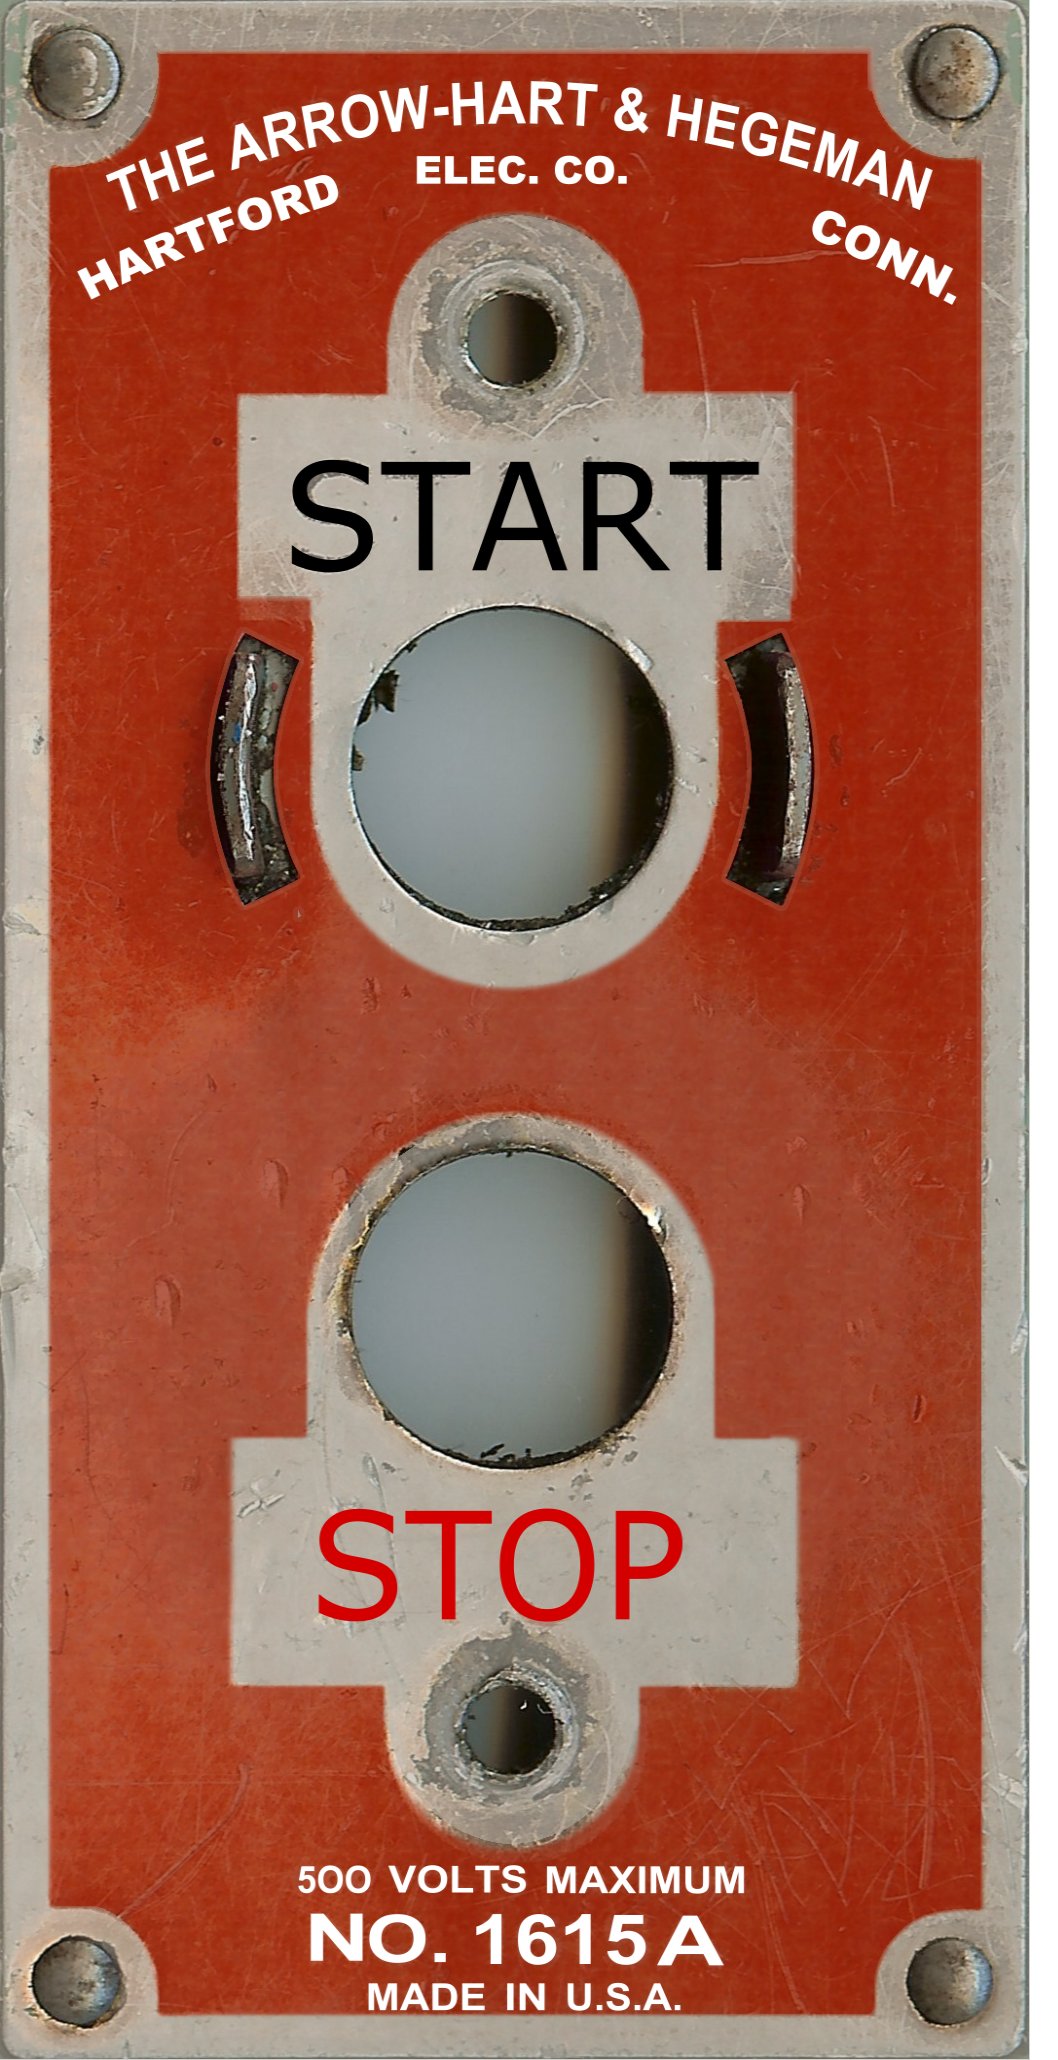
I brought the text bitmap image into the GIMP and put it into the top layer. This gave me a stack of three layers: new text, semi-transparent orange paint, and original photo. The editing was done.
At this point some smart guy will tell me how I could have saved myself a lot of work with only $600 worth of software. That’s probably true. Why, I could even pay for it by turning in 12000 soda cans for their deposit and come out even. Or perhaps not. I’ll stick with the free software.
Print the new label
Next I needed to print the new label at exactly the right size. (I’m skipping the surrealism at this point and just going for the realistic look.)
Both GIMP and Inkscape allow you to measure things on the screen in your choice of units, such as pixels, inches or millimeters. This makes it easier to get your image to print out at exactly the right size. Easier, but not foolproof. I’m a better fool than they expected.
For some reason, I could not get the size quite right. When I printed it out, the height was correct but the width was slightly too narrow. The easiest solution was to save a copy of the whole layered image as a new PNG bitmap image, and then play around with scaling that image. When I widened it by about 4%, it came out perfect. A little extra work, but good results. Of course, if only I had those 12000 soda cans, I could have skipped this part.
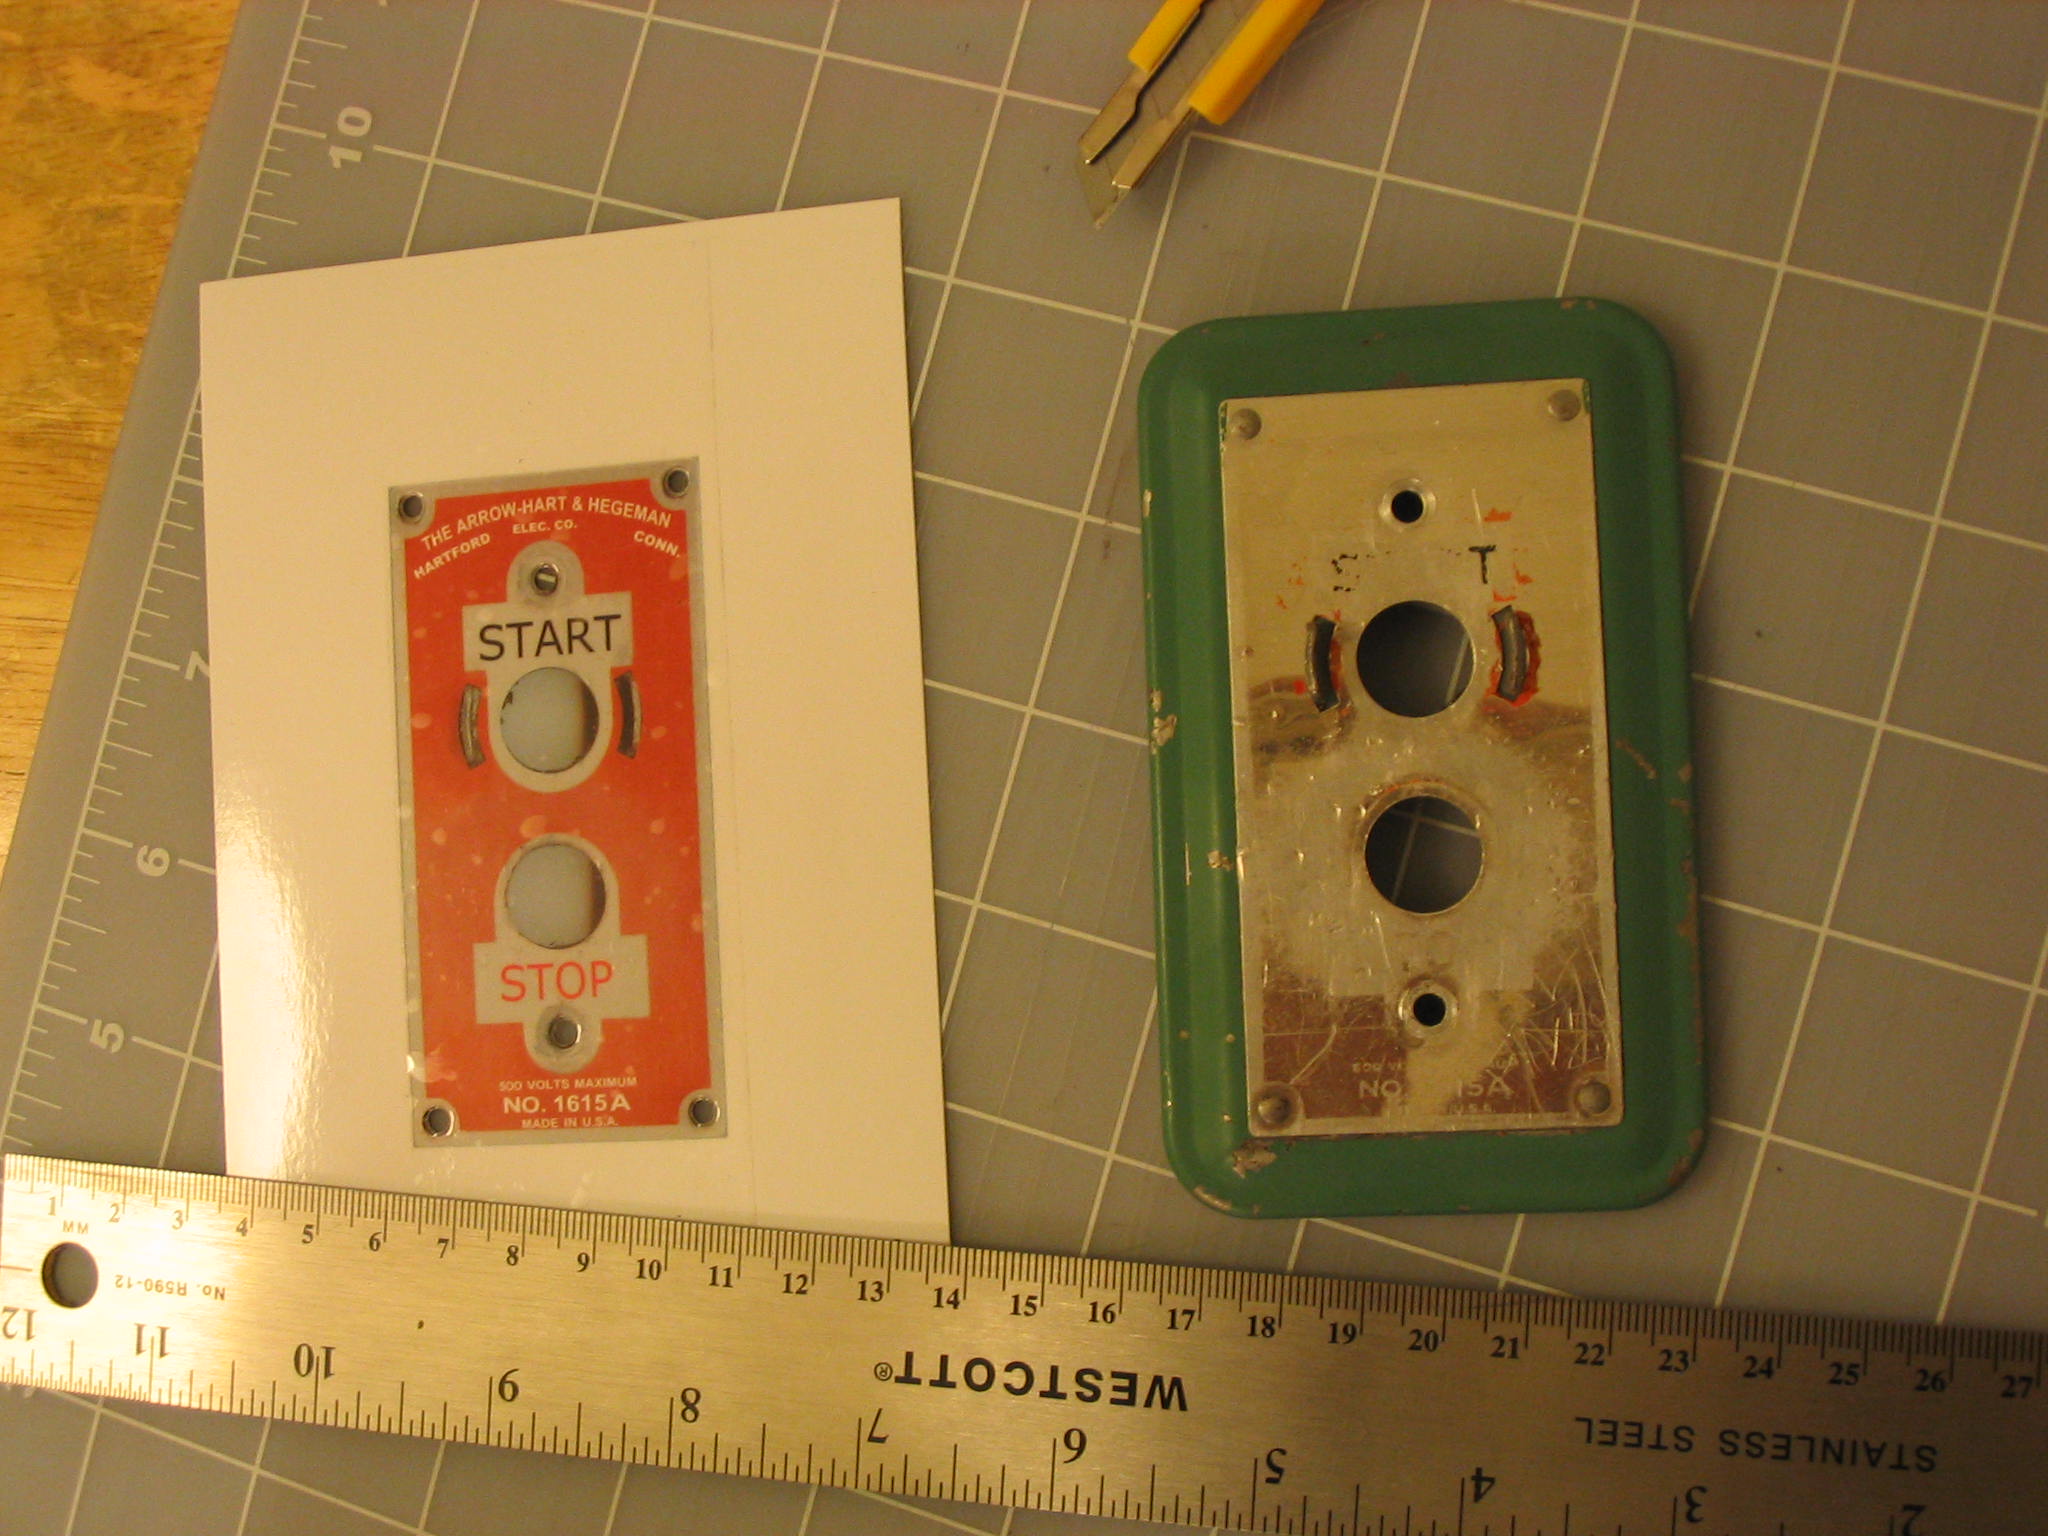
I printed the label on glossy 4-inch by 6-inch photo paper on an inkjet printer. Since digital cameras and photo printing have become so popular, it is quite easy and inexpensive to get excellent prints. No more waiting like Snow White (“Some day, my prints will come….” Ouch.)
Cut out the new label
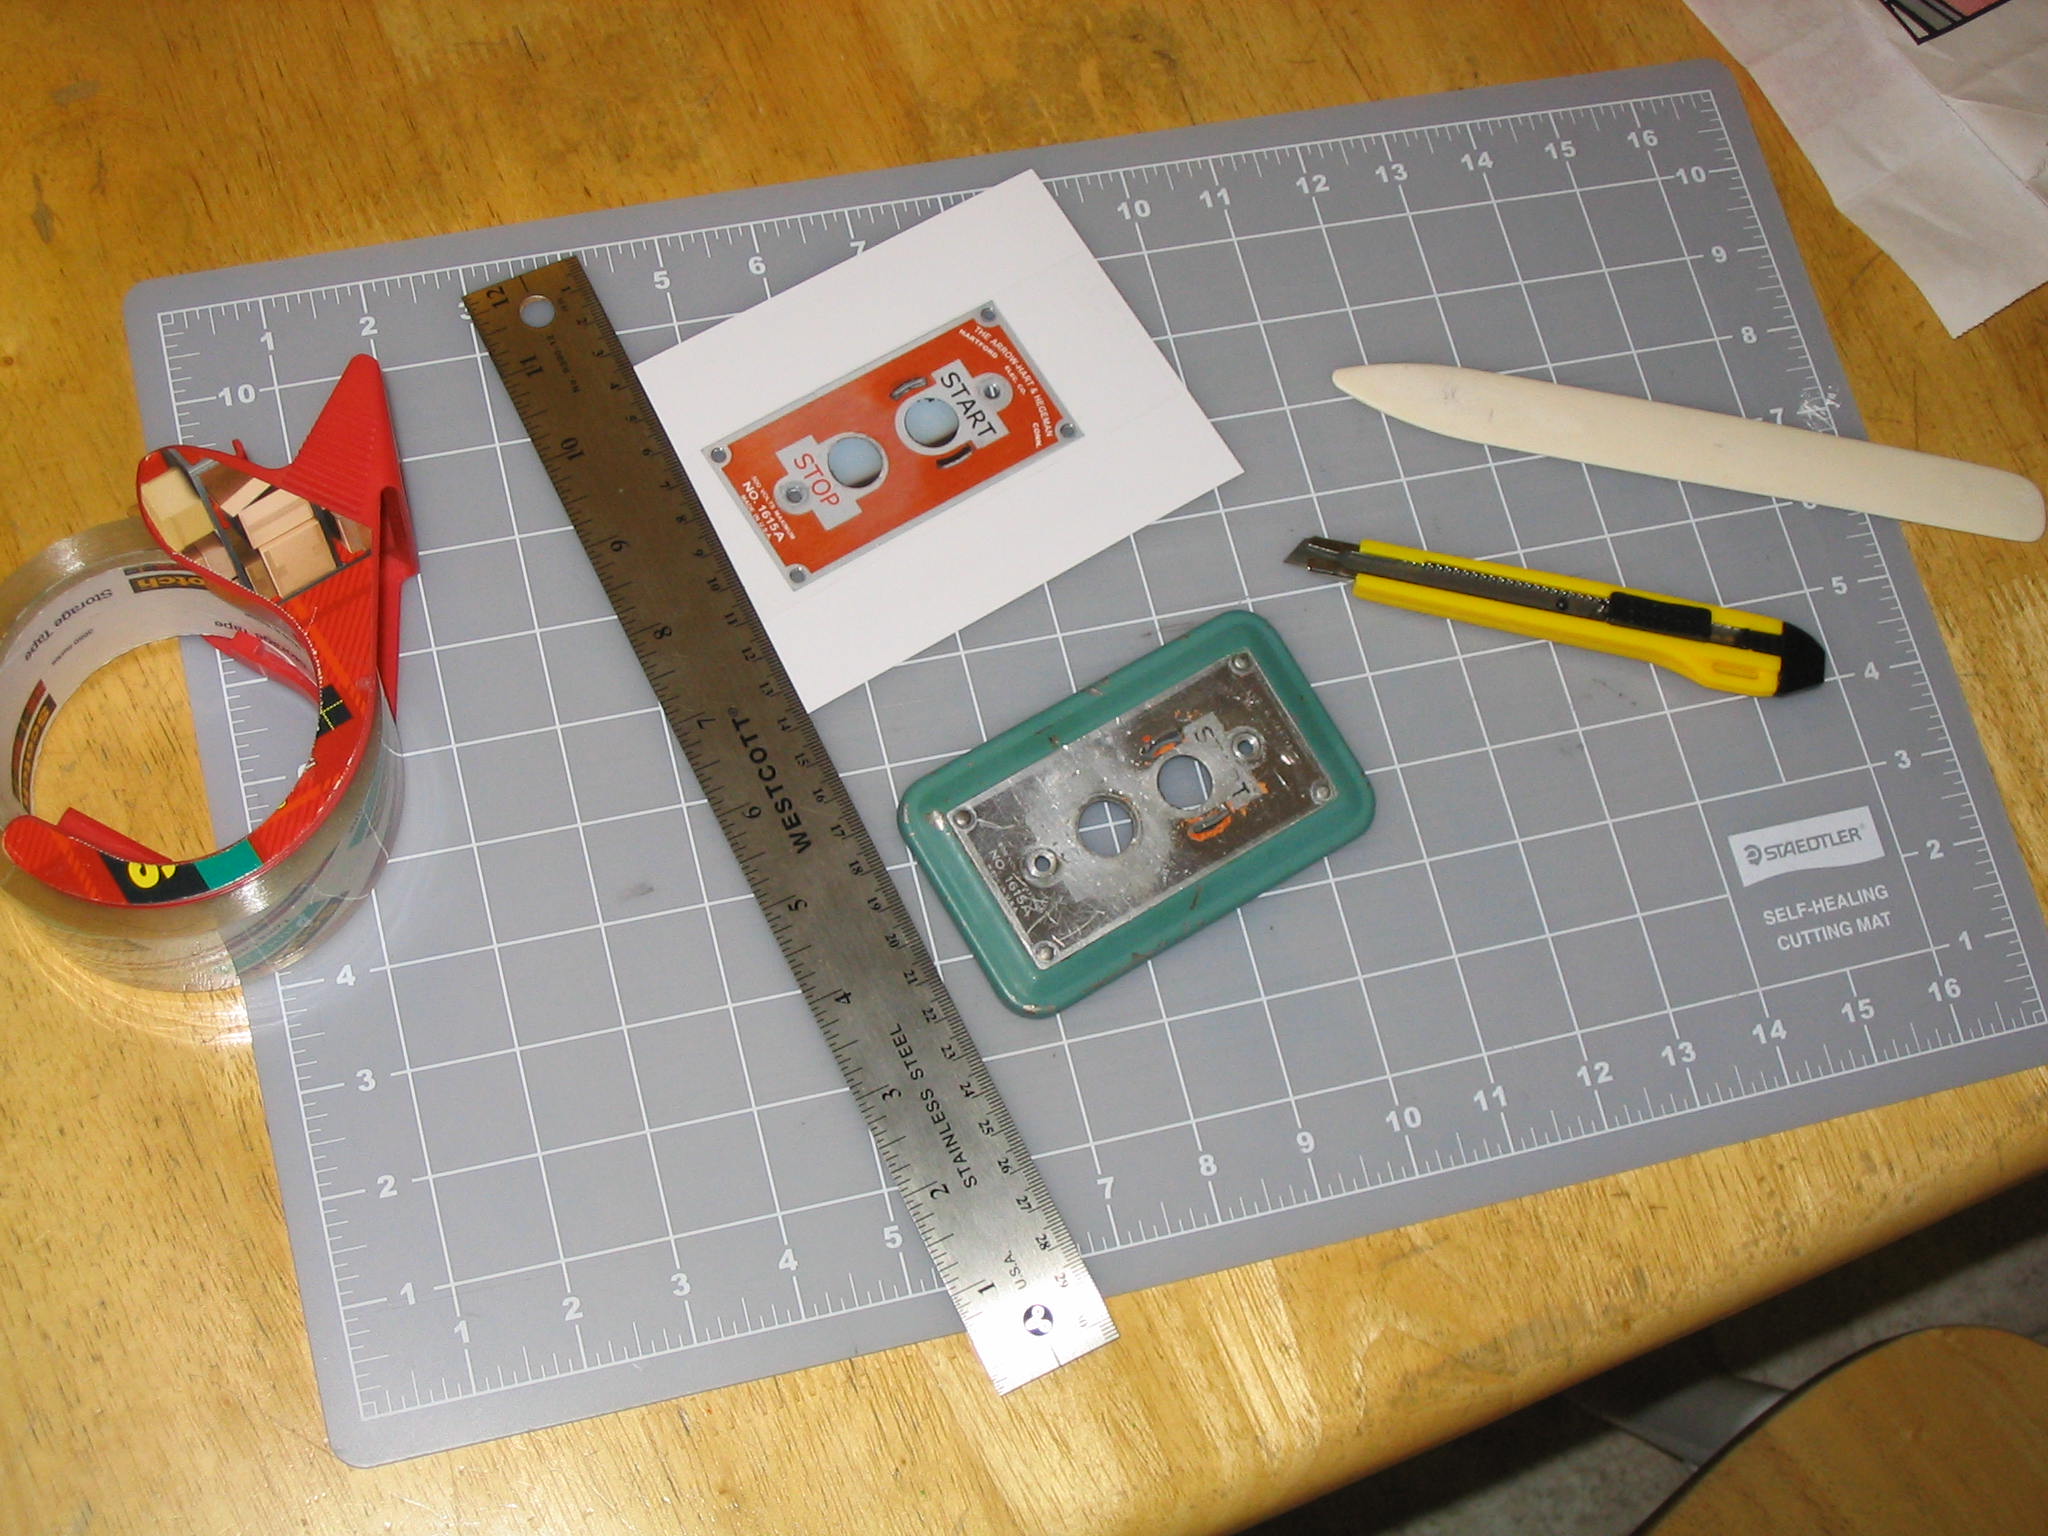
This is the easy part. Once it was printed at the right size, I simply cut the margins off the label and cut out the button holes. You certainly can use scissors, but I used a sharp utility knife and a straightedge for nice clean lines. On the straight parts, anyways. Not the circles.
There were several holes to cut for this label: the main holes for the start and stop buttons, the slots for the start button guard prongs, and the two small holes for the mounting screws. I did the big ones with the knife and did the screw holes with a punch, the kind that is a sharp-ended tube which you smack with a hammer. Ouch, not again! I said smack the punch, not my thumb!
Place over original label
If you have lived through the previous part, now you are ready to put the label in place. Finally.
My preferred method is just to tape it down with clear packing tape. It protects the surface of the print from getting smudged, and can be peeled off if needed. Pull out a length of packing tape longer than you need, and place the middle of it over the middle of the label. Press it down and smooth it out, starting in the middle and smoothing outward toward the edges. Tiny bubbles are great for Hawaiian music, but not for your label. Then place the label and tape onto the surface where it goes. Cut the excess tape off, smooth it down, and step back and admire your work.
In this case, since this label was part of a switch plate, I taped the label to the plate and then screwed the plate to the machine, so that the plate screws also held the label on. Be careful when tightening the screws; if you overdo it you will twist up the packing tape or maybe even the label. If you do that, all is lost! You can’t just go back and reprint another one! Oh wait, yes you can. Nevermind. These aren’t the droids you’re looking for. Move along.
This method worked so well for my drill press that I have been using it for other projects also, such as my grinder. I hope you give it a try, and have fun.