Many woodworkers have dust collection systems, which use suction and large pipes and hoses to collect sawdust and other particles from power tools. For the hobbyist, these systems can be affordable, below $1000 for a decent system. Naturally, I therefore wondered what I could accomplish with my old shop vacuum, some junk from the garbage can, and about 20 bucks.
Woodshop Dust Control Amazon IndieBound |
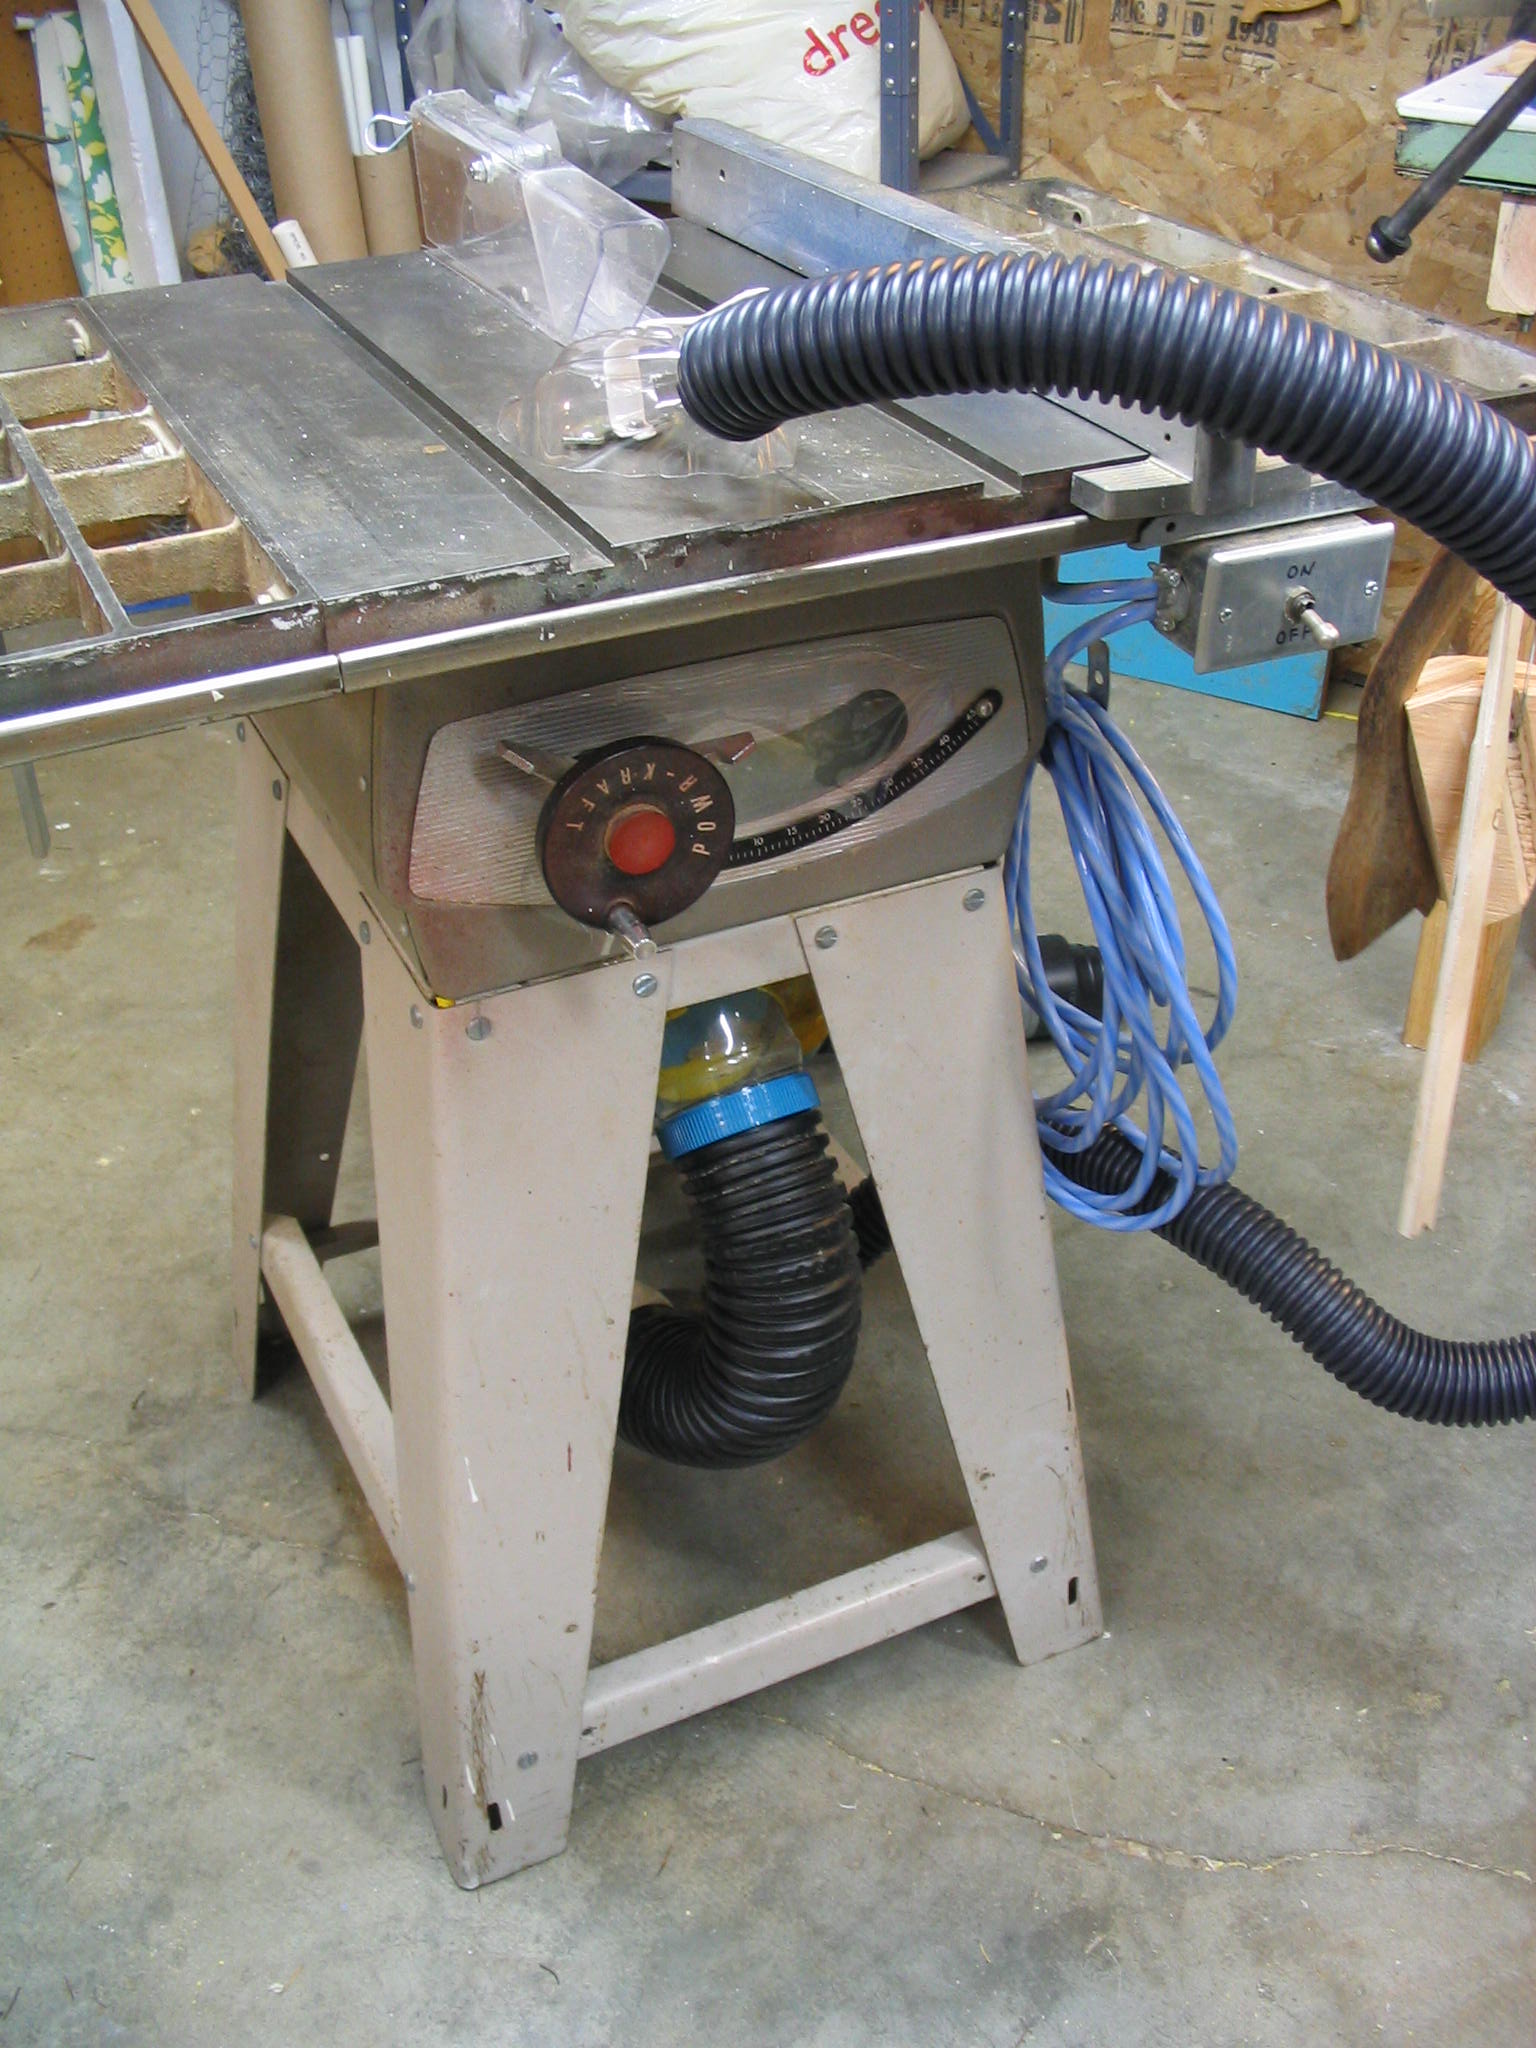
The basic premise is to collect sawdust, trimmings, and other particles as close to the source of production as possible. Many power tools come with dust collection ports built in to them these days. My 1950s PowrKraft table saw did not, so I set out to create a dust collector for it.
The Tablesaw
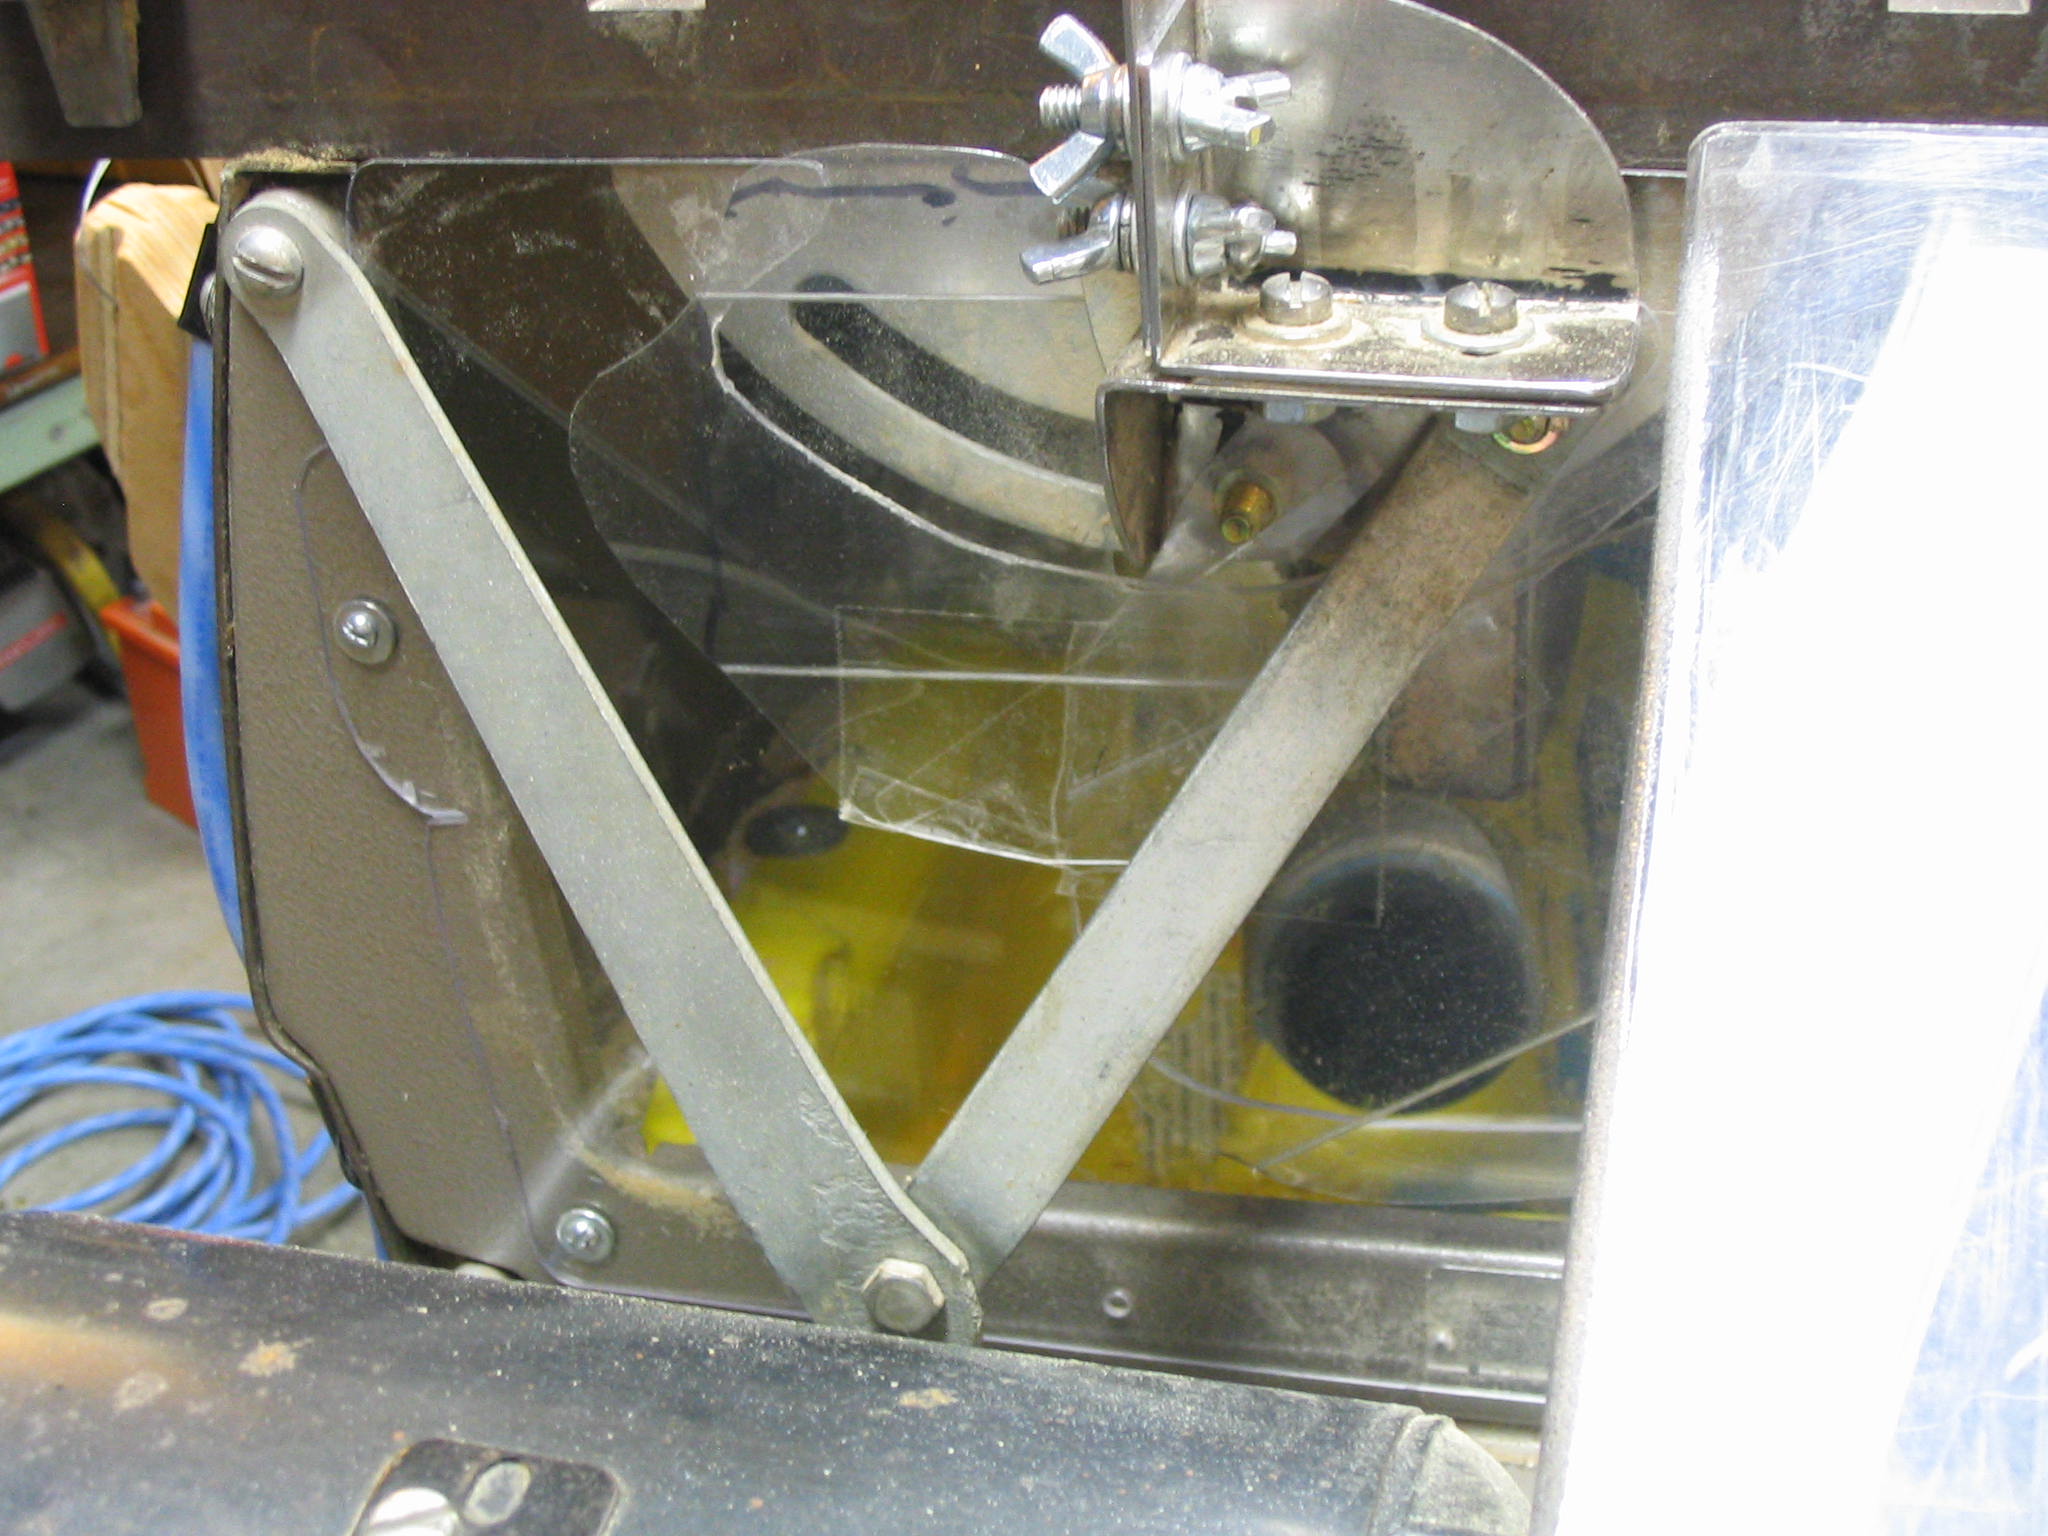
My tablesaw was not designed for vacuum collection of sawdust, so it has quite a few openings which needed to be covered. The underside of the saw is open, with a sheet-metal rim around the inside. This made a good place to attach a collection hood. I fabricated one from a rectangular plastic bucket made from HDPE (high-density polyethylene) plastic, the most common type used in common buckets and consumer packaging.
Since the bucket had a hinged snap-on lid, I turned the bucket upside down and used the lid as the bottom of the dust hood. The lid then became an access door to the underside of the saw. I used the heat gun to bend the sides of the bucket and weld on extra corner tabs, creating flanges to sit on the rim of the saw opening.
Tubing
For the dust-collection tubing, I took the cheap route. I used 3-inch water drainage tubing and 1.5-inch sump pump tubing, both from the local home improvement warehouse store.
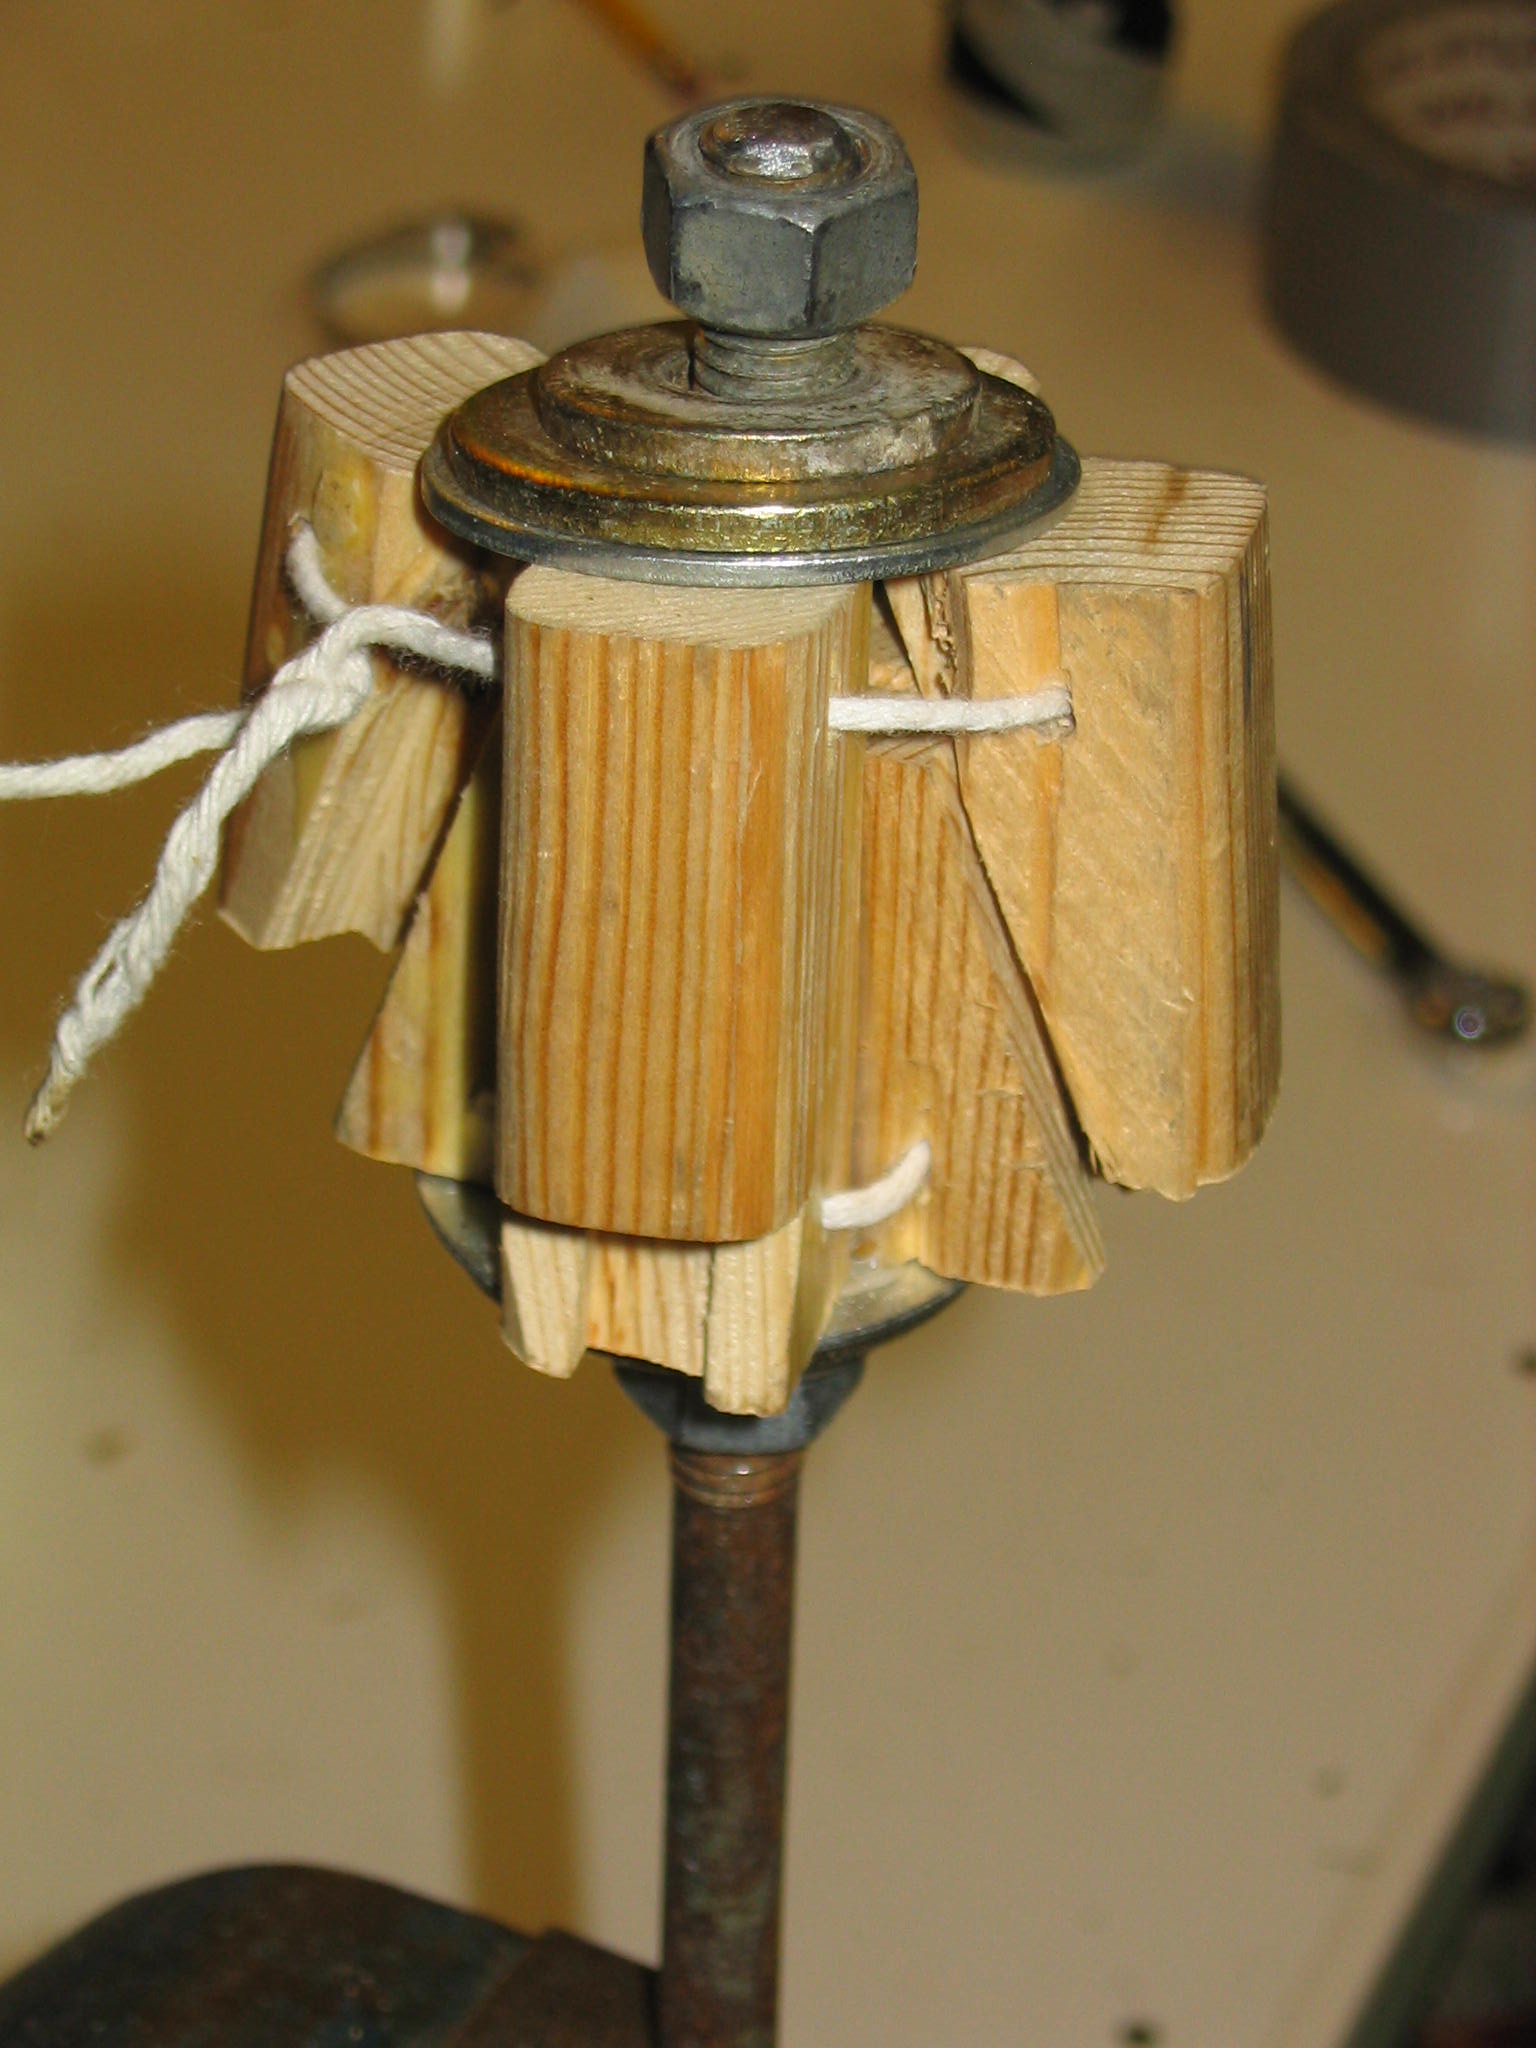
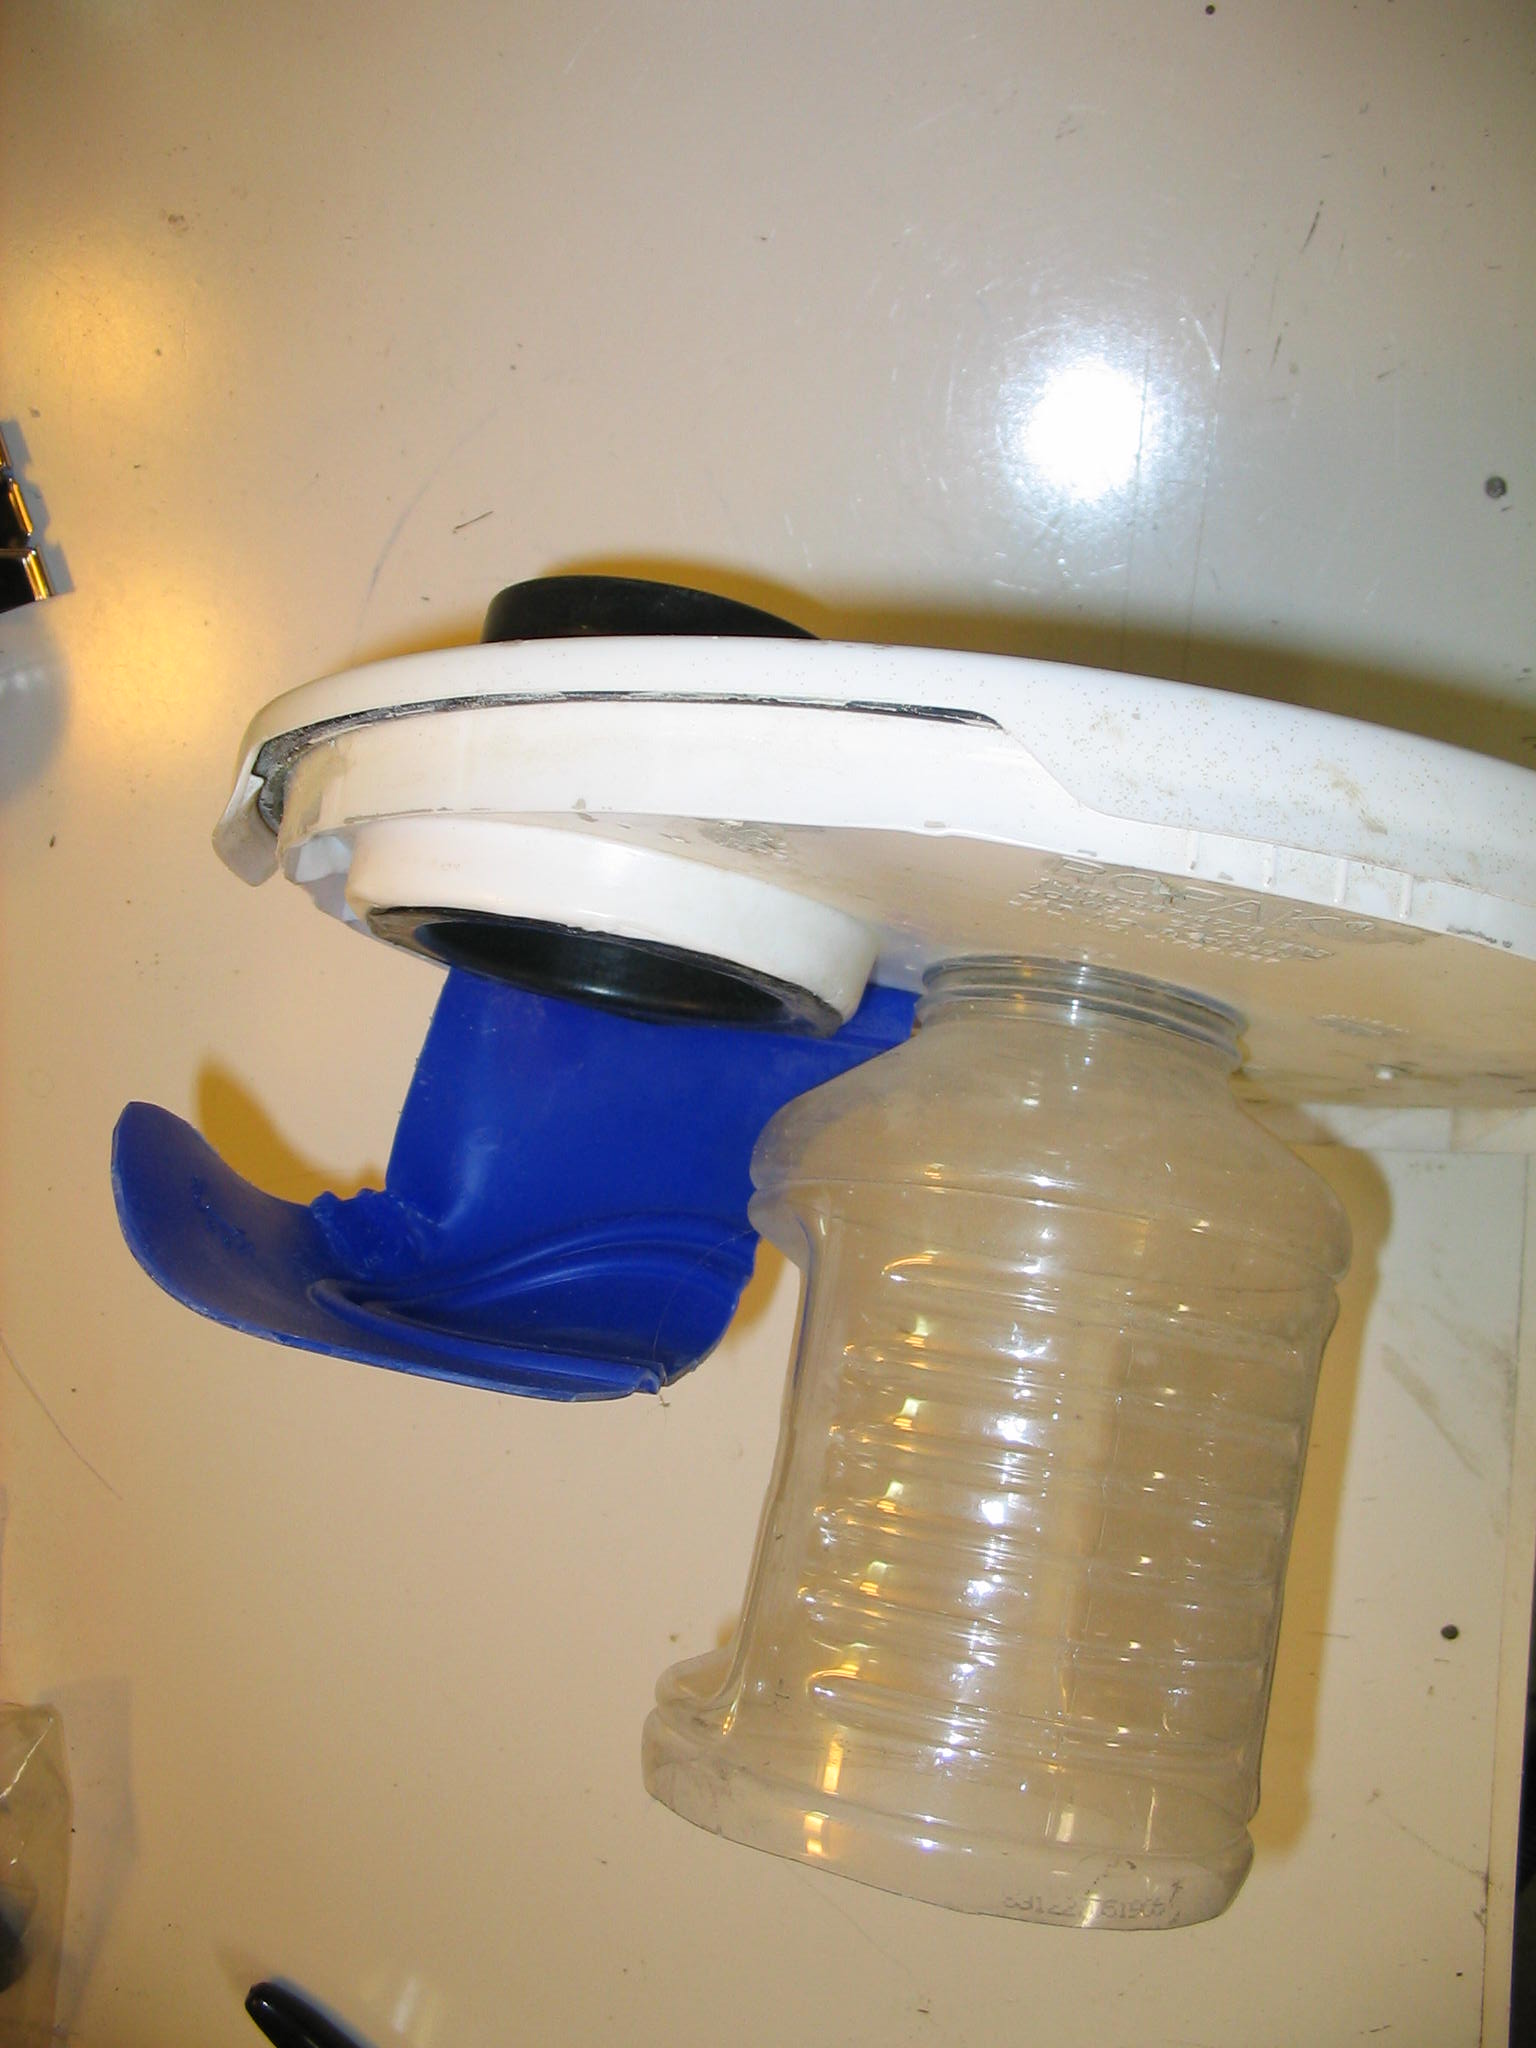
Neither one of the tubing sizes I used matches the hose of my shop vac at 2.5 inches, so I needed some adaptors. Several different plastic jars from peanut butter and applesauce turned out to be very close to the correct size. The opening on the applesauce jar was just a little too small, so I made a spreader jig with some wooden wedges between some nuts and washers. When one of the nuts is tightened, the washers squeeze the wedges, forcing them outward. I wrapped the wooden wedges in a piece of sheet metal from a tin vegetable can, and placed the mouth of the jar over it. By softening the jar mouth with the heat gun, and tightening the nut, I was able to expand the jar to fit the vacuum hose just right. I attached the 3-inch tubing to a hole I cut in the bottom of the jar on the other end, making a nice hose adaptor.
What’s That Noise?!
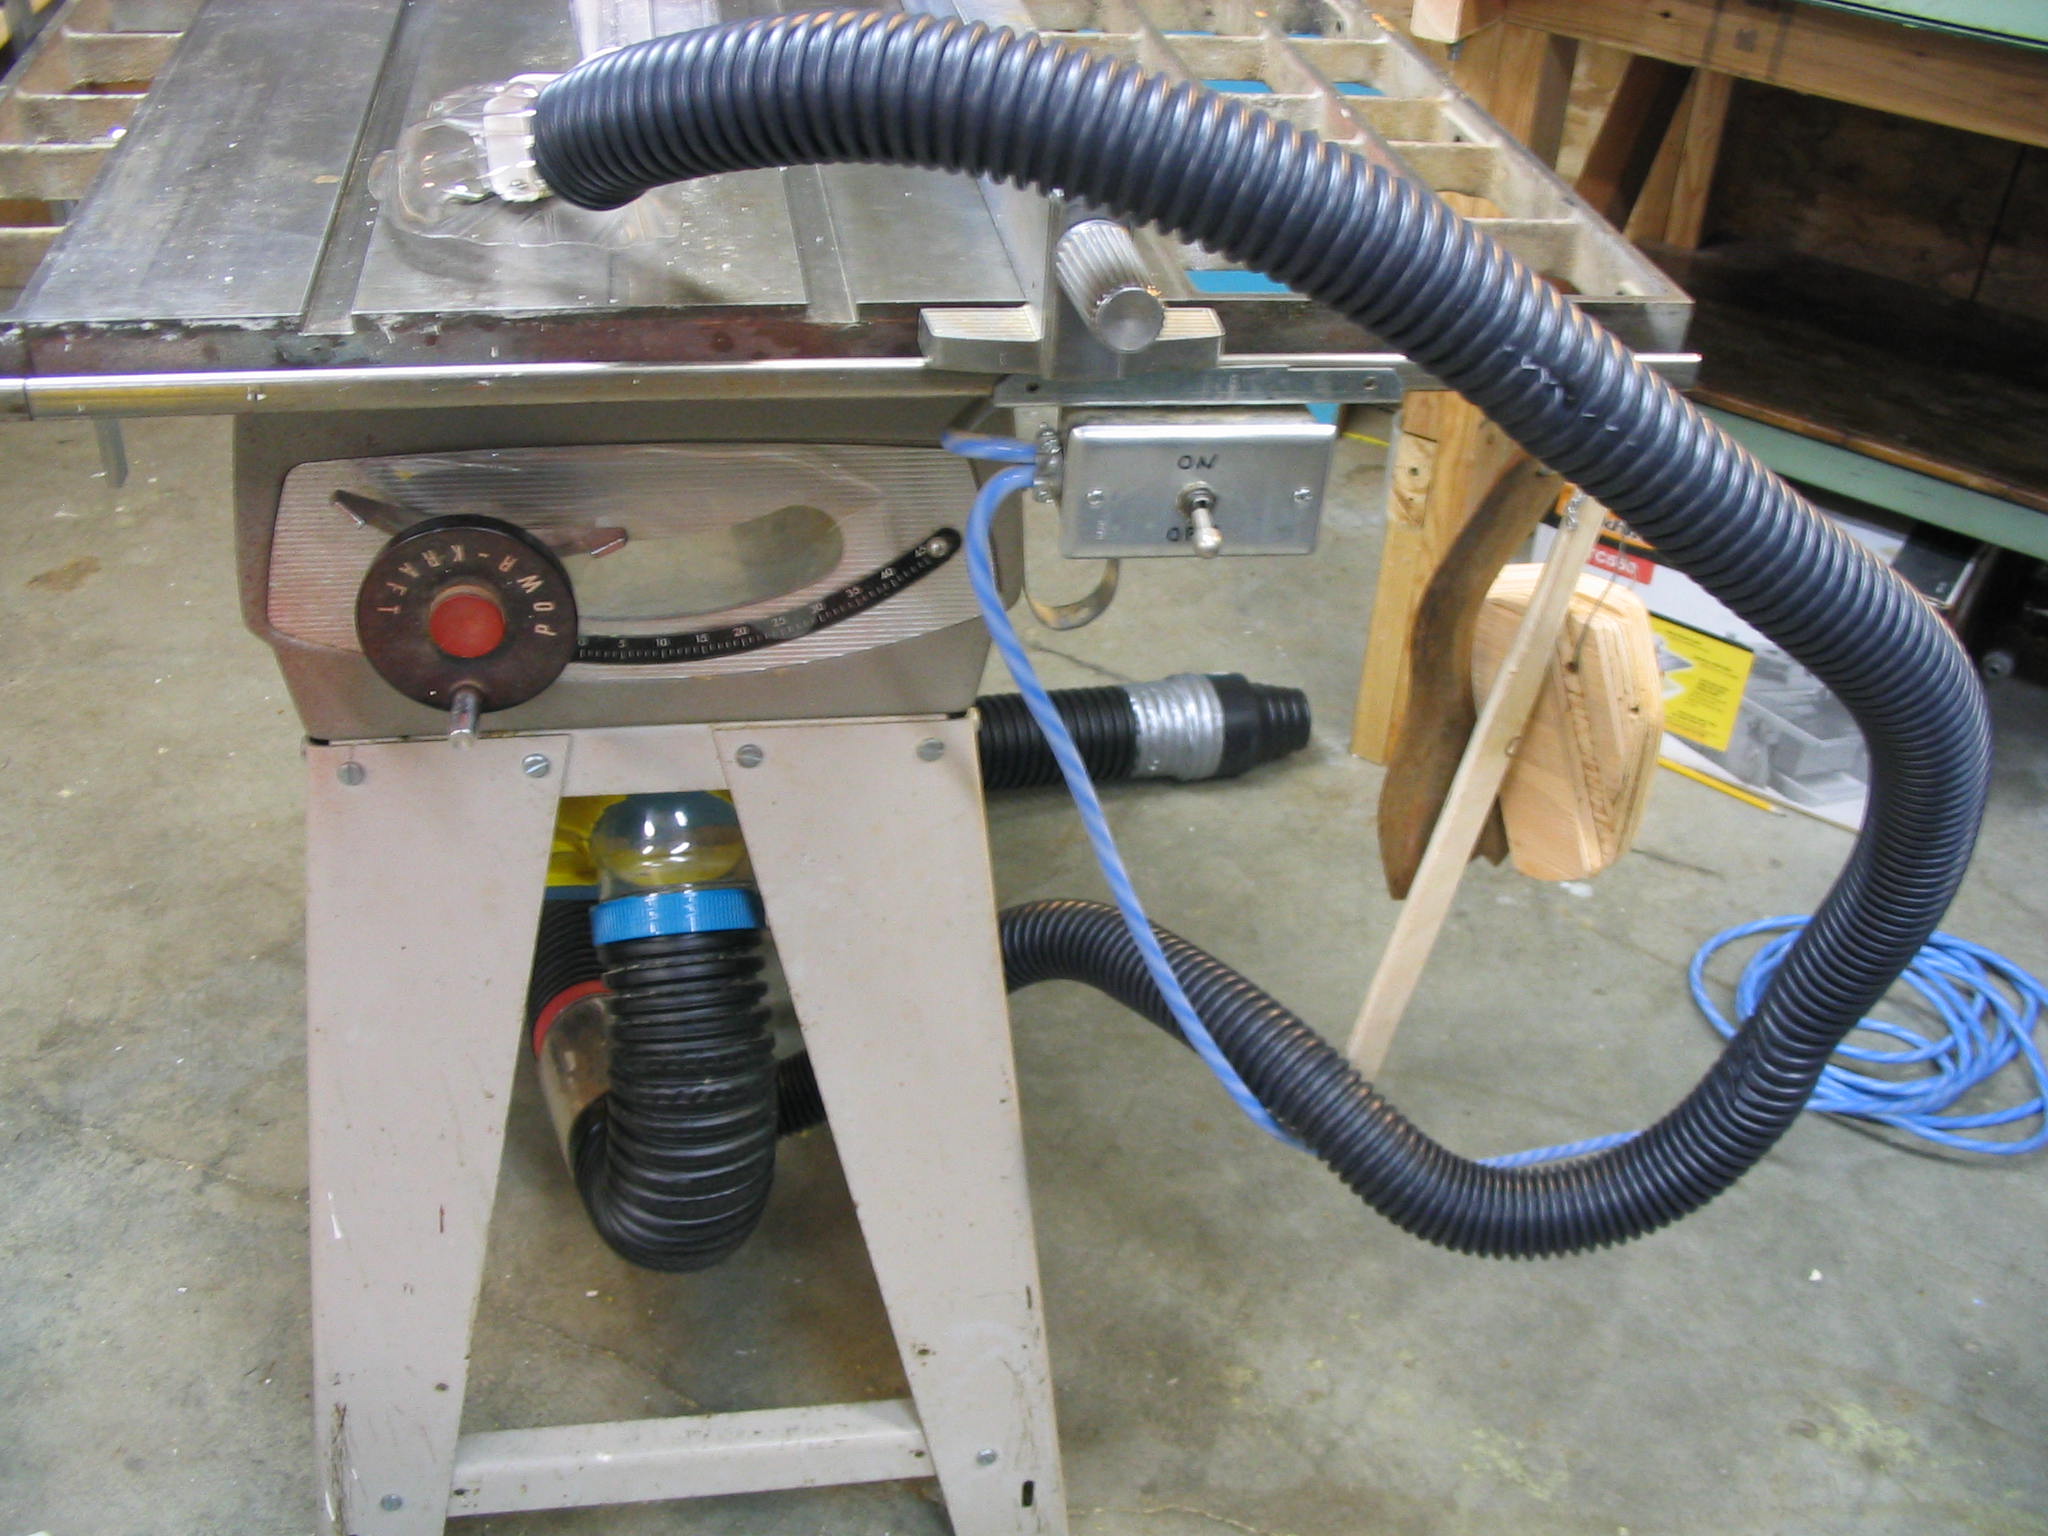
I put two dust collection points into the tablesaw collector: the large main 3-inch hose in the collector hood, and a second 1.5-inch hose to pick up stray sawdust from the top of the table. I attached them together with a Y-connection made from a plastic peanut butter jar. The 1.5-inch hose came out of the side of the jar, but I heated and warped the jar to make a Y connector for better airflow through the smaller hose.
The first time I turned on the shop vacuum with this setup, I got a big surprise. In addition to the usual loud shop vac whine, I got an additional loud piercing whistle noise from the 1.5-inch hose. Some Internet research told me this was a “standing wave” harmonic vibration, caused by the uniform ridges in the hose. The factory did an accurate job of creating all of the ridges in the hose the same. When air passes through the hose, the ridges cause the air to vibrate at the same frequency all along the hose, causing a single tone to come out. It’s one big whistle.
Ironically, my web search efforts revealed much about how to produce such a noise, but not how to surpress it. However, some thought and experimentation led to a simple answer: If the uniform ridges make the whistling noise, making them non-uniform should eliminate it. I heated the hose with the heat gun, and stretched it by different amounts at different points along the hose. It didn’t take much stretching to disrupt the harmonic effect, eliminating the shriek and producing quieter air flow.
Particle Separator
I use the tablesaw to cut both wood and plastic at different times. I want to keep the two separated so the wood sawdust can be used for composting, without being contaminated by plastic pieces.
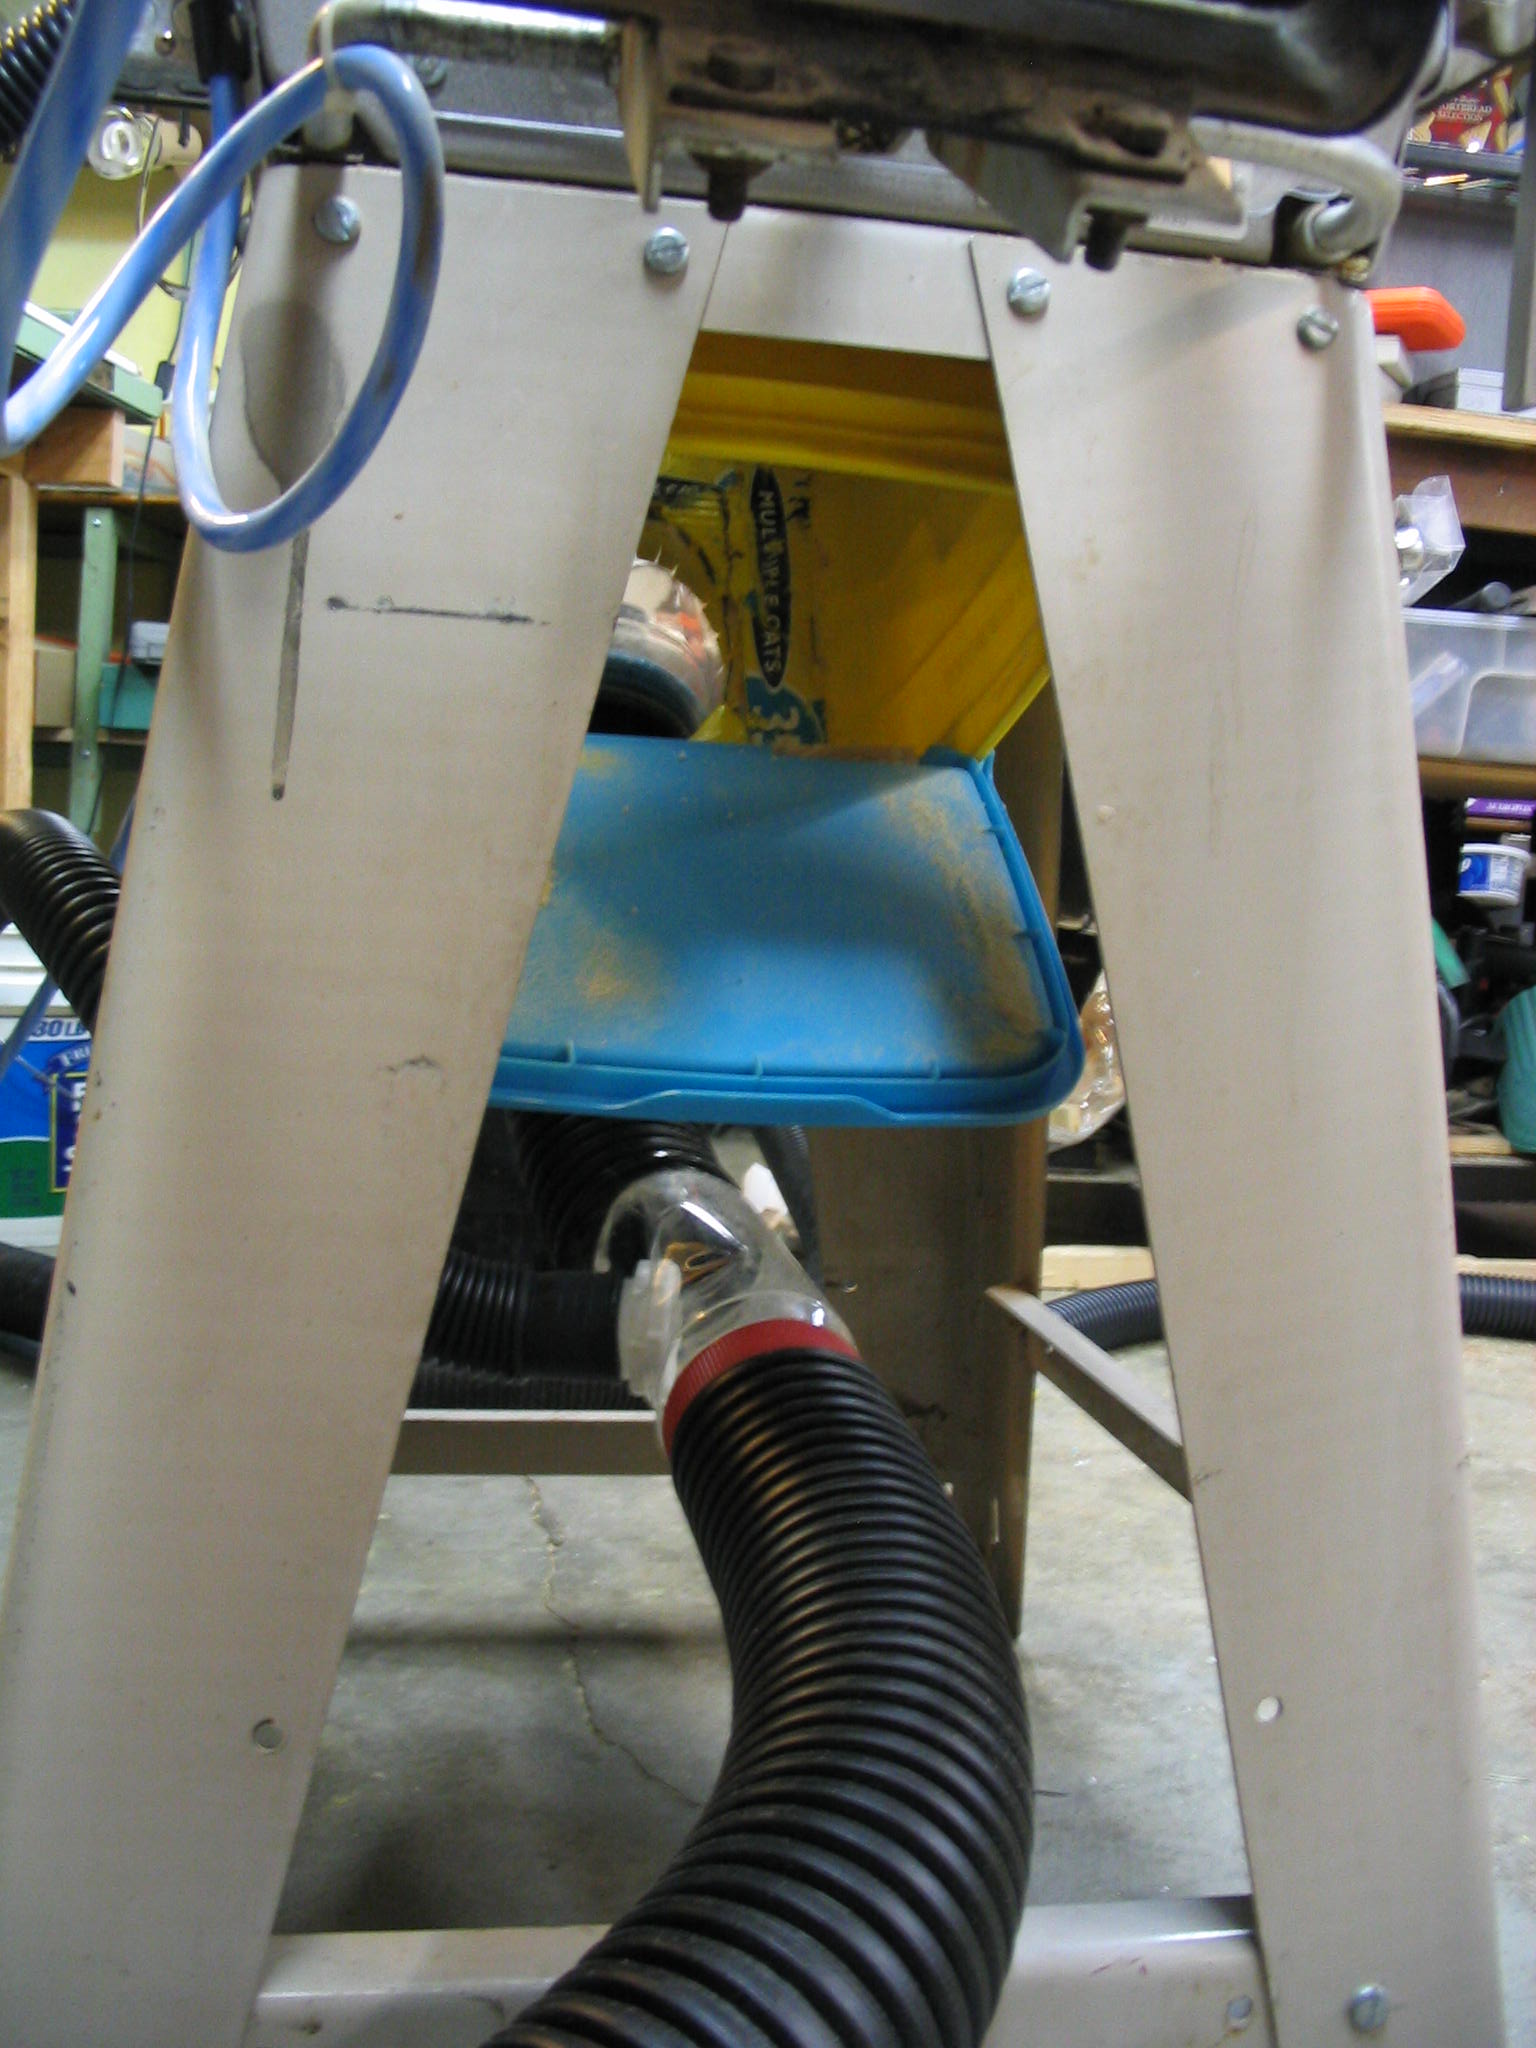
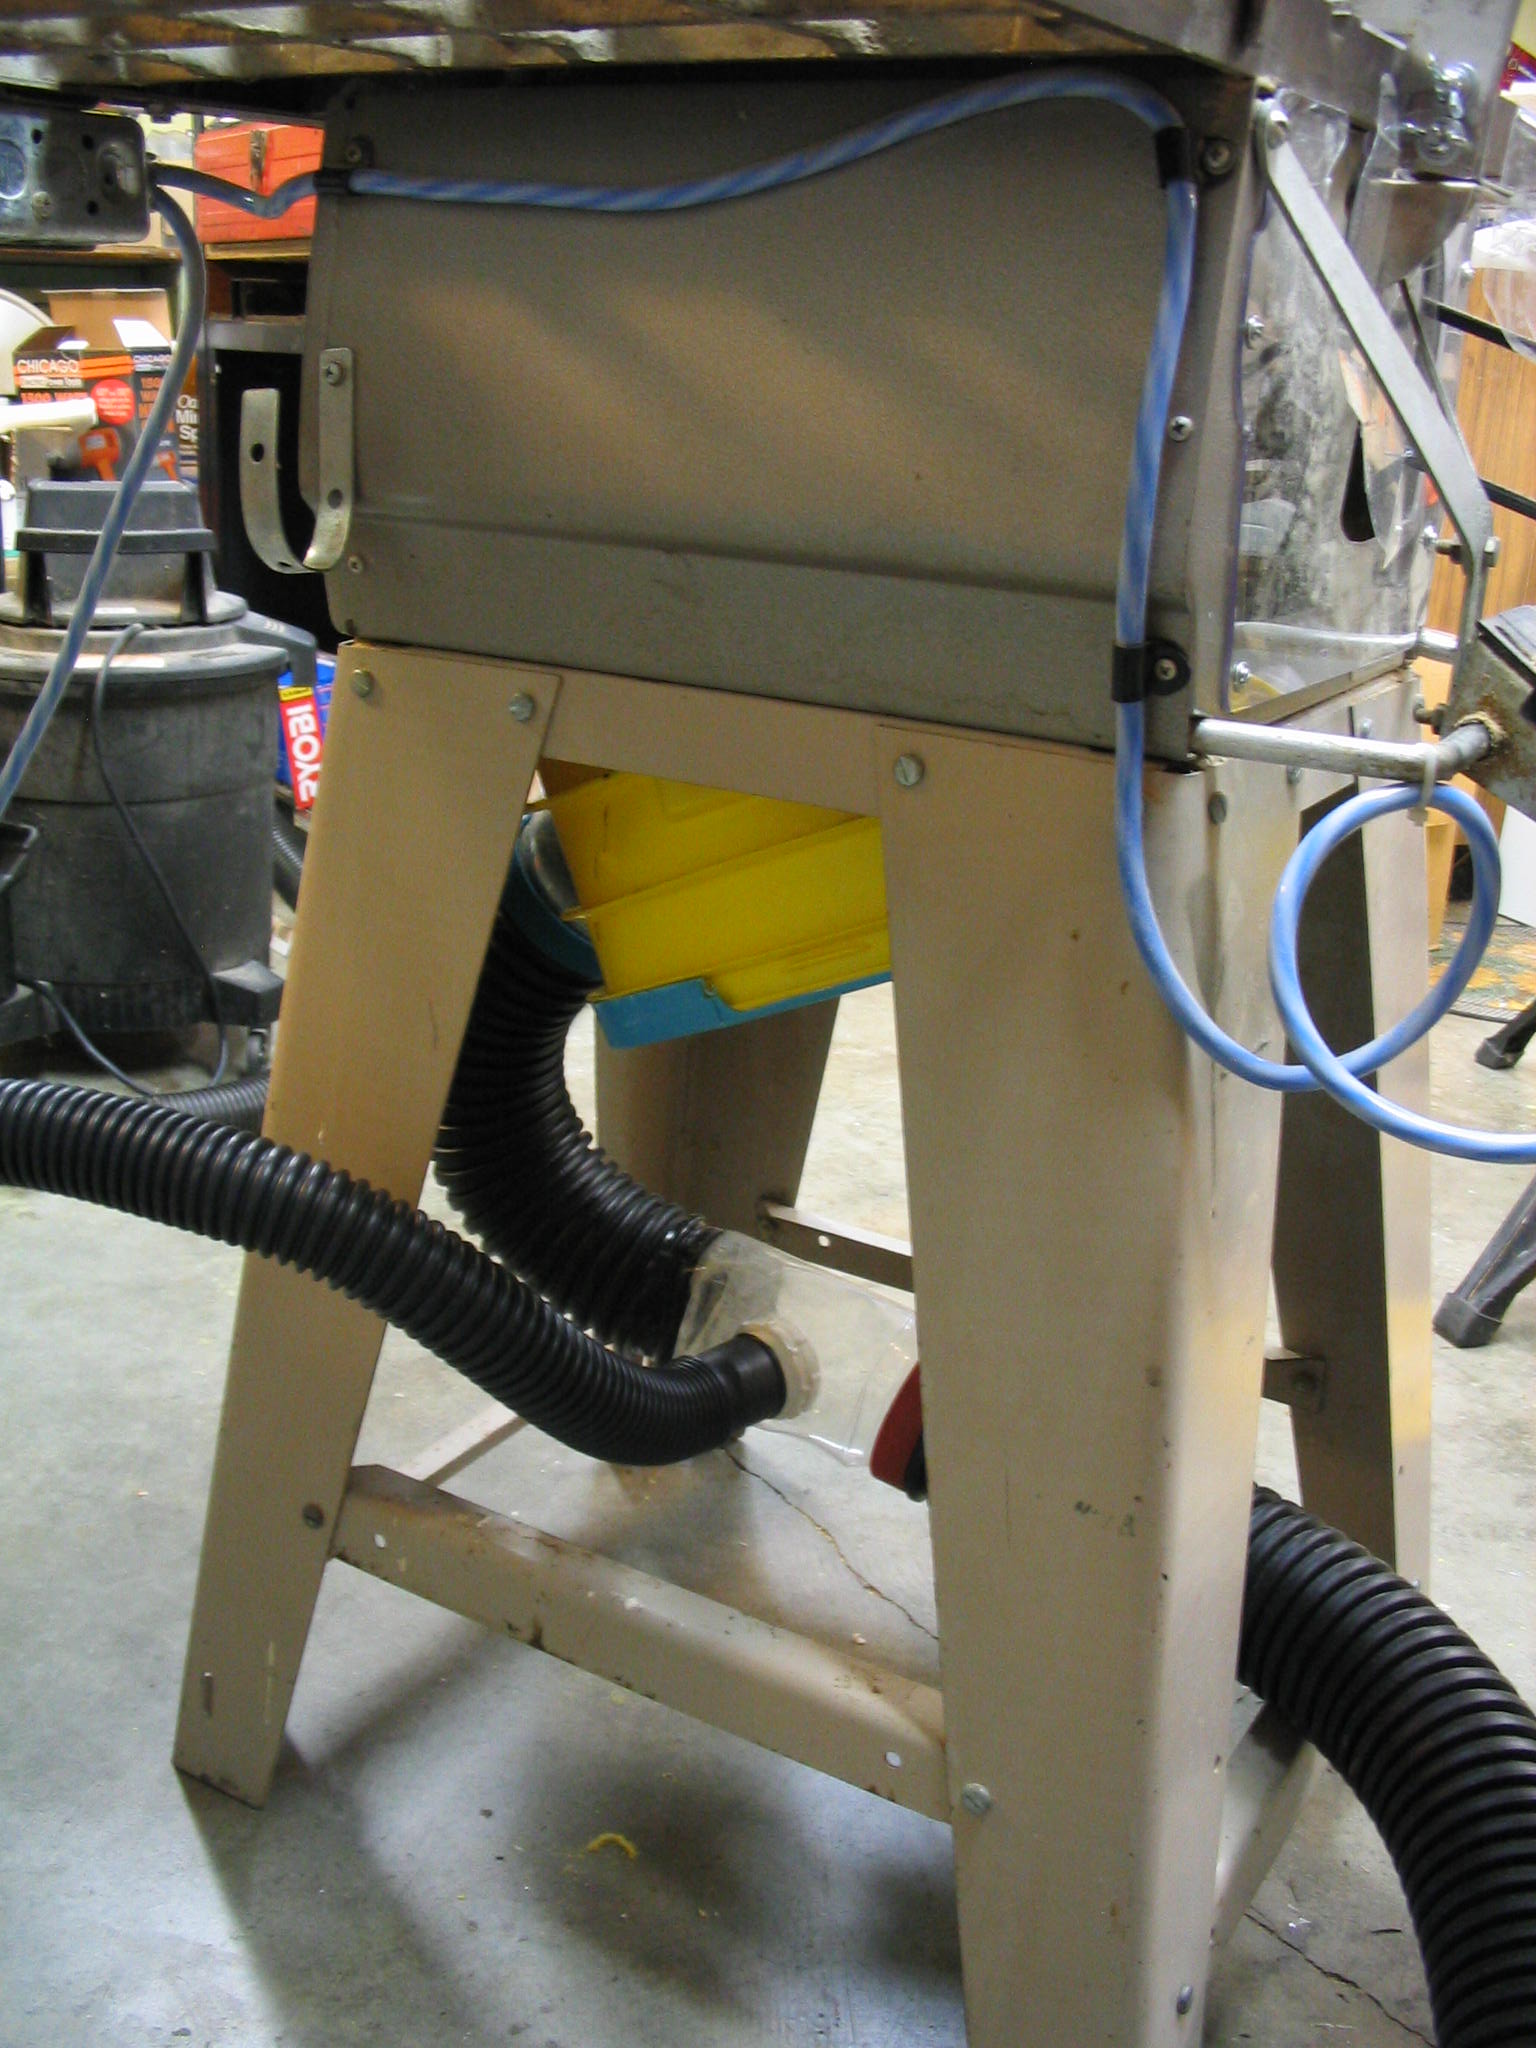
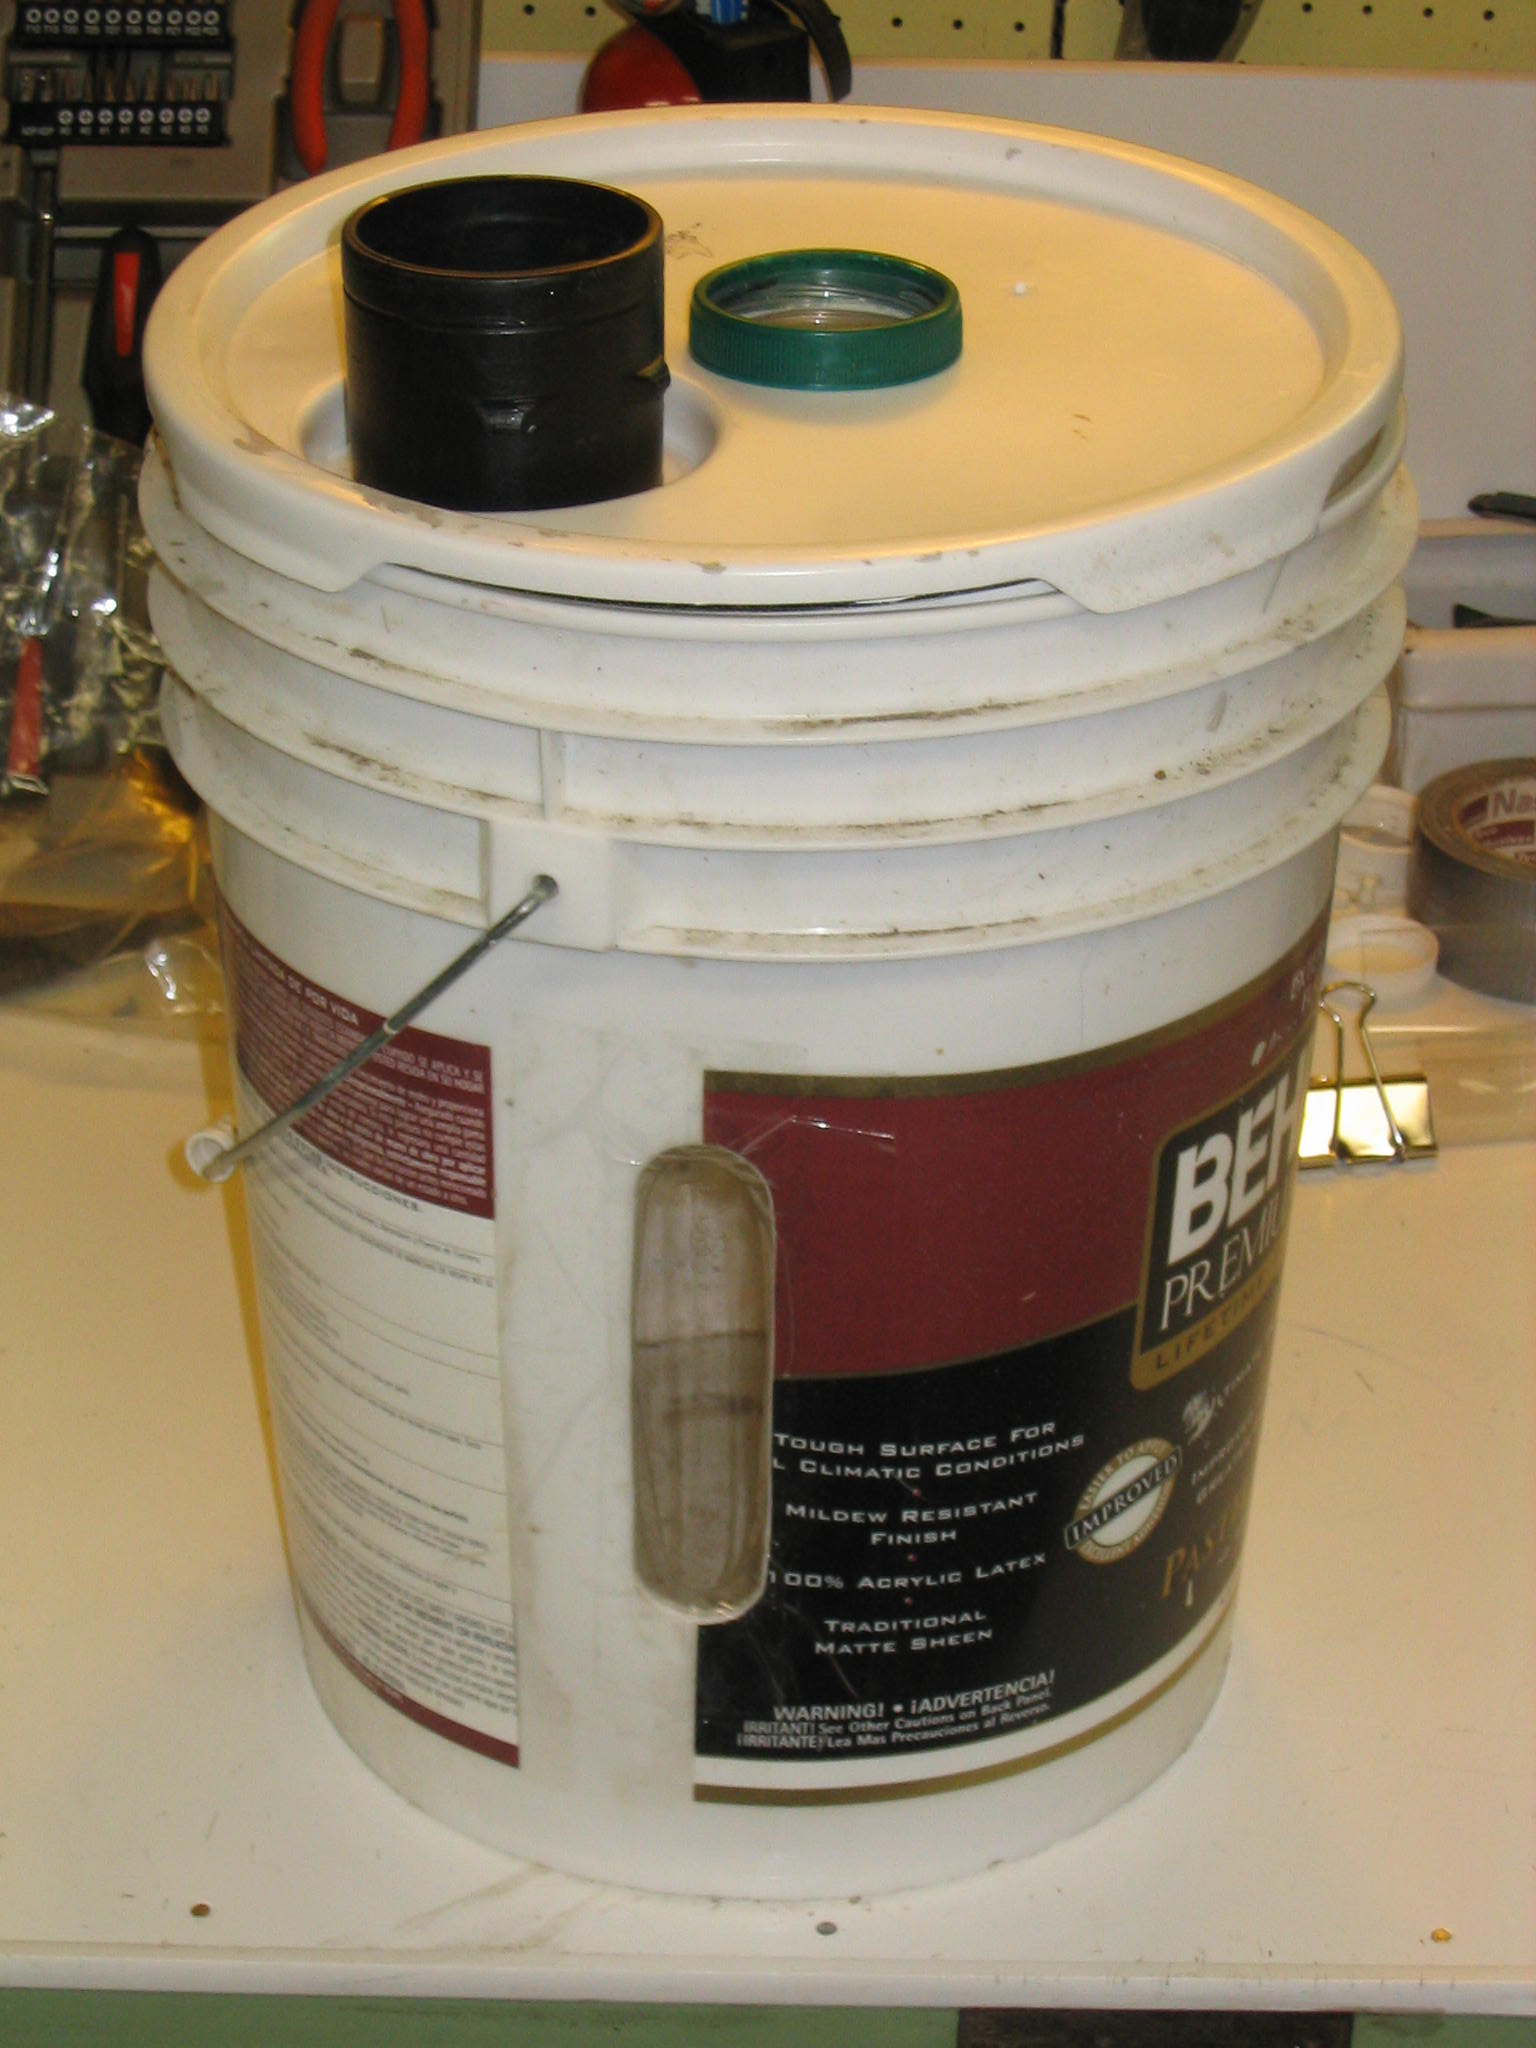
I made a pre-separator to collect the wood sawdust using a 5-gallon paint bucket. The separator bucket sits between the tablesaw and the shop vac. Scraps and larger sawdust particles settle to the bottom of the bucket, while the air and fine dust pass through to the vacuum. It is patterened after professional cyclone separators, where the incoming airflow is directed towards the side of the cylinder and the air exit is in the center. As the particles are blown towards the sides, they lose velocity and swirl down to the bottom.
There are just a few parts to the separator. The vacuum port (air exit) has a tube going down the center of the cylinder, which I made from a clear plastic applesauce jar with a mouth sized to the 2.5-inch vacuum hose, screwed into the bucket lid . The intake port goes to a deflector which sends the air towards the inside wall of the bucket. The intake port is a snap-on connector for the drain tubing, and the deflector is a scrap of plastic. Since the tube connector, deflector, and bucket lid are all HDPE plastic, I welded them together with the heat gun. I also cut a window into the side of the bucket, to indicate how full it is.
Now when I cut wood, I plug the vacuum in to the separator, and my wood cuttings are collected in the bucket. If I want to cut plastic, I bypass the separator and suck the plastic scraps right into the shop vac.
Airborne dust filter
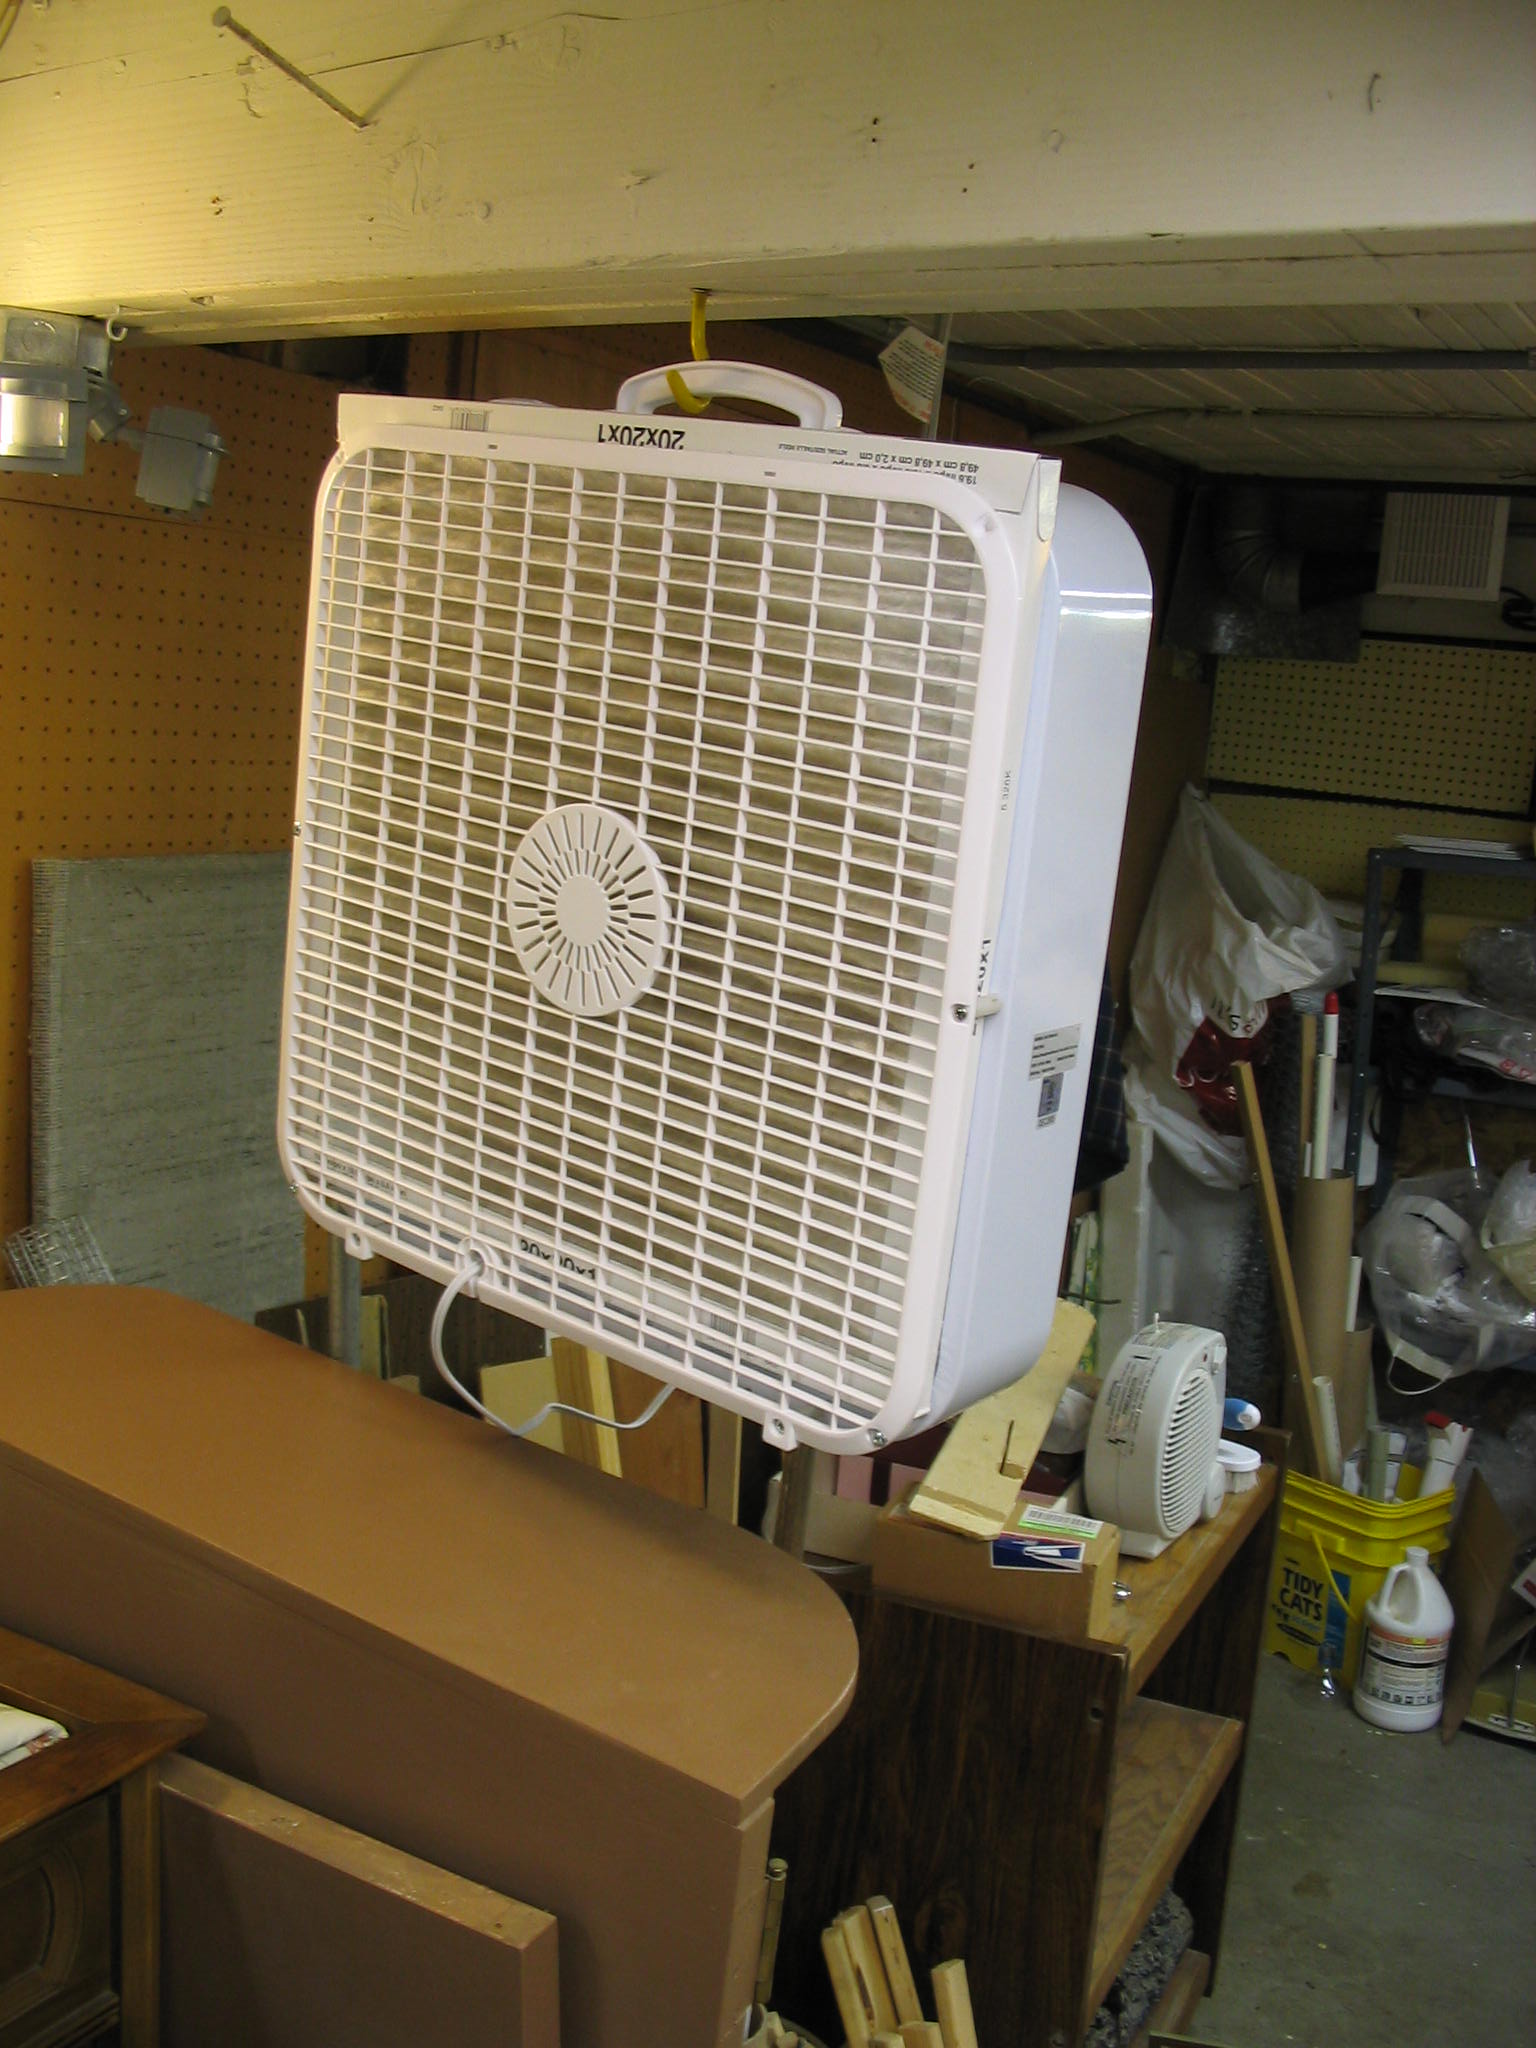
To reduce airborne free-floating dust, I employed a trick which I saw recently in a home improvement magazine. I took a normal household box fan, and attached a furnace filter onto the intake side of the fan. I took the plastic grill off the intake side of the fan and reattached it with spacers and longer screws, allowing me to simply slide the furnace filter into the slot. It works quite effectively, producing a nice brown circle on the filter in no time at all. This is good, showing dust that is not getting inhaled or settling on everything else.