I have an old laser printer which does not have a decent standby power-saving mode. I built a computer-controlled power switch for it, so the computer turns on the printer when there is a print job, then turns it off again later.
The printer is not near to the family computer, but in an out-of-the-way place in the basement. Because it doesn’t have a power-saver mode, it has been on a mechanical timer switch. Turn the knob, and the printer will stay on for 45 minutes. We had to go down and turn on the printer, go back up to the computer and print, then go down and get the printout from the printer. Good exercise, but annoying.
Existing solutions
I could have used off-the-shelf units from the X10 control system. This home automation system has been around for years and is well known and reliable. Since I don’t know much about electronics and have not built a computer-controlled real-world interface before, this would have been a good simple solution to the problem. But I have more fun breaking, I mean making things myself, so I built my own solution. Other people have done similar things, and I’m learning from their examples.
Design parameters
My laser printer is an Apple LaserWriter Pro 630. Its label says it can pull up to 5 amps of current. This would represent the highest load possible, most likely at power-on when the fuser is warming up. I want my switch to accommodate this plus some safety margin, so I’m using 7 amps as a minimum figure to be extra safe.
I send print jobs to the printer from my Linux server, using the CUPS print spooler system and the NetAtalk software. It sends the print jobs over Ethernet to the LaserWriter using the AppleTalk PAP protocol.
The software needs to turn on the power switch, wait until the printer is ready to respond, send the print job, and then turn off the power switch afterwards.
Serial port
There are many ways that a computer can interface to the outside world. Two common and popular choices on PC hardware are the RS232 serial port (“COM”) and the Centronics parallel port (“LPT”). I selected the serial port, since my server has two available and I’m not using them for anything else.
In reading up on serial ports, people caution that you should not try to draw too much current from the serial port or you could burn it out. A number of references said that you should not draw more than about 5 milliamps. This is a very small amount of electricity, and is not going to be enough to drive a good-size relay big enough to switch 7 amps. Therefore I will need something in between the RS232 signal and the 7A relay coil.
Electrically, the RS232 signal is interesting. The voltage can vary anywhere from around 4V to 20V. A binary one is a positive voltage, and a binary zero is a negative voltage.
If I knew more about electronics, I’d cook up a circuit with a voltage regulator and transistor and some other neat gizmos to drive a big relay. But I took the easy way out and just selected a solid-state relay in series with a diode. The diode makes sure the RS232 negative voltage for the binary zero is filtered out, so only a binary one will activate the solid-state relay. The SSR takes very little current, and operates from 3V to 24V input, which matches RS232 nicely. I bought the SSR from the local electronics store, and I pulled the diode out of a broken radio.
The solid-state relay, in turn, activates the mechanical relay with the high-current contacts. I used an SSR with 120VAC output, and a mechanical relay with a 120VAC coil, so I didn’t need any power source other than the RS232 signal and the 120VAC line power.
Software
To drive the switch, I need to turn on the DTR signal of the serial port when the printer should turn on, and turn off the DTR pin when the printer should turn off. I decided to activate the printer at the start of a print job, and deactivate it after a fixed period of time (30 minutes by default), if no new print jobs have shown up.
I found that the Linux serial port device drivers will control the DTR signal according to their own whims when a program opens or closes the port. Therefore I need a constantly-running background daemon to open the port, and then toggle the DTR signal as needed.
There are many ways to communicate with a background daemon. I chose the simple approach of a control file. When the file is created, the daemon turns on DTR. When the file is deleted, or the timestamp of the file is too old, the daemon turns off DTR. So when a print job needs to turn on the printer, a simple “touch” of the control file will turn it on.
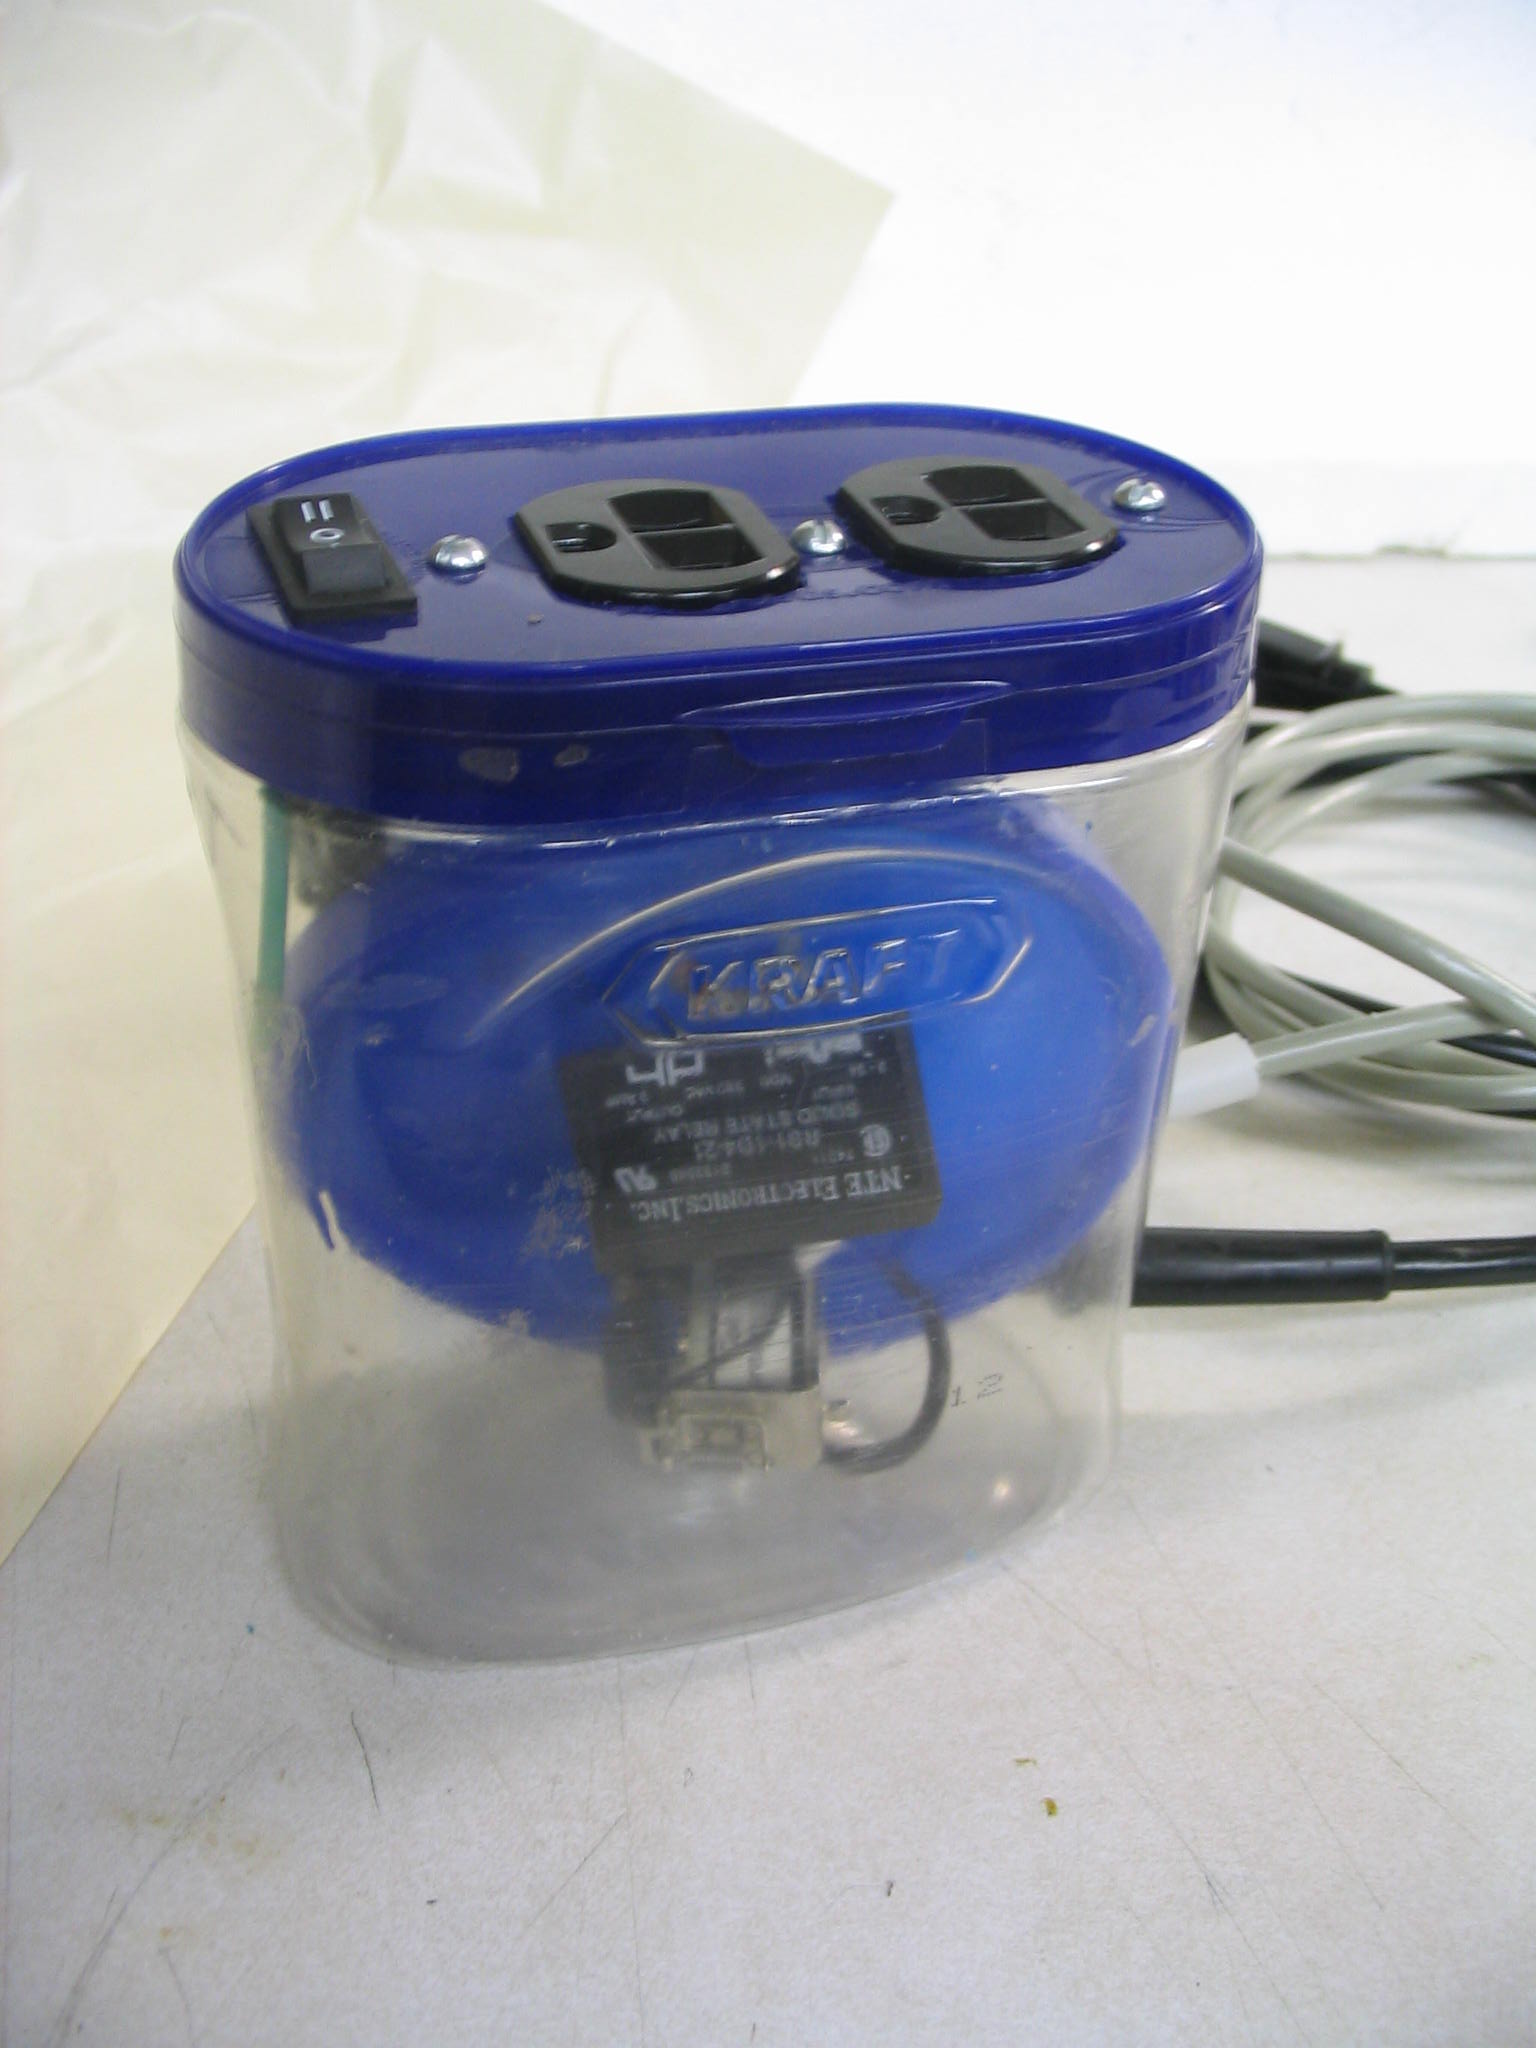
Construction
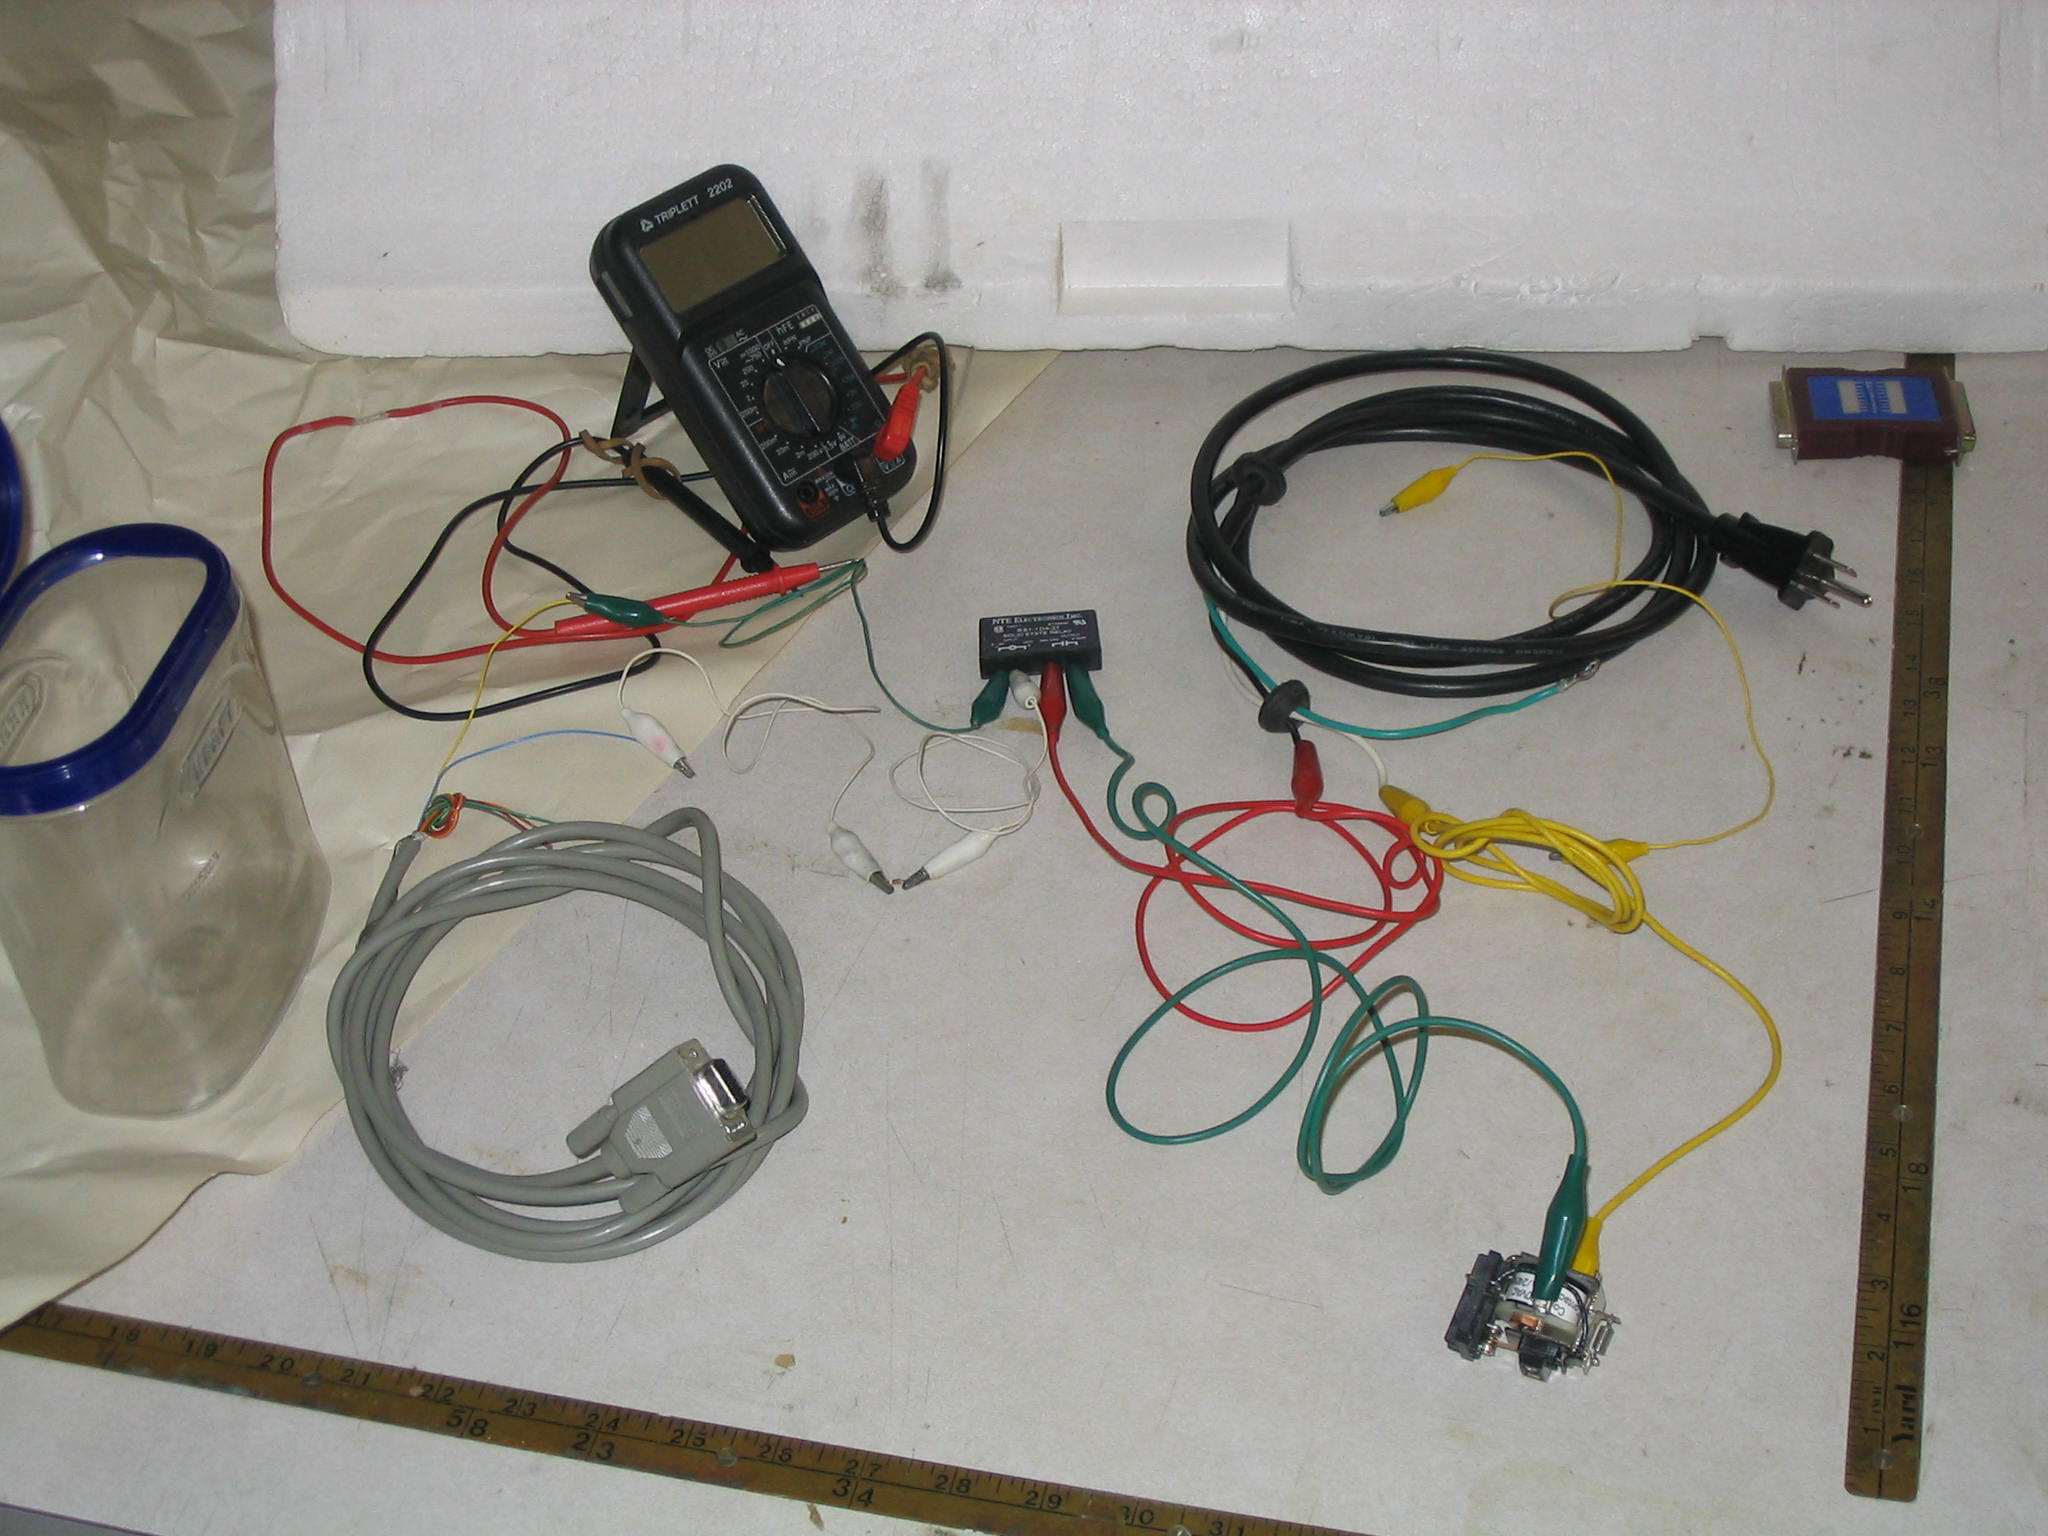
With the software working, I assembled the hardware. I first connected the components together with alligator clips to make sure it worked. The big relay clicked on and off to match the DTR signal, as I had hoped.
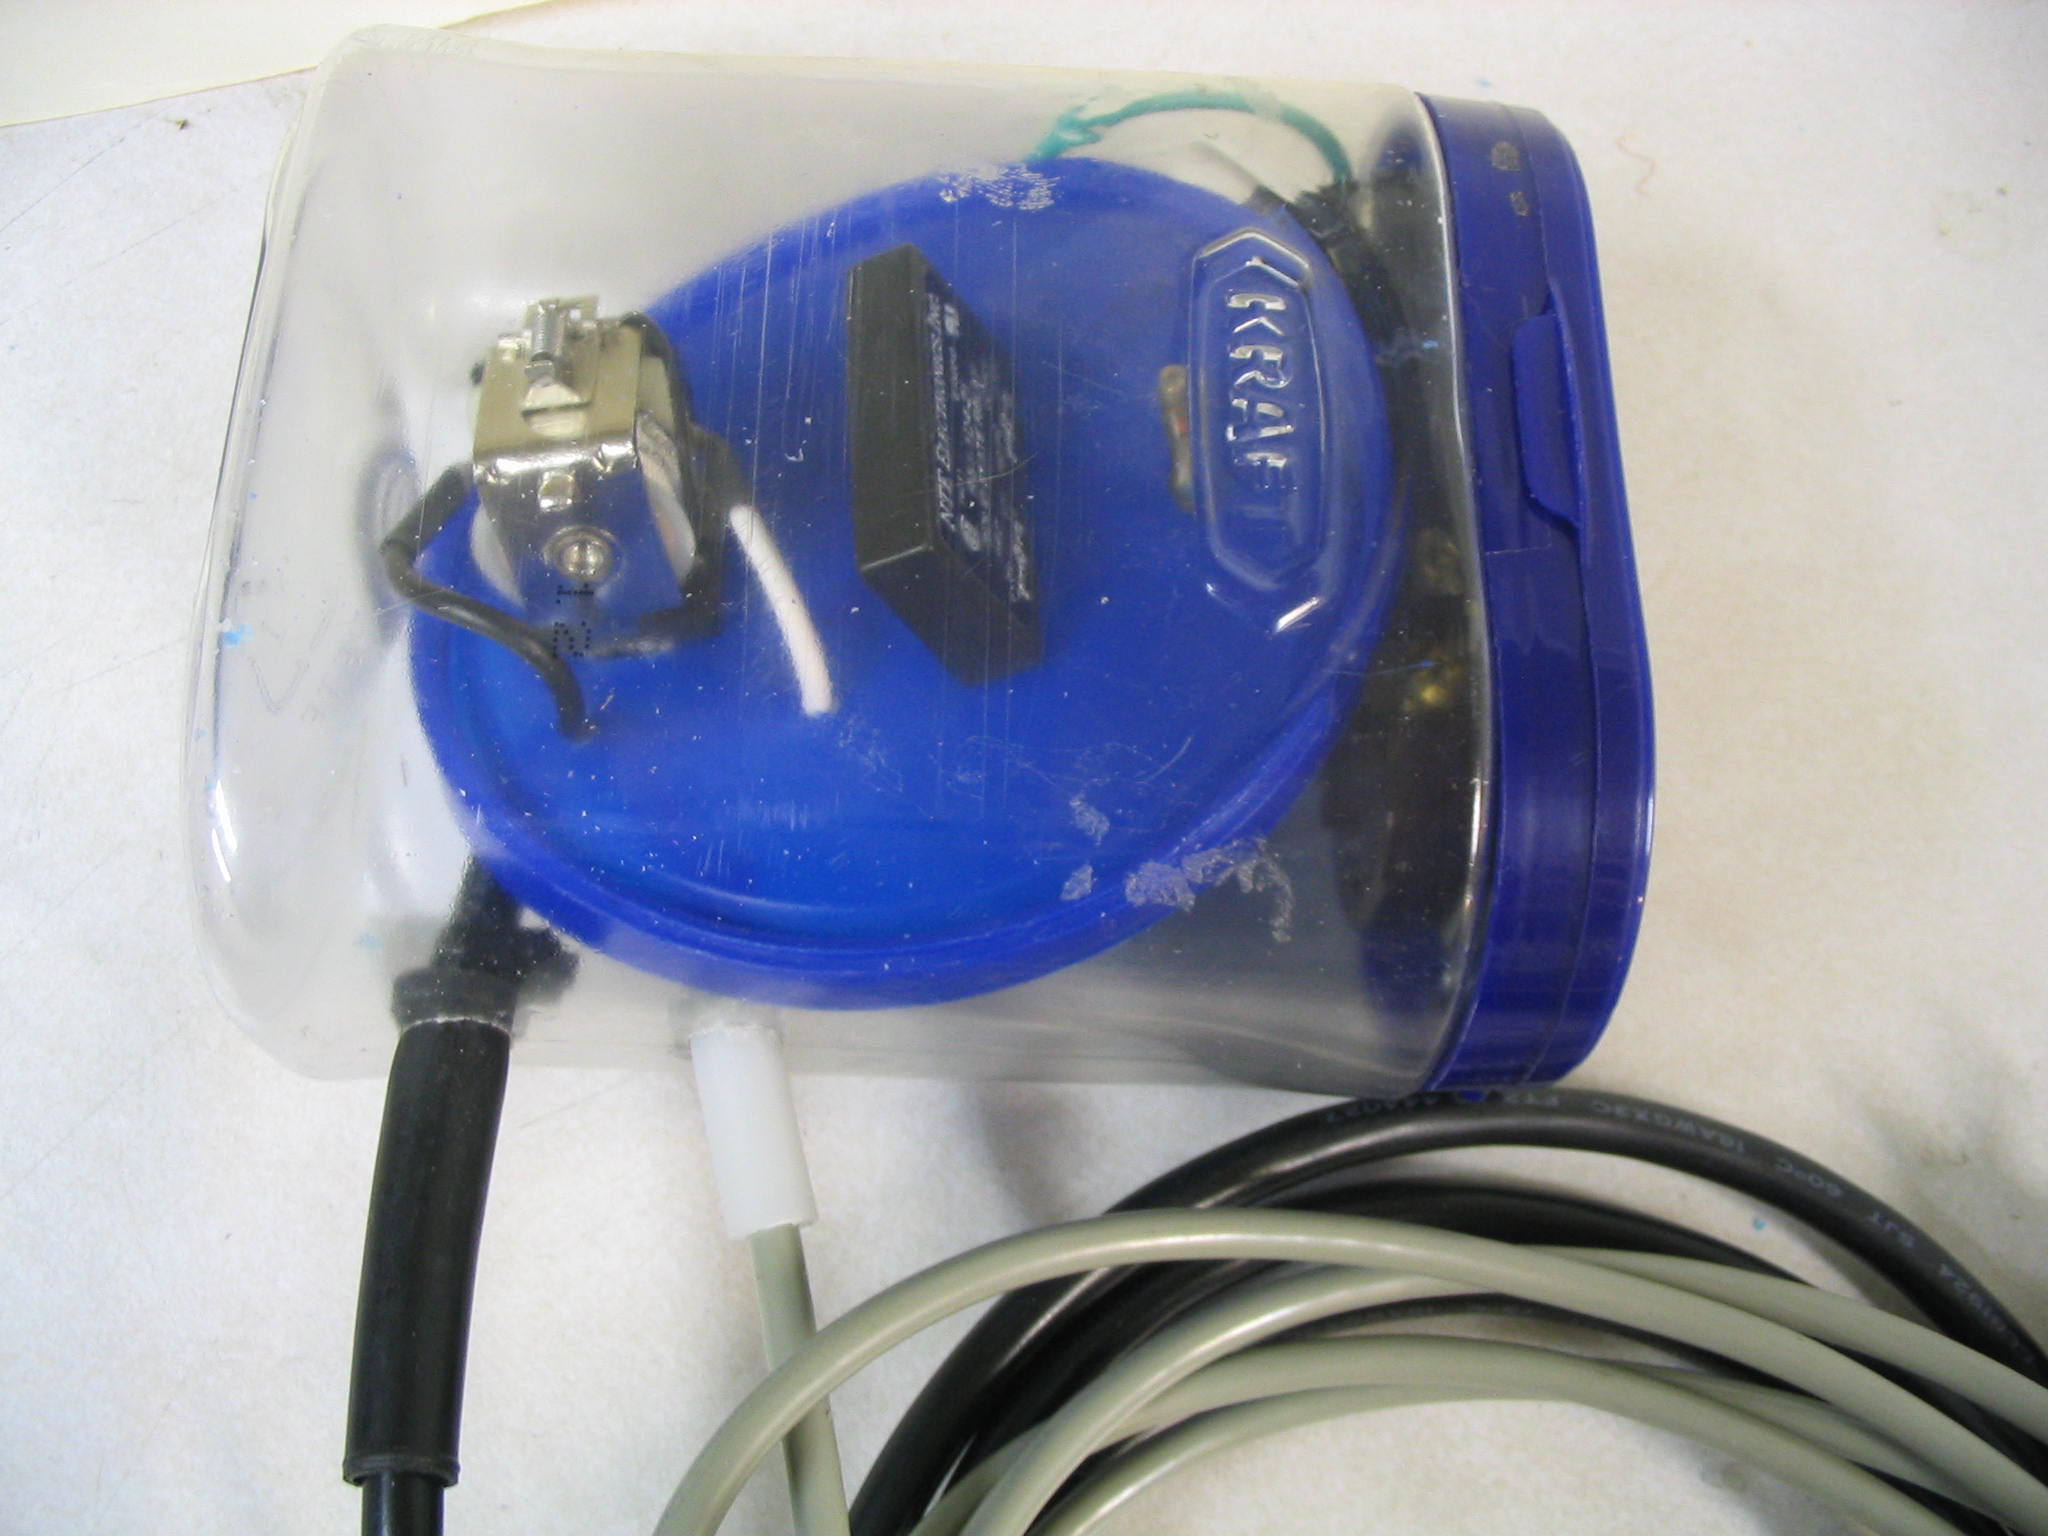
I used a clear plastic mayonaise jar as a case, and cut holes in the lid for the power outlet and master switch. The two-pole master switch allows the power output to be always off, always on, or controlled by the relay.
Silicone sealer
To keep things neat, I mounted the two relays and the diode on a piece of plastic (actually a lid from a can). I was short on shrink-wrap tubing, so I covered the exposed wire connections with clear silicone sealer to prevent shorts.
I tested it one more time, and made a strange discovery. The power output was stuck on, regardless of the state of the DTR line. Somehow my circuit was shorted out. I double-checked my connections, and could not find any wires out of place. Then I found the culprit: I had not used silicone sealer. I had used clear latex caulk. Latex caulking is water-based, and water conducts electricity. Even after drying for more than a day, it still was conducting electricity and shorting my circuit. I scraped off all of the latex caulk, and then it worked.
End result
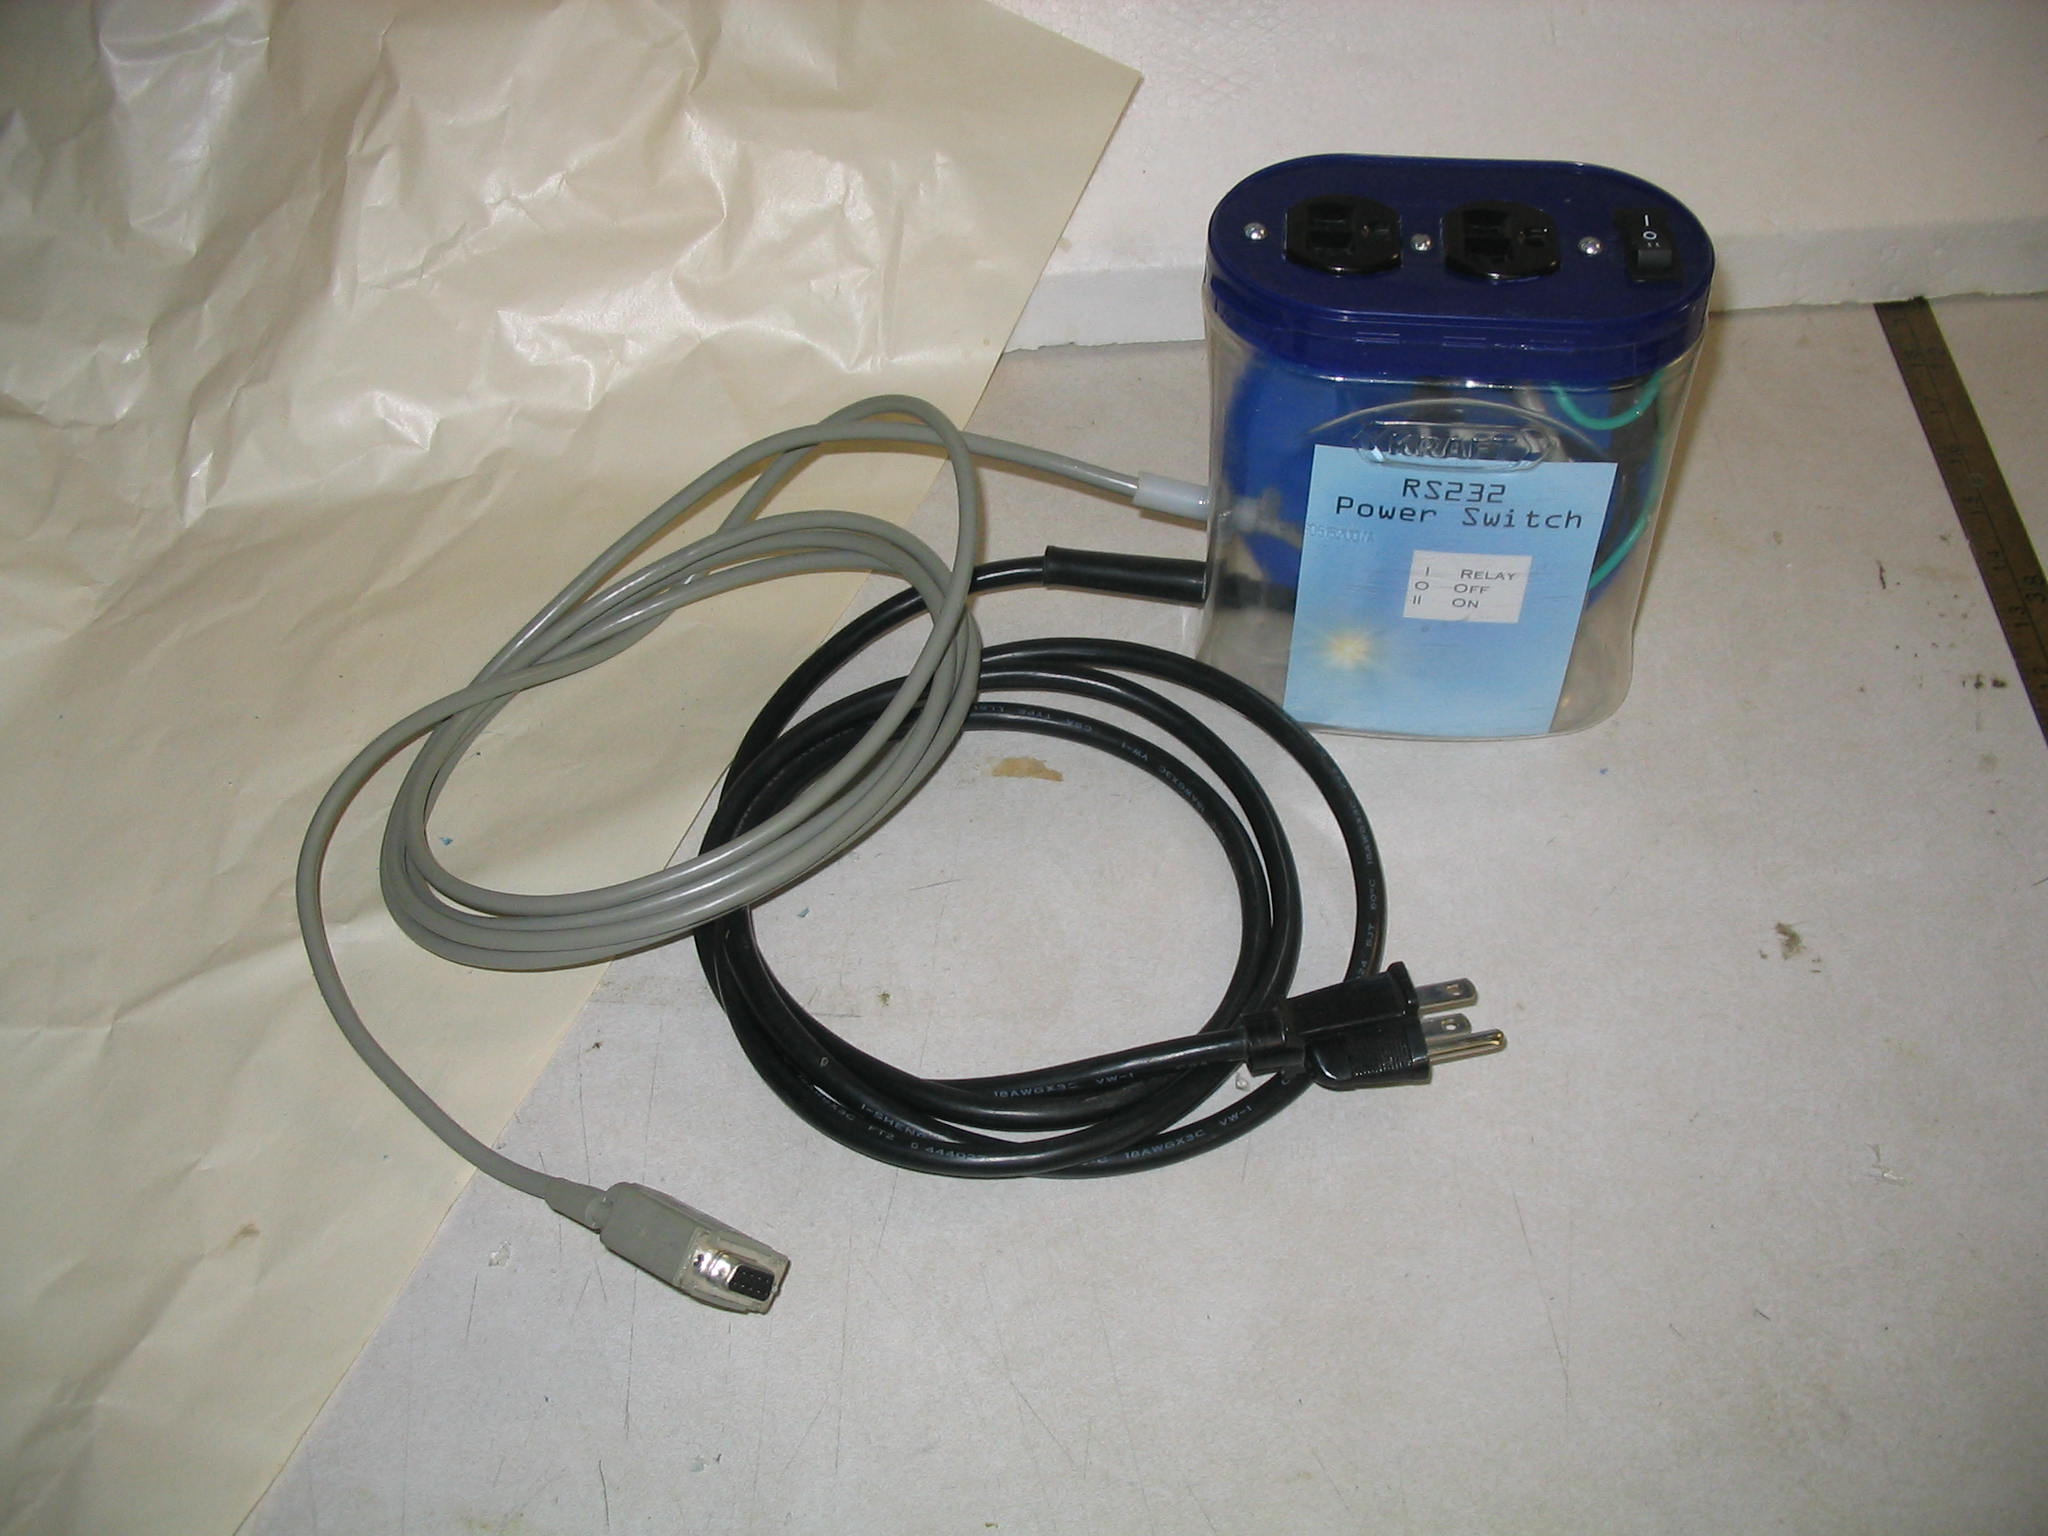
The end result was a nice power switch that works as well as I had hoped. My daughter the artist helped me make a fancy label using the GIMP, which we printed on photo paper and stuck inside. Success!
Code listing
Here is the Perl code for the background daemon which monitors the control file and sets the DTR line to match.
port-handler.pl
#!/usr/bin/perl -w
# Serial port line control
# Control a relay hooked to the serial port using DTR line. # Run as a daemon.# Monitor file for control action# – If file created recently, turn on line.# – If file deleted or too old, turn off line.
#——————————————–# Modules/directivesuse strict;use Device::SerialPort qw( :PARAM :STAT 0.07 );use Getopt::Long;
#————————————–
my $CheckTimeSeconds=10; # seconds between file checksmy $ControlFileName=”/var/run/port-dtr”; # file to monitormy $TimeoutMinutes=45; # turn off after this much time- 30 minutesmy $SerialPort=”/dev/ttyS0″;my $debug=0;
my ( $result, @filestat, $filetime, # last mod timestamp of control file );
$result=GetOptions ( “checktimeseconds=i” => $CheckTimeSeconds, “timeoutminutes=i” => $TimeoutMinutes, “portname=i” => $SerialPort, “debug=i” => $debug, “controlfile=i” => $ControlFileName );
# Open portDebugMsg ( “Starting with:n”, ” checktimeseconds=$CheckTimeSecondsn”, ” timeoutminutes =$TimeoutMinutesn”, ” portname =$SerialPortn”, ” controlfile =$ControlFileNamen”);
DebugMsg ( “Open portn”);
my $PortObj = Device::SerialPort->new($SerialPort) or die “Error: cannot open serial port: $! n”; ;
# Turn off status$result=$PortObj->dtr_active(0);
while (1) {
if ( -f $ControlFileName ) { @filestat = stat $ControlFileName; $filetime = $filestat[9]; if ( ( time – $filetime) > ( $TimeoutMinutes * 60 ) ) { # file expired; turn off DebugMsg ( “File expired; Turn off dtrn”); $result=$PortObj->dtr_active(0); } else { # file is recent; turn on DebugMsg ( “File is recent; Turn on dtrn”); $result=$PortObj->dtr_active(1); } # if time } else { DebugMsg ( “File is gone; Turn off dtrn”); $result=$PortObj->dtr_active(0); } # if controlfile exists
sleep $CheckTimeSeconds;
} # while
#—————————–sub DebugMsg { my @Message =@_;
if ( $debug ) { print STDERR “@Messagen”; } } # sub DebugMsg
/usr/lib/cups/backend/pap
added just before the pap command is run:
# Turn on power switchtouch /var/run/port-dtr# See if printer is therePrinterFound=` $nbplkup $nbpname | wc -l `while [ $PrinterFound -eq 0 ] ; do sleep 20 PrinterFound=` $nbplkup $nbpname | wc -l ` sleep 10done
Submitted by amillar on Mon, 2006-10-16 05:44
Don’t know perl, can’t read the mess that the site made of your code… any way to clean it up?