JPEG images are a good data format for photographs because they contain data that is compressed in a manner optimized for the human eye. However, it is a “lossy” compression, meaning that if they are unencoded and re-encoded several times, the image will lose quality.
Sometimes all I want to do is crop a picture, to chop off uninteresting areas of the photo. Several tools can do this by working on the native JPEG data, meaning there is no loss of information from re-encoding the image.
The command-line tool jpegtran is designed to make a number of transformations to JPEG pictures with no data loss, including rotation and cropping. However, being a command-line tool, it requires you to specify x and y coordinates to crop. It is not convenient to visually pick a section of a picture to save.
A Windows application called jpegcrop gives you the ability to display a JPEG picture on the screen and select the portion to crop out. It saves the cropped section as a new file, or you can overwrite the original file if you prefer. It even preserves the EXIF metadata of the original file. For Linux, I have not found a native graphical application like Jpegcrop, but Jpegcrop for Windows runs just fine on Linux using Wine.
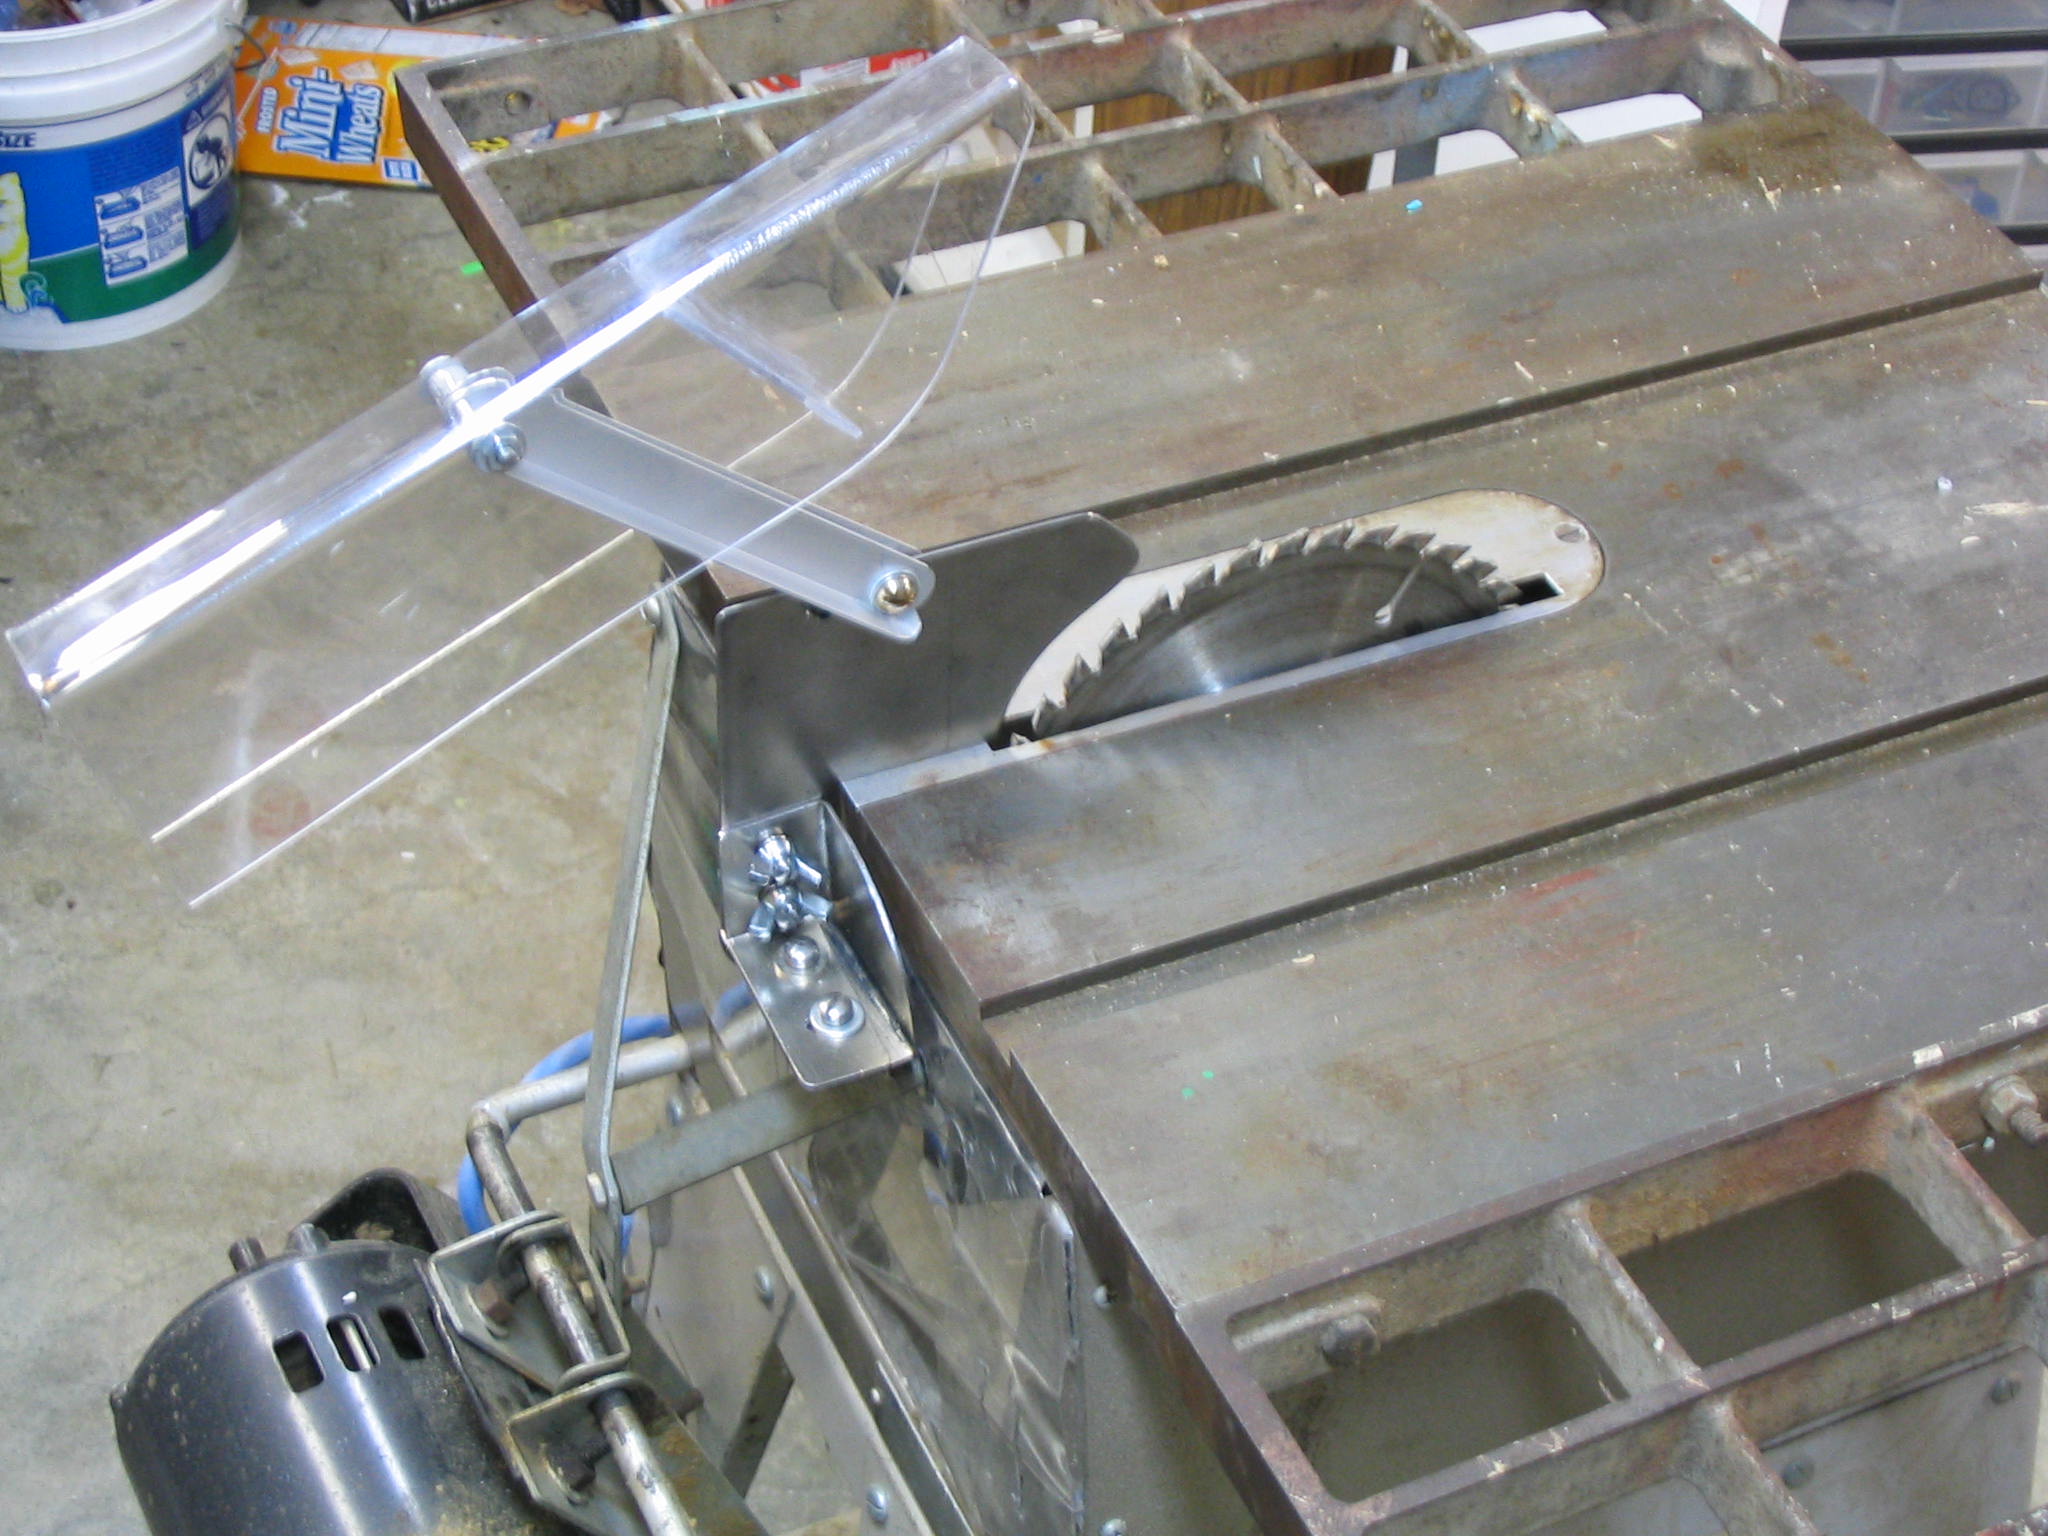
After I made the mounting bracket, then I proceeded to create the blade guard and splitter.
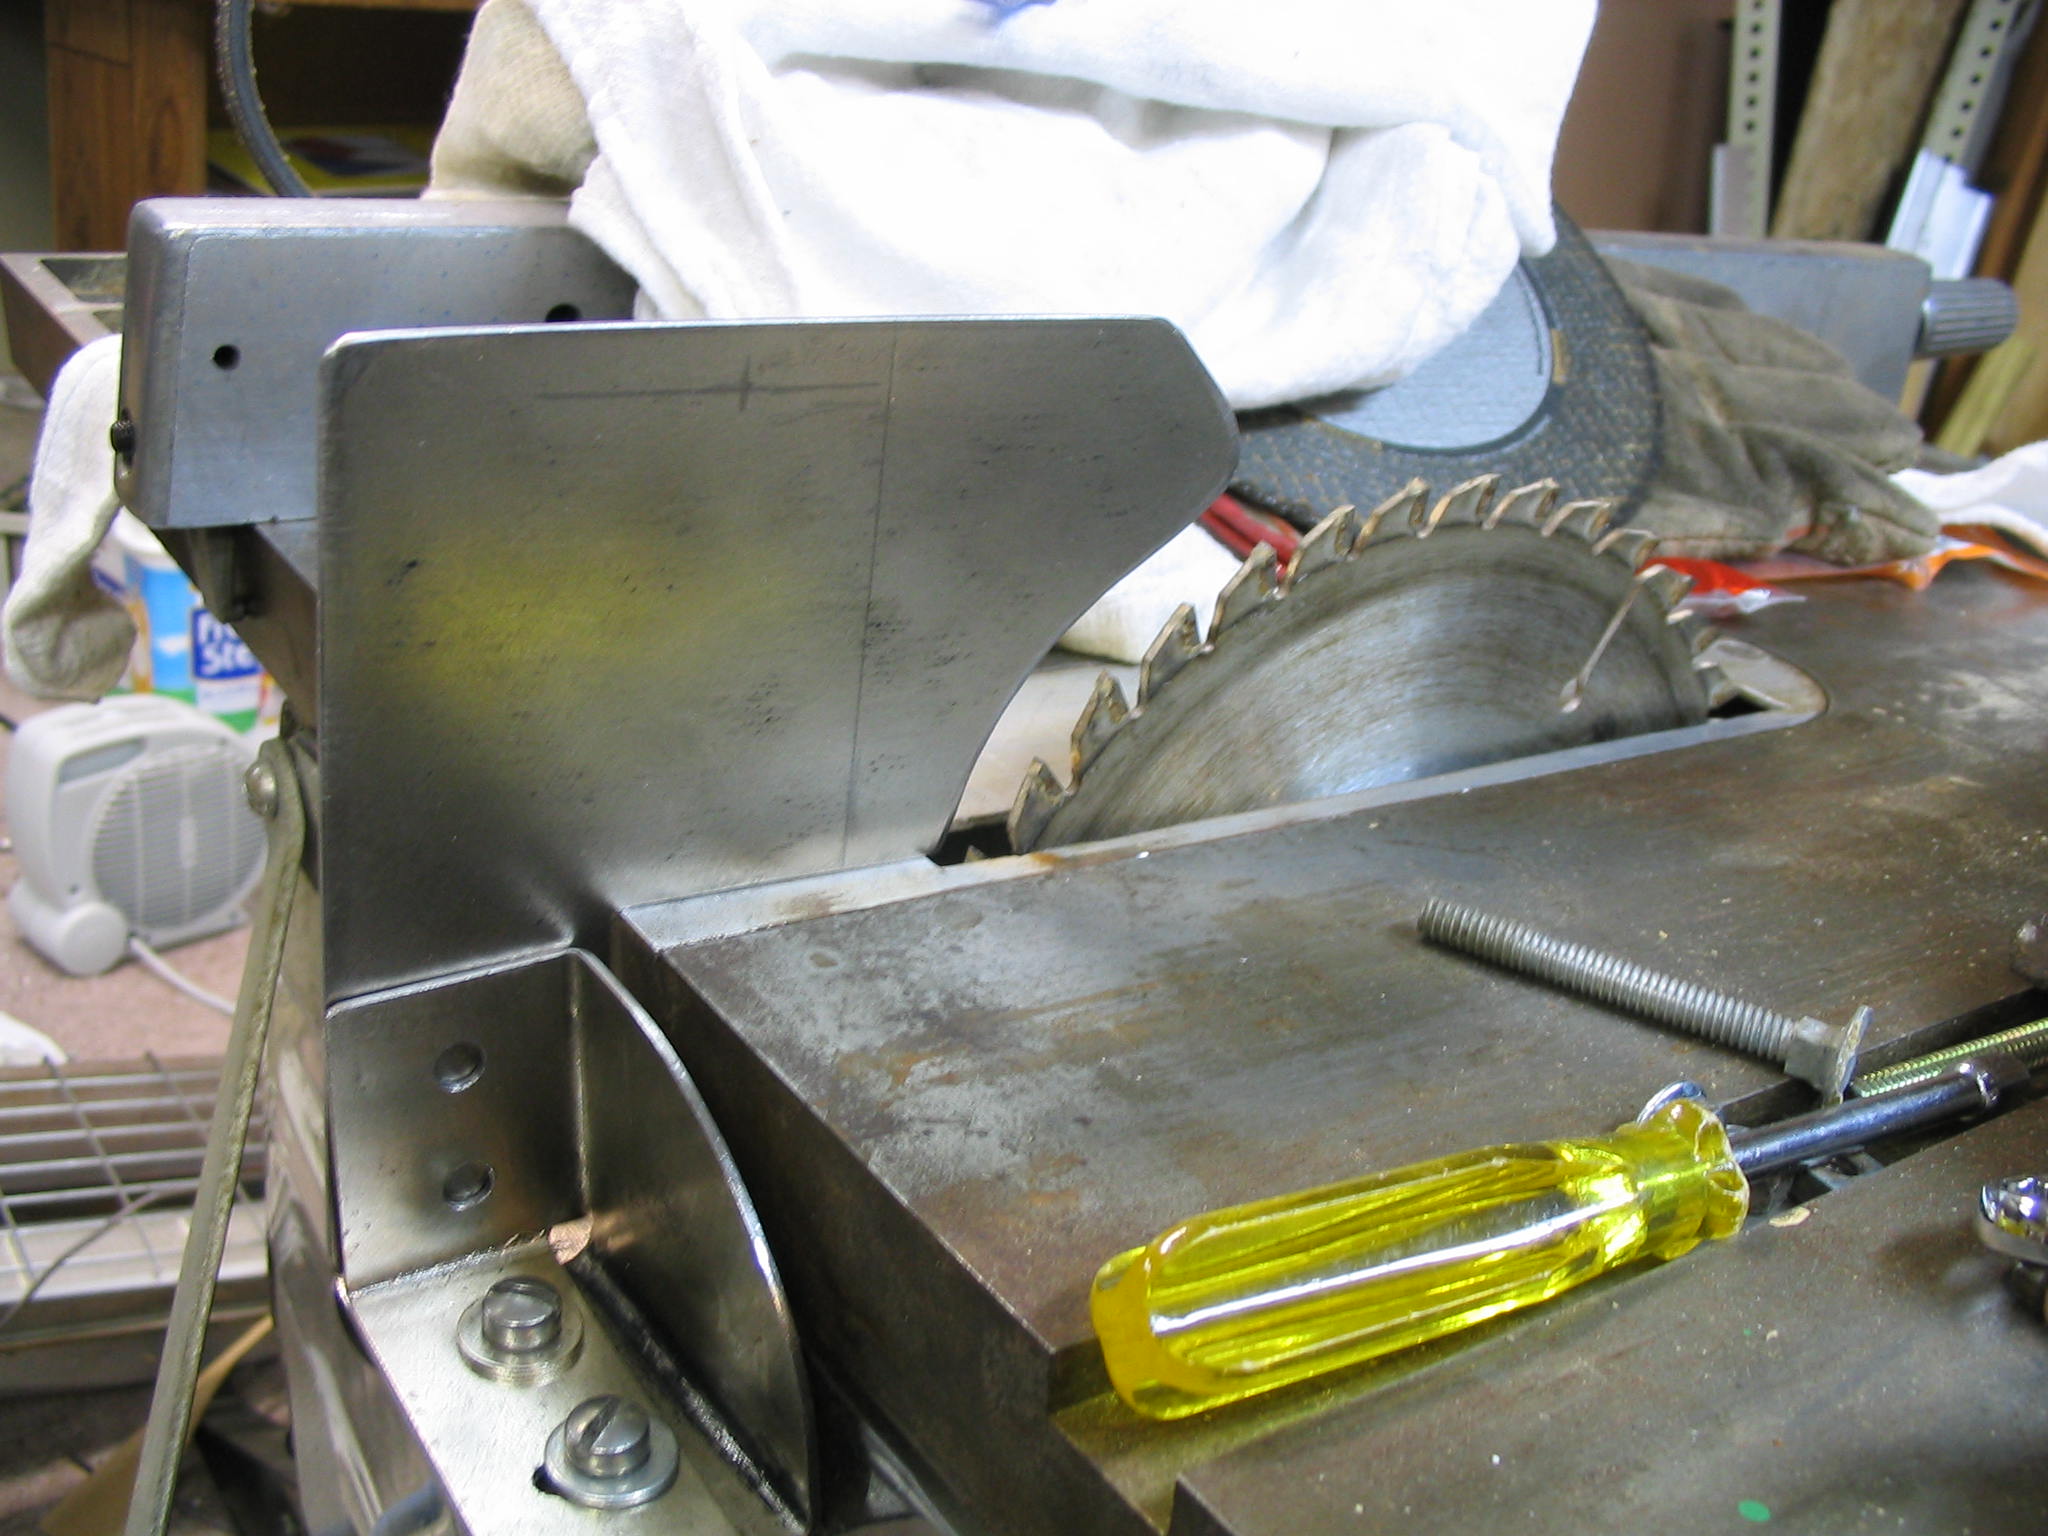
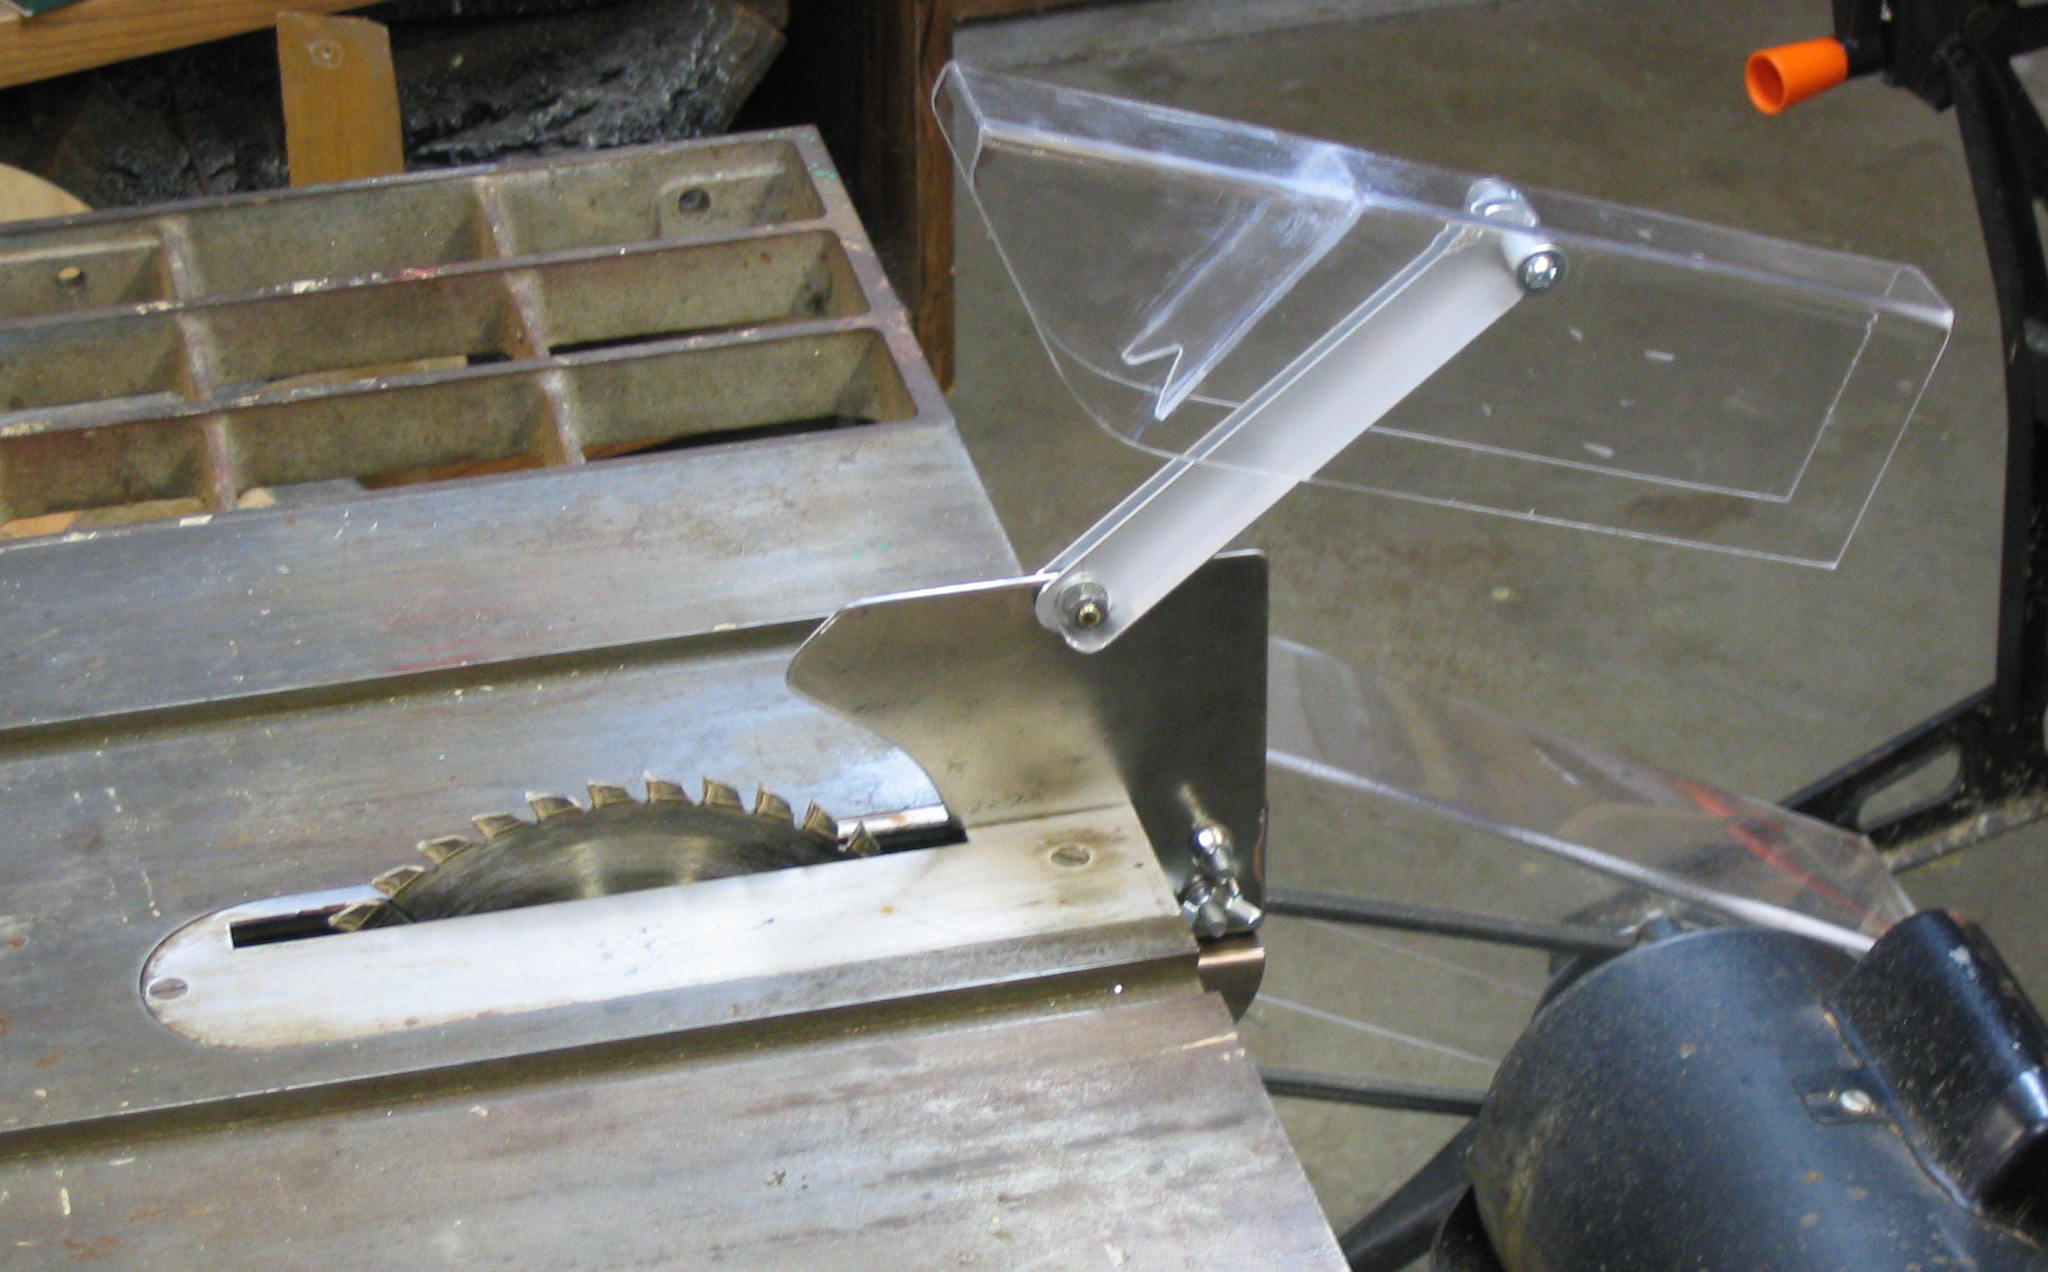
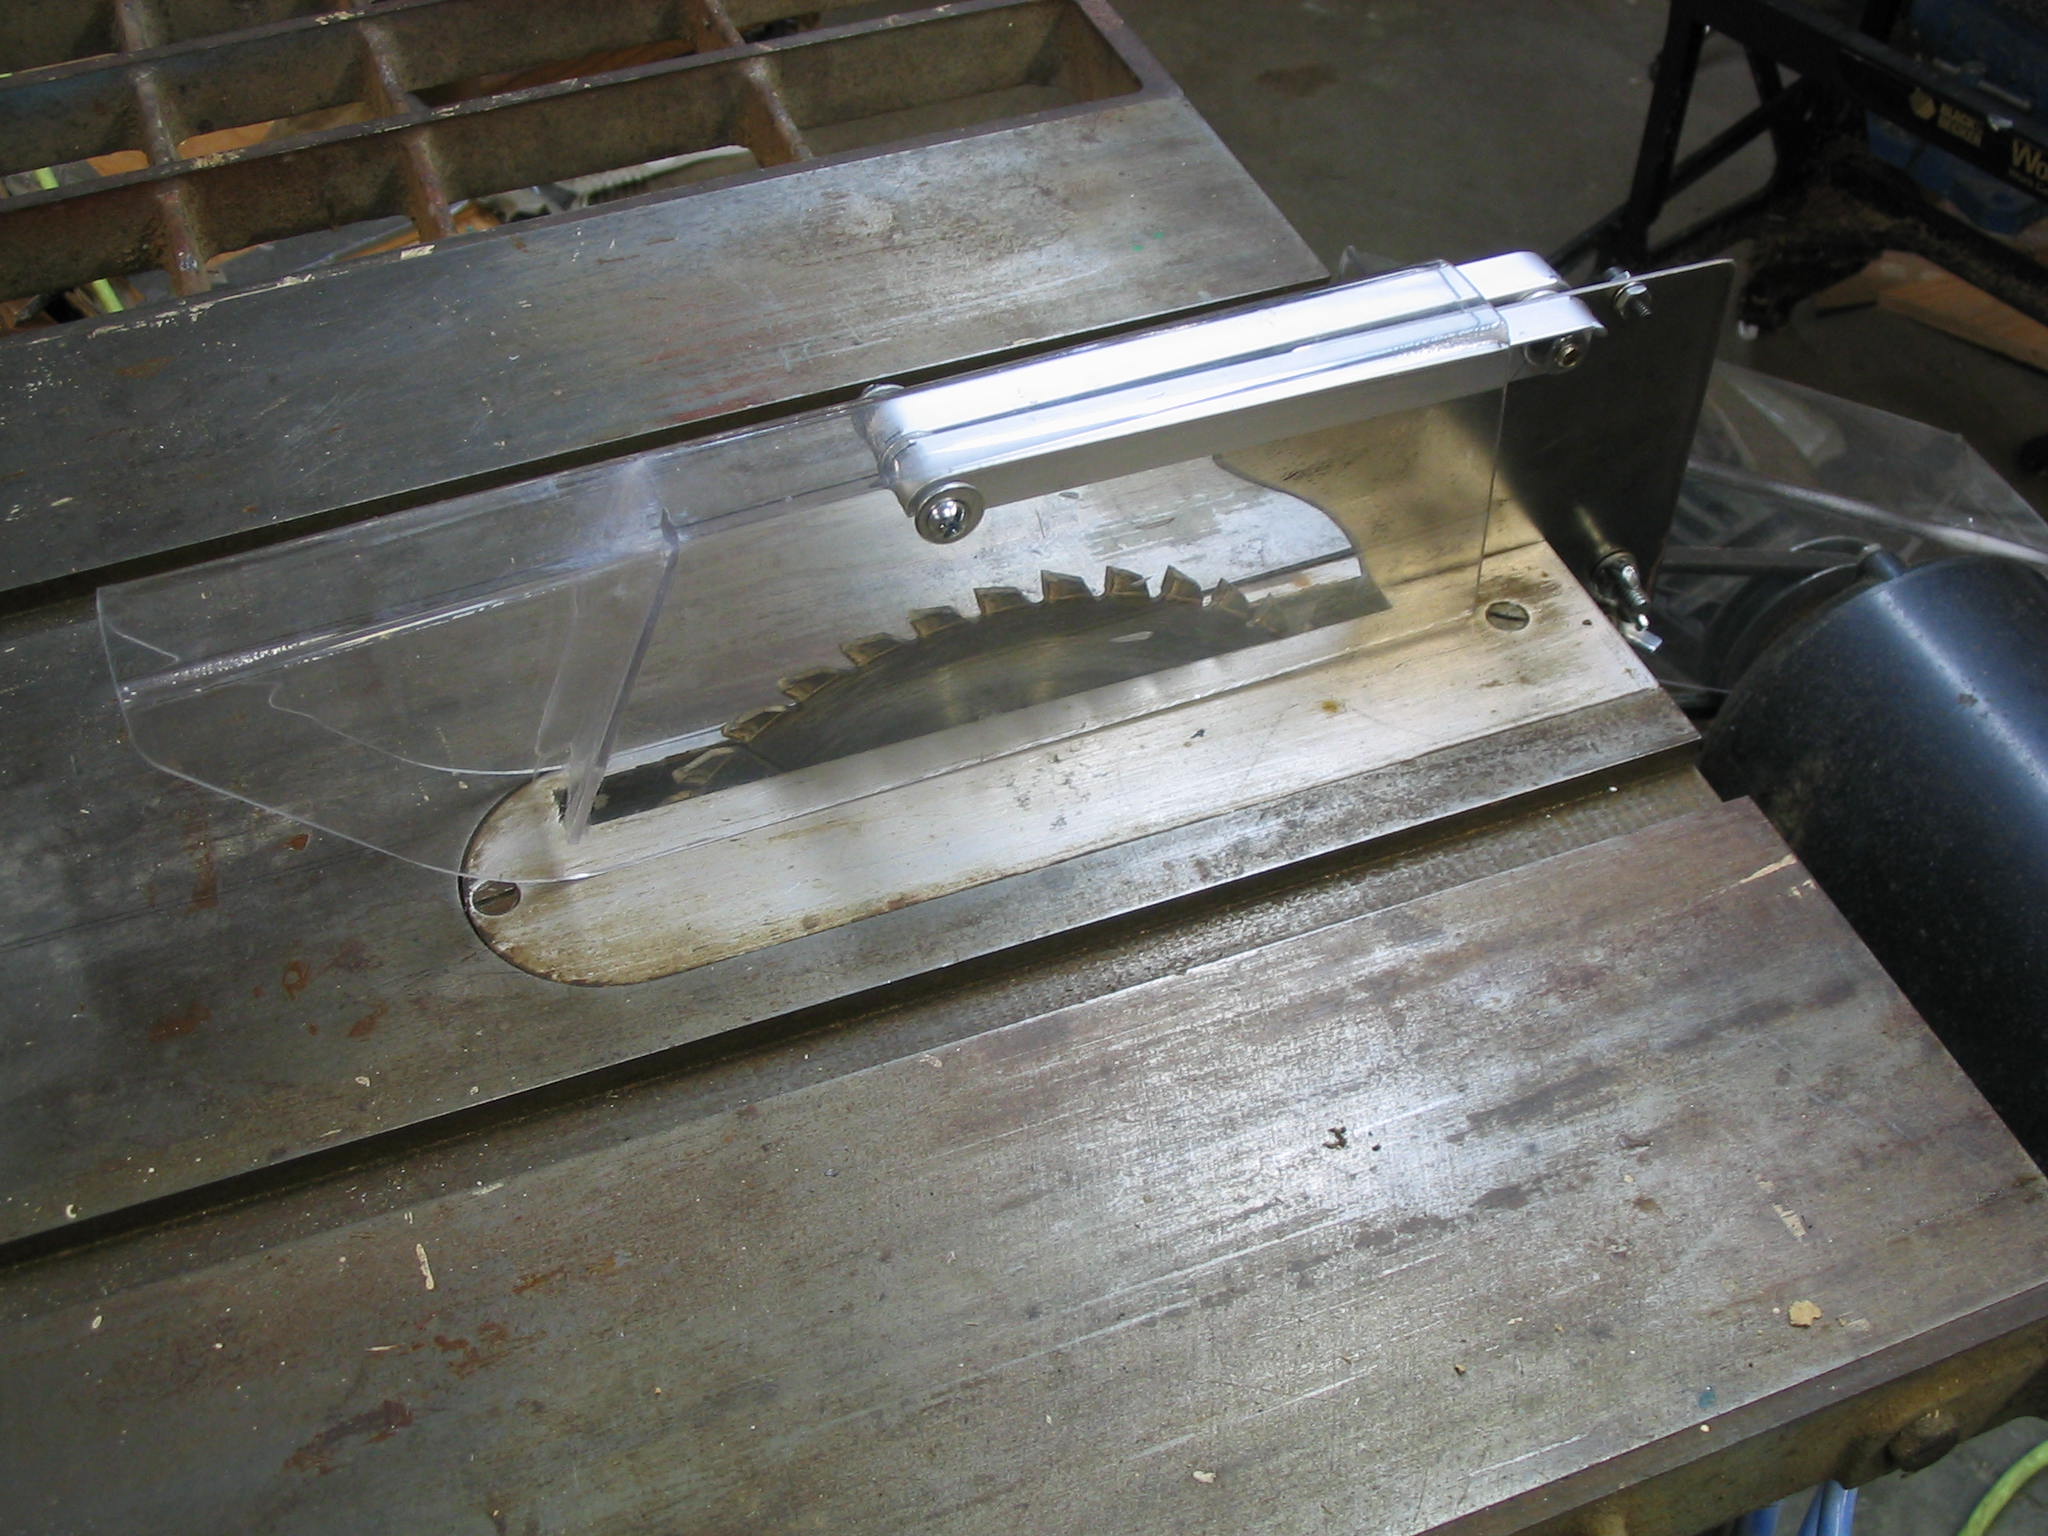
The blade guard has two main components. The cover goes over the blade, to prevent the saw operator from getting injured directly on the spinning blade. The cover is usually made of clear plastic, and is attached to the splitter. The splitter is a vertical piece of sheet metal sitting behind the blade, which guides the cut wood past the blade so it won’t bind.
Splitter
Splitter
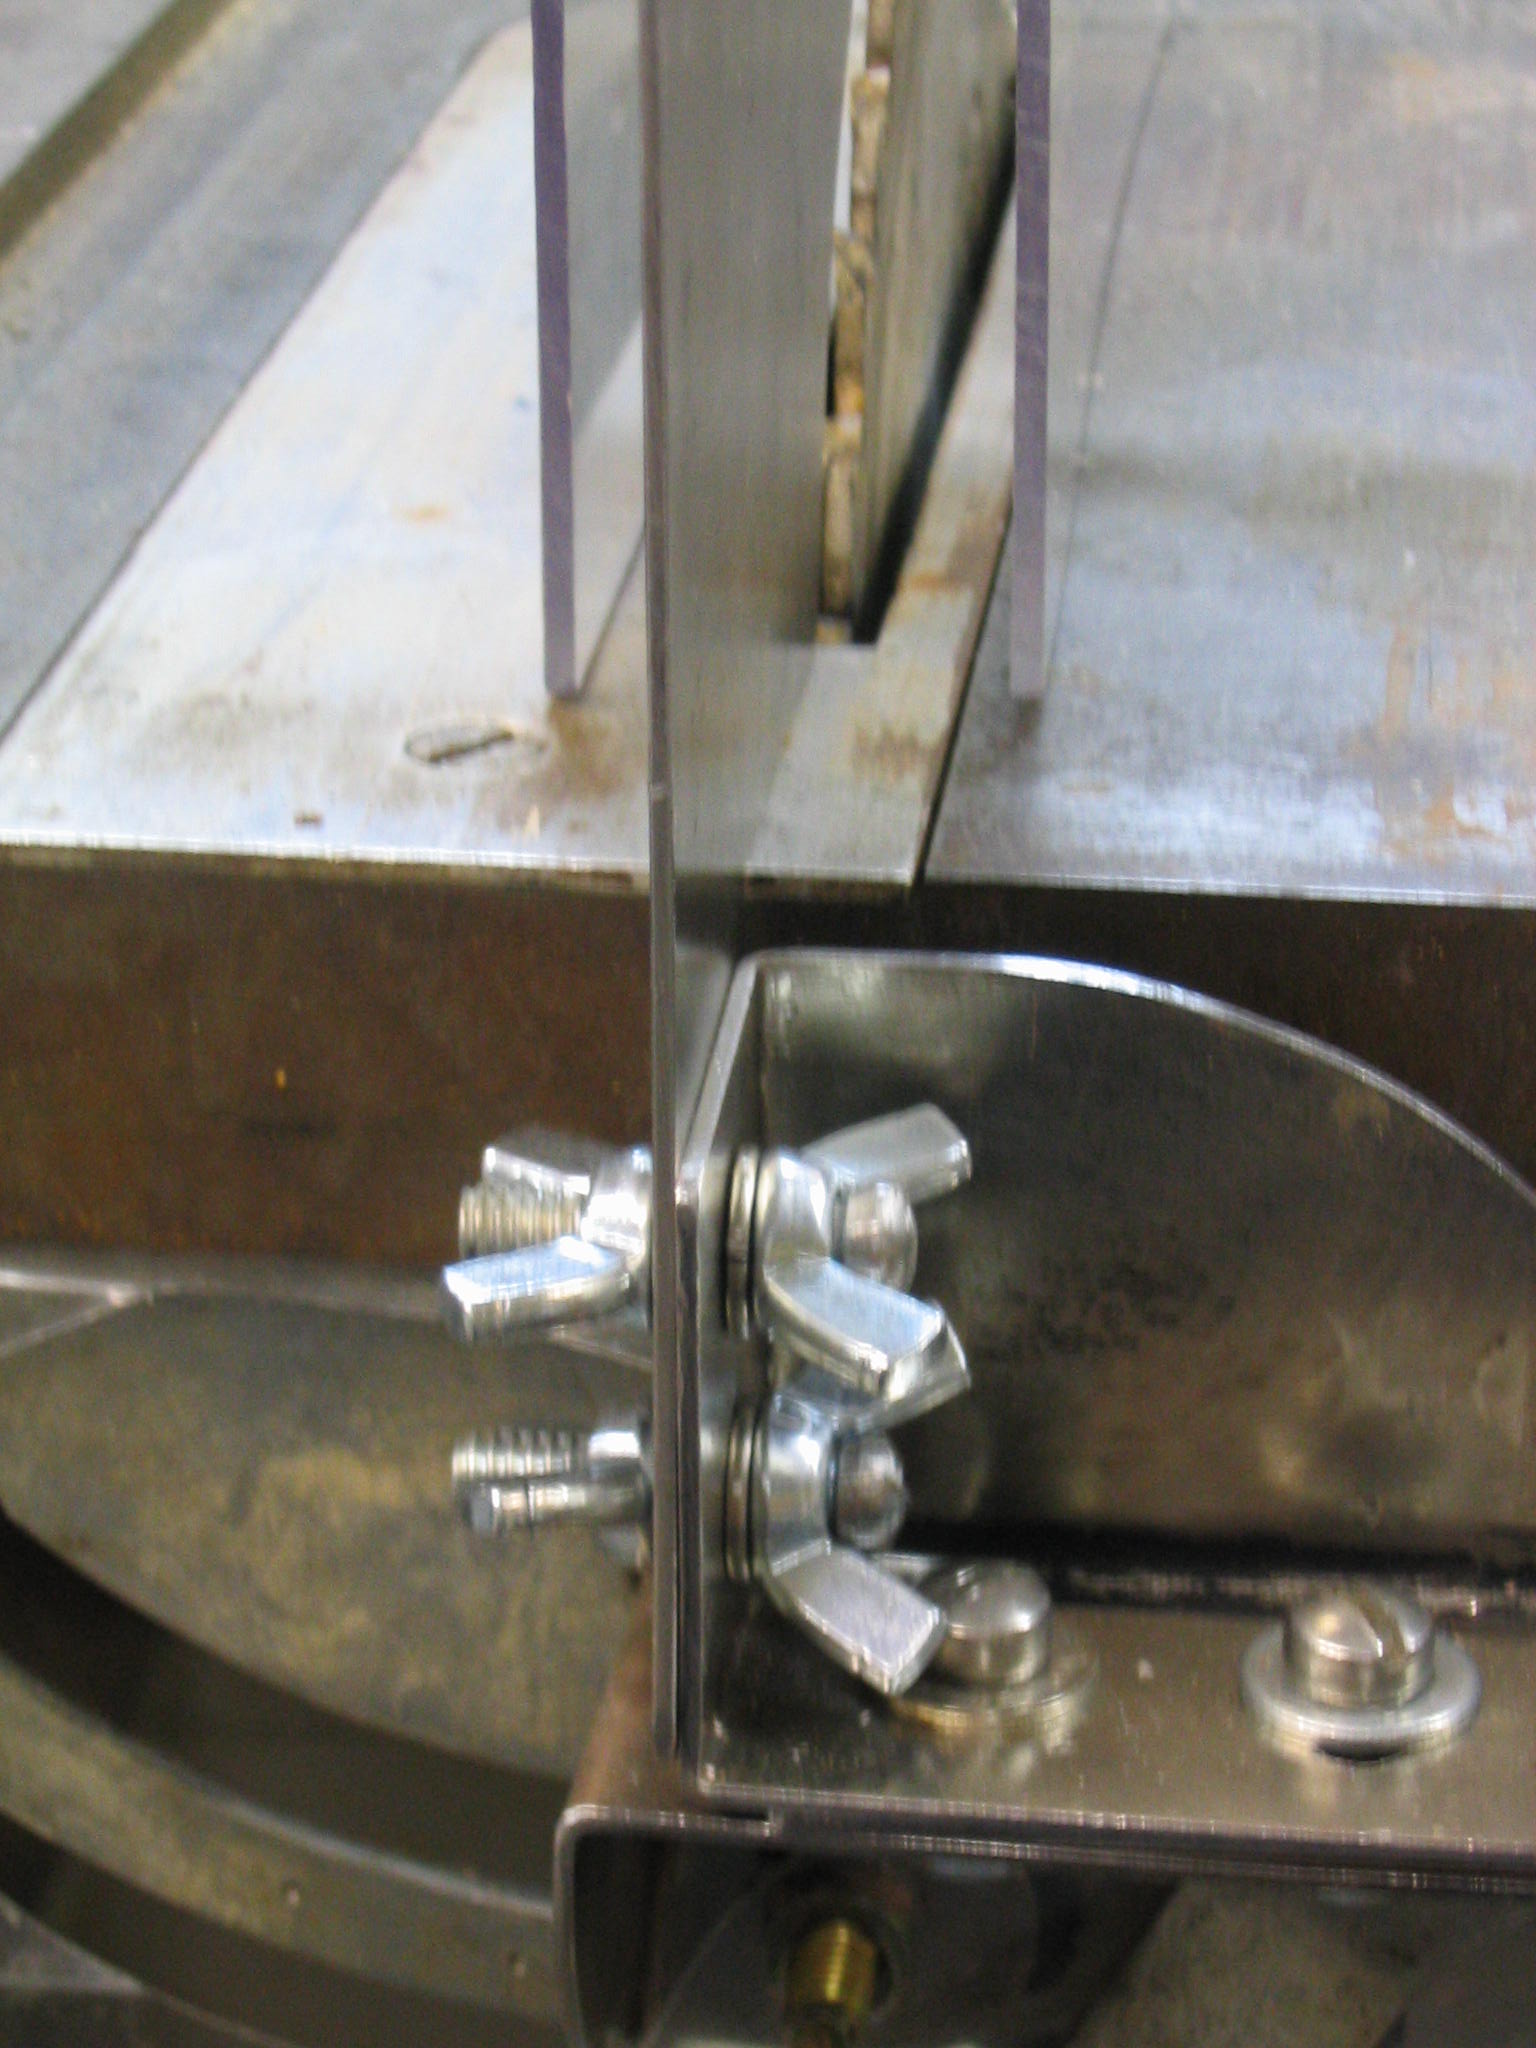
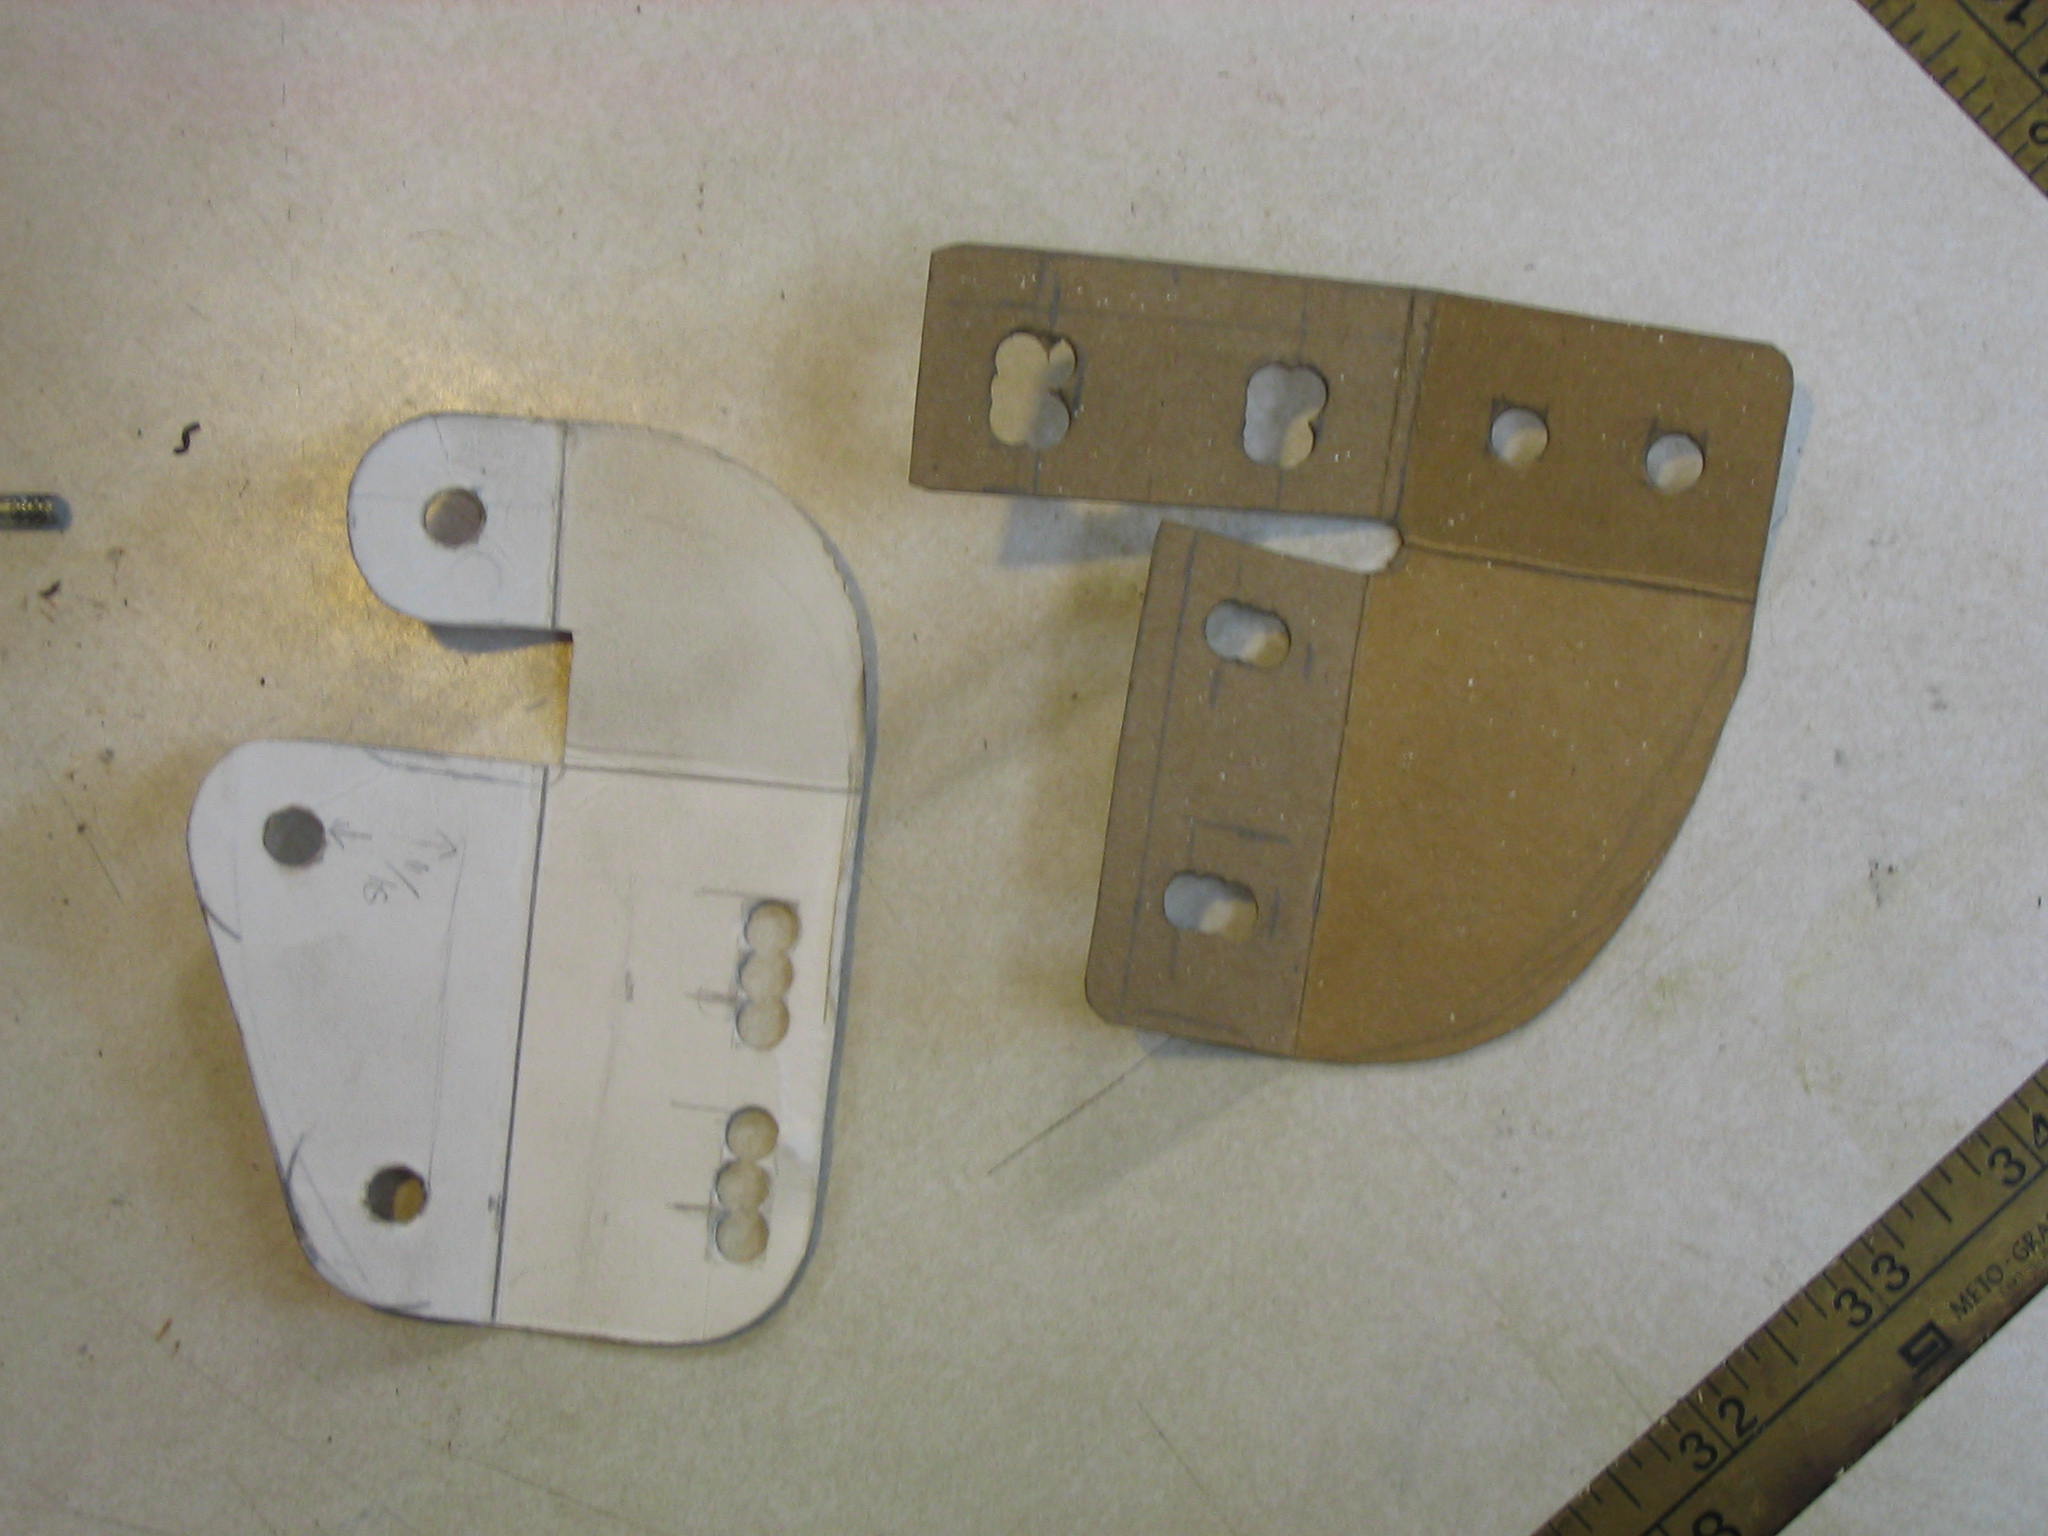
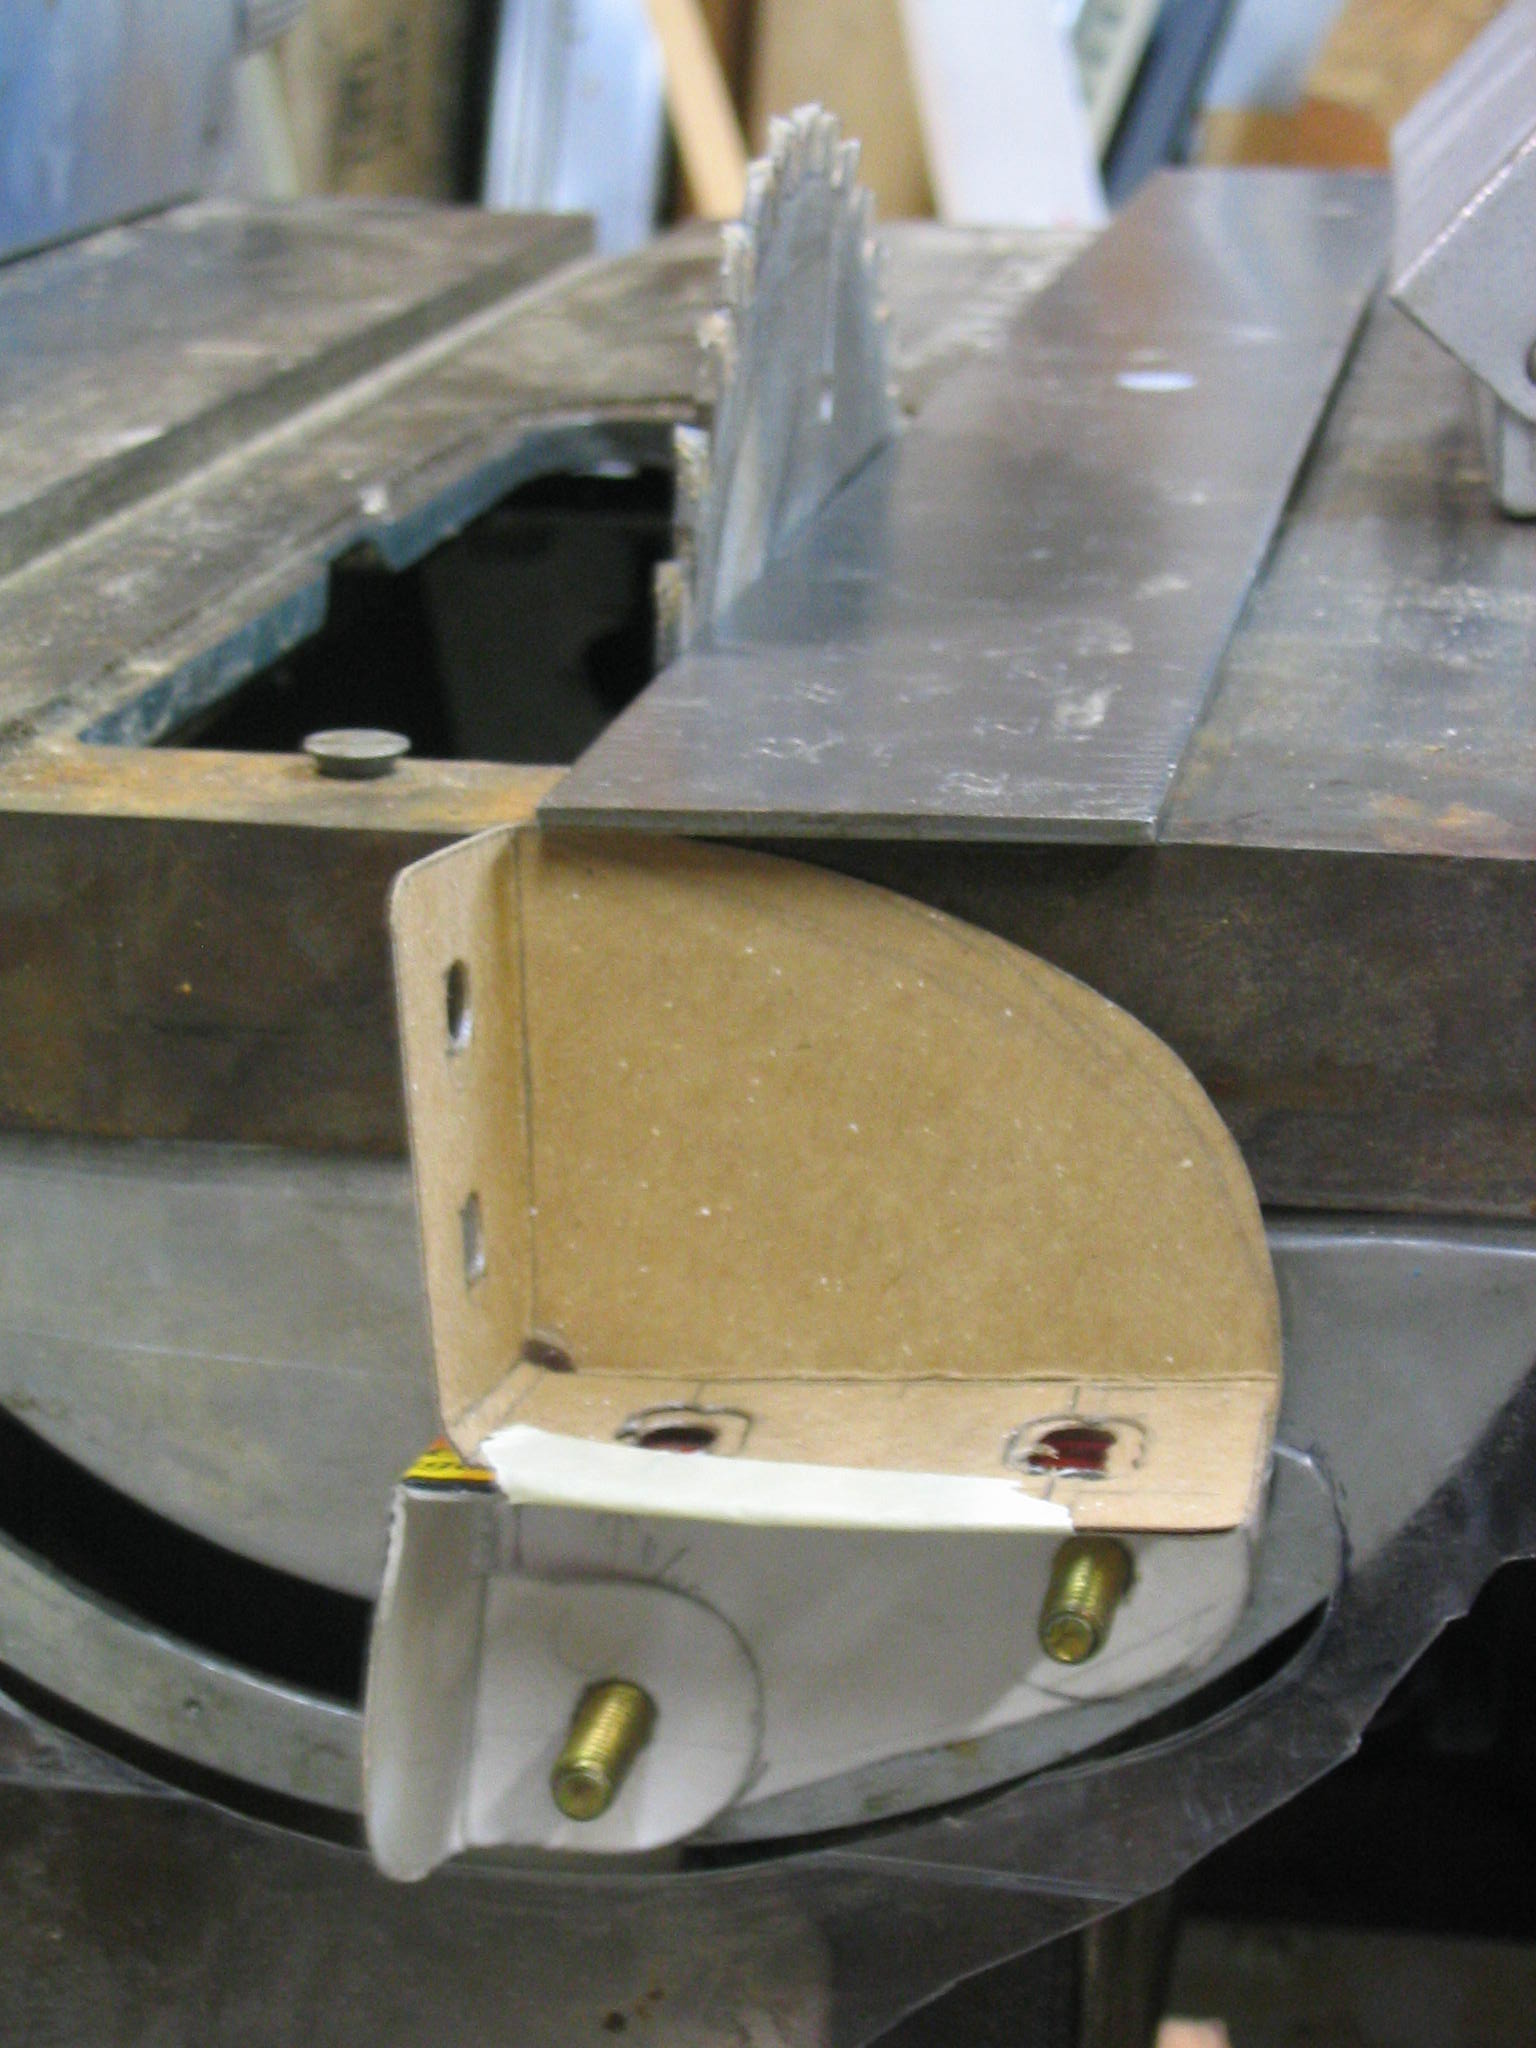
I made the splitter out of the same heavy sheet metal I used for the mounting bracket, 1/16″ steel. I used the same process, where I made a cardboard template first. That way I could ensure that I had the proper positioning on the table saw bed and around the blade, and I could make the bolt holes line up with the mounting bracket. I used 1/4″ holes and bolts on the mounting bracket, but used slightly larger 5/16″ holes on the tail of the splitter that attaches to the mounting bracket. The holes are just enough bigger that I have some adjustability in the positioning, but still have a secure fit with the bracket.
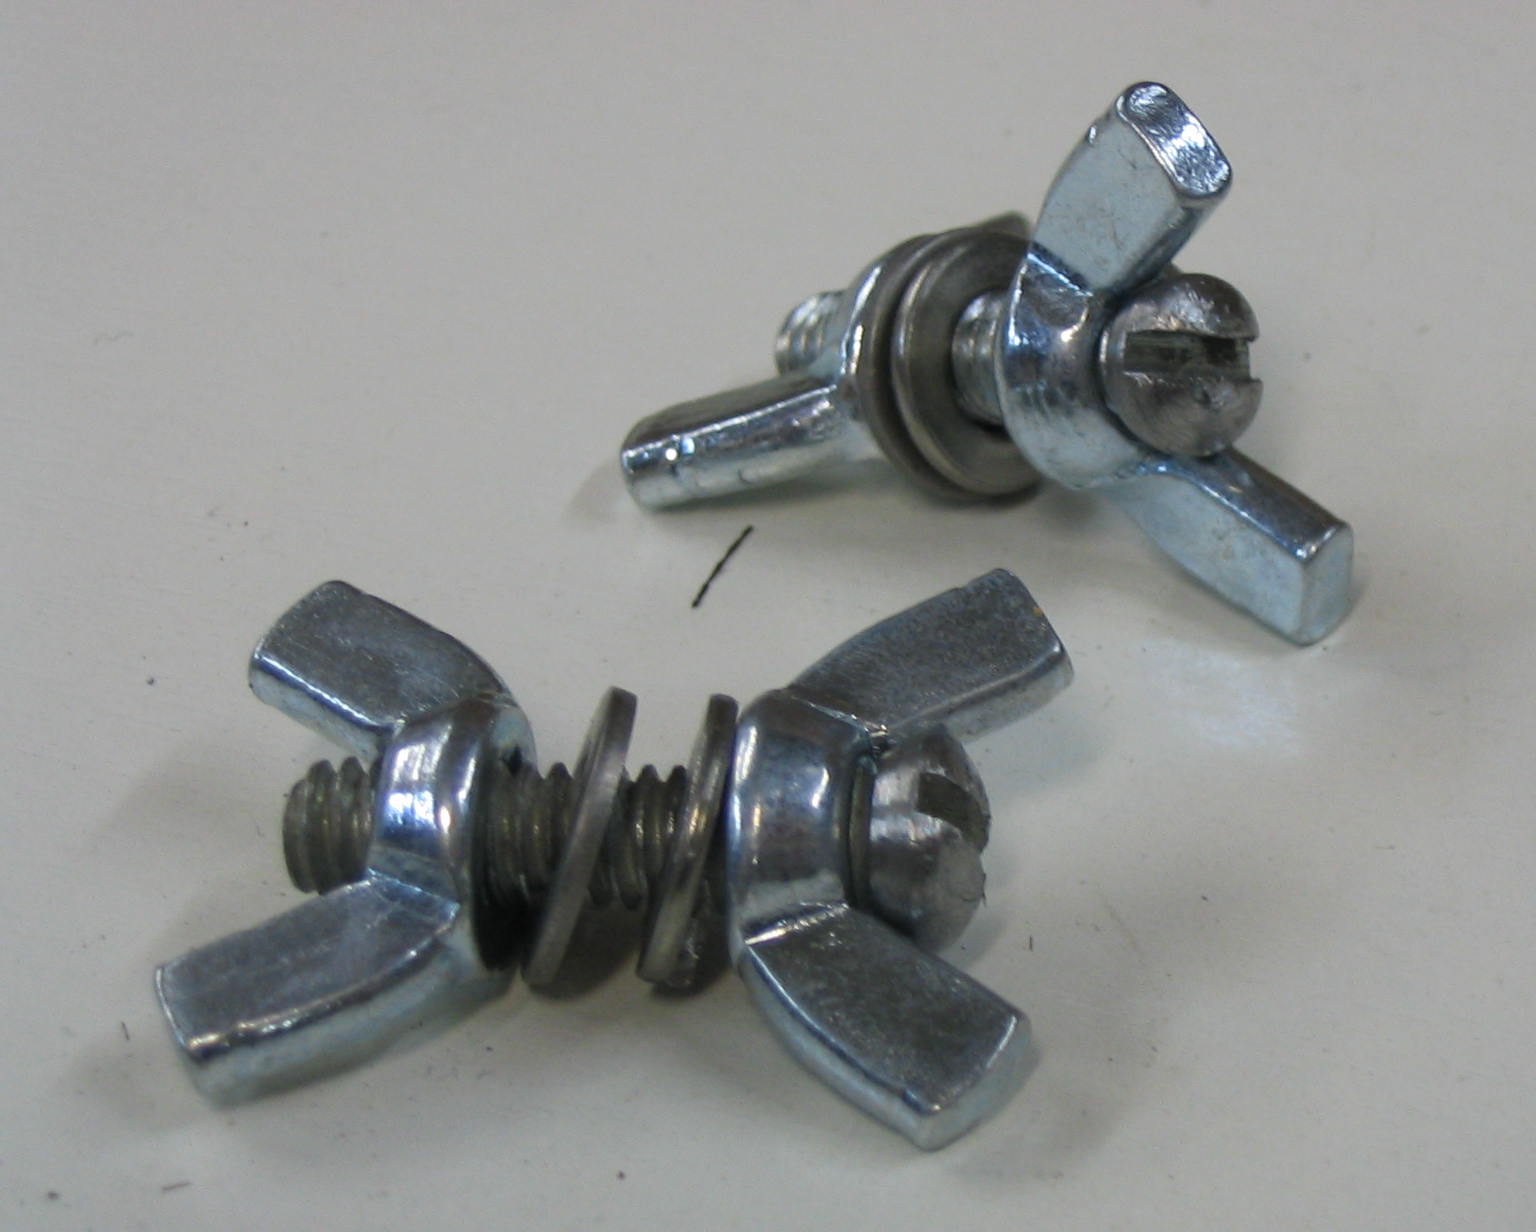
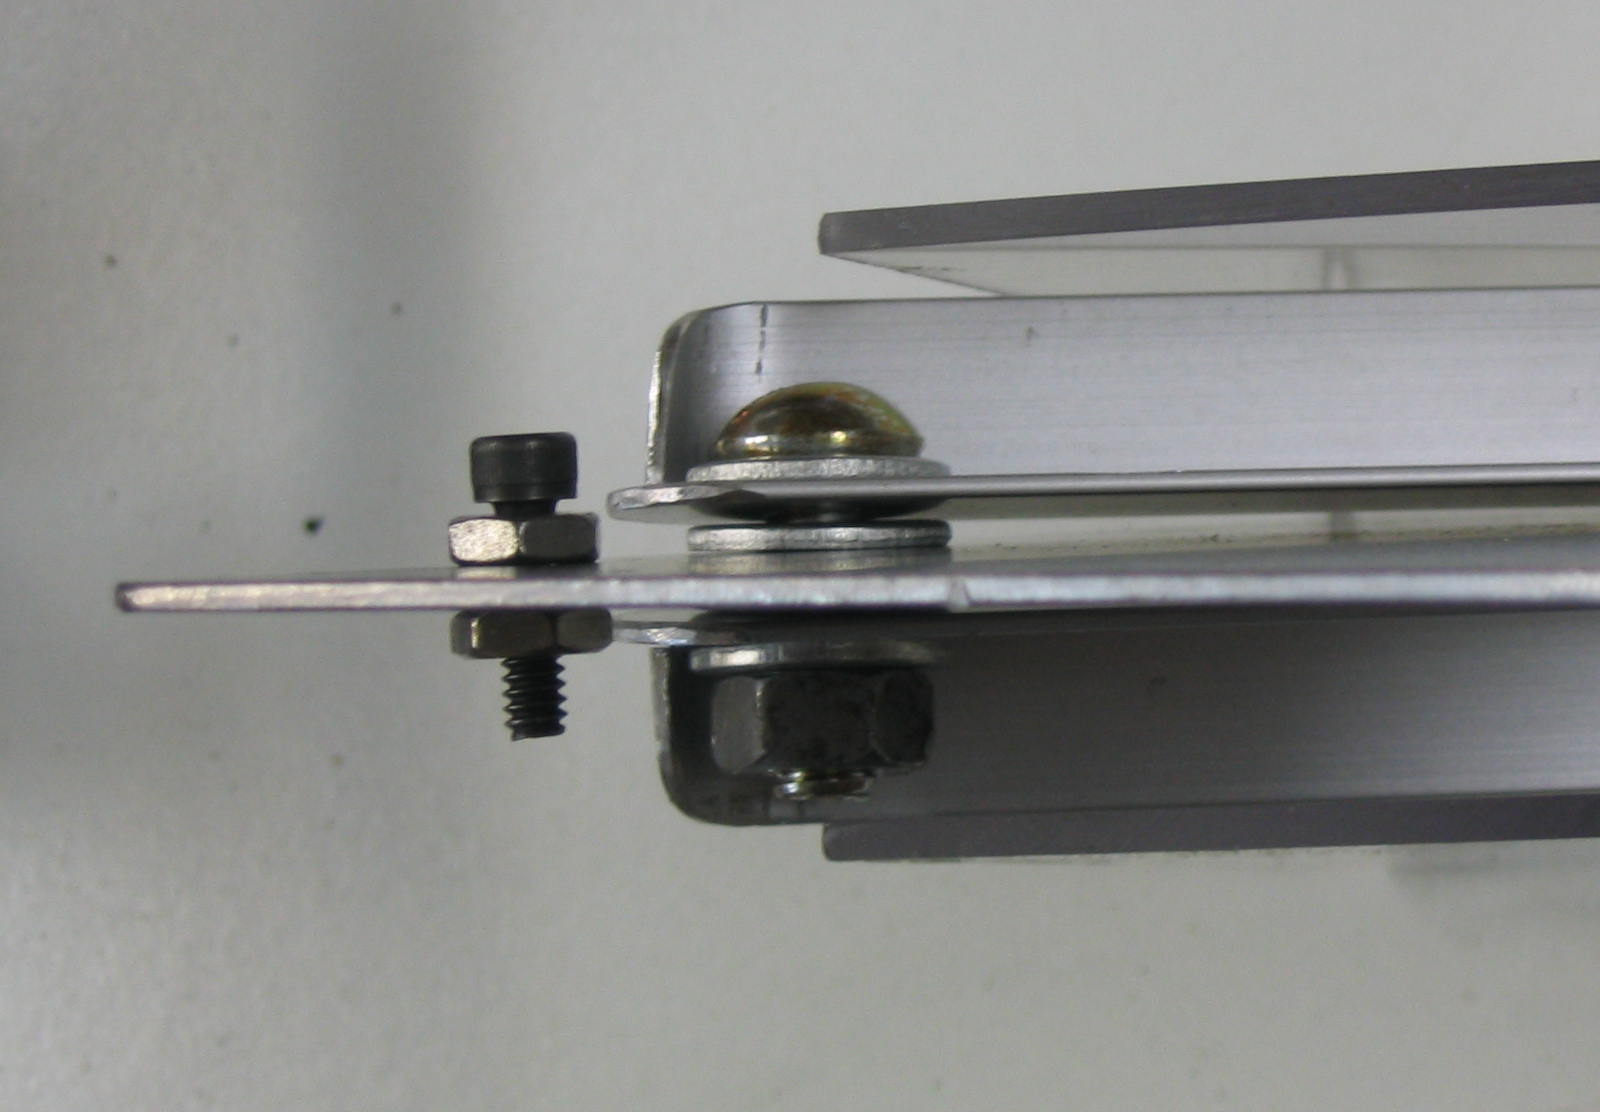
The splitter/guard should be removable for different saw operations like dadoes or shaping. Wing nuts make it easy to remove the splitter without requiring any tools. You can buy bolts with wing heads on them, but I already had extra wing nuts so I decided to put them on both sides. I had screws of the right size, but the screw heads were too wide to fit in between the wings. A lathe would be the ideal way to reduce the screw heads, but I don’t have one, so I put the screws into the chuck of my electric drill and filed them down while it spun.
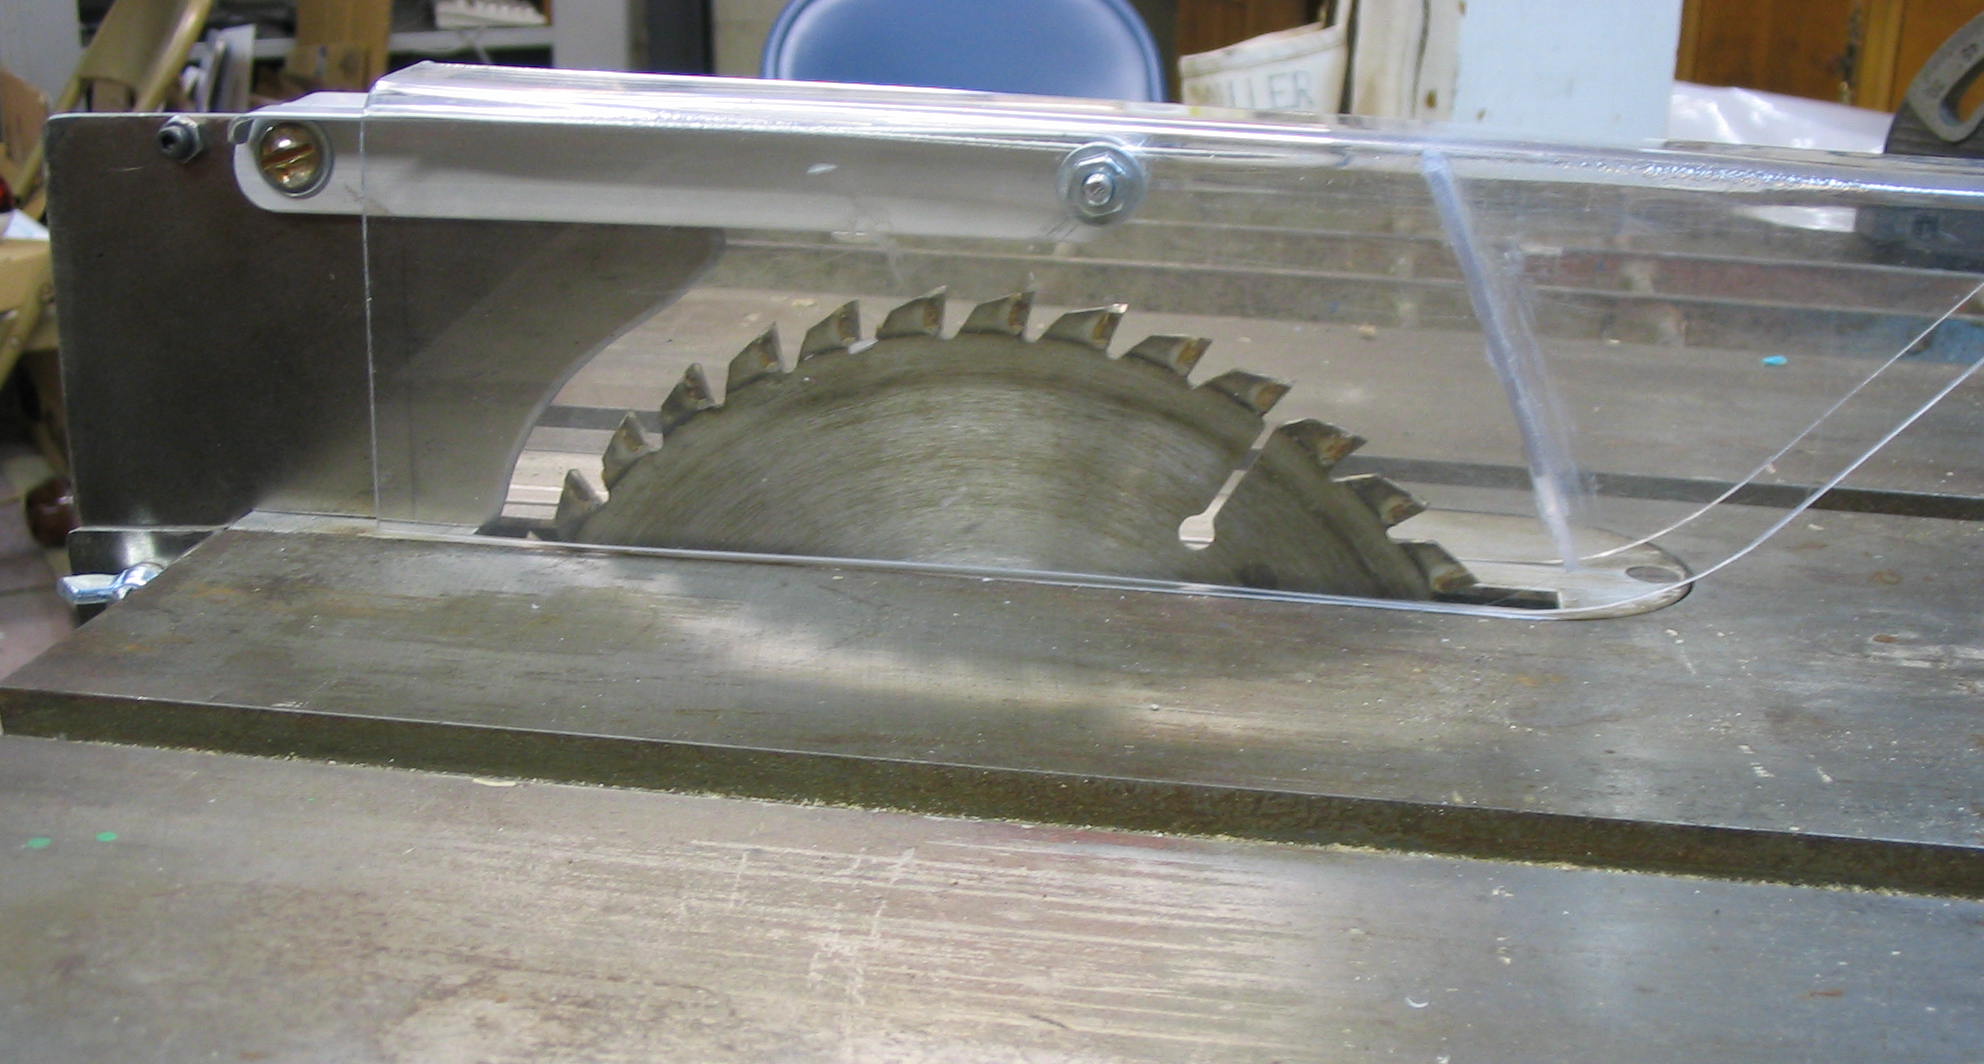
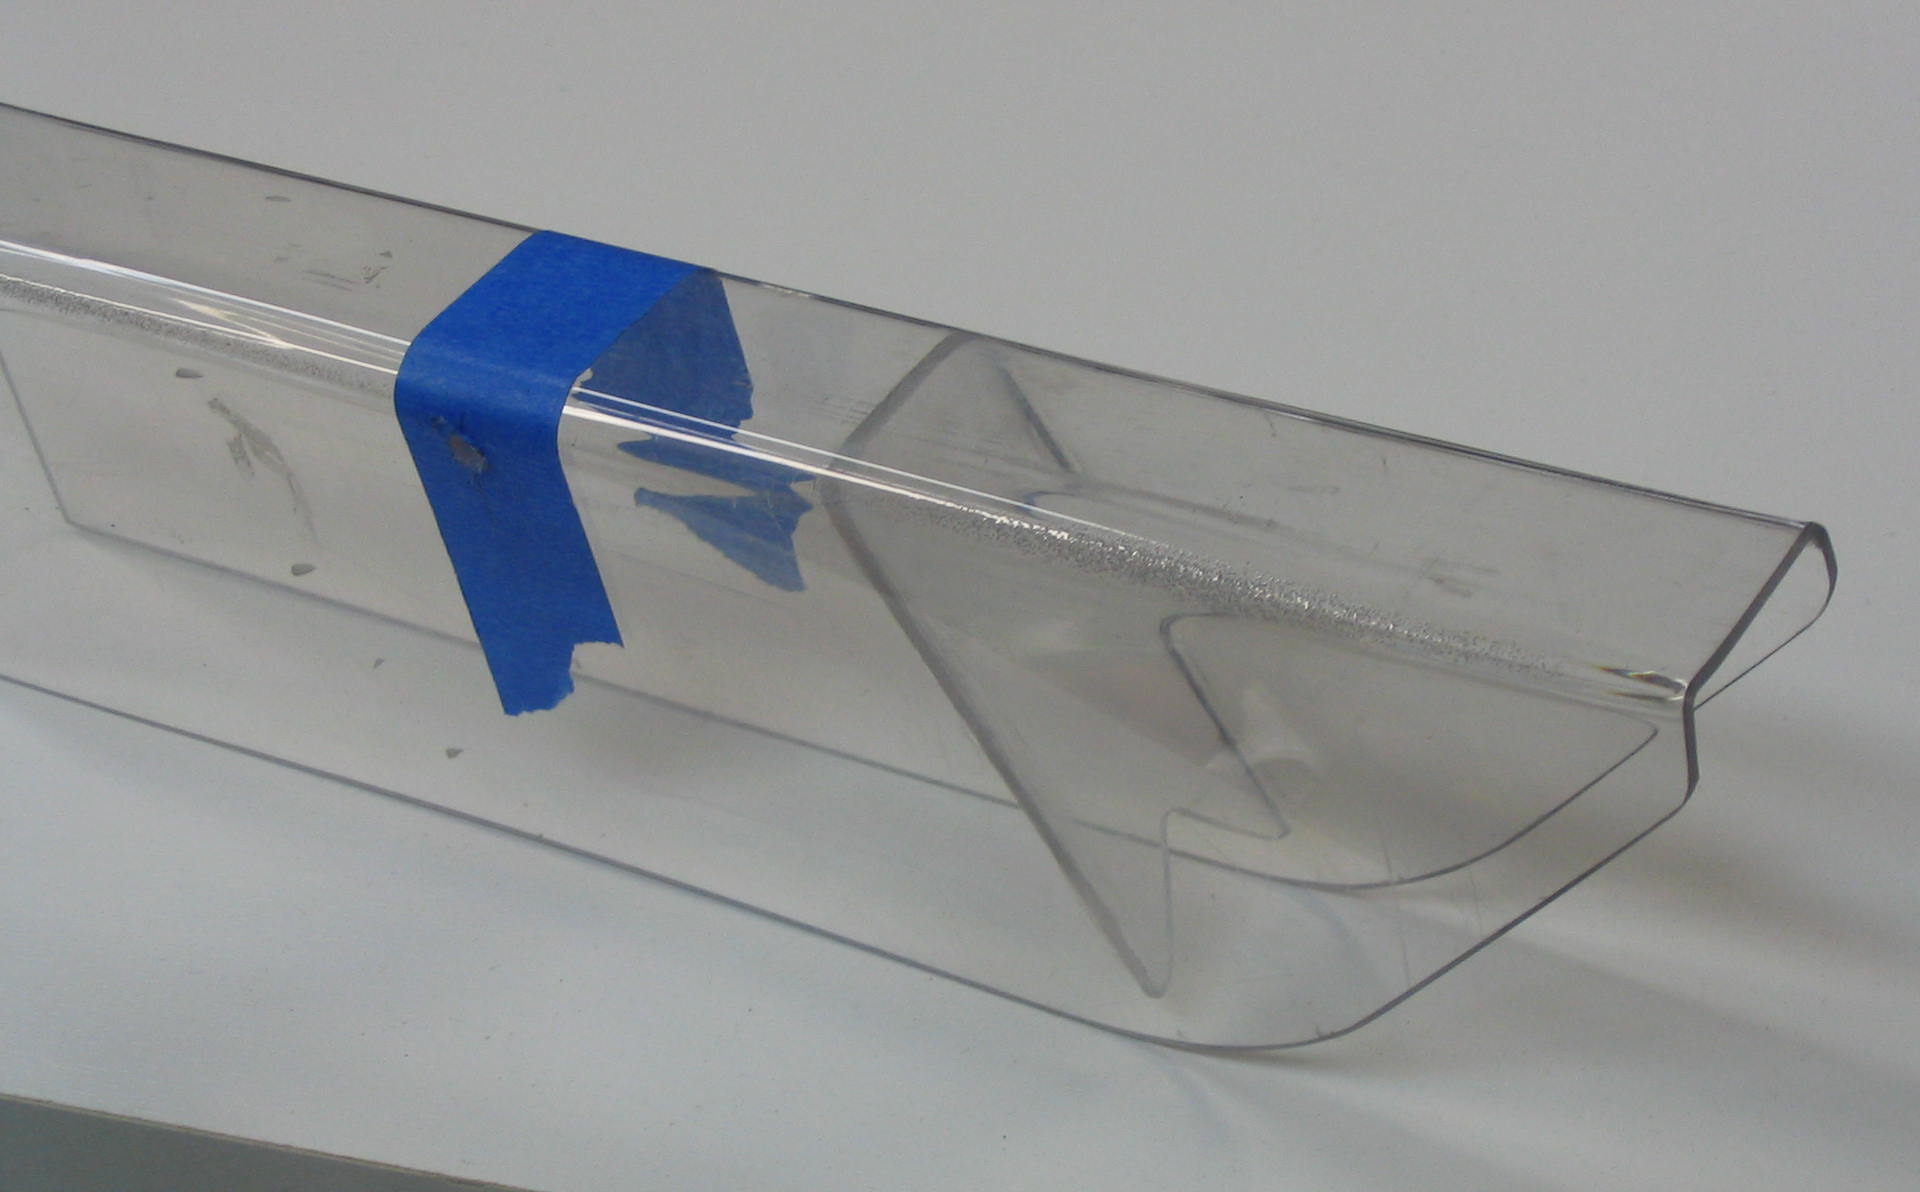
The blade cover is made of clear Lexan polycarbonate plastic, which I think is a better choice than acrylic because it is shatter-resistant. It covers the top, sides, and front of the blade.
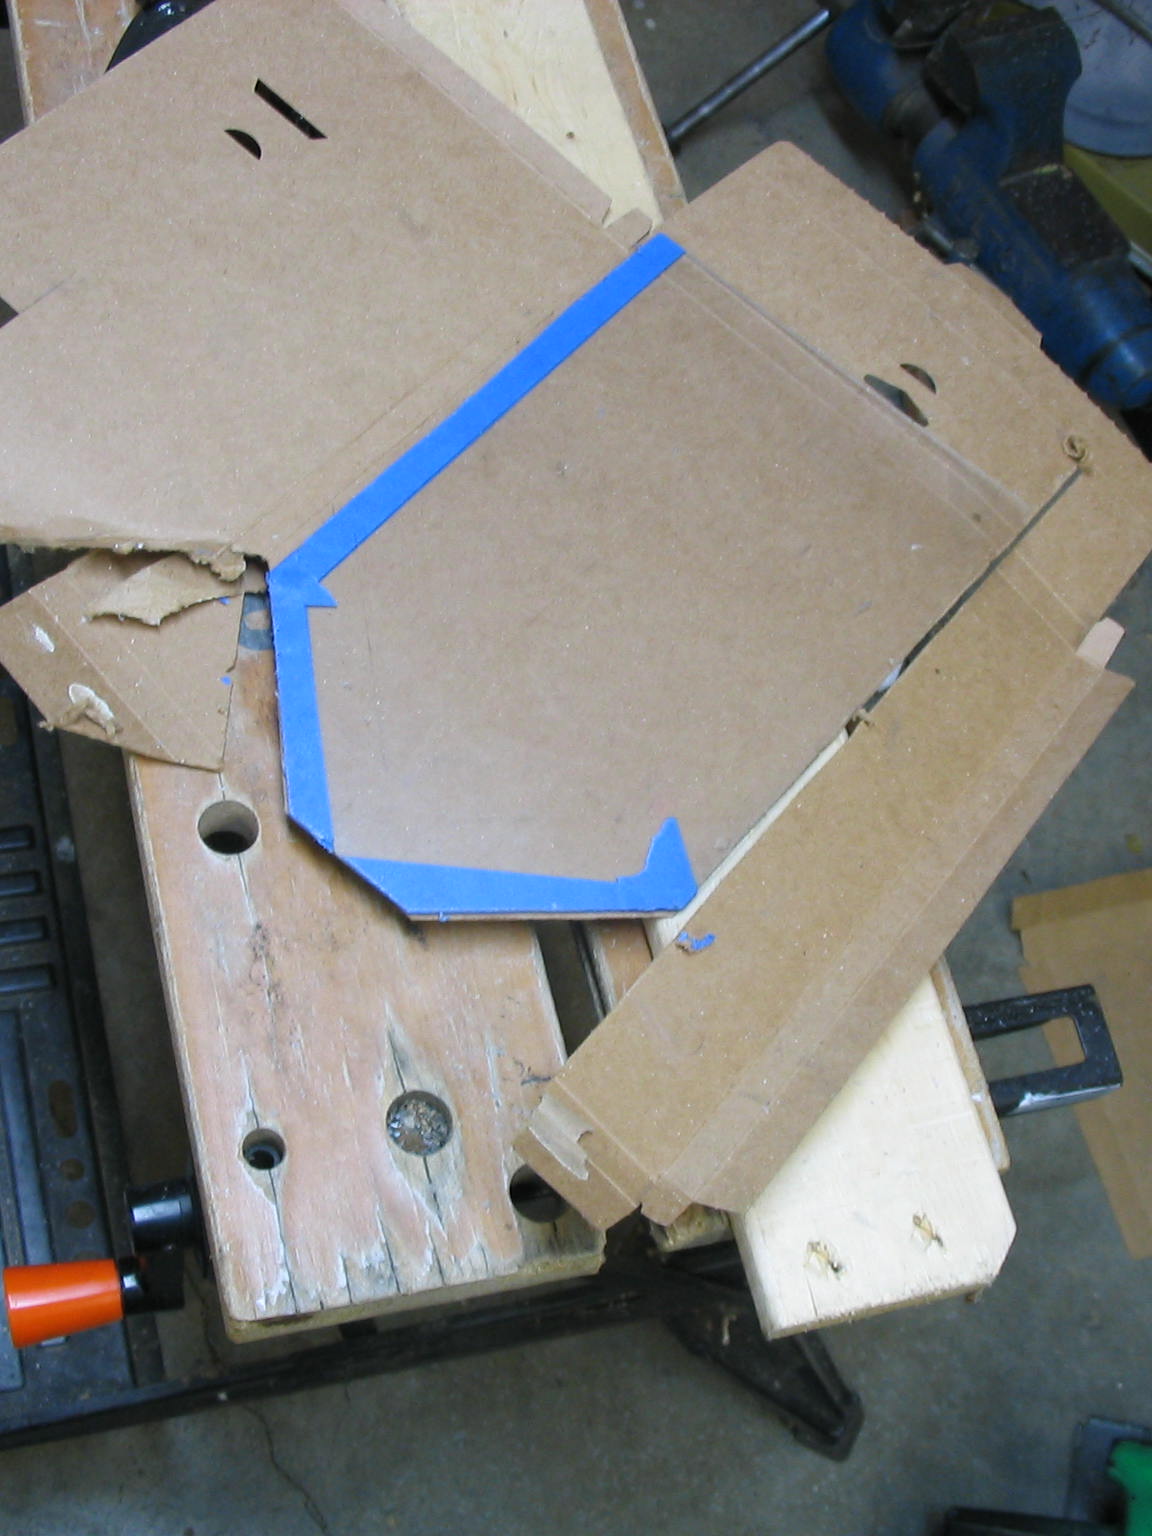
When you buy sheet plastic, it usually comes with a paper covering on both sides. This reduces scratches and also reduces chipping along the saw cuts. Since I was working with a salvaged piece of plastic from another project, I placed masking tape along the saw lines to reduce chipping, and put cardboard around the sheet to protect it from scratches and scrapes.
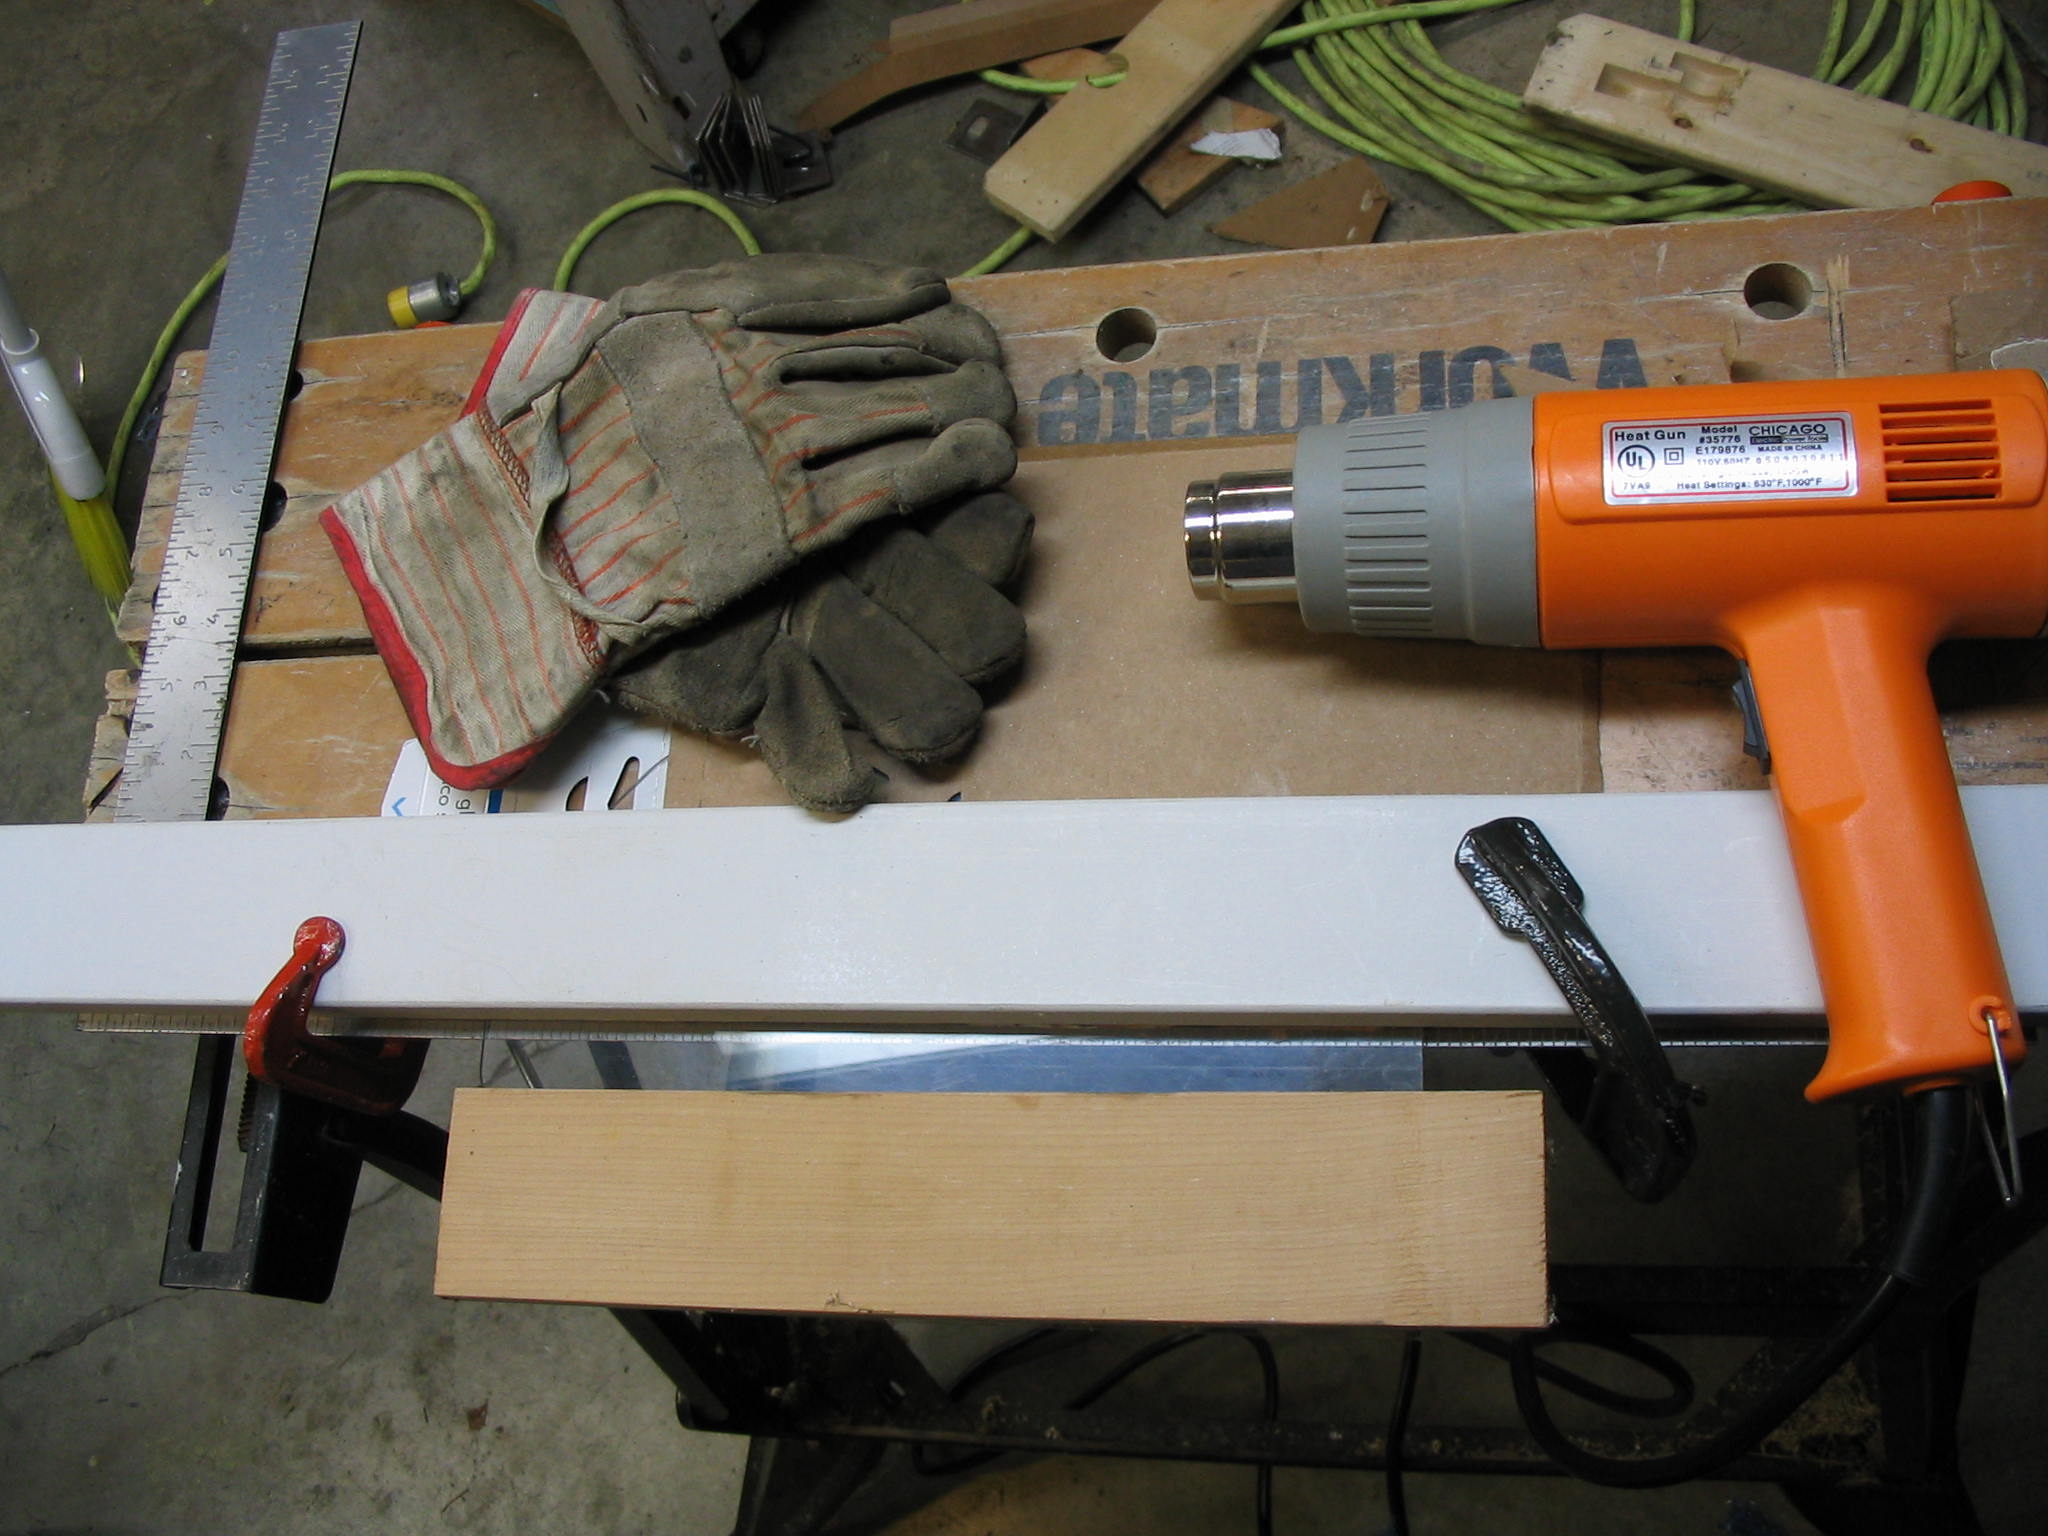
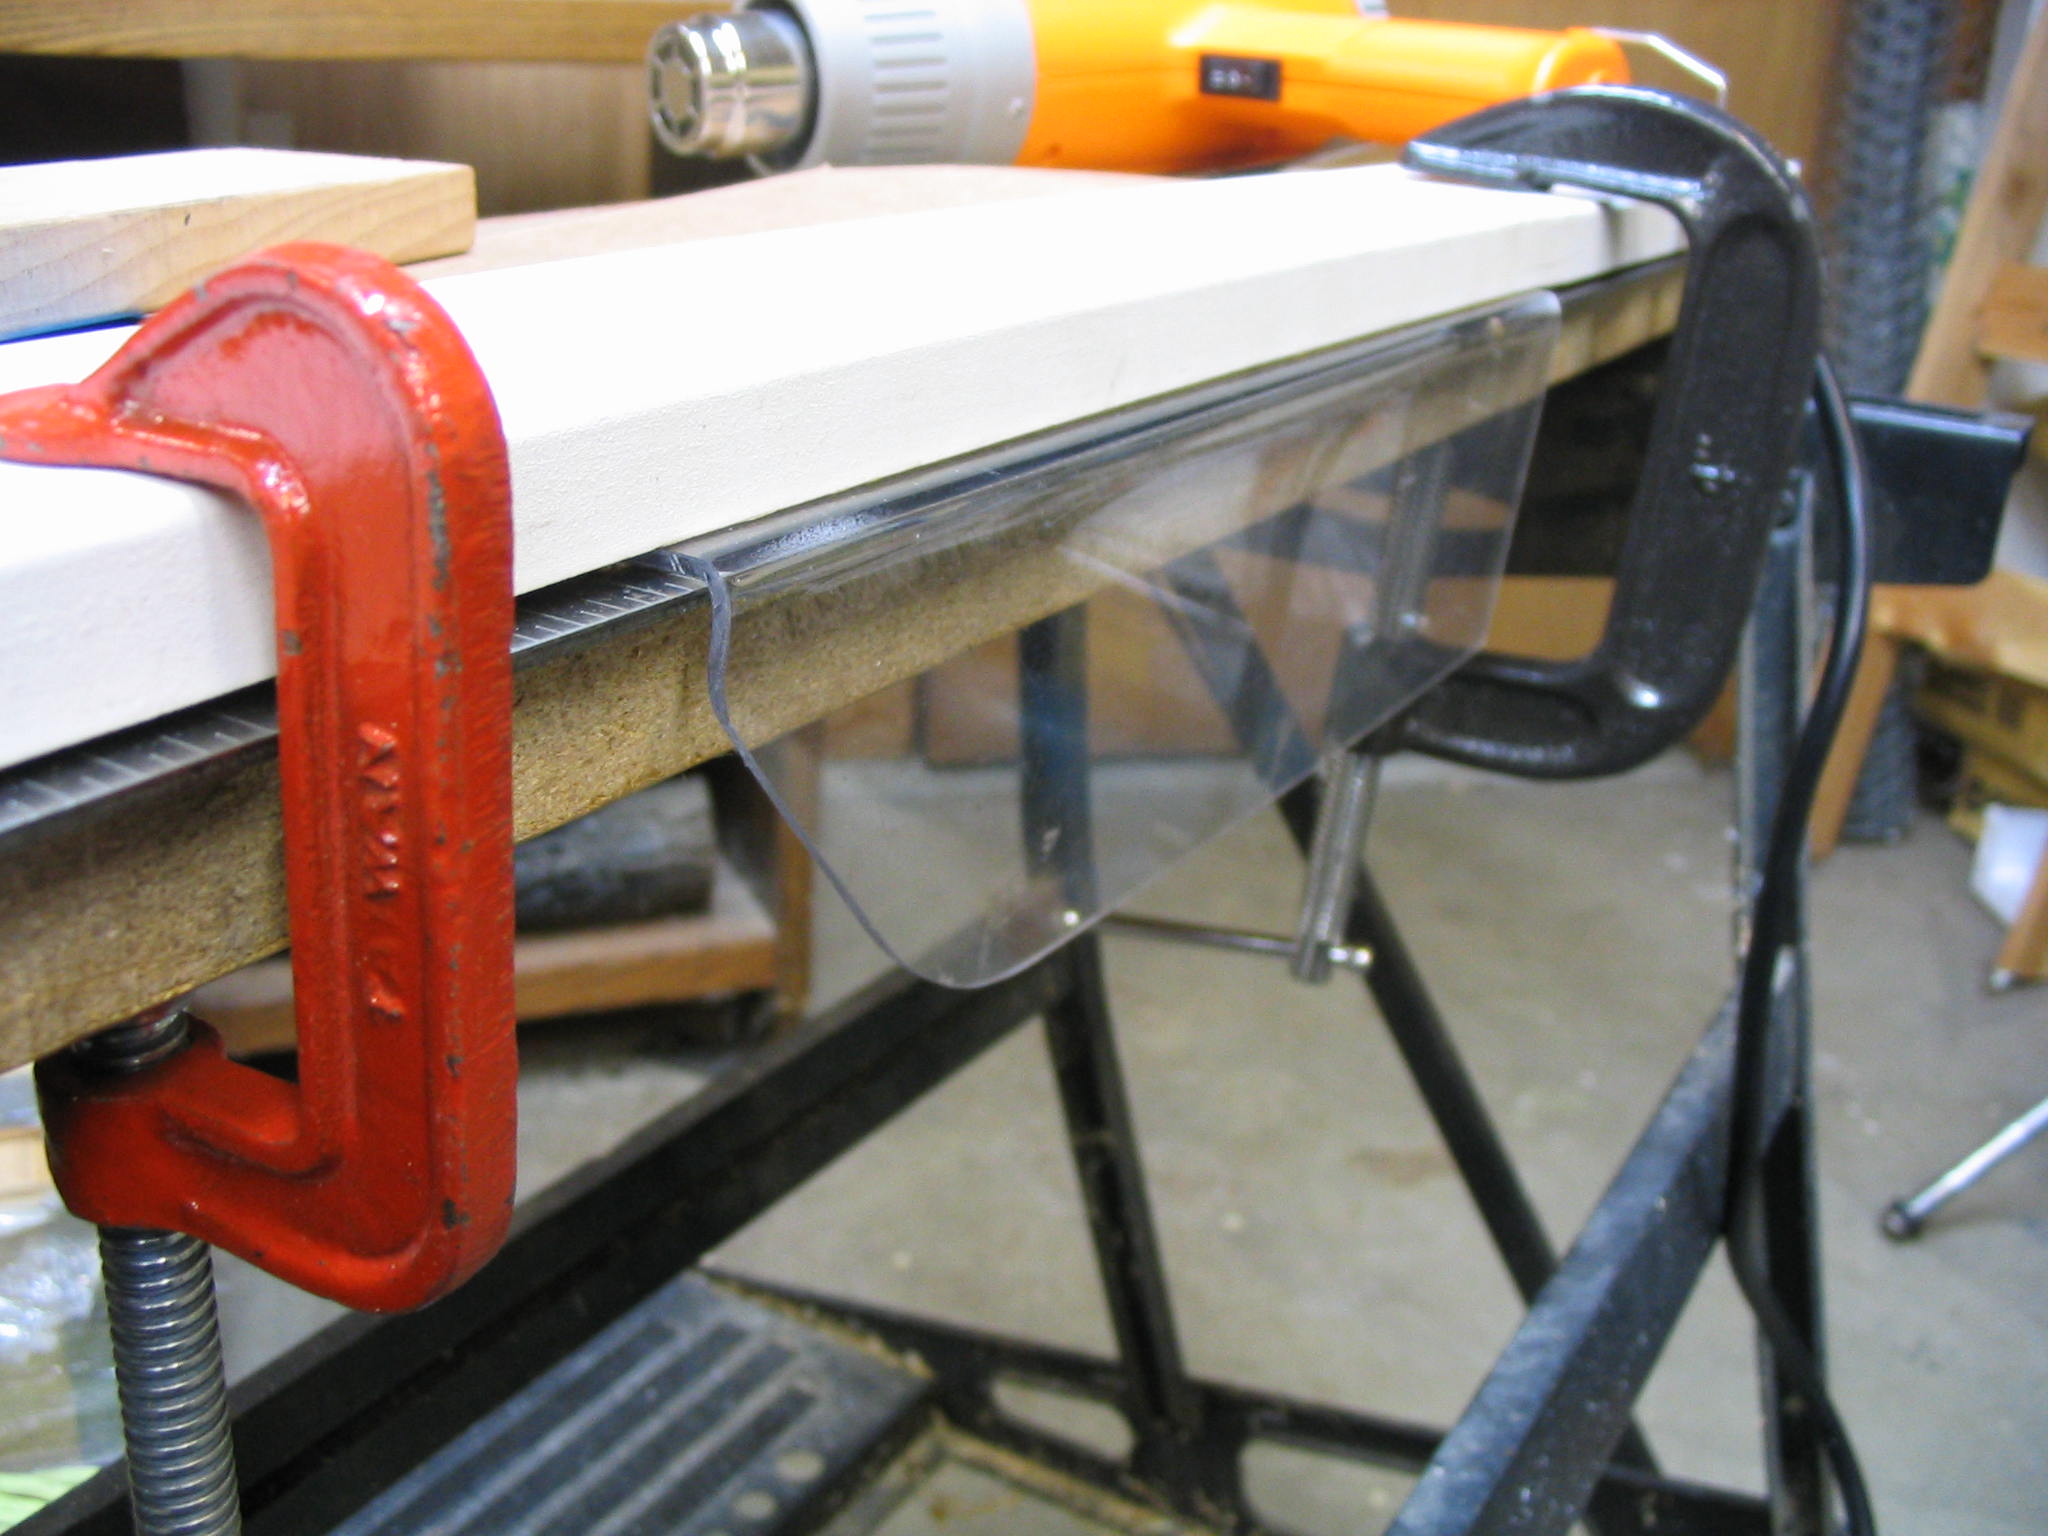
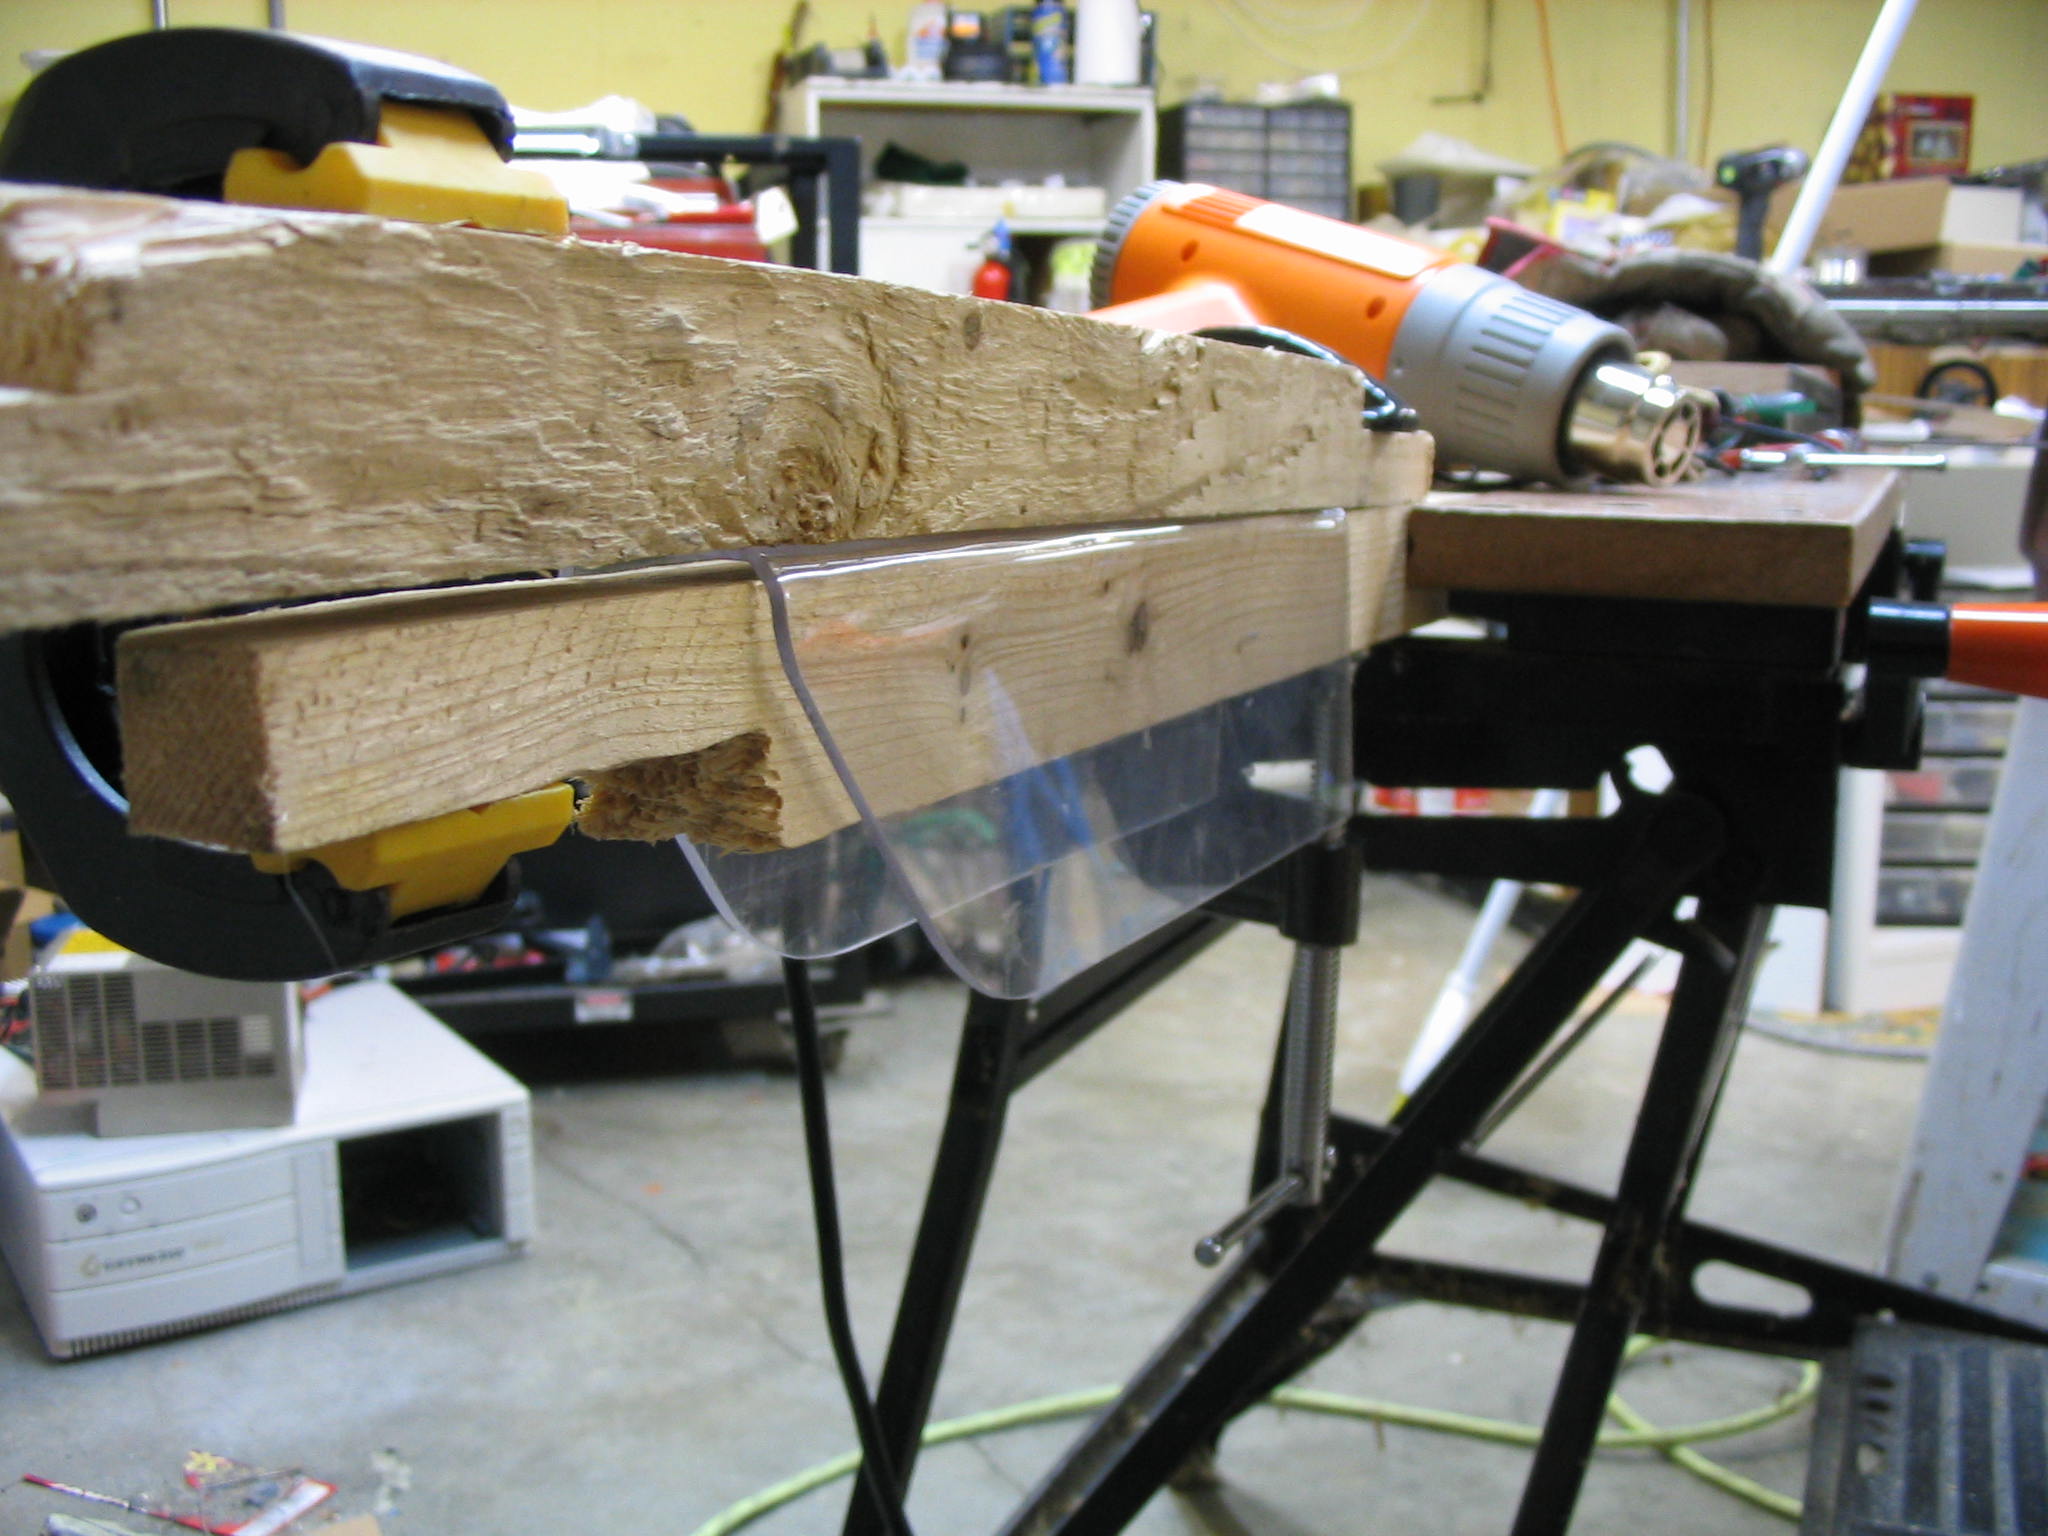
I bent a piece of Lexan into a U-shape channel using the heat gun, making two 90-degree bends. To make the bend, I clamped down the plastic between two boards, and used a metal straight-edge to bend on. I used another board to cover the rest of the plastic, leaving only a small strip of the plastic exposed between the two boards. I heated that strip by moving the heat gun back and forth along it, until the plastic became soft enough to bend. It is still a little hard to get both angles square, so I used another board which was the exact width of the channel. I reheated the corners and pressed the sides flat, producing a decent square channel.
Heat gun for bendingBending plasticGetting sides straight
This covered the top and side, but not the front. Since the saw blade spins over the top toward the operator, it is useful to cover the front to prevent any chips from being flung forward. I cut out another piece of Lexan and filed it to fit the channel, and glued it with cyanoacrylate “krazy glue”.
Arms
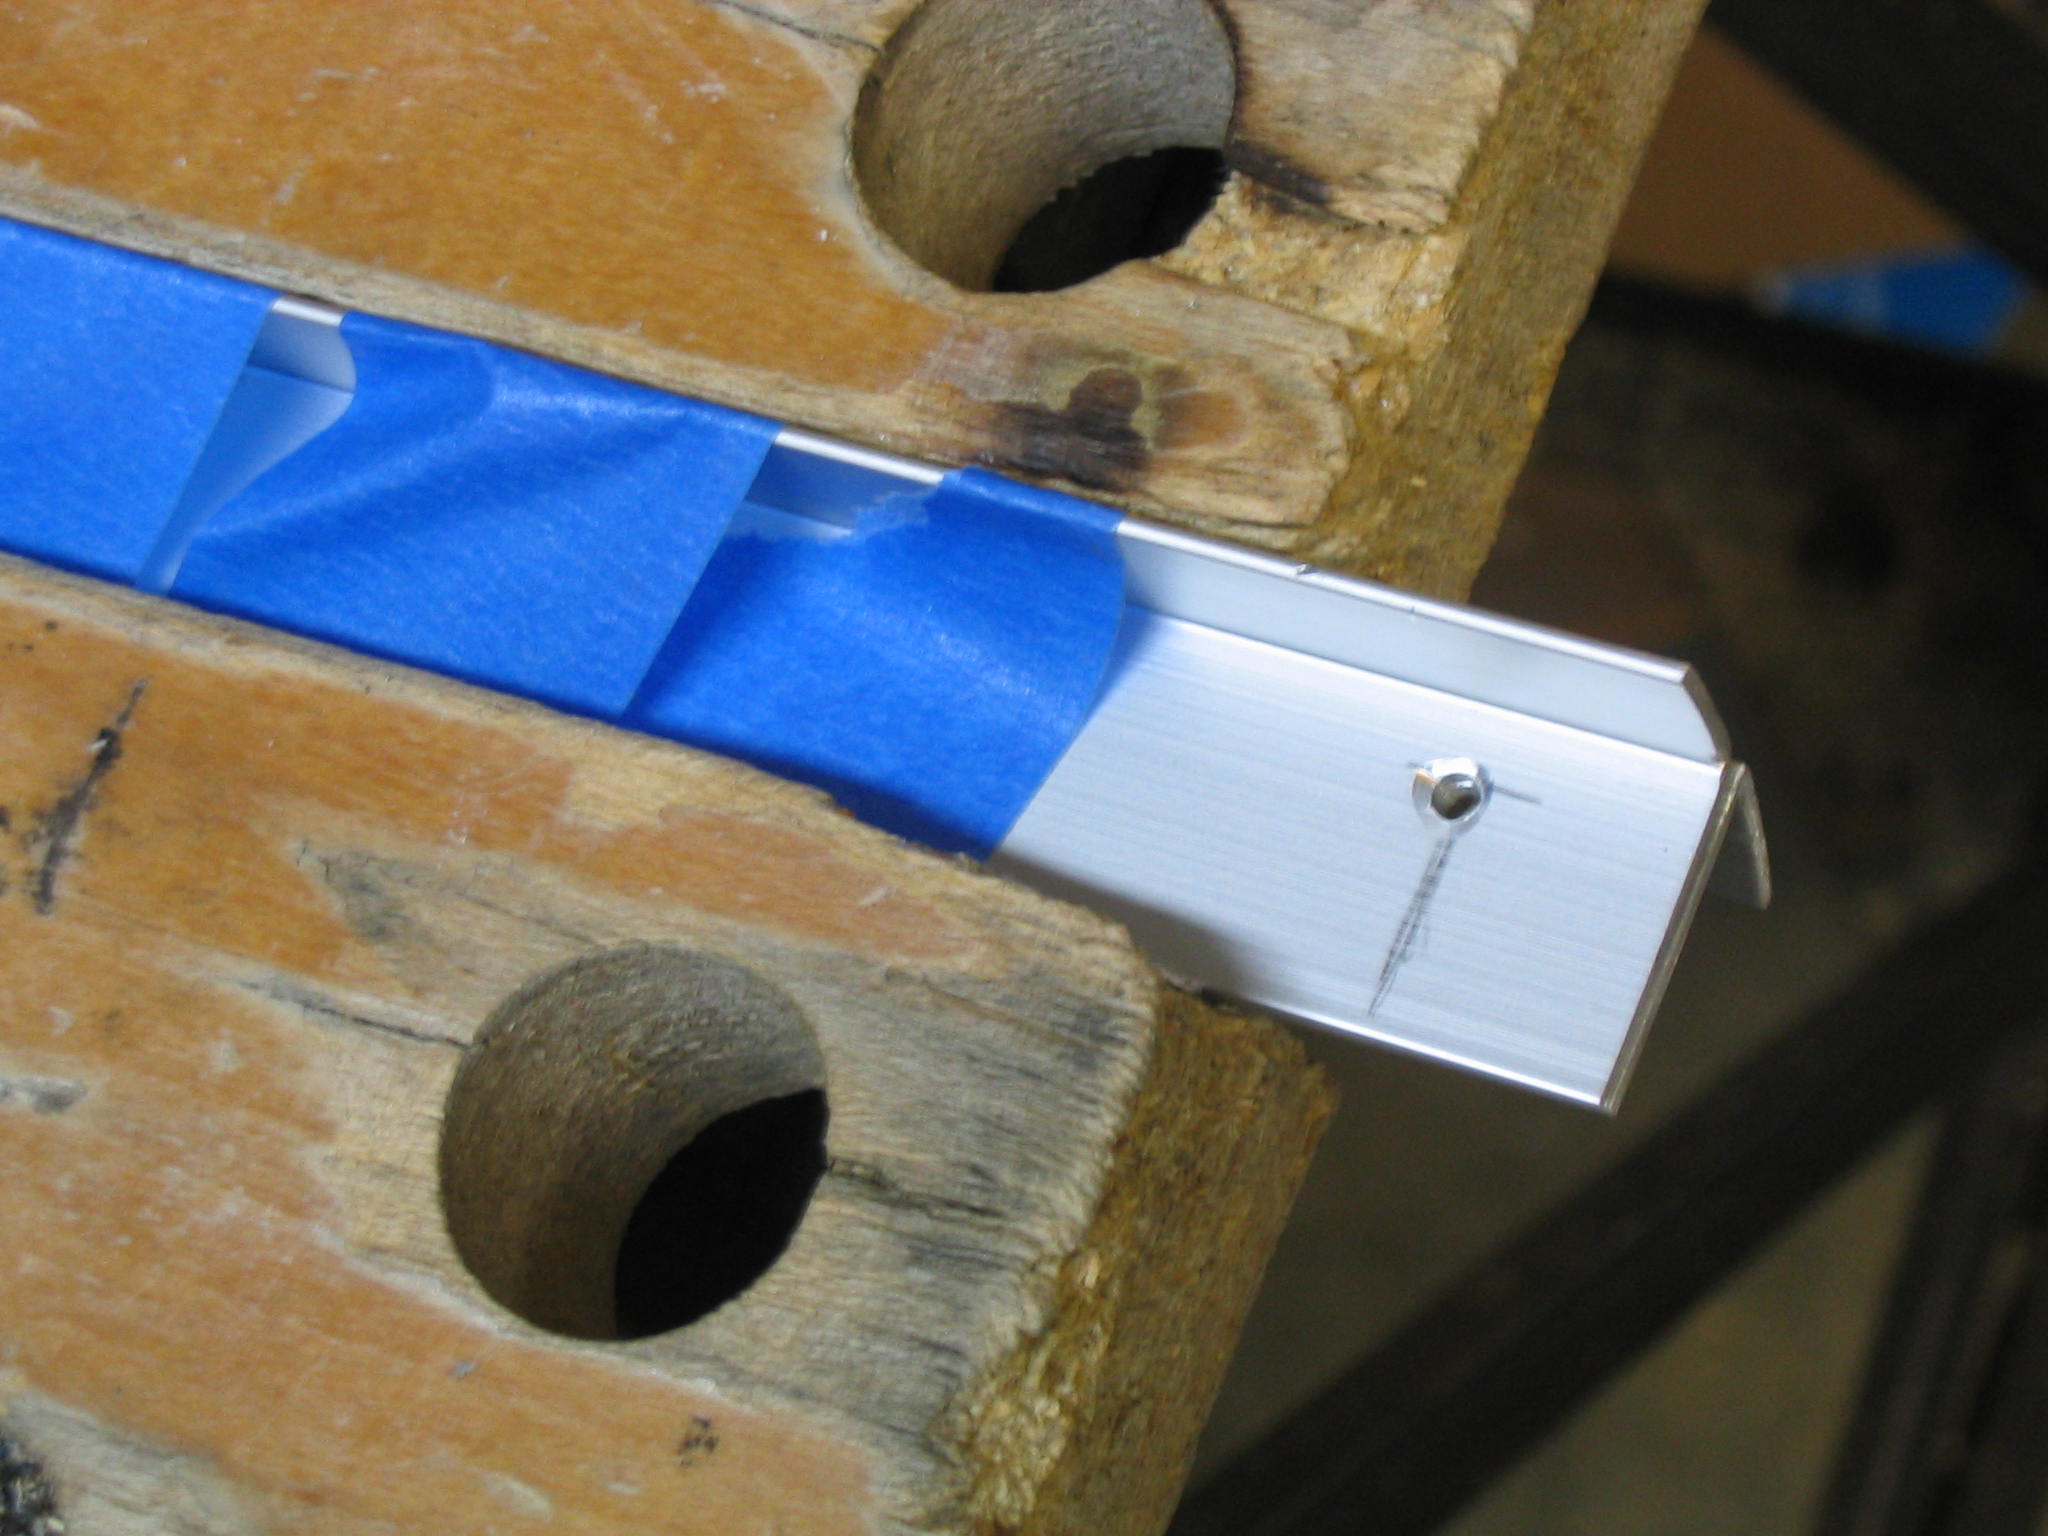
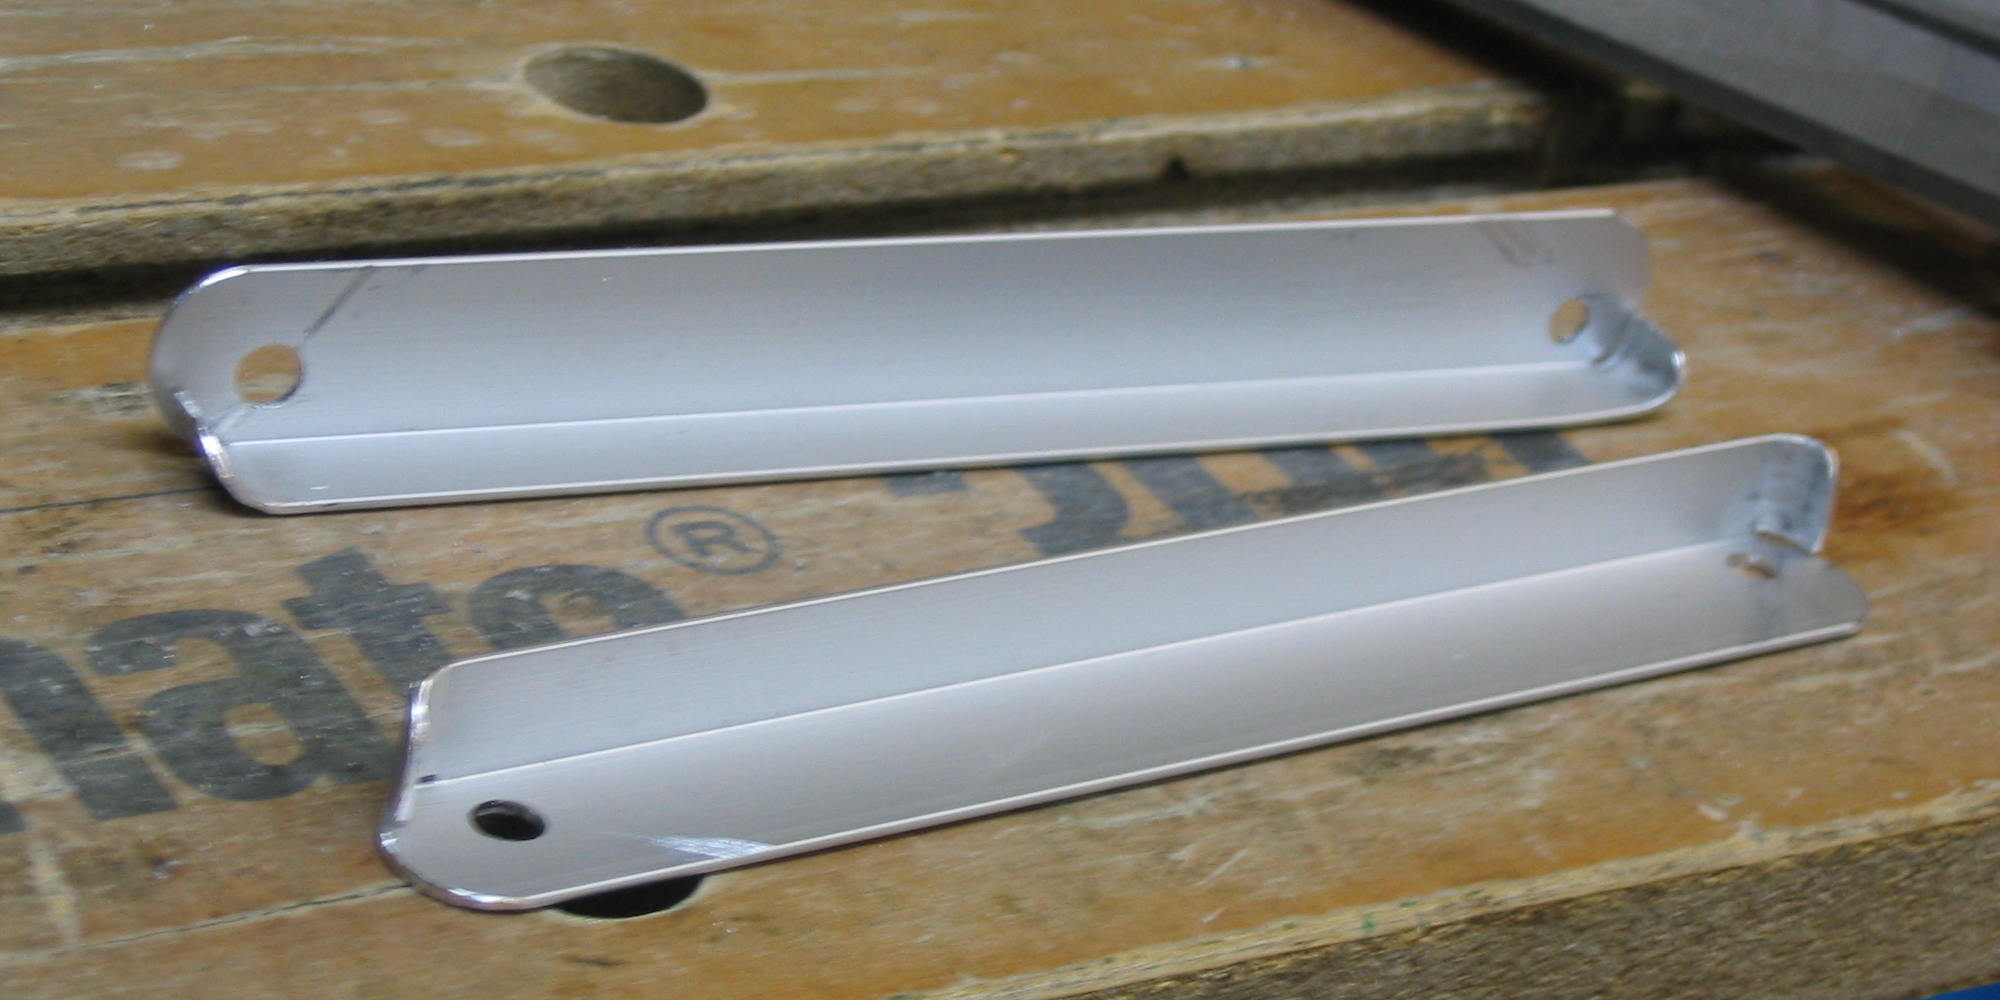
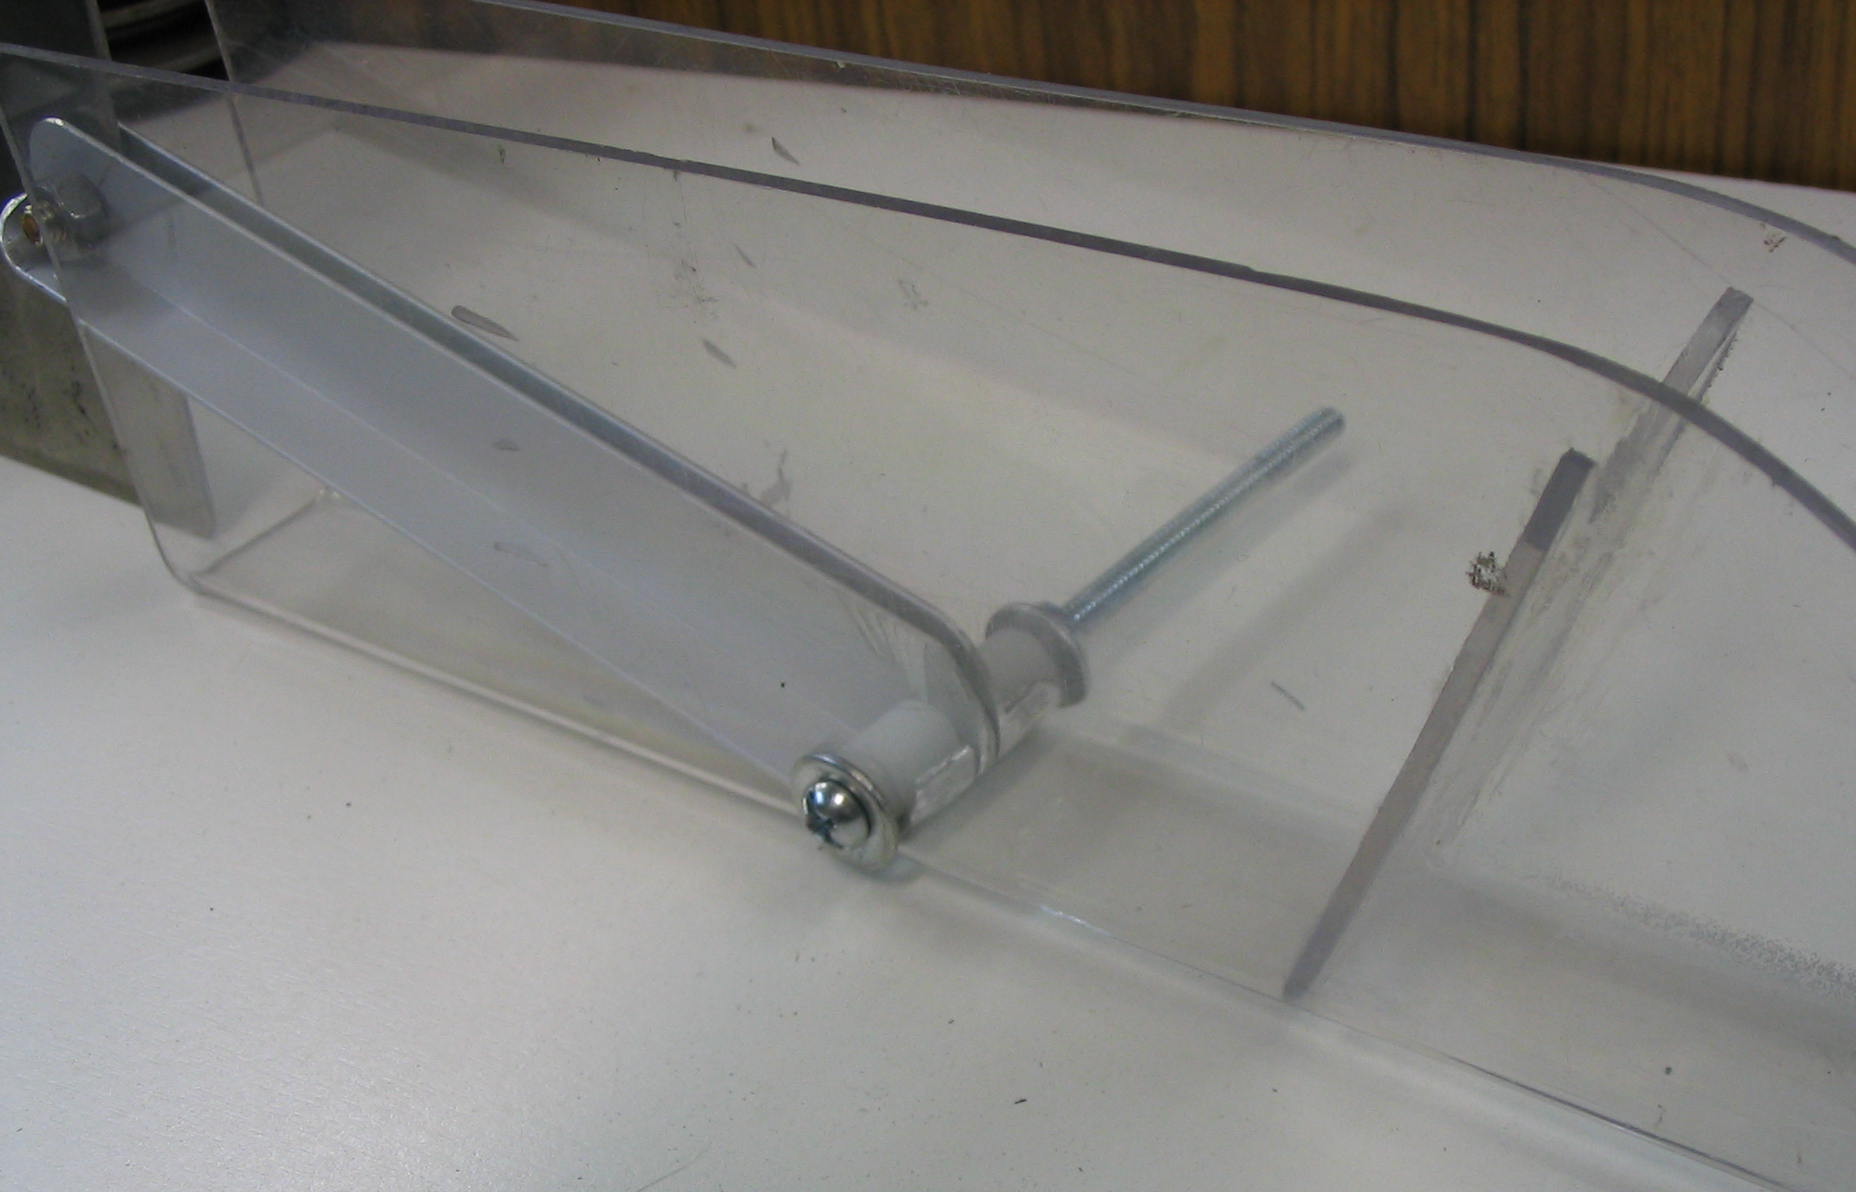
The cover is attached to the splitter by a pivoting support arm. I made this out of two pieces of aluminum L-shaped track, one on each side of the splitter. There is a hole where they connect to the splitter, and another hole where they connect to the cover. The best way to ensure that the holes line up is to drill them at the same time.
After I drilled the holes, I inserted screws with washers and locknuts to connect the arms to the blade cover and splitter. Since the cover screw goes through the sides of the cover, it needs some extra spacers to hold the arms in the center. I used two short pieces of 1/4″ plastic pipe.
Occaisionally you may want to flip back the cover without removing the splitter. I added a stop screw to keep the arms from flipping all the way over and blocking the wood path on the back side.
Drilling holes in armsRounded endsCover arm attachment
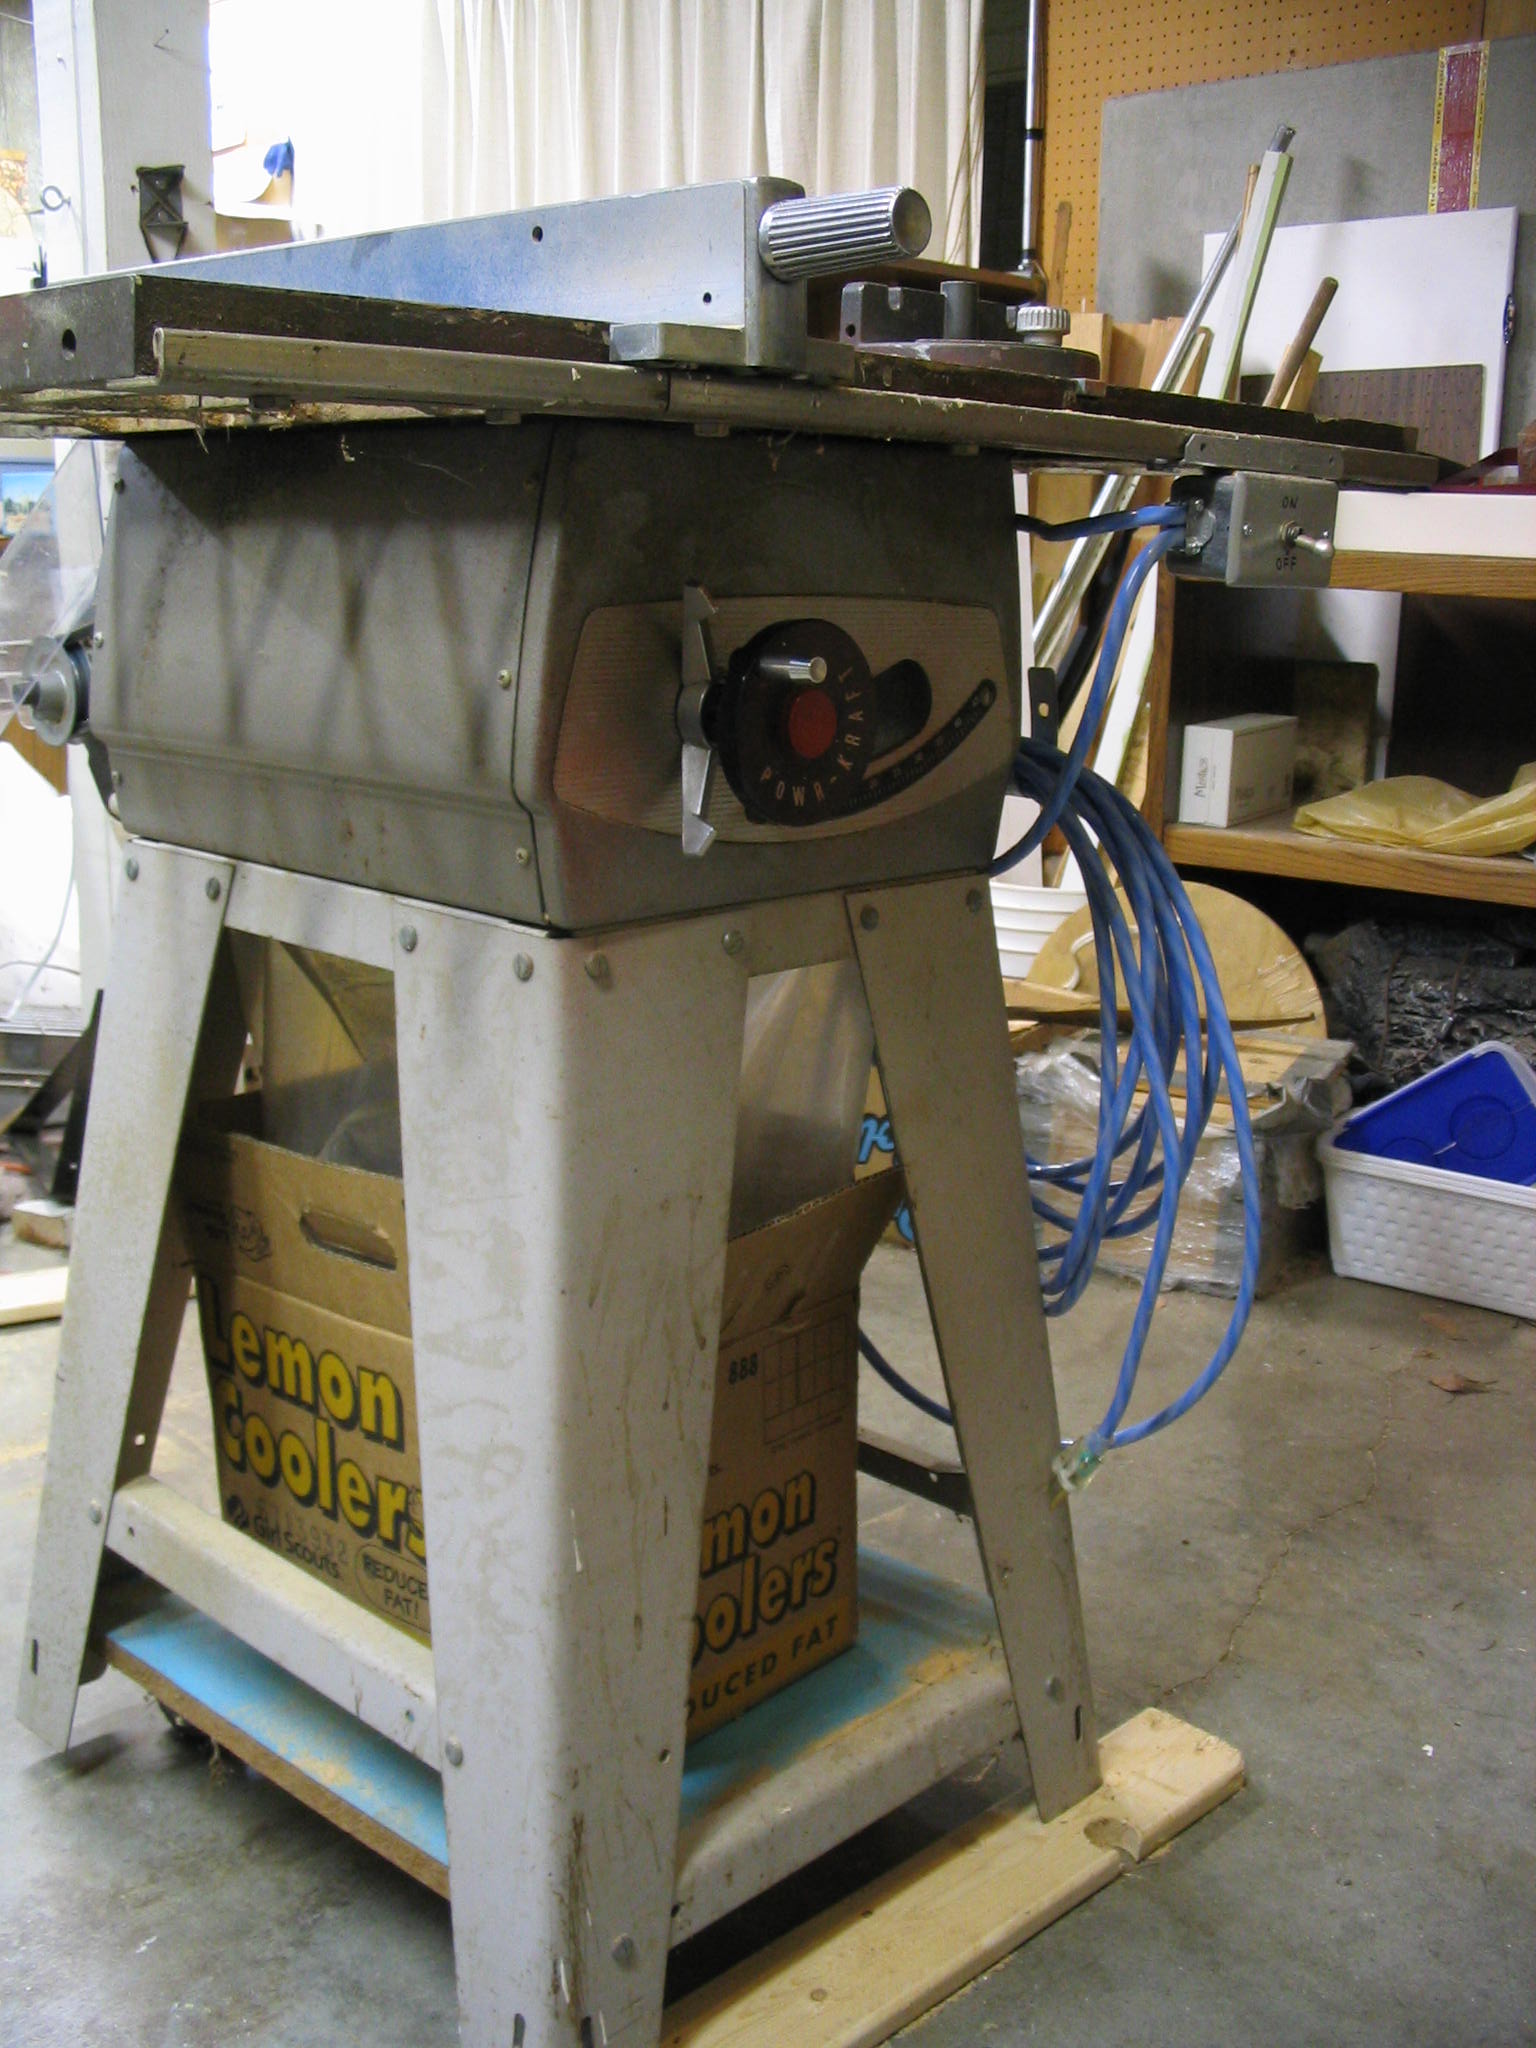
I acquired a table saw last summer at a local estate sale for $20. It needed some repair, but looked like it was likely still in fairly good condition.
The label identifies it as a Powr-Kraft model TMG-3332A from Montgomery-Wards; date unkown. Looking at it, I guessed it was from the 1960s.
The saw takes an 8-inch blade, and is belt-driven with the motor mounted on the back of the frame. Mine has a 1-horsepower Craftsman electrical motor. I know this is not the original since Craftsman is a Sears brand.
My friend Jerry helped me find more information about this saw from the Old Wood Working Machine’s Powr-Kraft page. They had a reprint of a 1956 Ward’s catalog, and my saw is right inside on the second page.
Even though it is 50 years old, it still works nicely, but there are a number of things this saw needs. The electrical wiring needs repair, and it needs some safety guards. Since it is bordering on being an antique, or at least a collector’s item, I’m making sure that any fixes or modifications are not permanent, so it could be restored to original state if desired in the future.
My used tablesaw came without a splitter/blade guard. This is an important safety item, so I am making one for the saw. The first step was to create a mounting bracket where it could attach.
A blade guard has two main components. The cover goes over the spinning blade, to prevent the saw operator from getting injured directly on the spinning blade. The cover is usually made of clear plastic nowadays, and it is mounted on the splitter. The splitter is a vertical piece of sheet metal sitting behind the blade, which guides the cut wood past the blade so it won’t bind.
The blade on the tablesaw is mounted on a shaft called the arbor. The arbor tilts up to 45 degrees to make angled cuts. The splitter must therefore also tilt along with the blade and arbor to match. The splitter must be aligned perfectly straight behind the blade, so that the cut wood does not bind against it.
Attachment
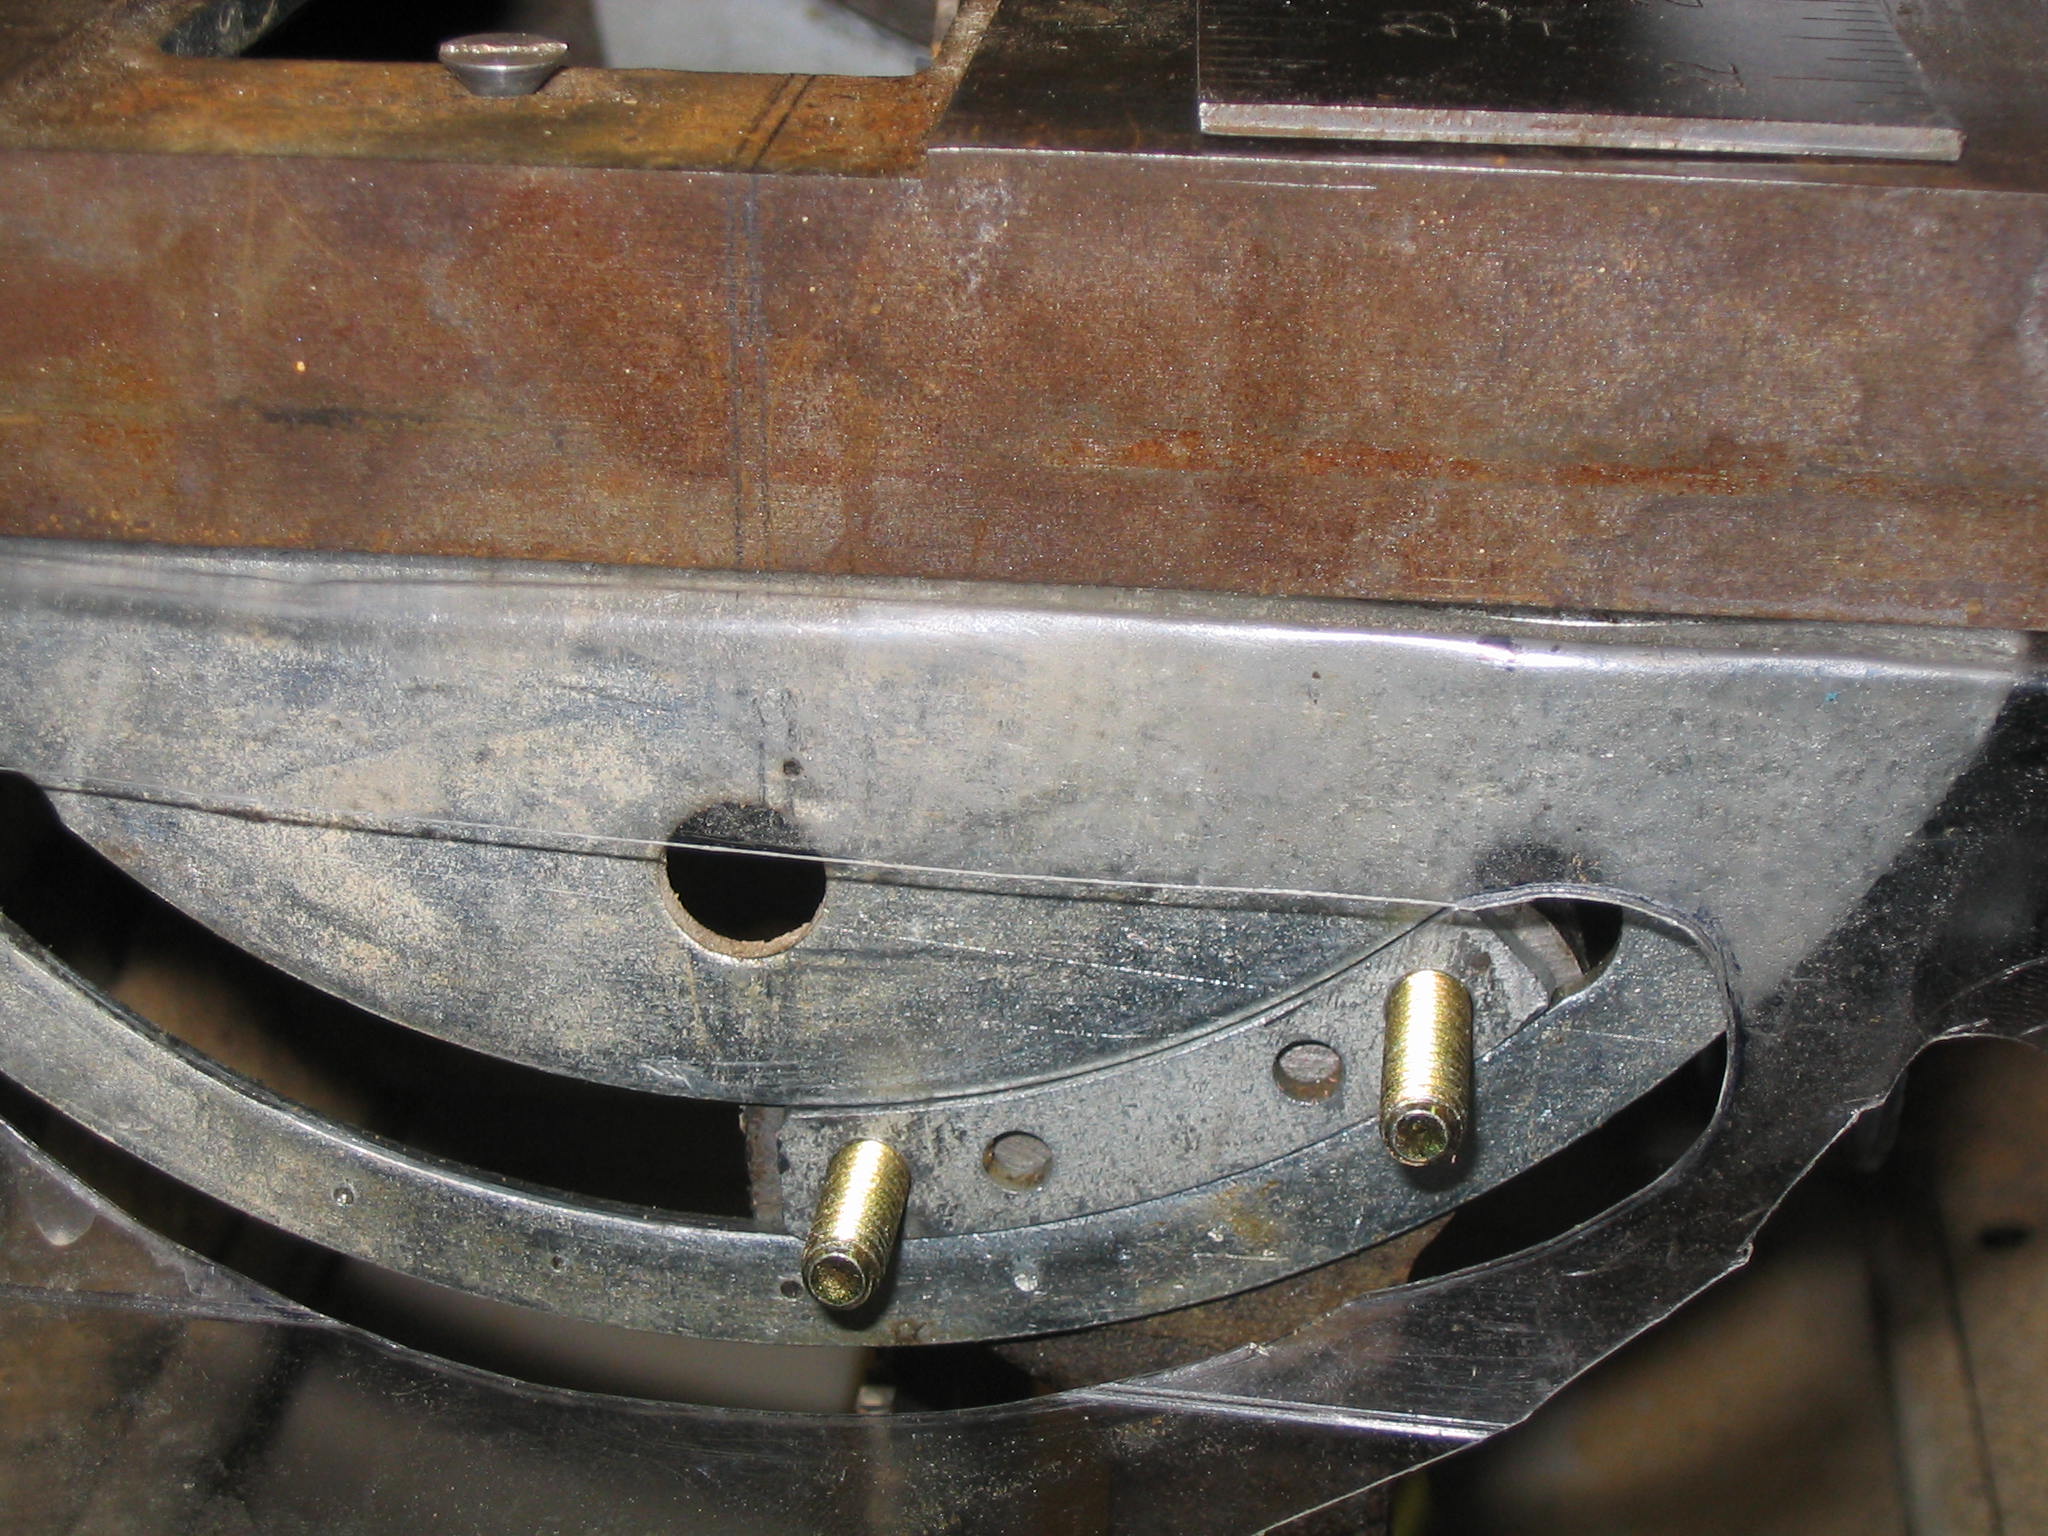
Rear trunion bolts
This presents an interesting challenge on a saw that did not come with an obvious mount for a guard. On my saw, the front and rear mounts of the arbor assembly, known as the trunions, slide in curved slots on the table saw frame. The bolts that hold the rear trunion in the slot look like they are the best place to attach a guard. I found a picture of my saw in an old 1956 Ward’s tool catalog, and it appears that the original (optional) guard attached to the back, presumably to the trunion bolts.
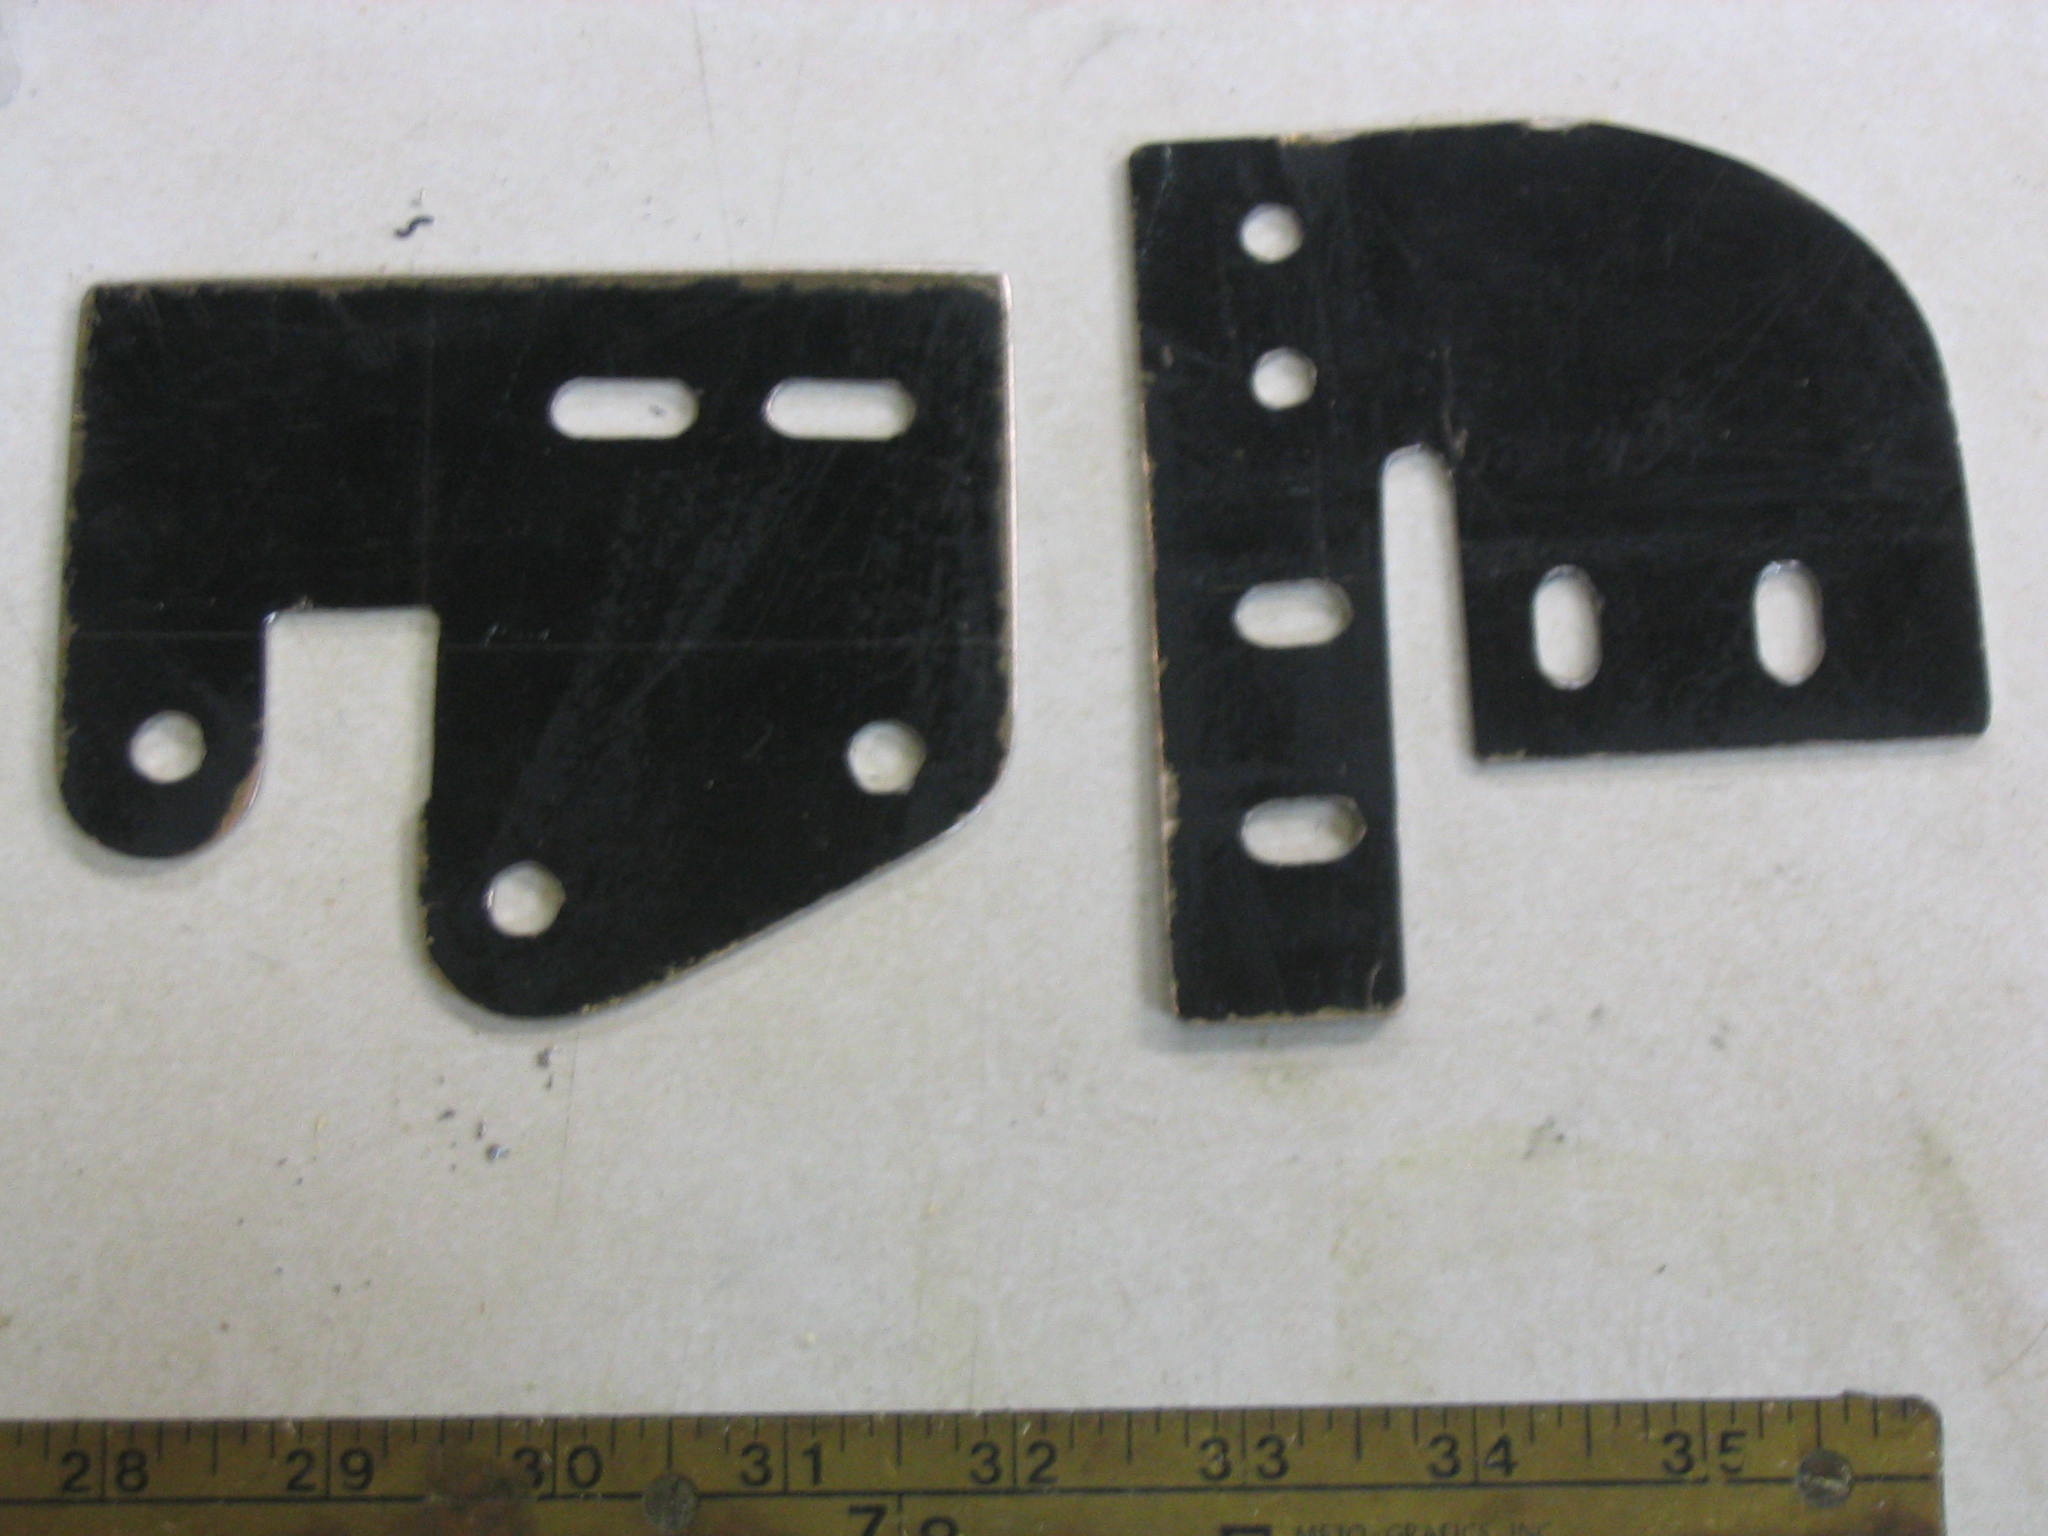
For the best adjustability, I am making a two-part bracket to attach to the trunion bolts. The two-piece design allows it to be adjusted in multiple directions and angles. The splitter will attach to this bracket.
Bracket Design
The choice of materials and construction methods affect the design. The guard must be mounted so that the splitter is aligned with the blade. I am making the guard out of materials I have on hand, and I don’t have precision metal fabrication tools. Therefore, adjustability is a major component of the guard design.
I am making the splitter and mounting bracket out of heavy sheet metal. The standard table saw blade width (“kerf”) is 1/8″, so the splitter must be thinner than that.
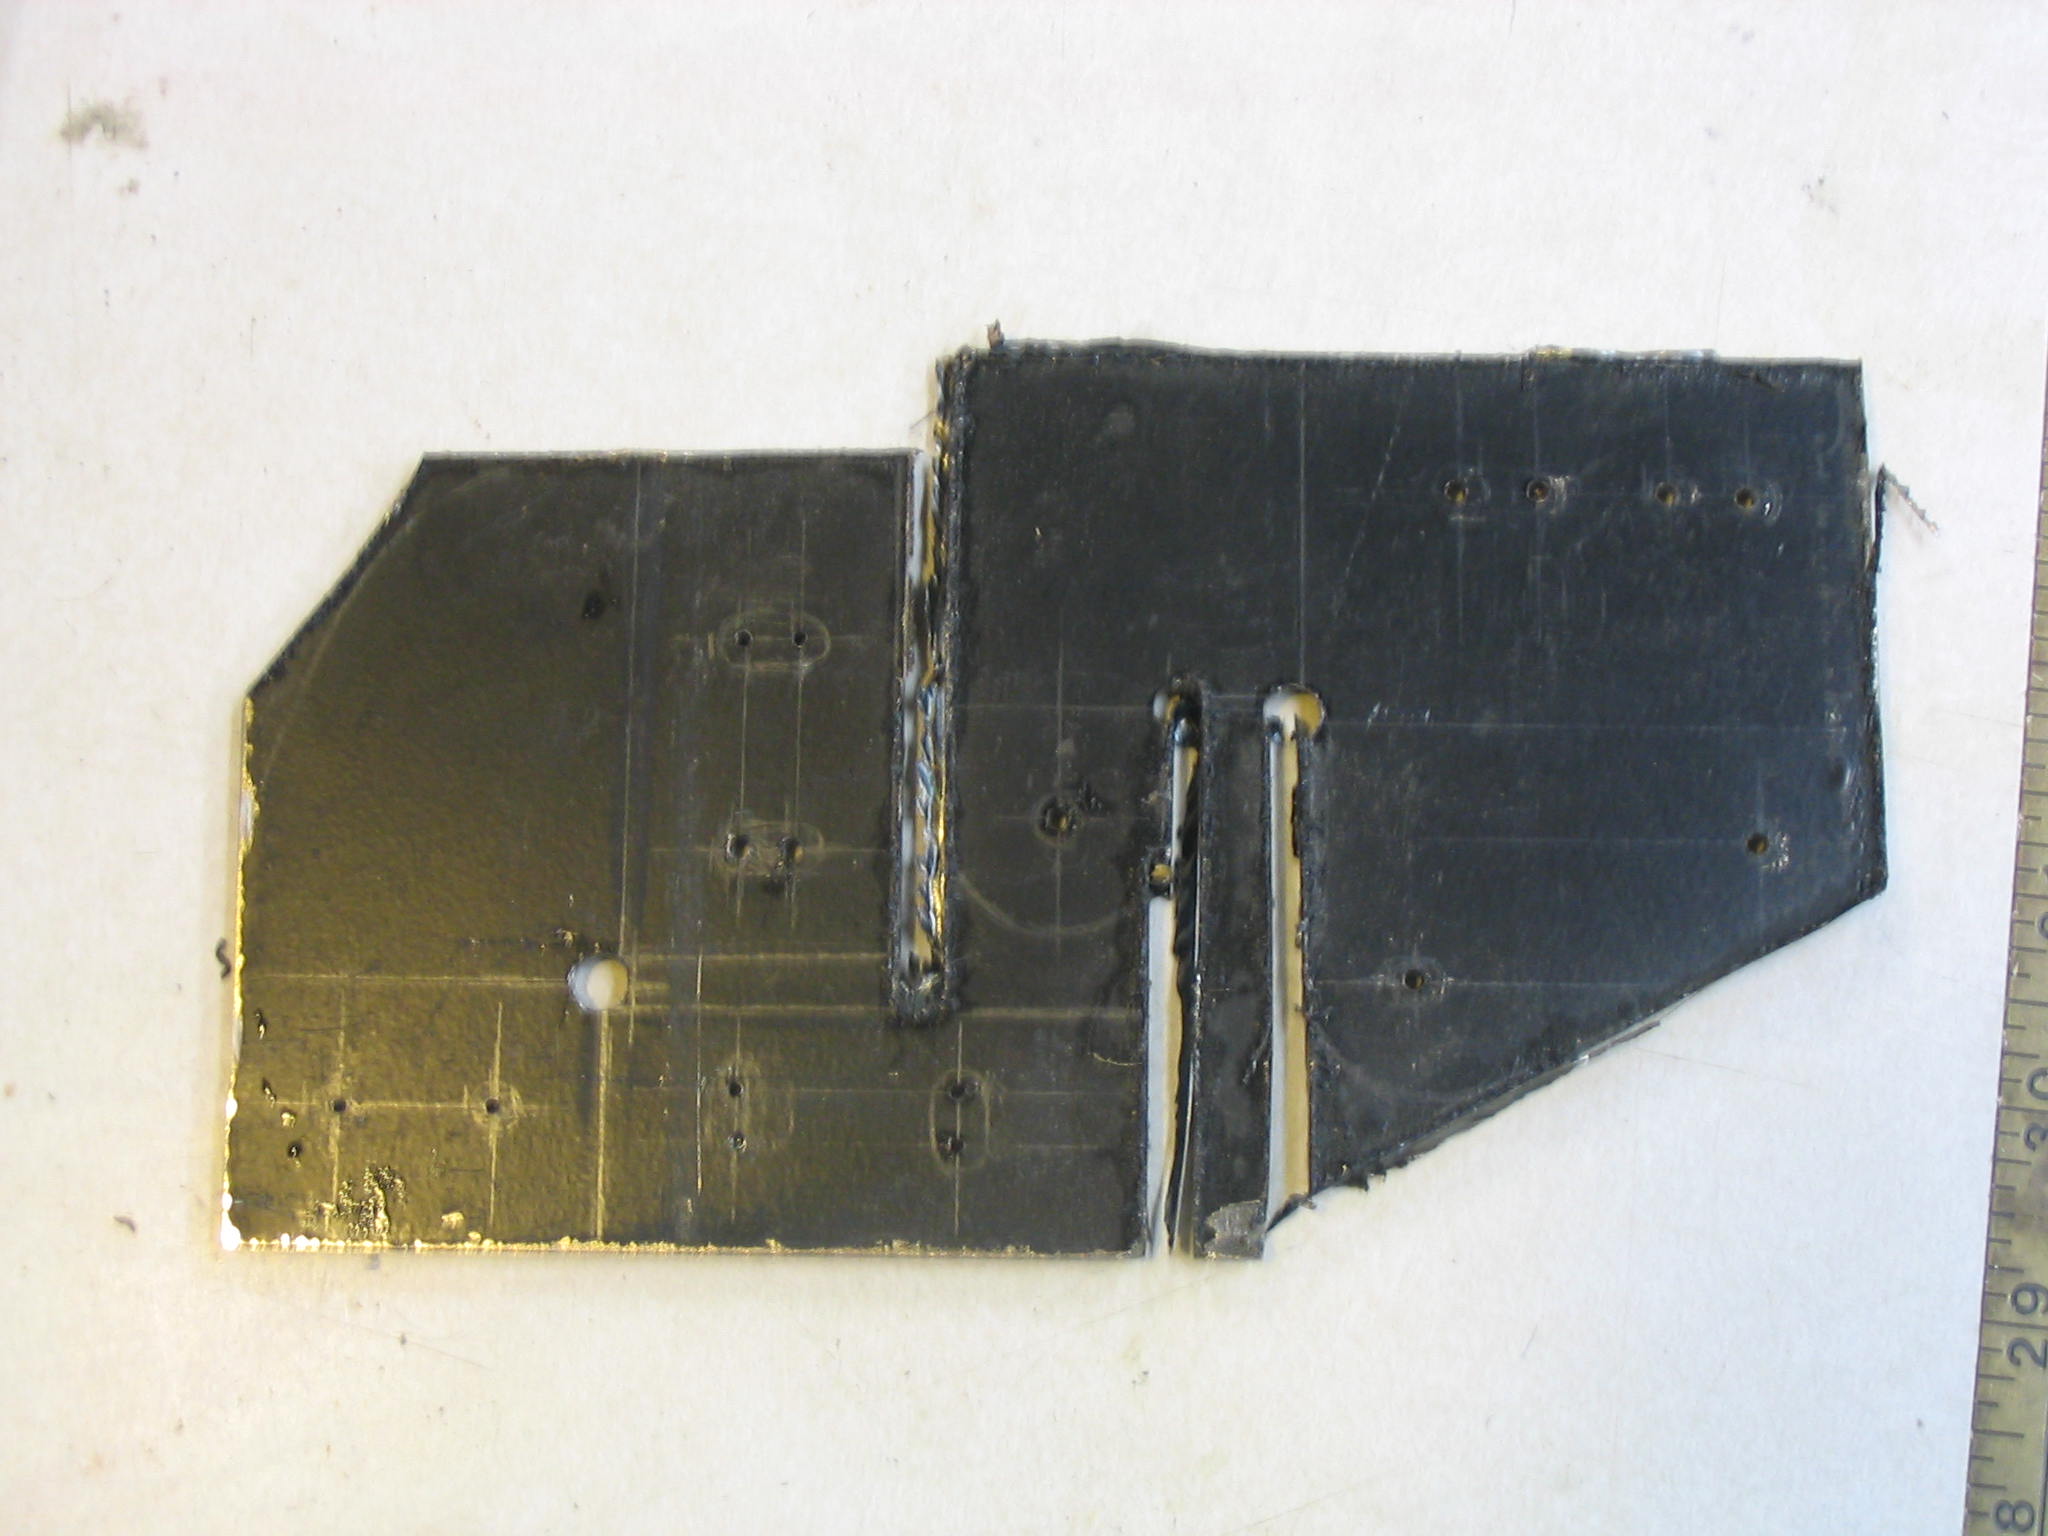
I first made some templates out of carboard, allowing me to adjust the size and positioning, before cutting any sheet metal.
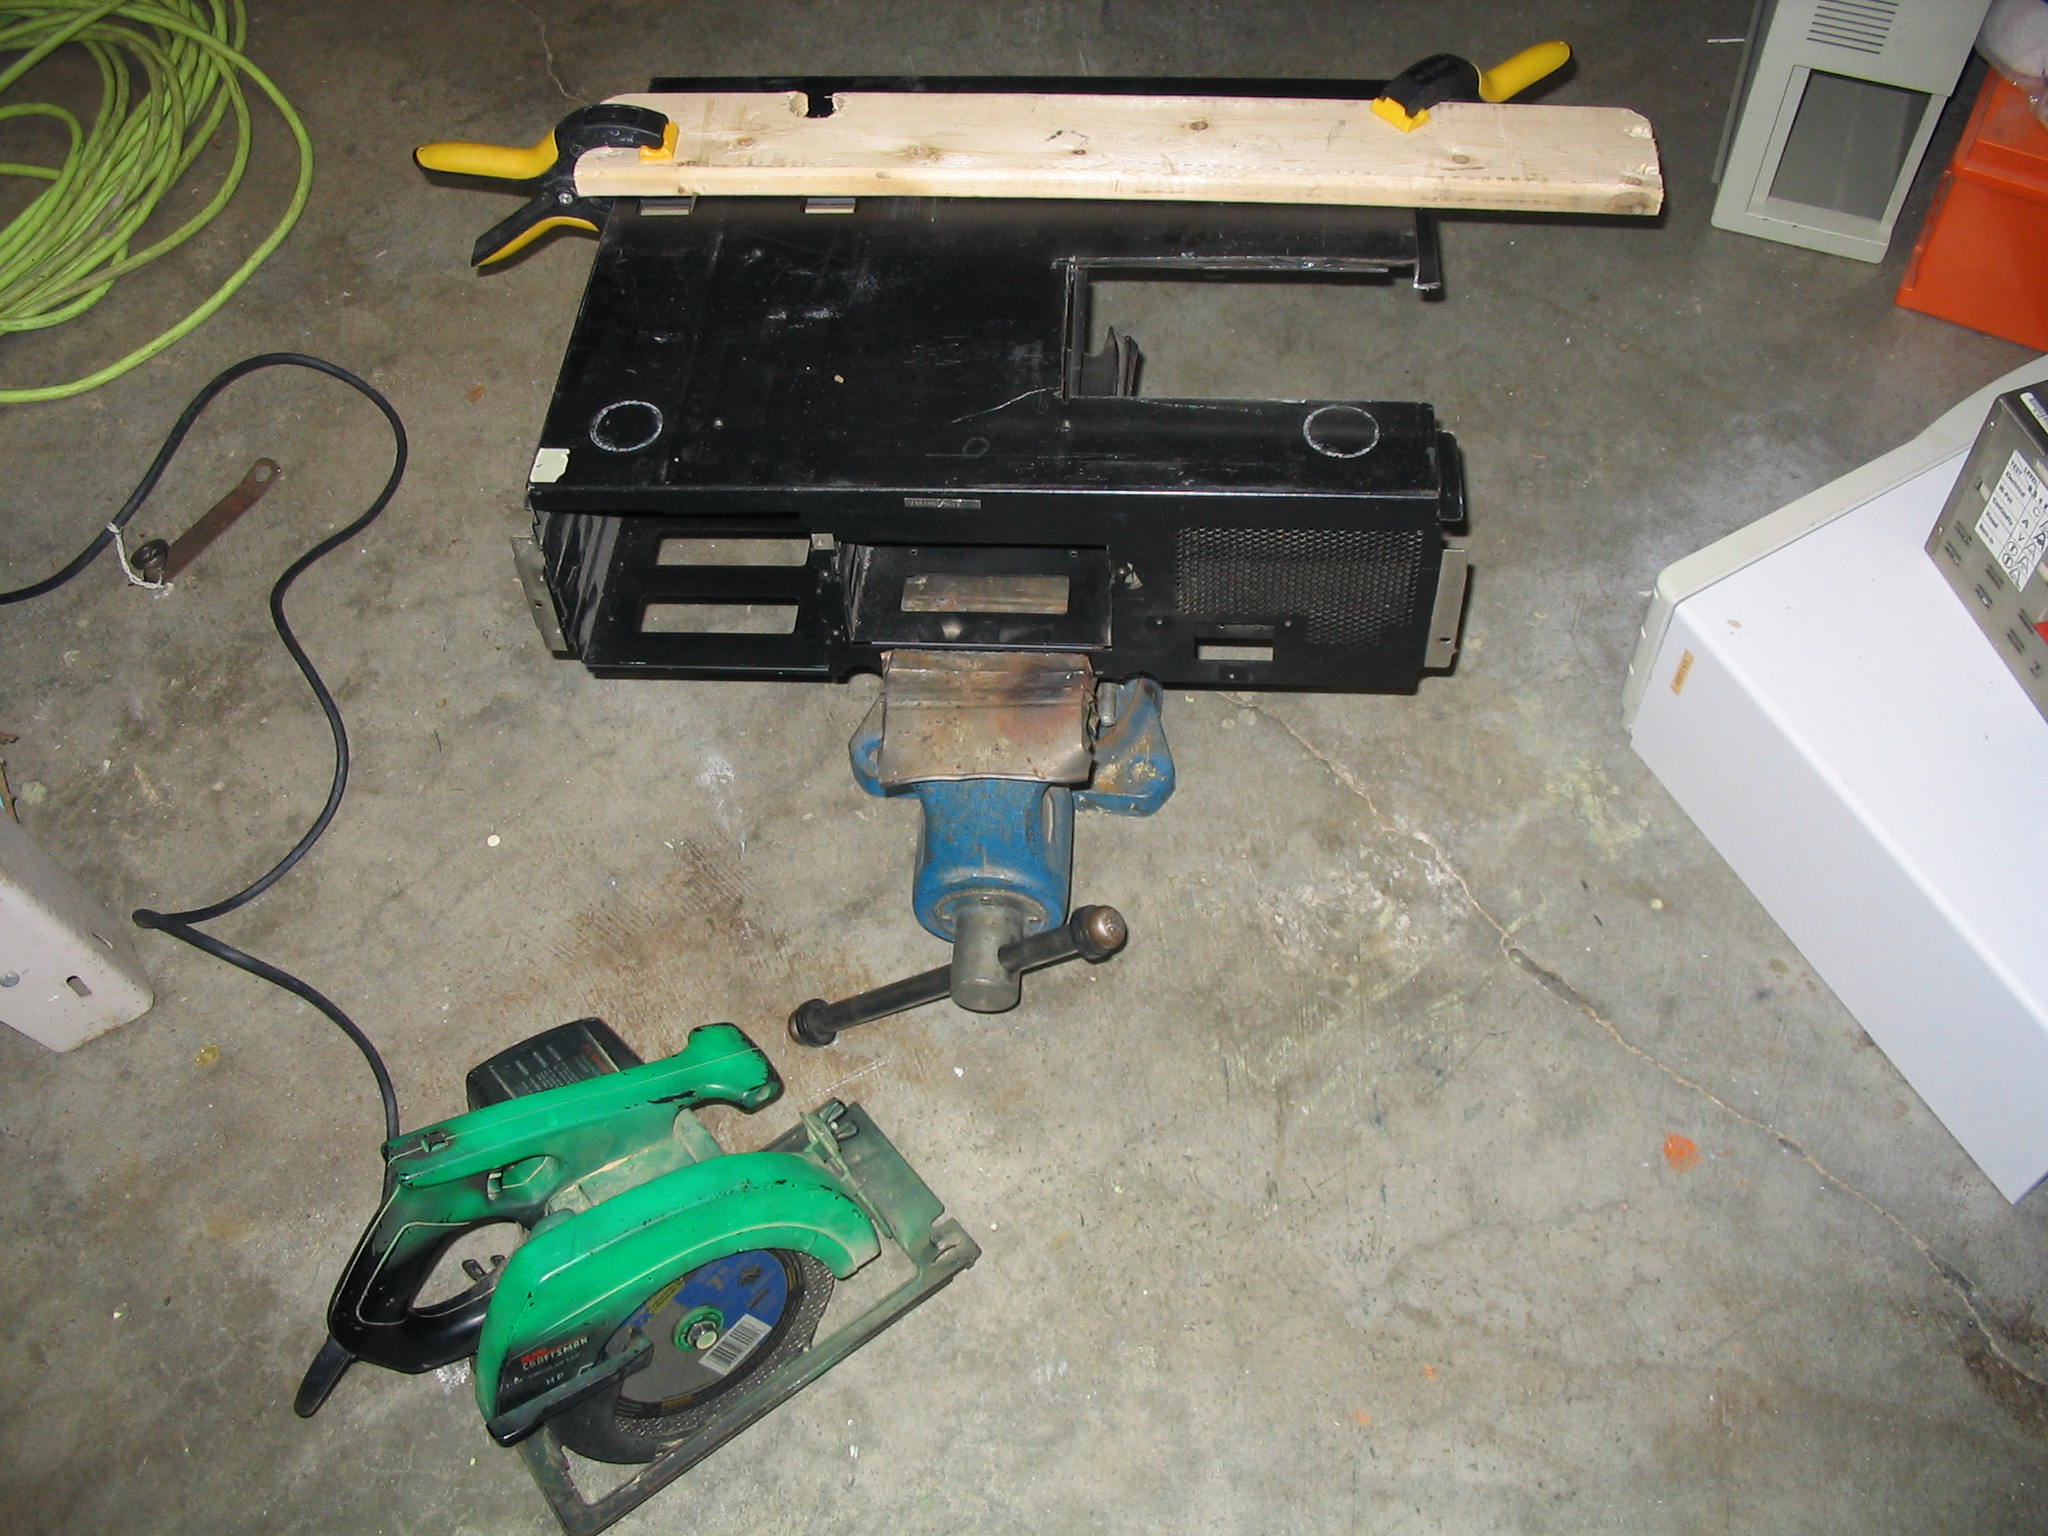
I have salvaged the sheet metal from the base of a personal computer case. This one was a genuine IBM AT 286 case, and the metal is about 1/16″ thick (1.6 mm). This heavy metal can take a while to cut with a hacksaw, so I made the rough cuts with a metal-cutting blade on my circular saw. The metal cutting blade is basically a thin grinding wheel, which spits lots of sparks and fireworks. Keep anything flammable well away from your cutting area. The metal PC case was slippery, so I clamped a wooden board down as a saw guide. The circular saw made quick work of it, and the blade was only a few dollars at the local home improvement store. If you don’t have a circular saw, a hacksaw will still work.
Drilling holes
After cutting out a rough blank piece and filing the burrs off, I transferred my cardboard template onto the metal.
The trunion bolts are 1/4″ diameter (6 mm), so I’m using the same size on the rest of the holes and bolts. When drilling holes in metal like this, the drill bit can drift easily and the hole can end up in the wrong place. To avoid this, use a hammer and center-punch to make a dimple where you want the center of the hole. If you don’t have a center punch, pound a sharp deck screw with a hammer as a substitute punch. Then drill a pilot hole the center with a small bit, say 1/16″ or 3/32″. Then your larger bit will stay in proper place for the actual hole.
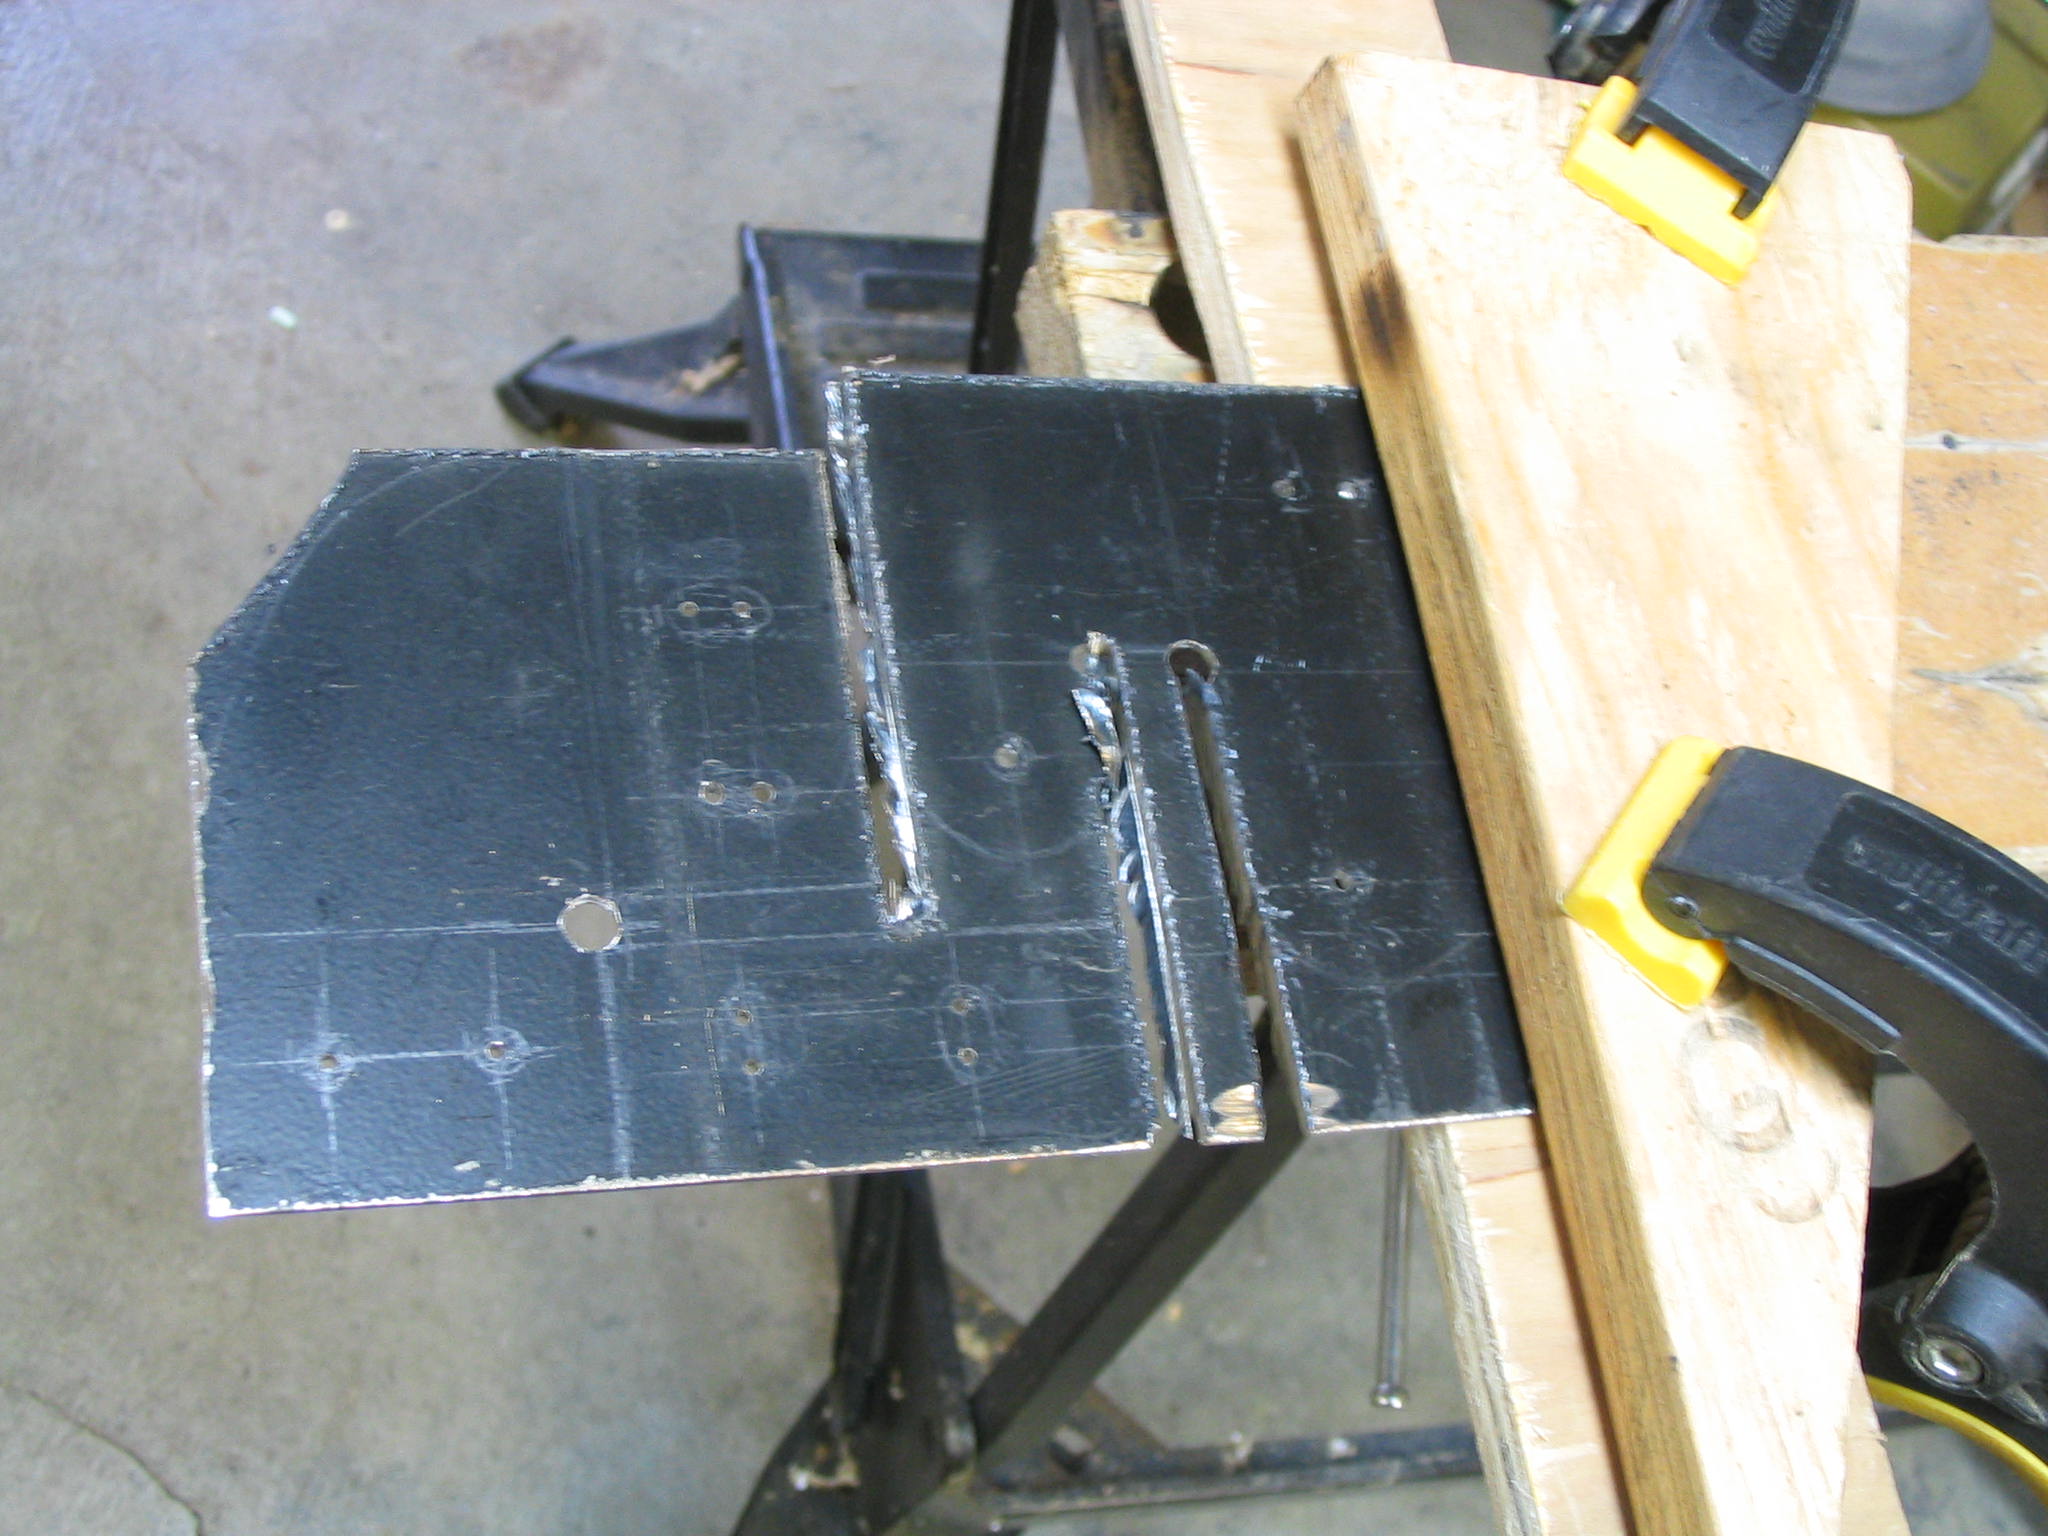
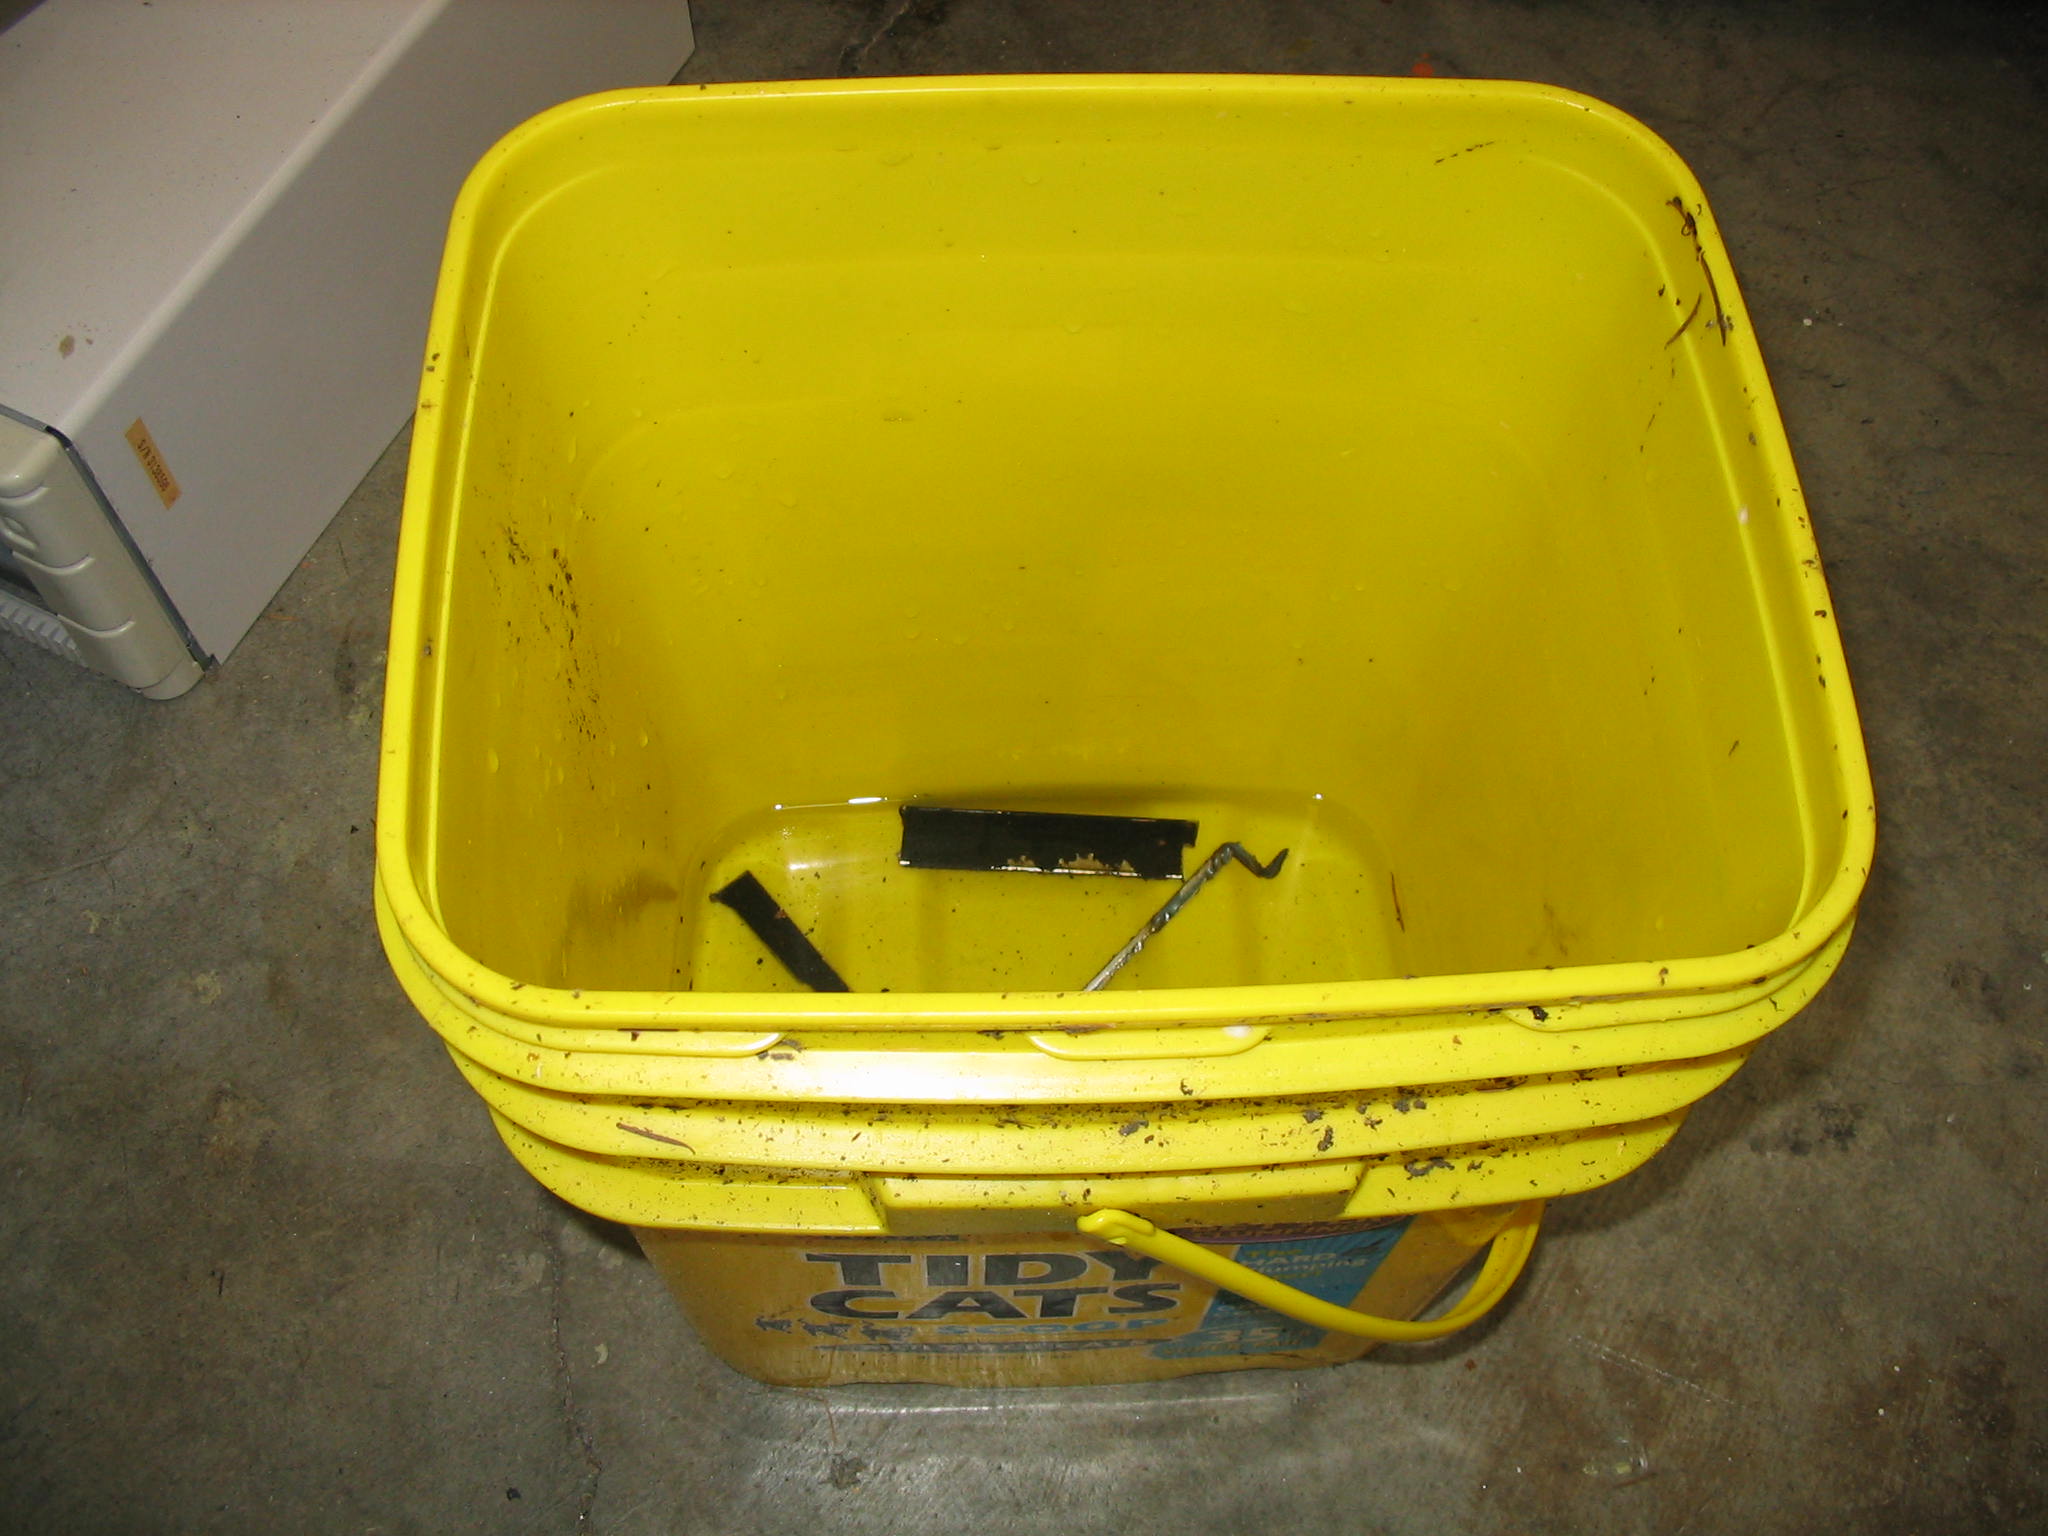
I used the circular saw to make the rough cuts of the brackets. The cutting wheel heats the metal scraps enough to burn you. Use pliers to pick up any scraps, and drop them in a bucket of water.
Once the brackets are rough cut, finish any remaining cuts with a hacksaw, and file all of the edges smooth.
Bending
Bending
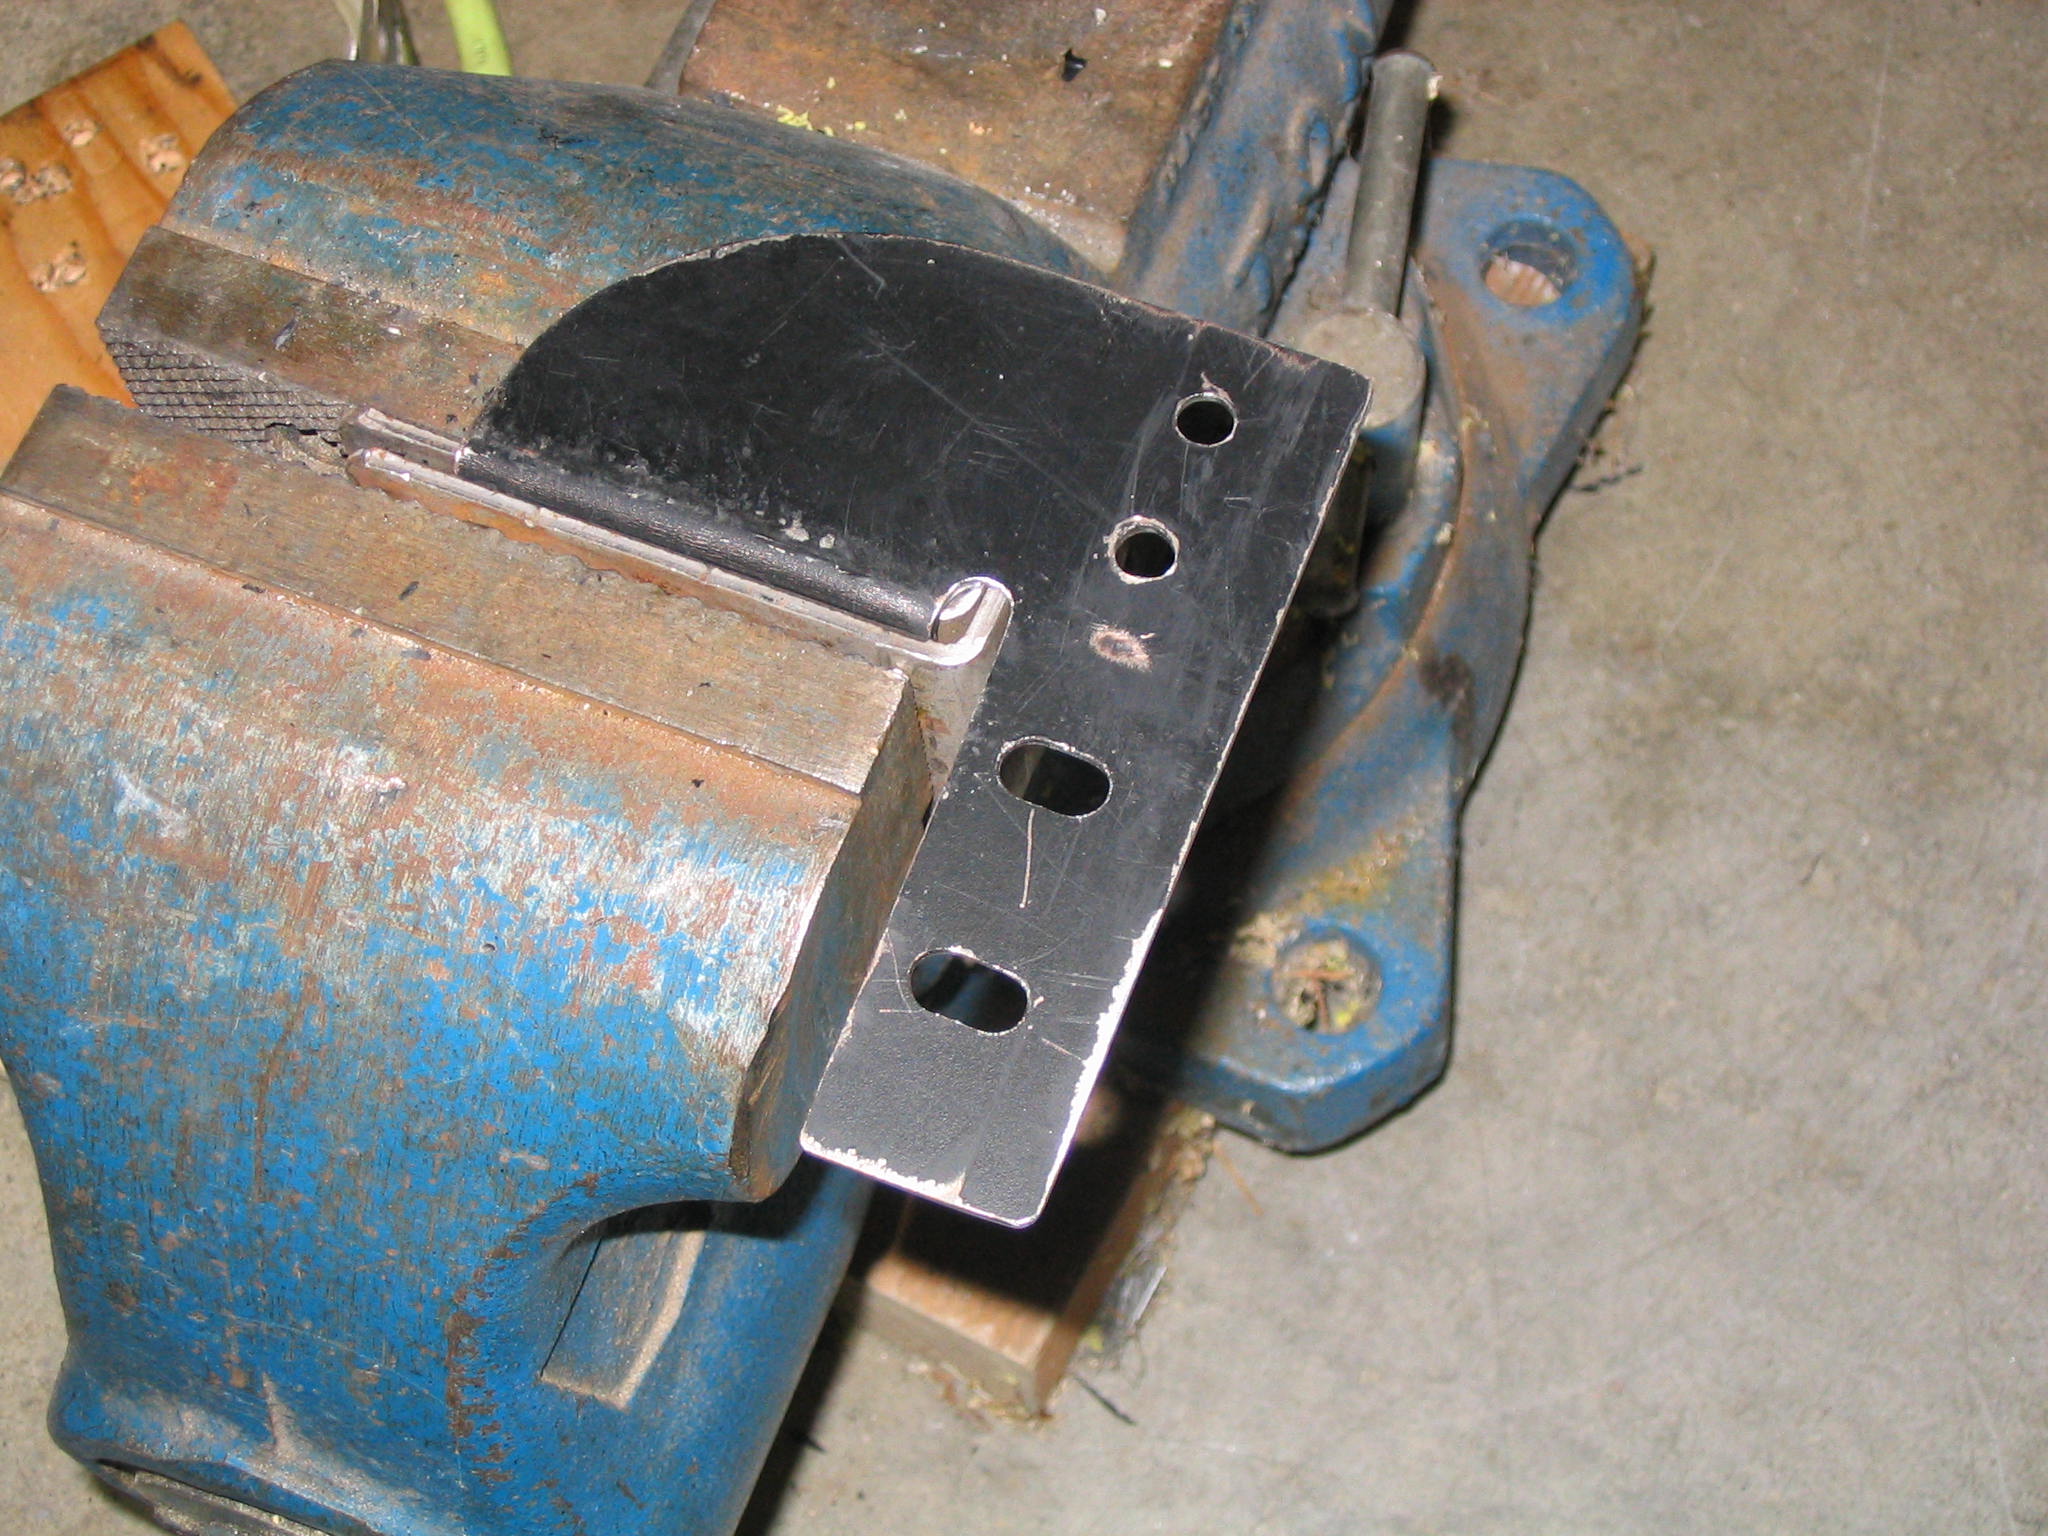
After the bracket pieces are filed to shape, they are ready to be bent. The ideal way to bend them is to use a metal brake, which most people don’t have in their garage. Alternatively, stick them in a vise and pound them with a hammer like I did.
On each bracket, there is an overlapping flange where a bolt goes through. Ideally, you should not drill the hole through the second flange until after the bracket is bent to shape. I had to widen holes on one of the brackets because my bends weren’t aligned perfectly.
Finished bracket
Finished bracket
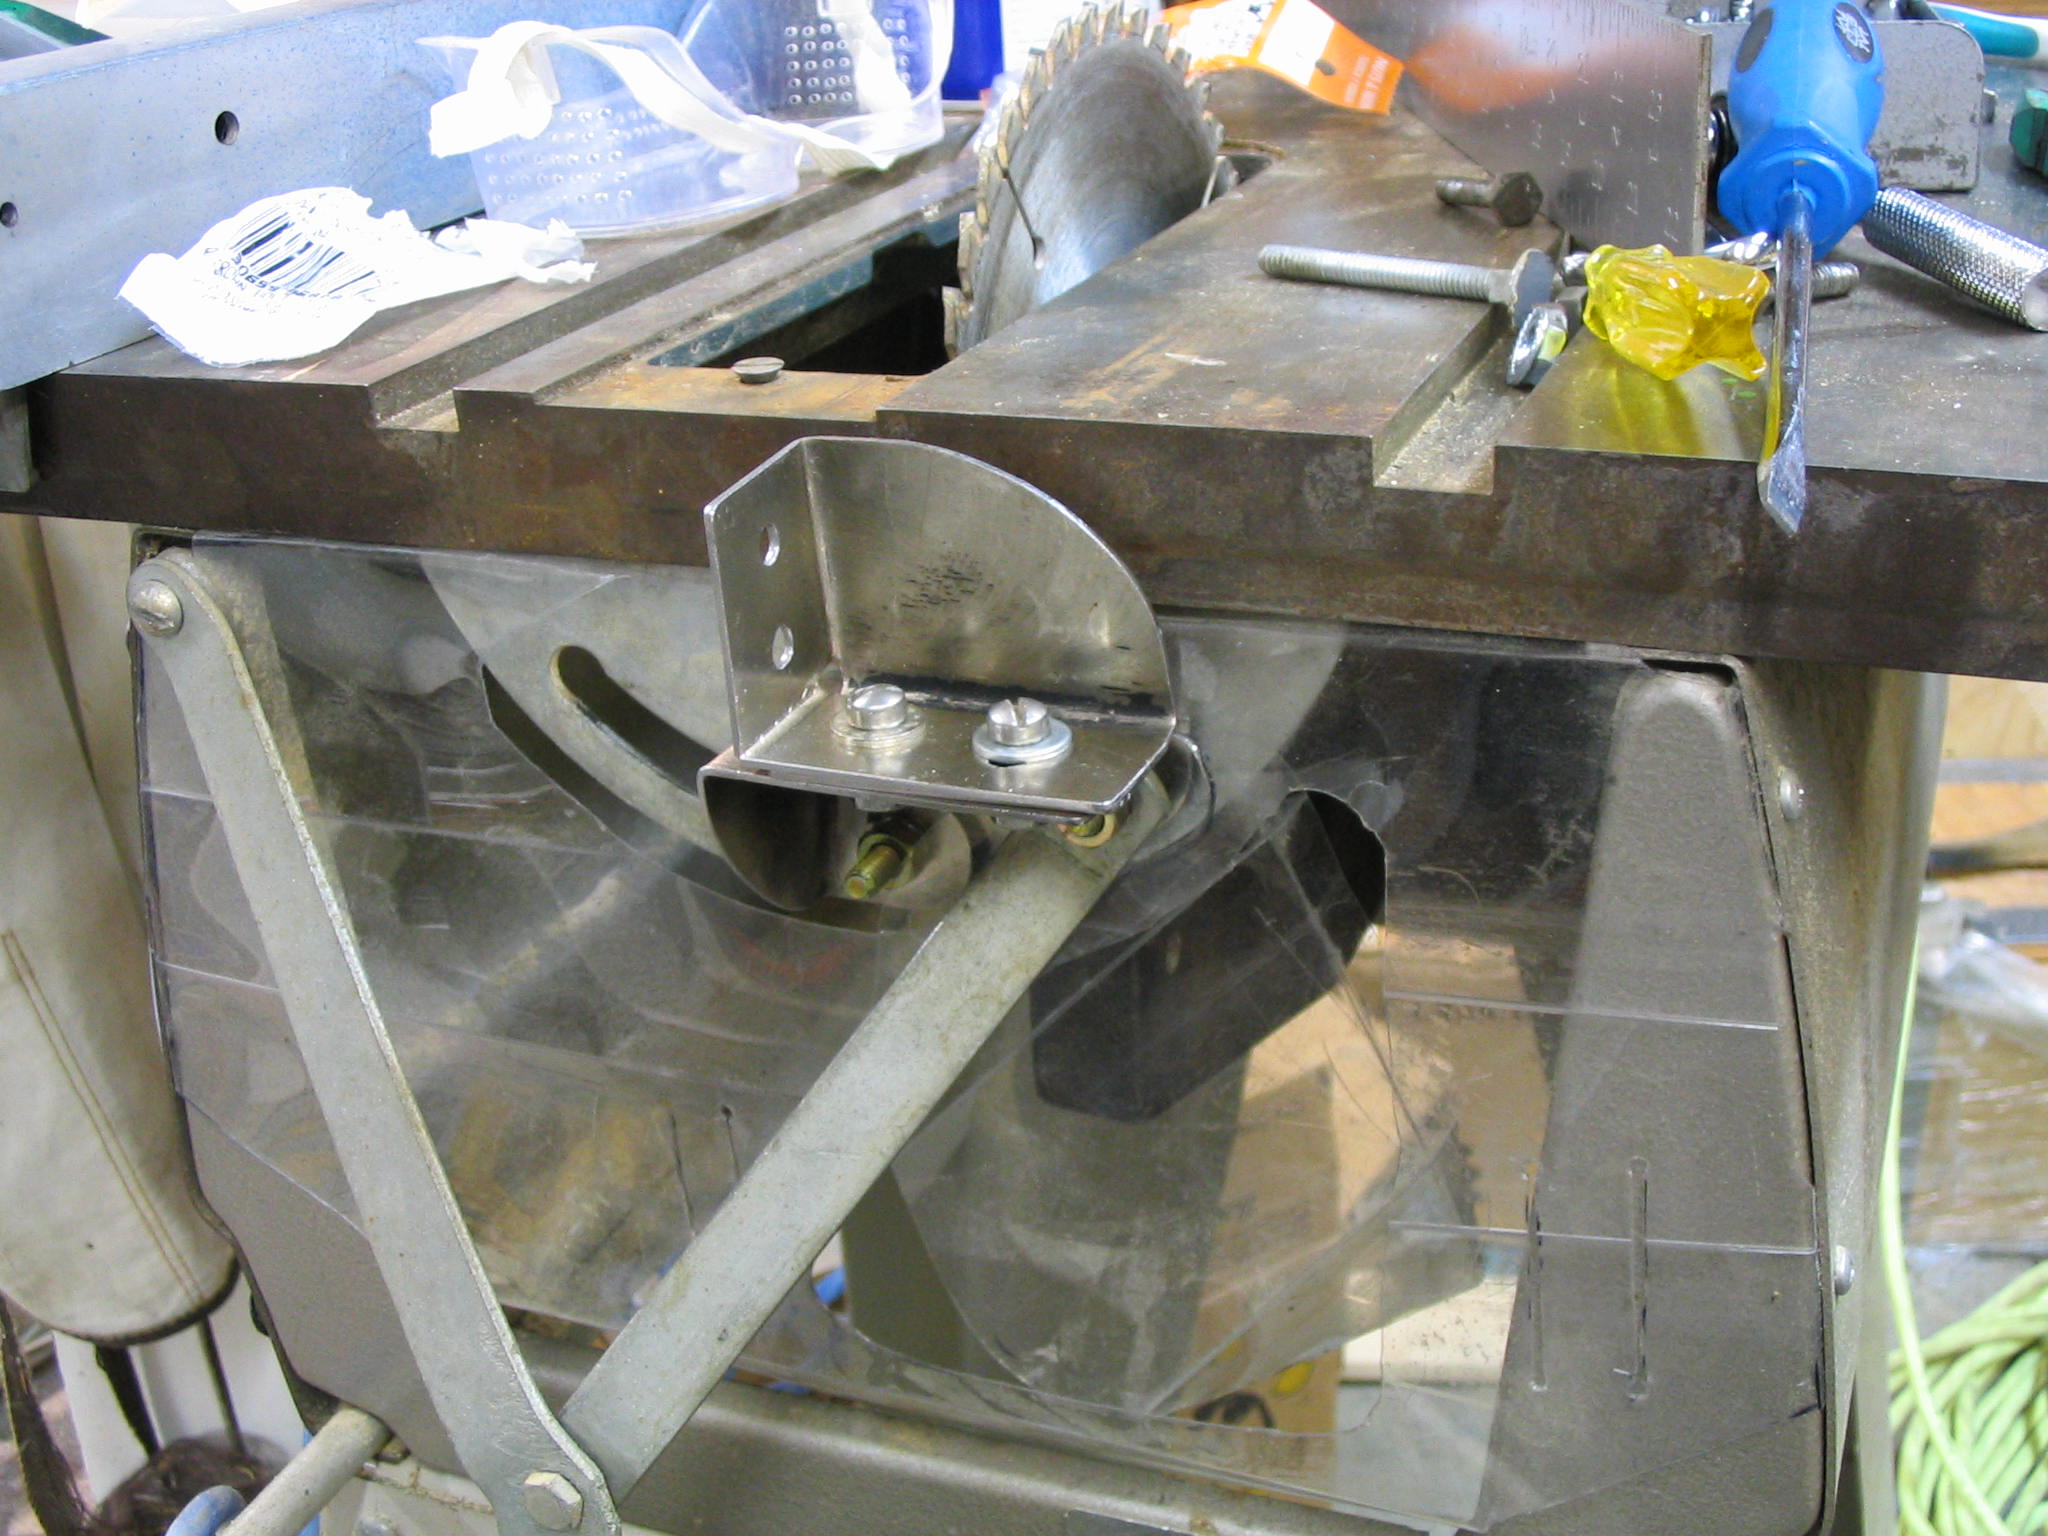
Once the bracket pieces are bent, they are ready to be attached to the table. I used split-ring lock washers on each of the bolts to ensure that they don’t work loose with the vibration of the saw. The mount is now ready for use.
When working with electricity, it is important to ensure you have electrical wires large enough to carry the load. The diameter of the wire is referred to as the wire gauge. A smaller number is a larger wire.
If your wires are too small for the current, they can overheat and start a fire. Of course, for any questions, consult a licensed electrician.
Wire size requirements are based on amperage, not voltage. There are tables available to tell you what wire gauge you need for a given amperage.
Two common sizes in household electrical wiring: 14 gauge wire can carry 15 amps safely, and 12 gauge wire can carry 20 amps.
I have been using LTSP for a while to turn old PCs into X terminals. LTSP works well for a desktop PC that can use PXE or Etherboot. LTSP does not work as cleanly on old laptops with PCMCIA network cards. In these cases, the kernel has to be installed on the laptop hard disk, but the rest of the LTSP installation runs from the server. When upgrading LTSP, the kernel on the hard disk gets out of sync with the modules on the server, and the laptops stop working as terminals.
I’ve been looking for a simpler setup for a laptop X terminal, and I’ve found ThinStation. It is a customizable Linux distribution designed for building terminals. The entire terminal image can run locally, from the hard drive or a bootable CD. The typical image takes up 5 to 10 megabytes. In this way, the server software can change versions, but the terminal is still standalone for its software versions. Thinstation does support centralized configuration files, giving you centralized control of options without linked dependencies.
Thinstation comes with software for several terminal types, including X Windows, VNC, NX, and Windows RDP.
After I repaired the electrical wiring on my garage-sale table saw, I inspected the mechanical workings. It appeared to be in good working condition. There were, however, no modern safety controls. I later found that this table saw was made somewhere around 1956, when blade guards were optional and belt guards weren’t even offered.
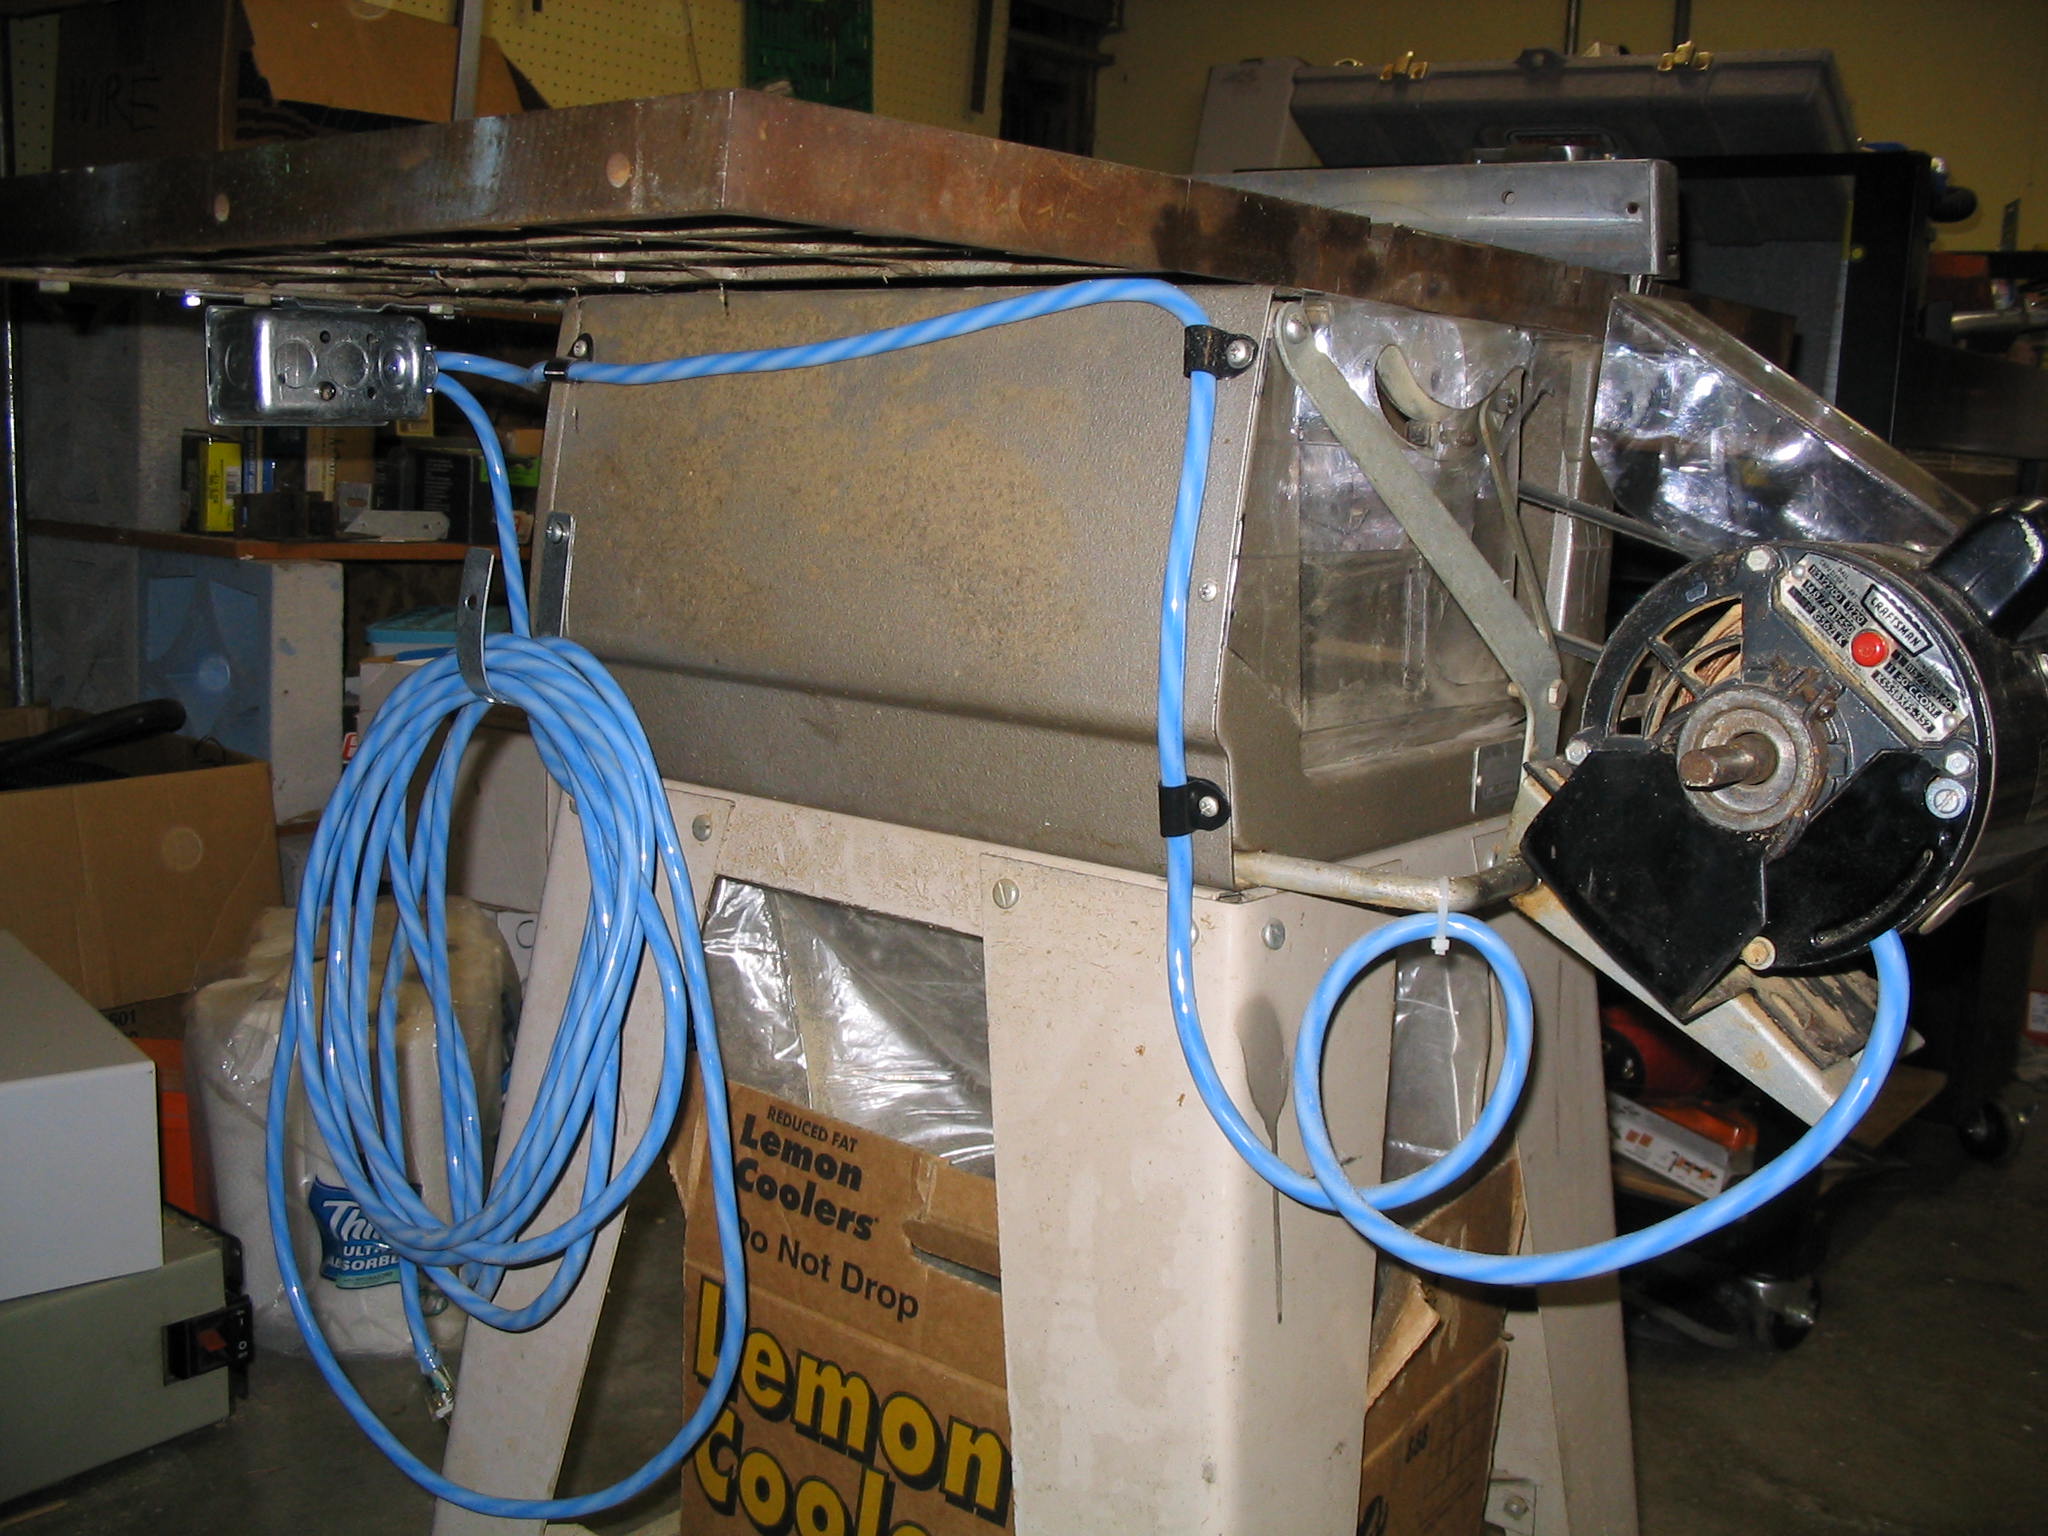
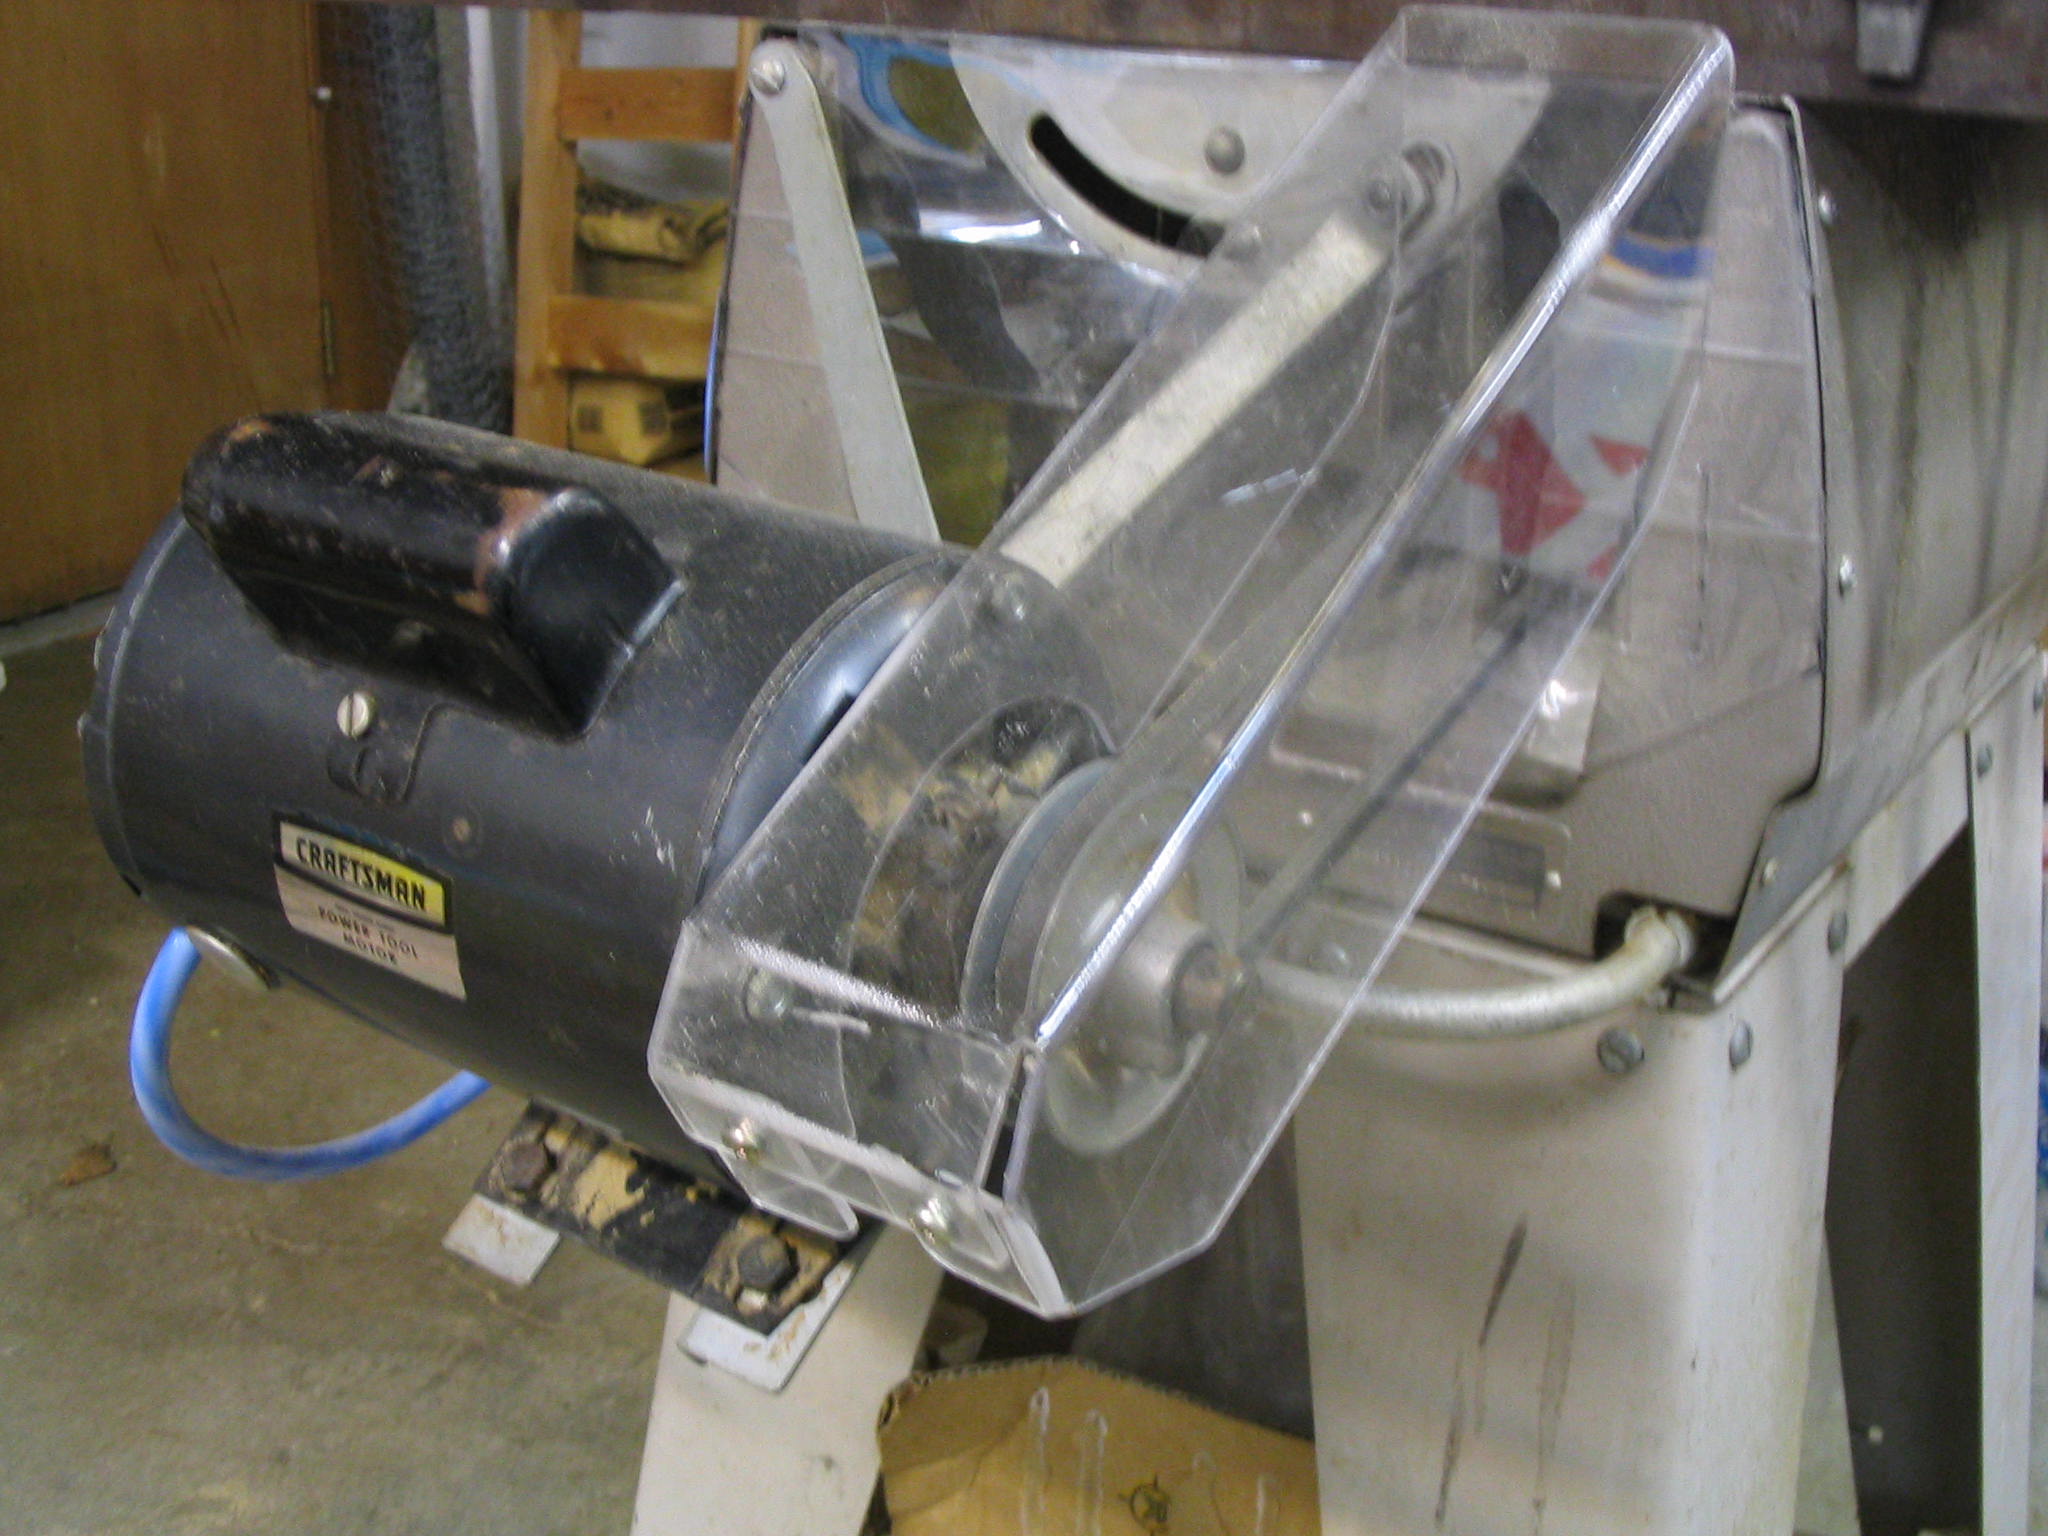
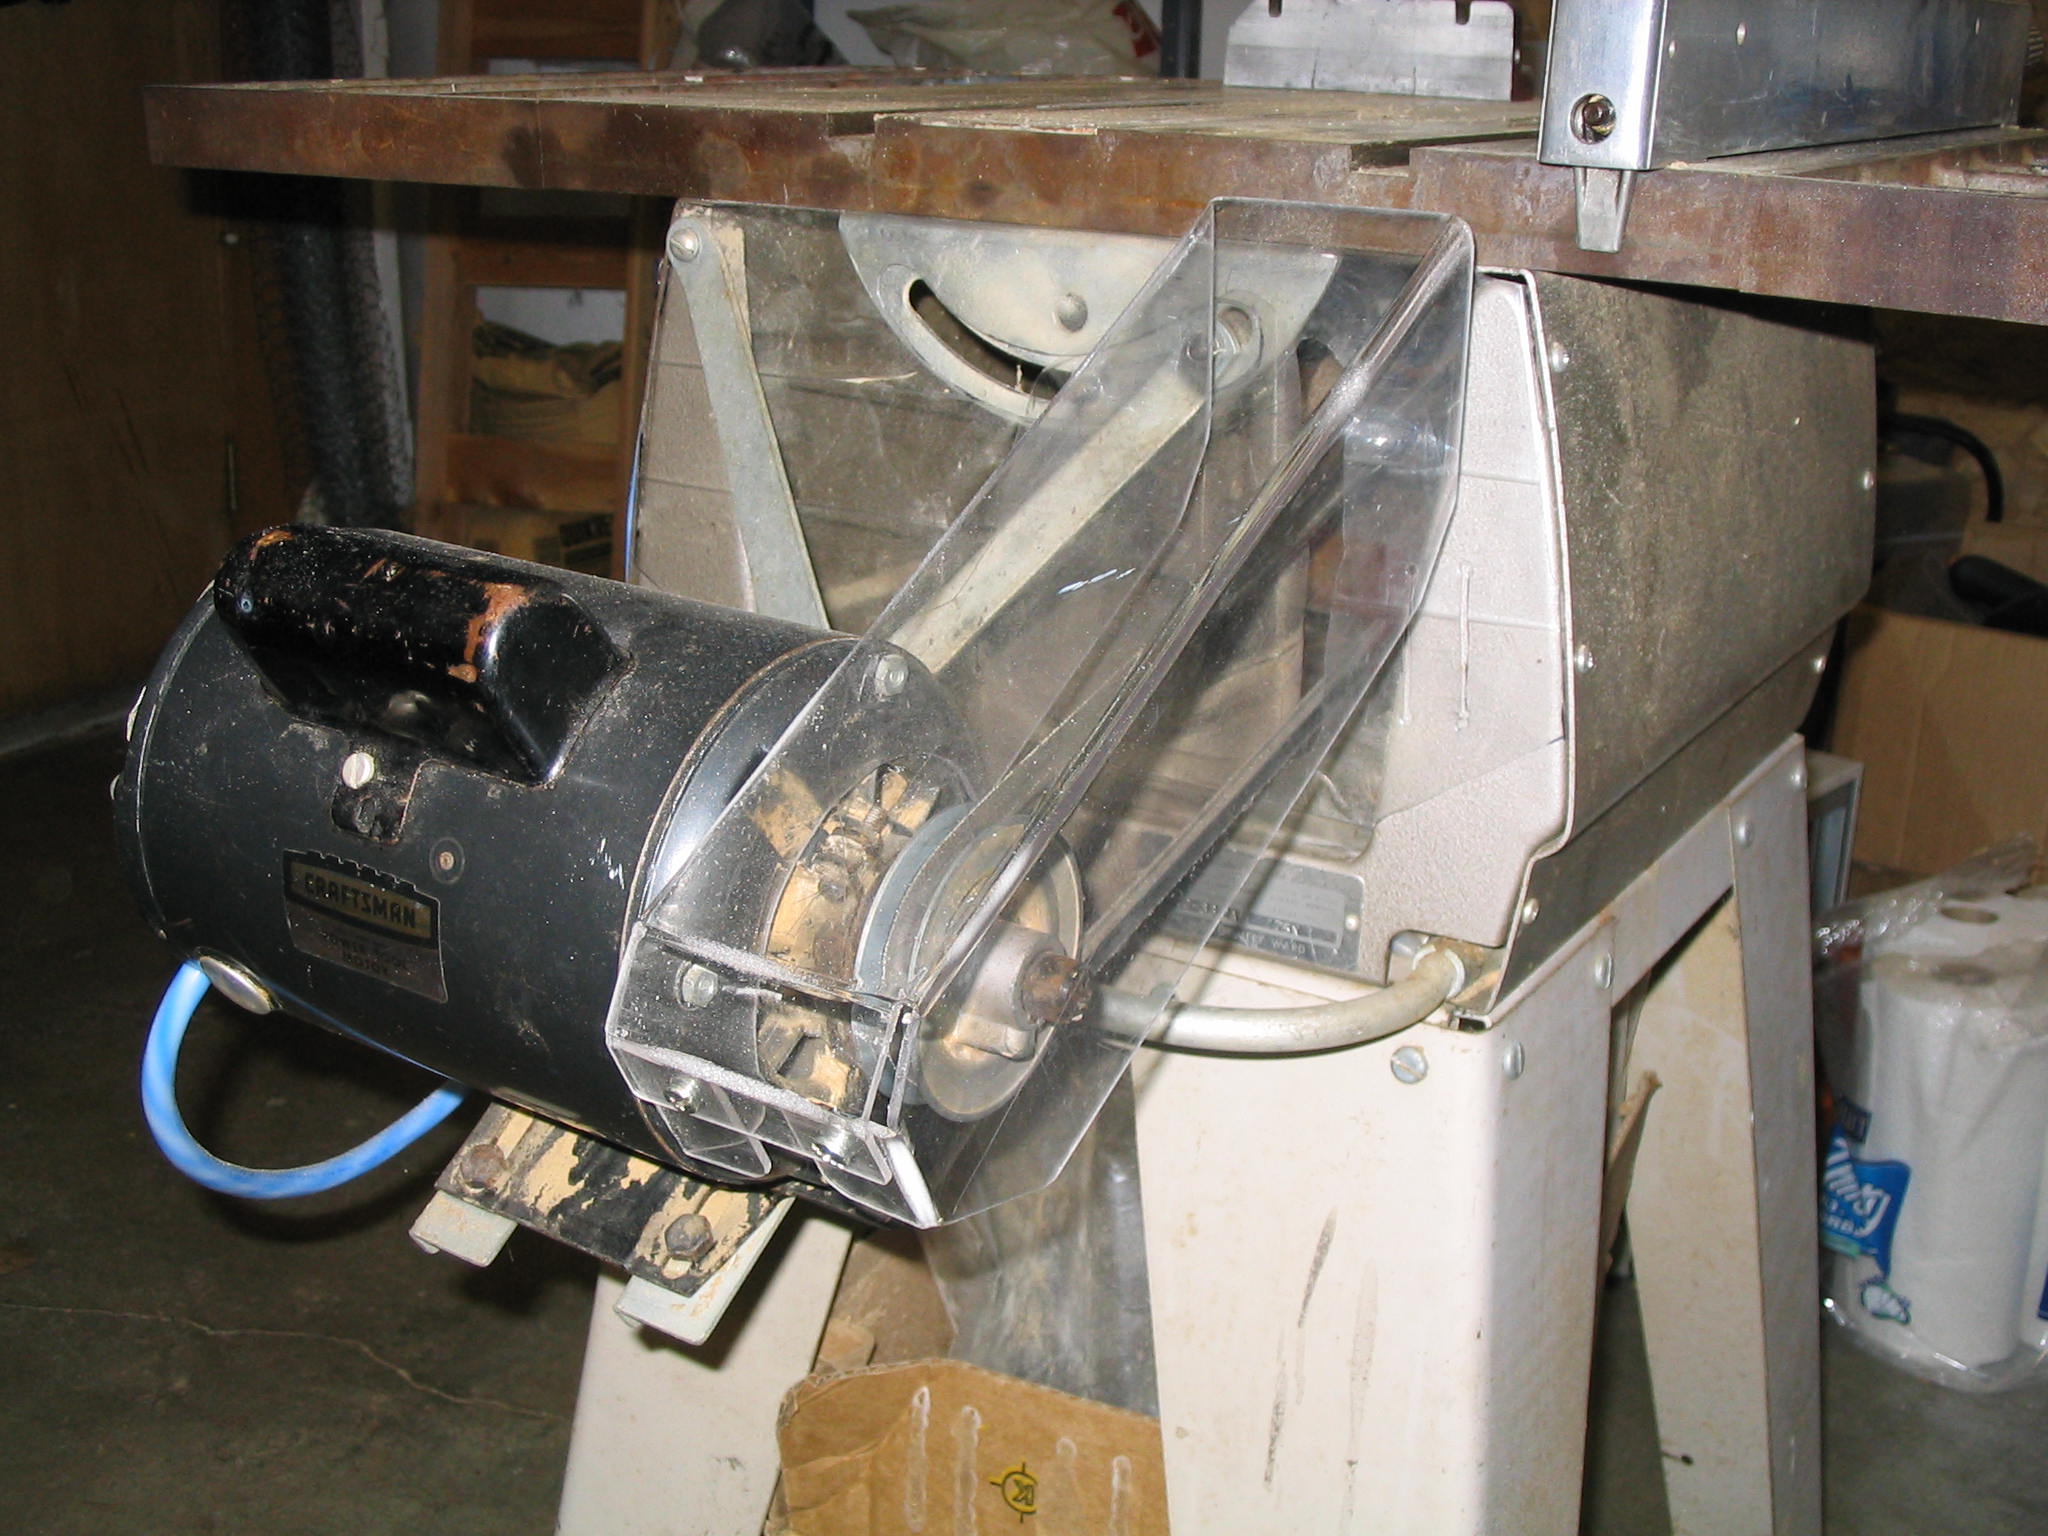
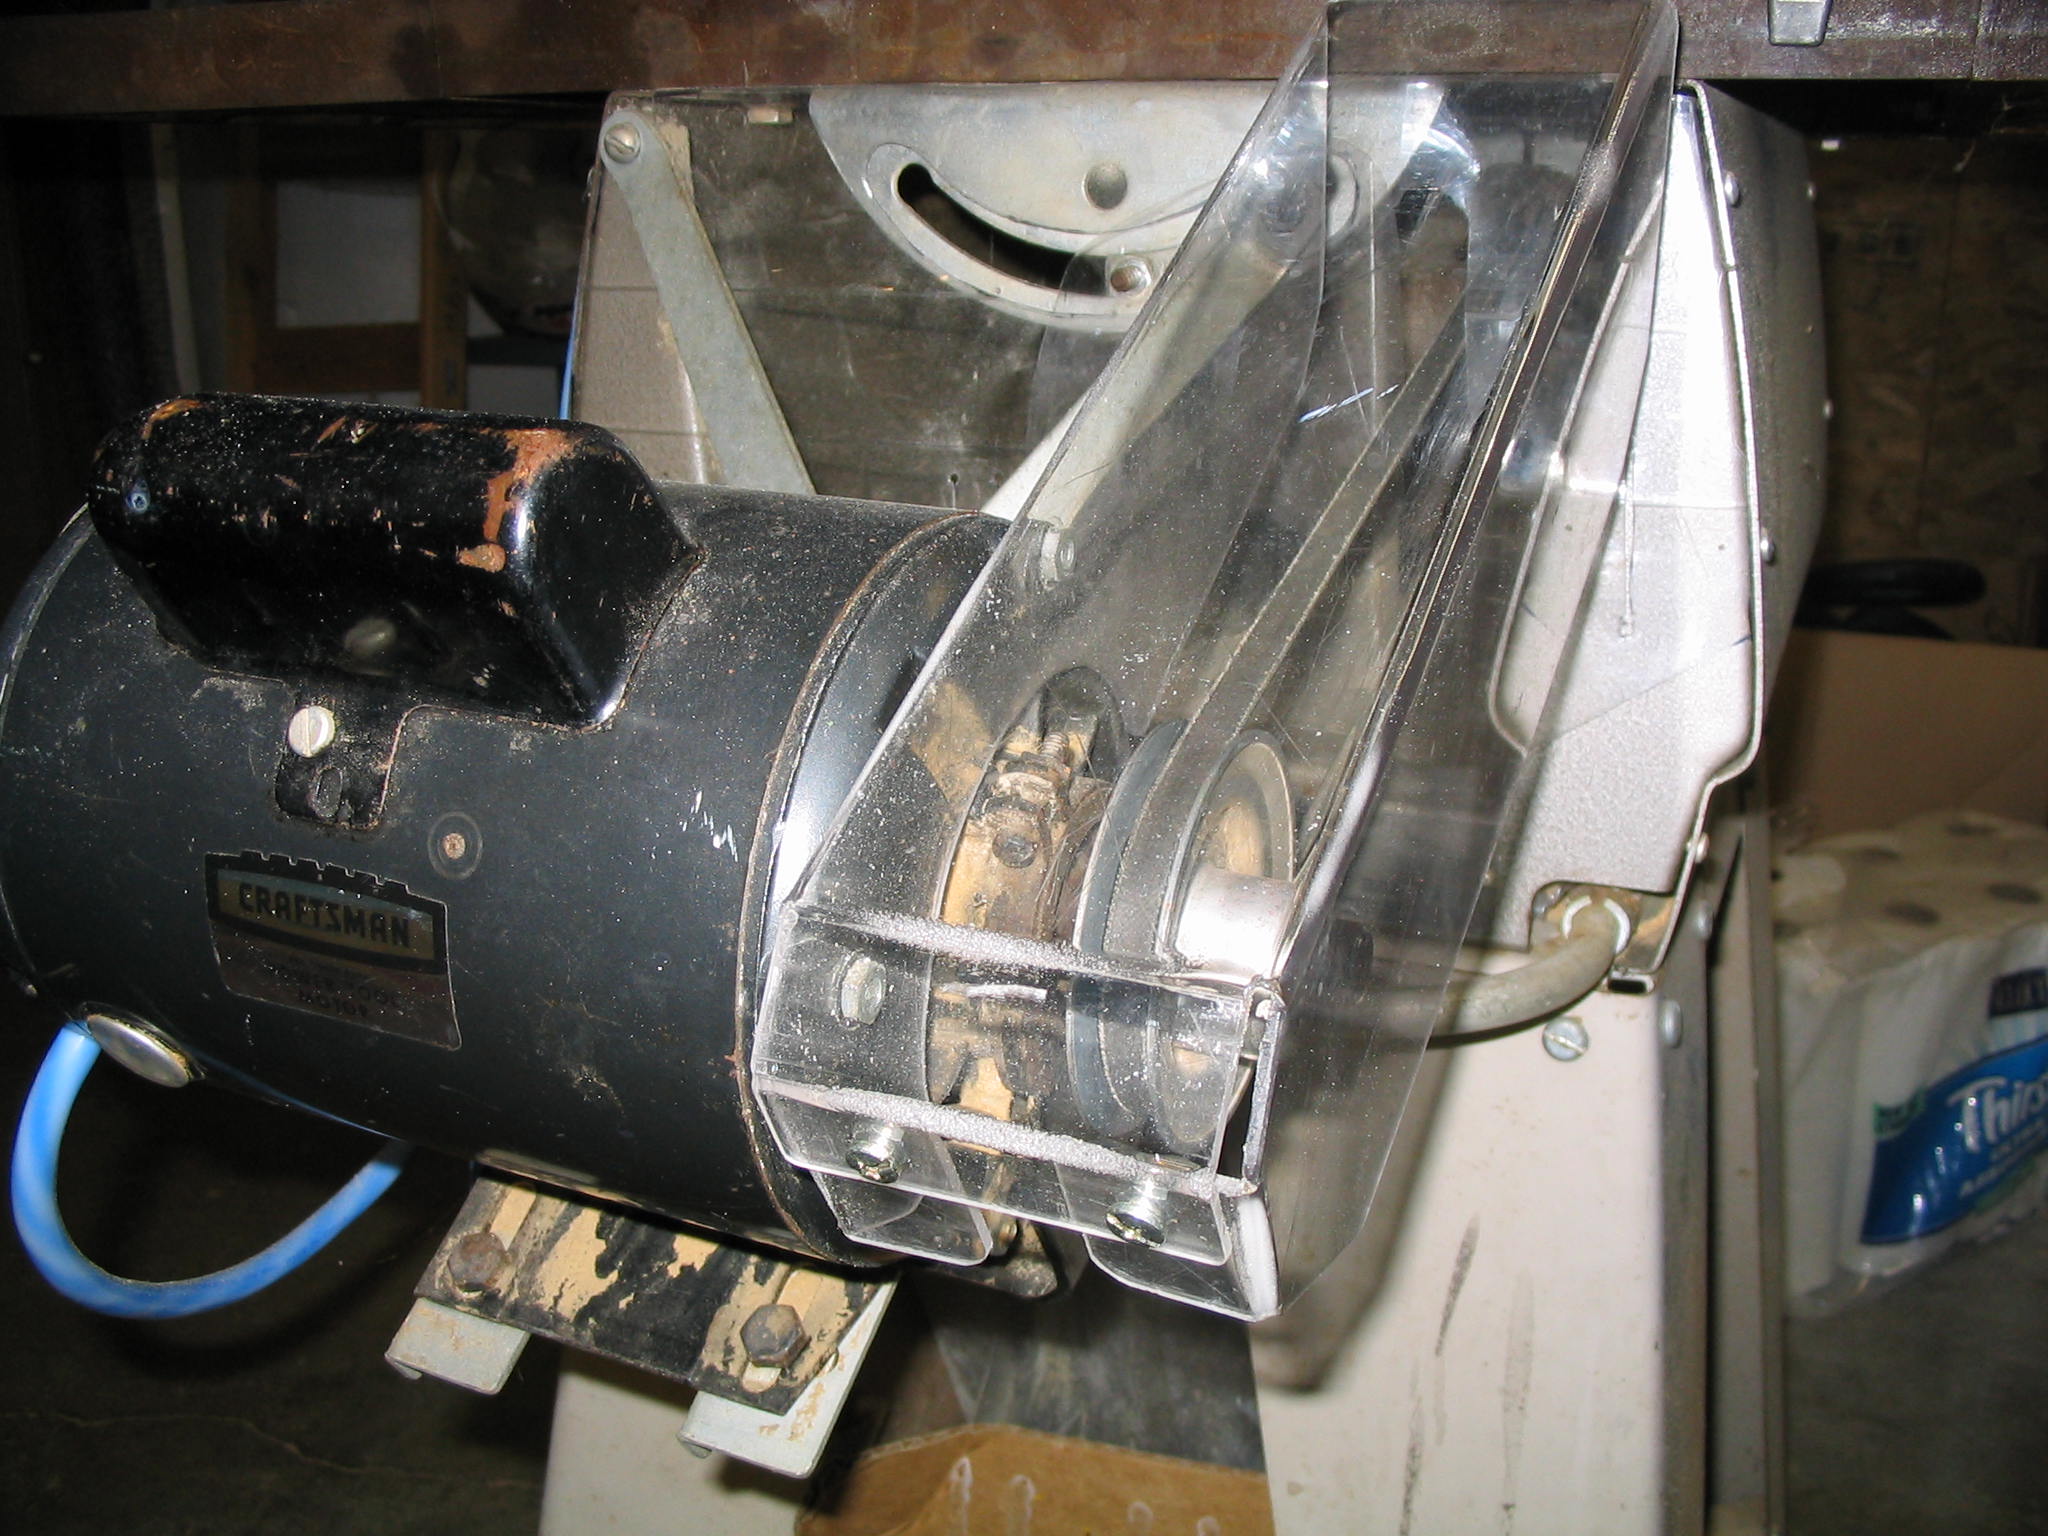
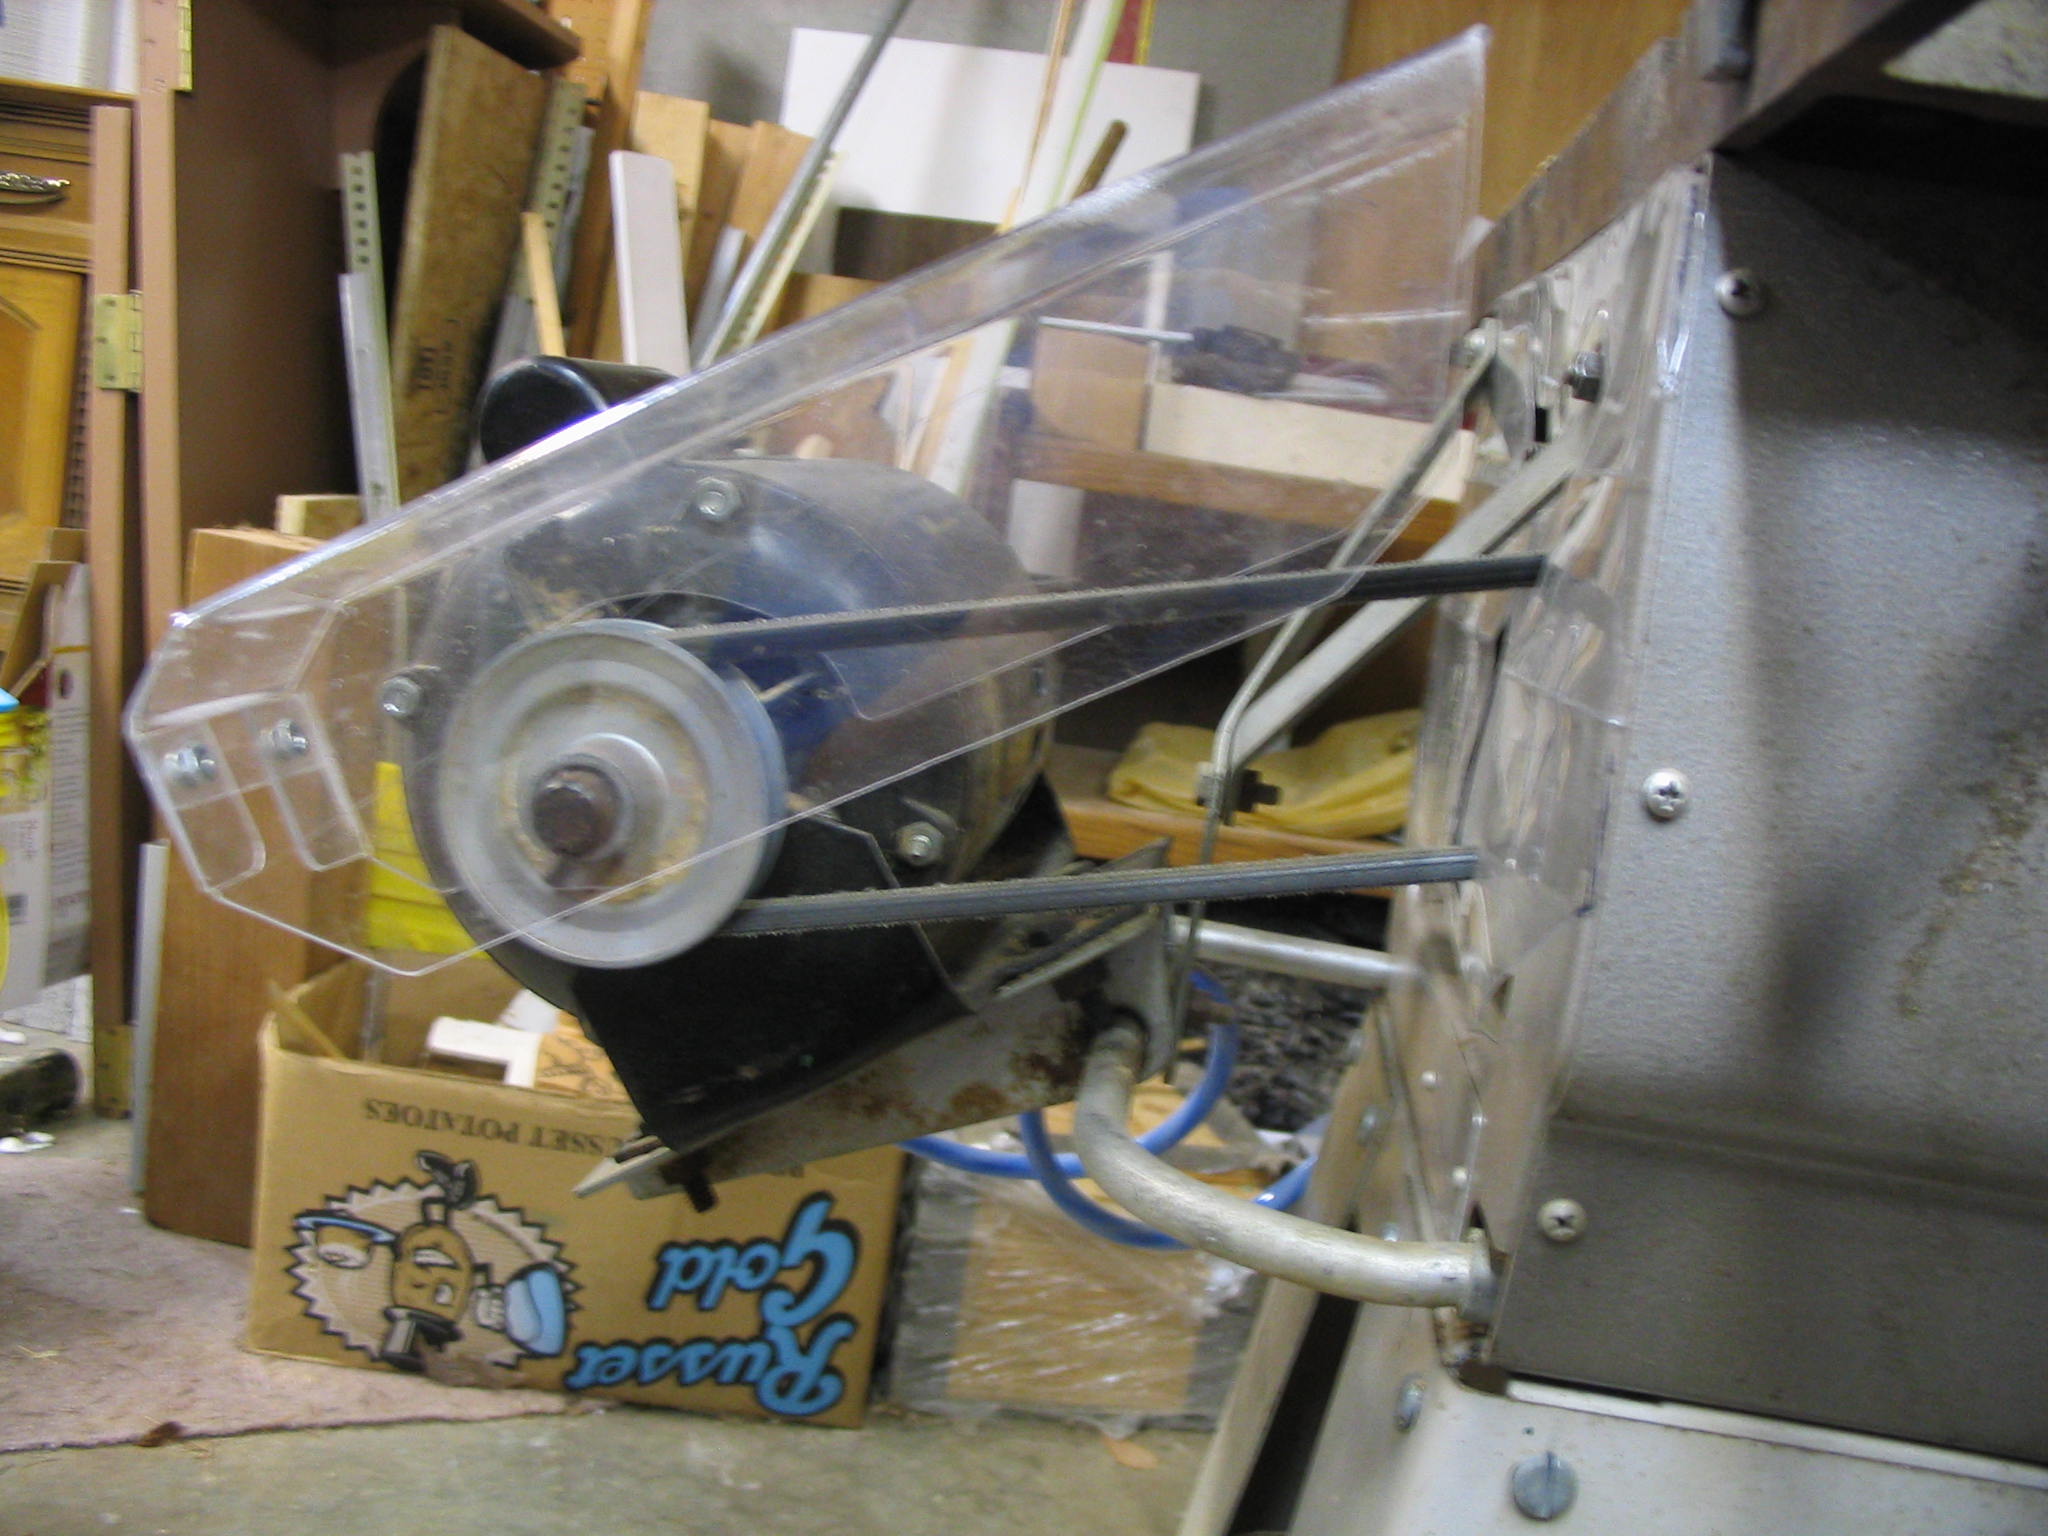
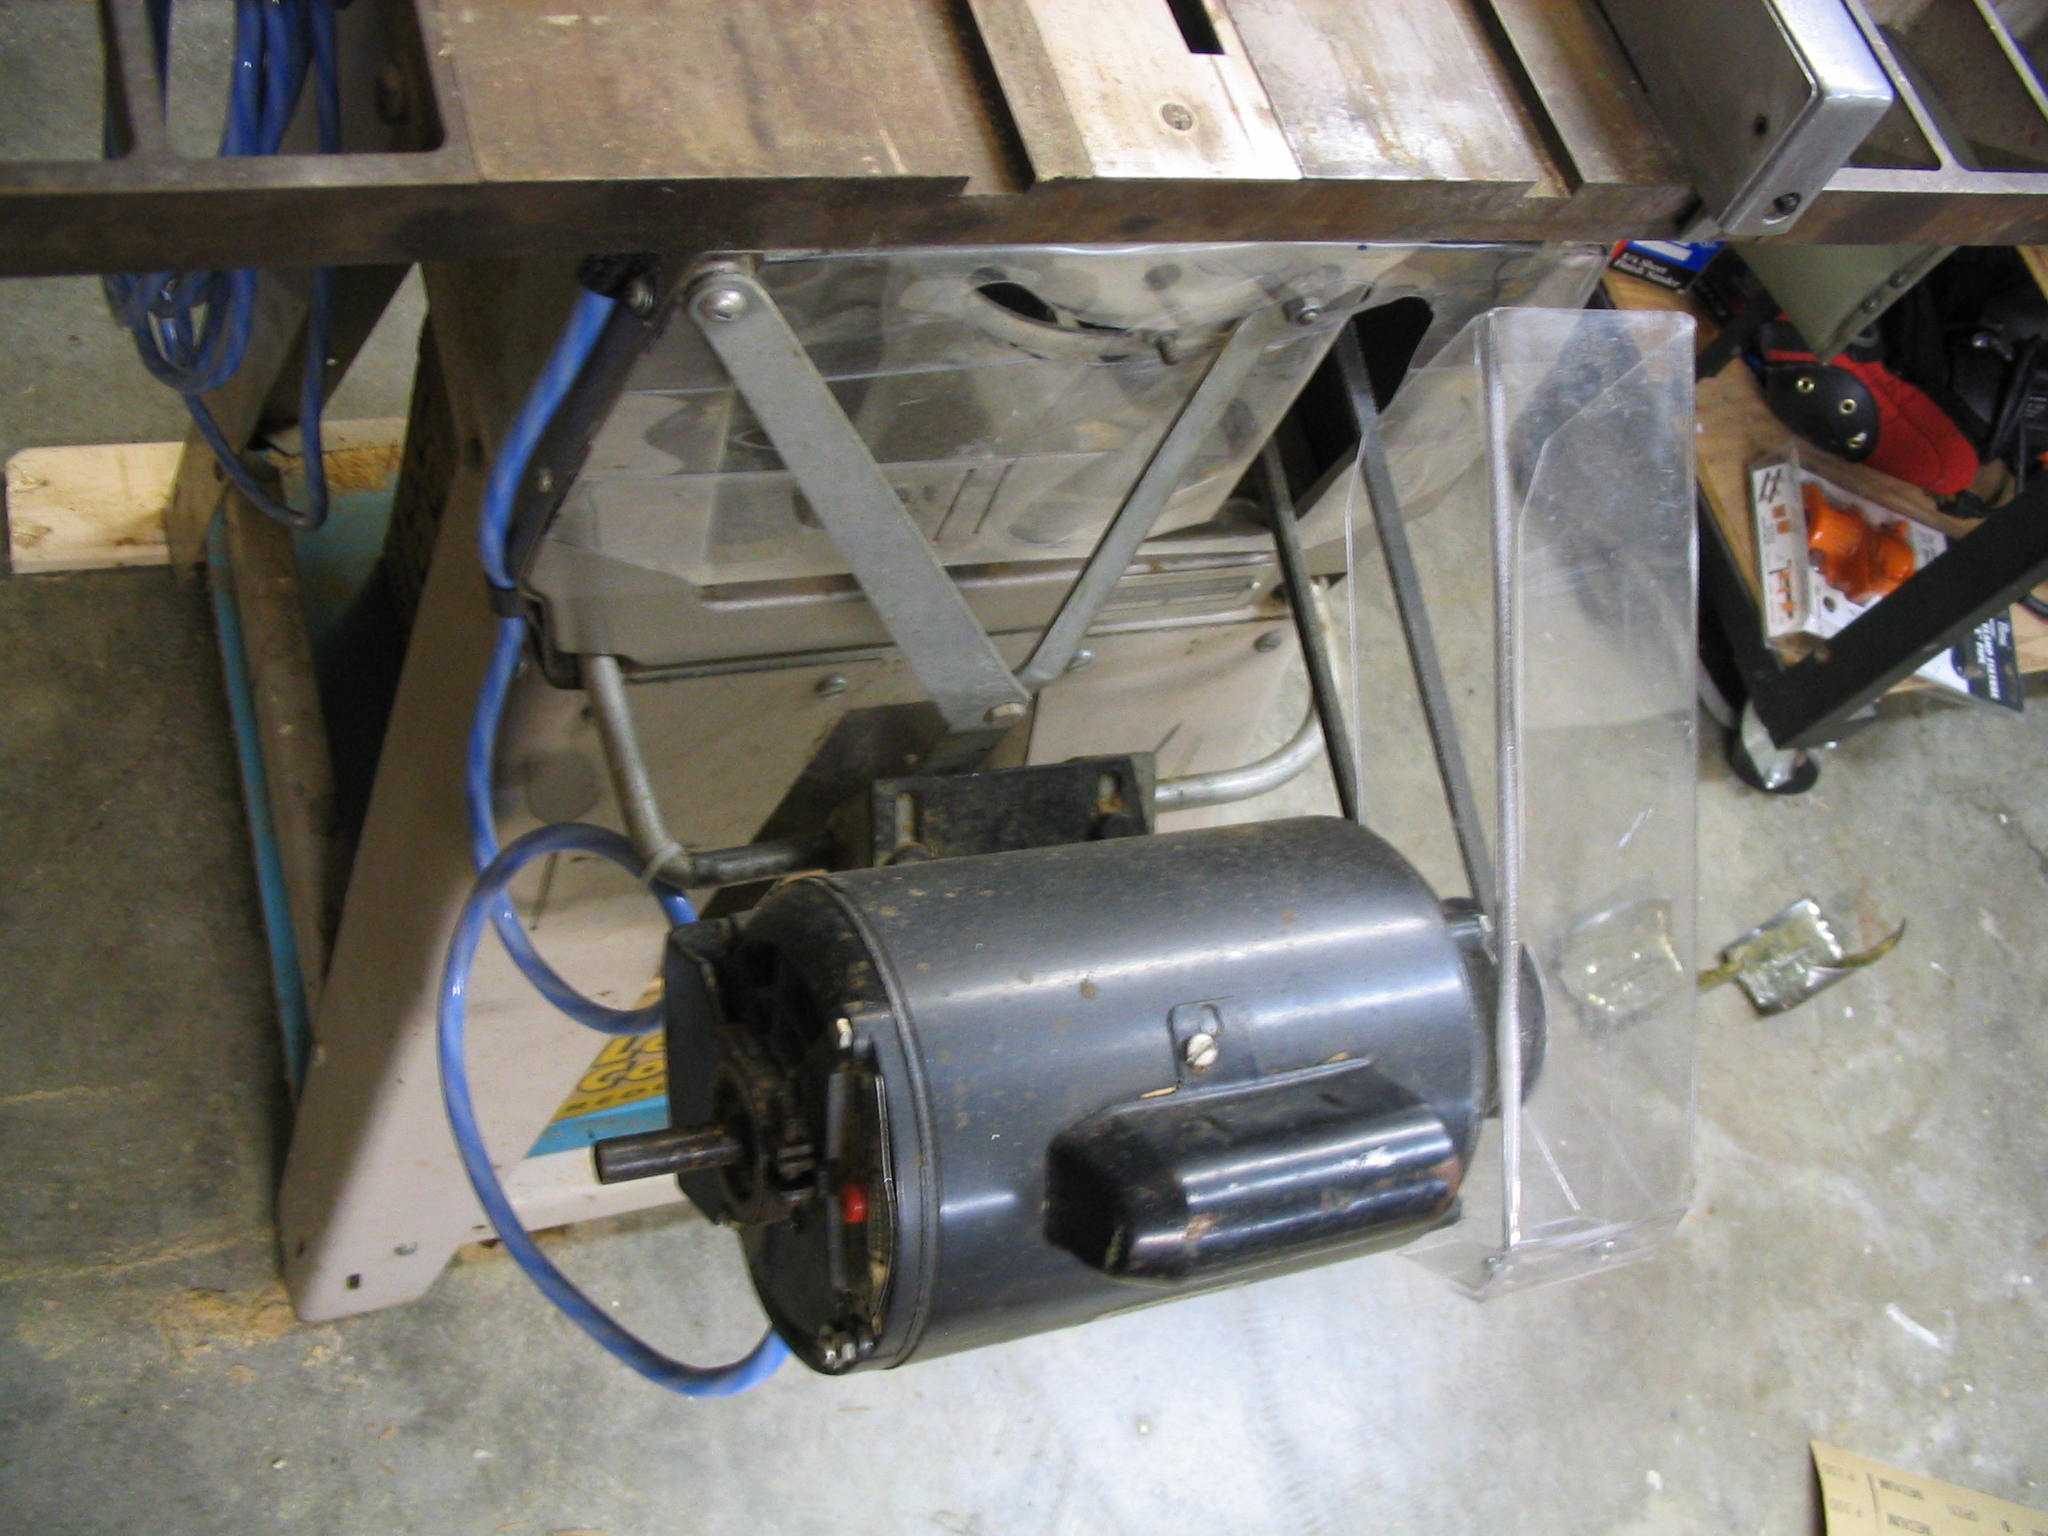
I decided to make a belt guard using a piece of Lexan shatter-resistant polycarbonate plastic, to prevent dropped items from hitting the moving belt. Don’t use acrylic plexiglass for safety features like this, since acrylic will shatter with a hard impact.
This saw presented one small challenge, in that the motor is not stationary. It actually slides sideways along a rail when the blade is tilted, and pivots forward and backward when the blade height is changed. Therefore I had to decide whether to mount the guard to the motor or to the table. I decided to mount it to the motor, since that gave the most consistent coverage of the belt in the various motor positions.
First I made a template using cardboard and fit it to shape. I moved the motor to its various limits of blade tilt and height, ensuring I still had reasonable coverage of the belt. I made sure to leave room for the ventilation holes in the motor case around the shaft, and room around the pulley to change the belt.
Then I transferred the cardboard template onto the plastic. I cut out the plastic with a saber saw and drilled the mounting holes. Then I had to bend the sides.
Lexan can be bent by brute force, but it leaves a weak joint. (Don’t even try to bend acrylic by brute force, it shatters into nasty shards.) The best way to bend it is with heat. I used a propane torch, since I had one readily available. I covered the plastic with wood pieces, leaving just a small strip where I wanted the fold. I heated it slowly, moving the flame along the line. When it softened enough, I bent it and held it in place for a minute while it cooled. This worked fairly well, although I did bubble and scorch the plastic in a few places.
After making all the bends, I screwed the end tabs together with simple nuts and screws. It could probably be glued also, but I did not investigate proper gluing for Lexan. I mounted it on the motor bolts, and declared it a success.
My used tablesaw needed a new power cord and switch. The cord was clearly in bad shape. The on-off switch was spliced in with a mess of wire nuts and electrical tape. It was time for some basic electrical repair.
The label on the motor said it would pull up to 14 amps at full load. I replaced the cord completely using a 14-gauge extension cord I got on Christmas clearance sale at Home Depot, which is rated to carry 15 amps. I added a safety switch, which must be pulled out and forward to turn it on, and mounted the switch in a proper electrical box with no exposed terminals or wires.
There are a number of considerations when replacing a switch and cord on an appliance or power tool.
Maintain proper grounding. The motor already had a ground lug for the cord, which I connected securely. I also attached the ground wire to the new metal switch box I installed, thereby ensuring a good ground for the table saw frame as well.
Use the correct wire size. 14 gauge should carry up to 15 amps safely.
Switch the “hot” wire. In household AC wiring, there is a black “hot” wire and a white “neutral” wire. Although both carry electricity, the hot wire should always be switched instead of the neutral. This is important in case of a short circuit, to maintain safety.
I have Linux running on an IBM ThinkPad T41 laptop. I recently upgrade from Fedora Core 1 to Fedora Core 4. Several things broke from upgrading, including sound.
A number of people have had sound problems with FC4, requiring various solutions such as disabling the soft modem.
Some people had problems where their mixer settings were muted. Mine was similar. I am familiar with the Linux OSS sound system used in kernel 2.4, but I am unfamiliar with the ALSA sound system used in kernel 2.6.
I verified that my sound hardware was detected, using various utilities like system-config-soundcard, lspci, and lsmod. Under KDE, I used kmix to set the volume and unmute the sound channels. The artscontrol display showed me that all of the software believed it was pumping sound to the soundcard when playing a song in xmms. It was starting to look to me like my hardware and sound module setting were good, but I was somehow muted.
I discovered that in addition to volume levels and mute settings for input and output in the sound mixer, ALSA also has some additional on/off switch settings. I do not recall seeing these with the earlier OSS sound drivers. In the case of this T41 laptop, I found a mixer switch called “Headphone Jack Sense”. Turning this off gave me working sound immediately.


 After I repaired the electrical wiring on my garage-sale table saw, I inspected the mechanical workings. It appeared to be in good working condition. There were, however, no modern safety controls. I later found that this table saw was made somewhere around 1956, when blade guards were optional and belt guards weren’t even offered.
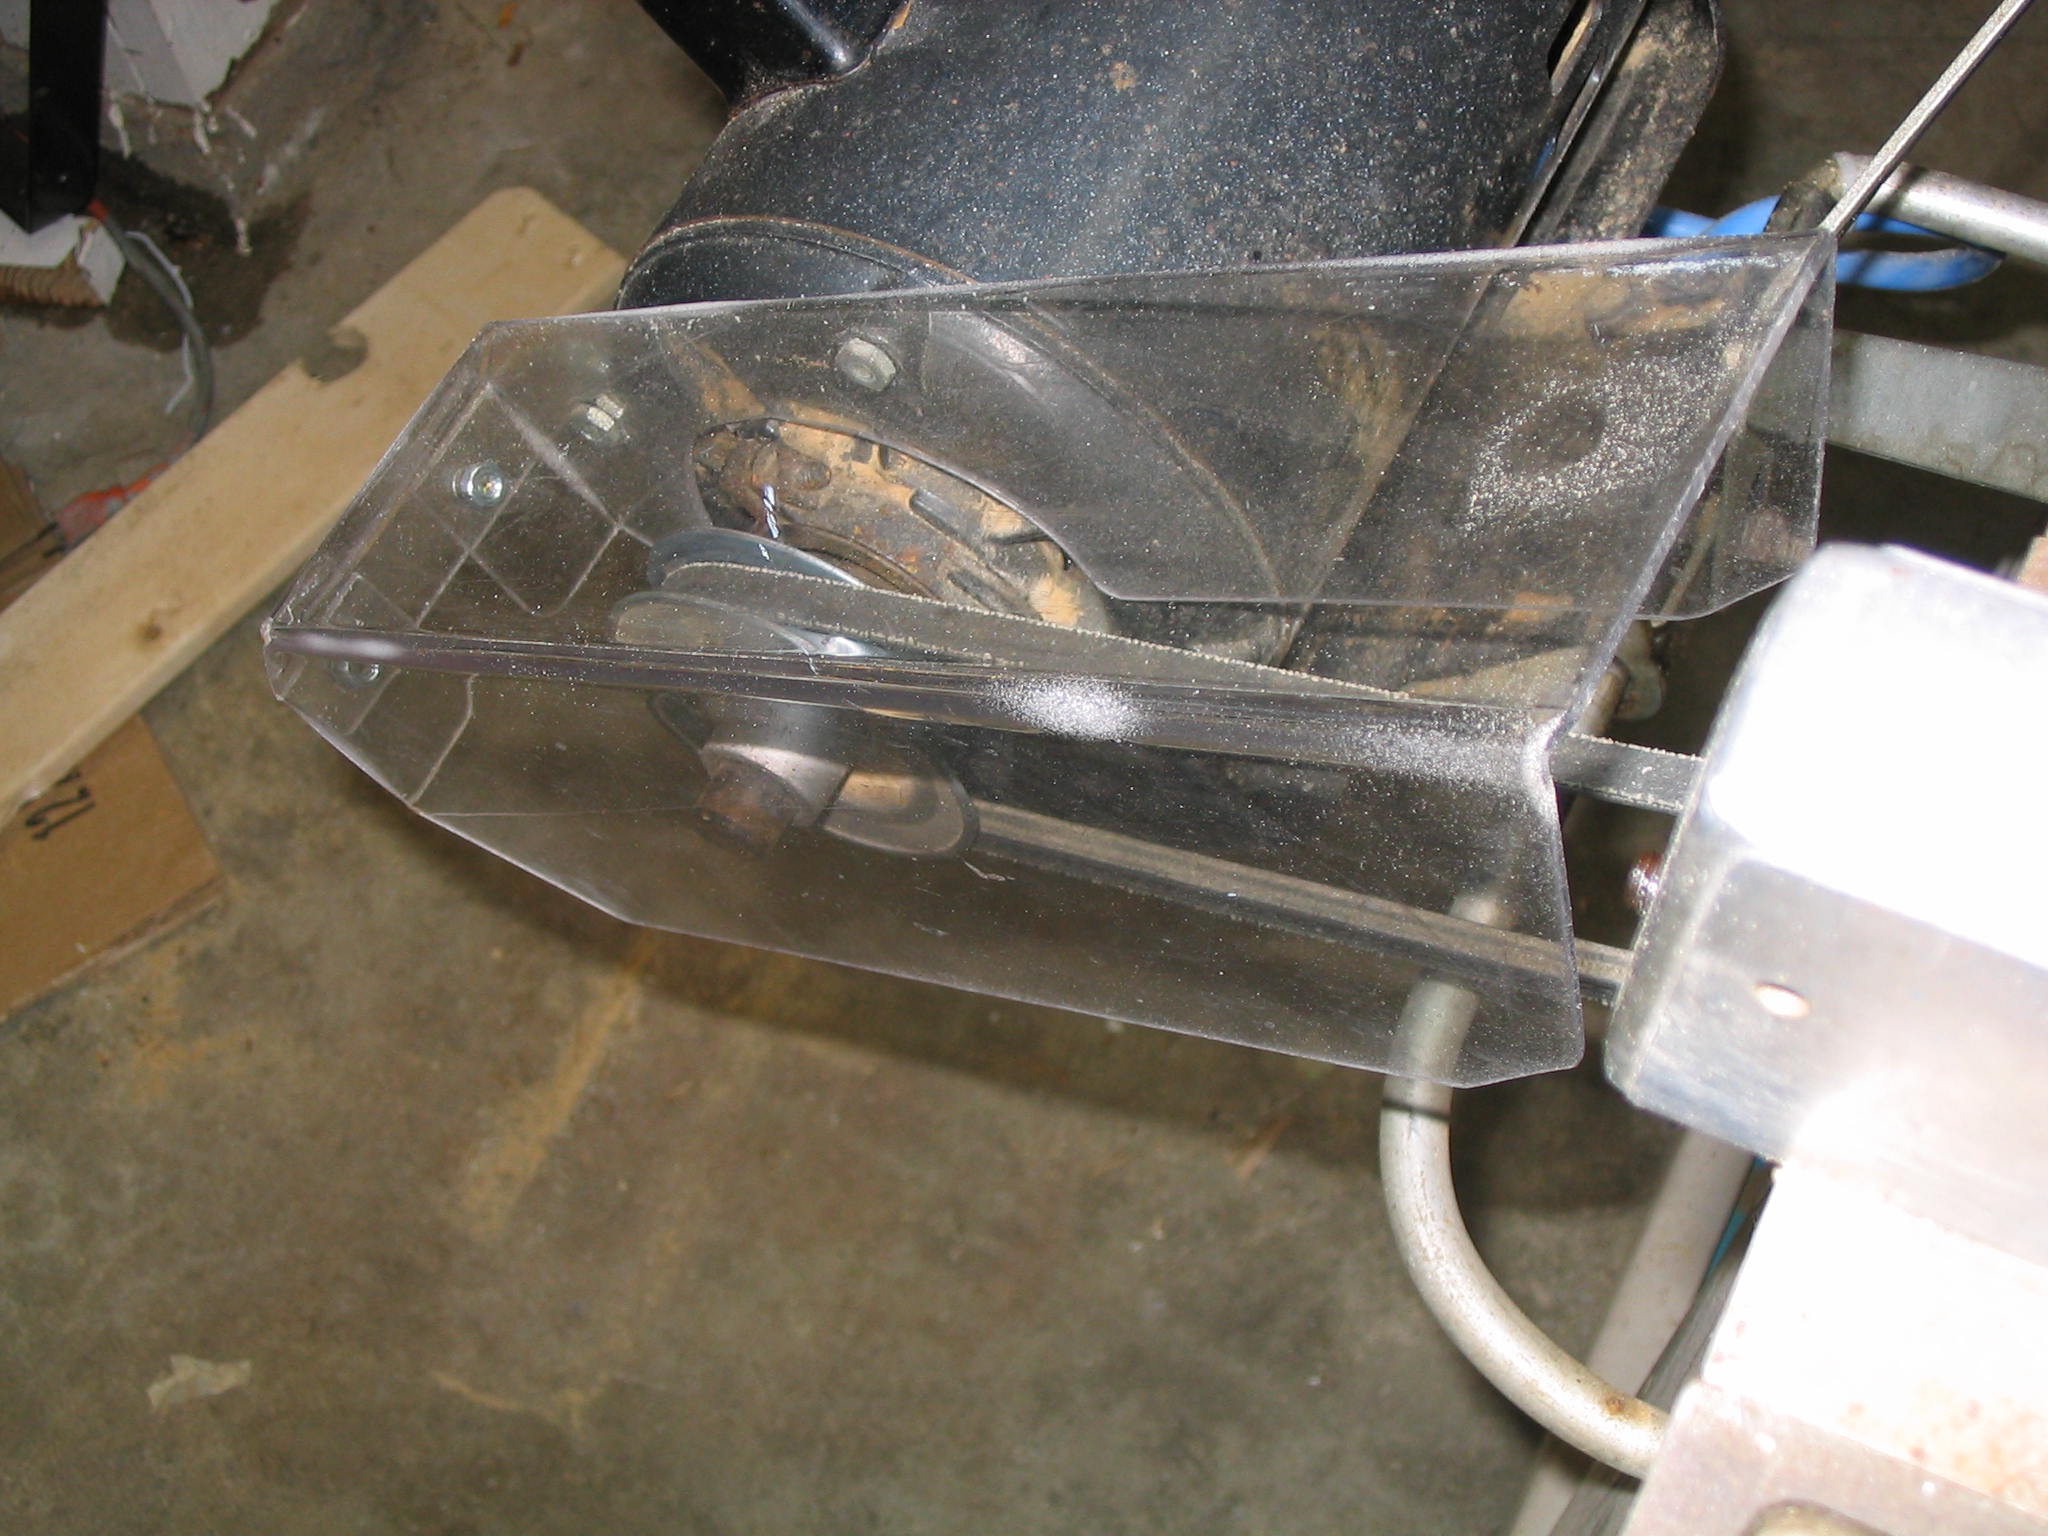

 My used tablesaw needed a new power cord and switch. The cord was clearly in bad shape. The on-off switch was spliced in with a mess of wire nuts and electrical tape. It was time for some basic electrical repair.