Any trained machinist will tell you that a drill press with a cheap jig is no substitute for a proper lathe. I’m not a trained machinist, so now that I’ve said that, let’s get on to accomplishing something interesting.
I recently saw an idea for using a drill press as a simple vertical lathe. If you make a “live center” and attach it to the drill press table, you can do some basic wood turning in a vertical position. A live center is a pointed shaft on a bearing, which rotates with the work being turned on the lathe.
Eccentric Cubicle Amazon IndieBound |
New Wood Puzzle Designs Amazon IndieBound |
200 Original Shop Aids & Jigs for Woodworkers Amazon IndieBound |
This is not a new idea. One has been sold commercially for years as the Vertilathe, and Grizzly sells a lathe attachment for a drill press also. It has shown up in several books, including “200 Original Shop Aids & Jigs for Woodworkers” by Rosario Capotosto, “New Wood Puzzle Designs” by James Follette, and “Eccentric Cubicle” by Kaden Harris.
Needless to say, I had to try it out. If you want to make one like me (which of course you don’t because such endeavors are both tedious and hazardous), you might (or might not) do it as follows:
- Acquire a bicycle wheel. This will be found rusting next to the apartment dumpster, or perhaps readily retrieved from the neighbor’s garbage can. Do not take the wheel off your neighbor’s working bicycle; they will frown upon this. Make sure you grab the cheap wheel with nuts that hold it on a solid axle, not the one with the cool and coveted lever clamp through a hollow axle. (Actually, snag that one too, but keep it for later.)
- Remove the spokes from the hub. If you got the rusty one from next to the dumpster, you’re in luck because half the spokes will snap right off quite easily. If you are impatient and/or feeling destructive, use some heavy wire cutters to clip the remaining spokes. If you are feeling a little more retentive, remove the tire and unscrew the nuts holding the spokes to the rim. Toss the spokes and rim into the nearest metal recycling bin. We don’t need them for this project. If we need some for another project later, well there’s no shortage of rusty bicycle wheels in the world, now is there?
- Disassemble the hub and axle. Unscrew the nuts on each end of the axle. You should find that both ends simply unscrew, and that the axle is just one long threaded rod. Behind the nuts there should be some ball bearings. Take it all apart and soak it with your favorite rust remover, such as WD40. Don’t use water; it isn’t a good rust remover.
- Clean the parts. Use a rotating wire wheel to remove the rust from the hub, axle, and nuts. Chuck the wire wheel into the drill press and start cleaning the parts. You do have a drill press, right? This lathe jig isn’t going to work with a hand drill. And don’t accidentally clean your fingers with the wire wheel; it hurts. Don’t ask how I know.
- Put a point on the axle. Use a grinder or file to make a rough point on one end of the axle. Then chuck the axle into the drill press and use a file to make it nice and pretty. And centered. That’s more important than the pretty part. Mostly.
- Grease and reassemble. Load up the bearings with grease and reassemble the hub. Just like those Brady boys on TV, working on their bikes instead of riding them. OK, I never actually saw them reassemble a hub on one of their bikes. In fact, while they appeared to be working on their bikes, I don’t think I ever saw them actually fix anything. Hmmm.
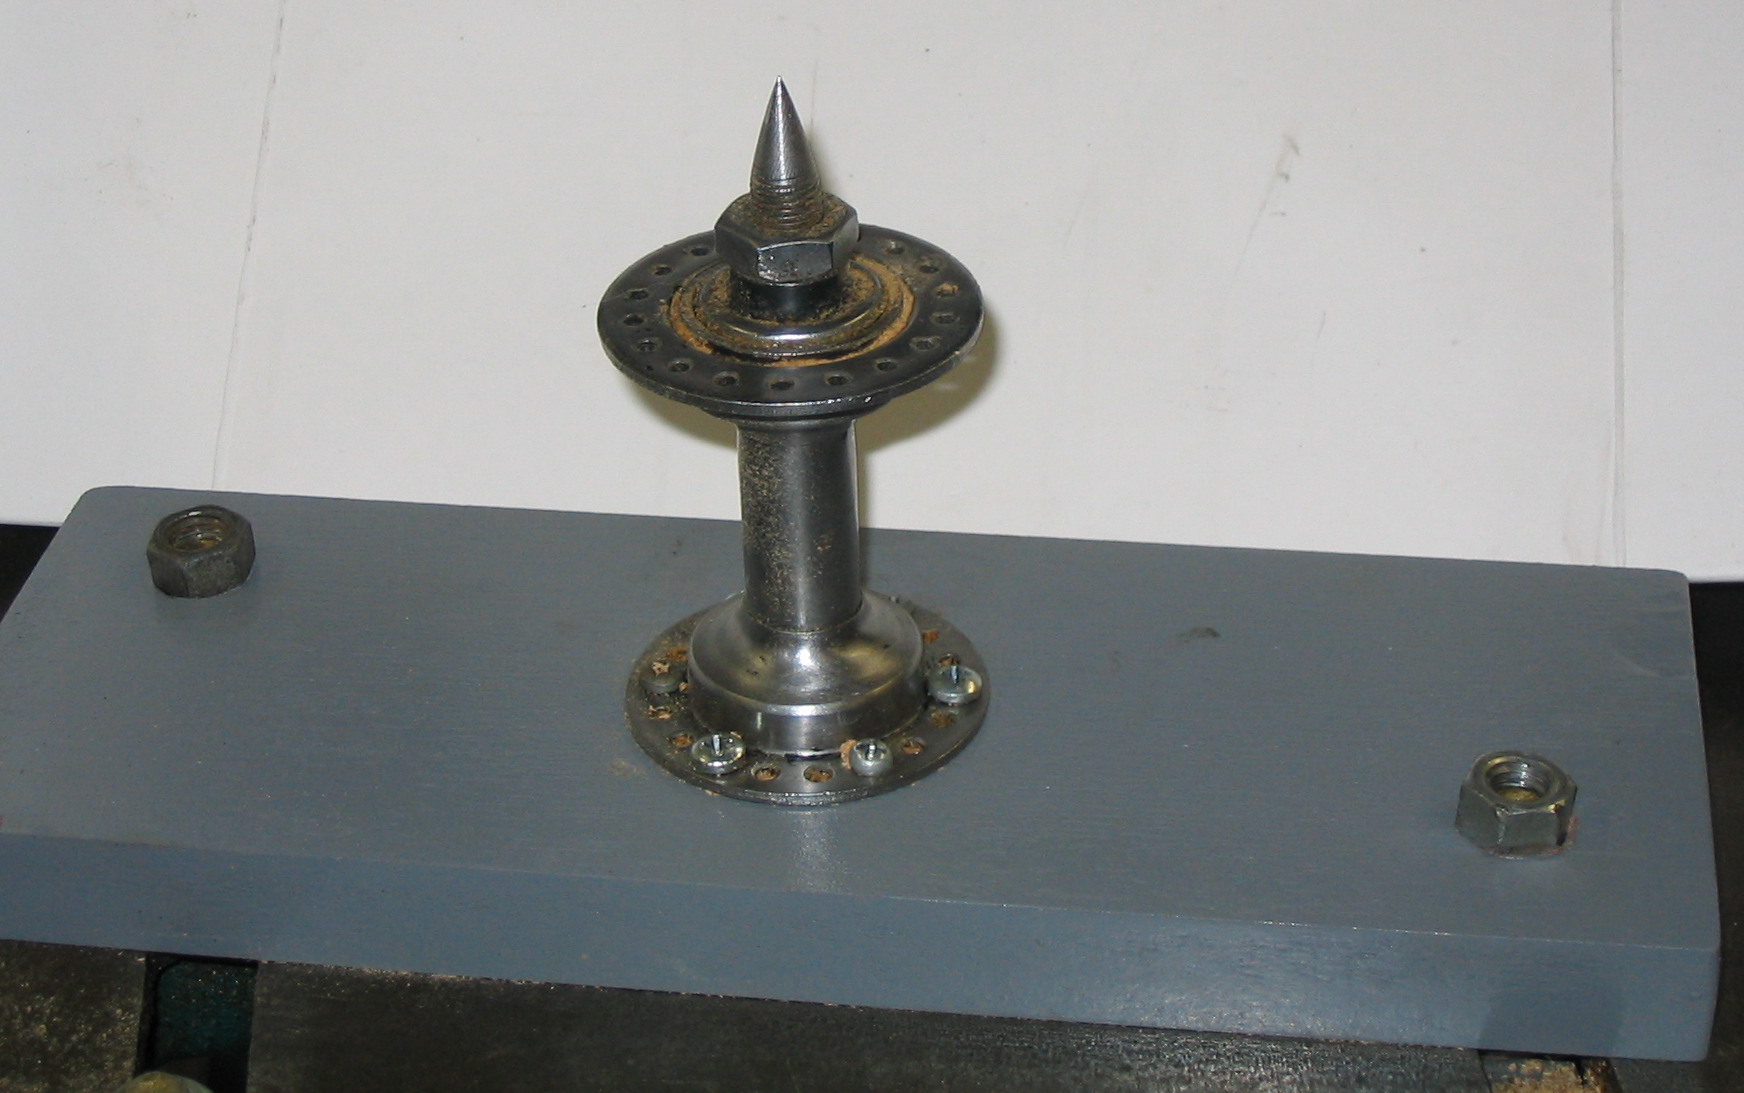
Once you have done all this, you will have a rather hazardous-looking sharp pointy bolt that rotates. My wife says it looks like something Speed Racer would have coming out of the side of the Mach 5, so he could pop the tires of the other cars in the Grand Prix. Why were all the races always called the Grand Prix? Aggh, stupid TV. Where was I?
Now we need to hold it to the drill press table.
- Cut a piece of wood to size. Make it fit the size of your drill press table, so you can clamp it or bolt it down. (This is where those cool bike axles with the lever clamp come in, if you were lucky enough to find some.)
- Drill a hole in the center. Make it large enough to fit the other end of the axle, which will stick through the wood and drill press table. We want the axle to rotate freely, and not bind against the wood. That would defeat the whole purpose of those fancy ball bearings in the hub, now wouldn’t it?
- Paint the wood to look official. Perhaps a nice gloss grey, just like they would do in the Navy when using a piece of wood and an old bike wheel to make a lathe out of a drill press. Ahem.
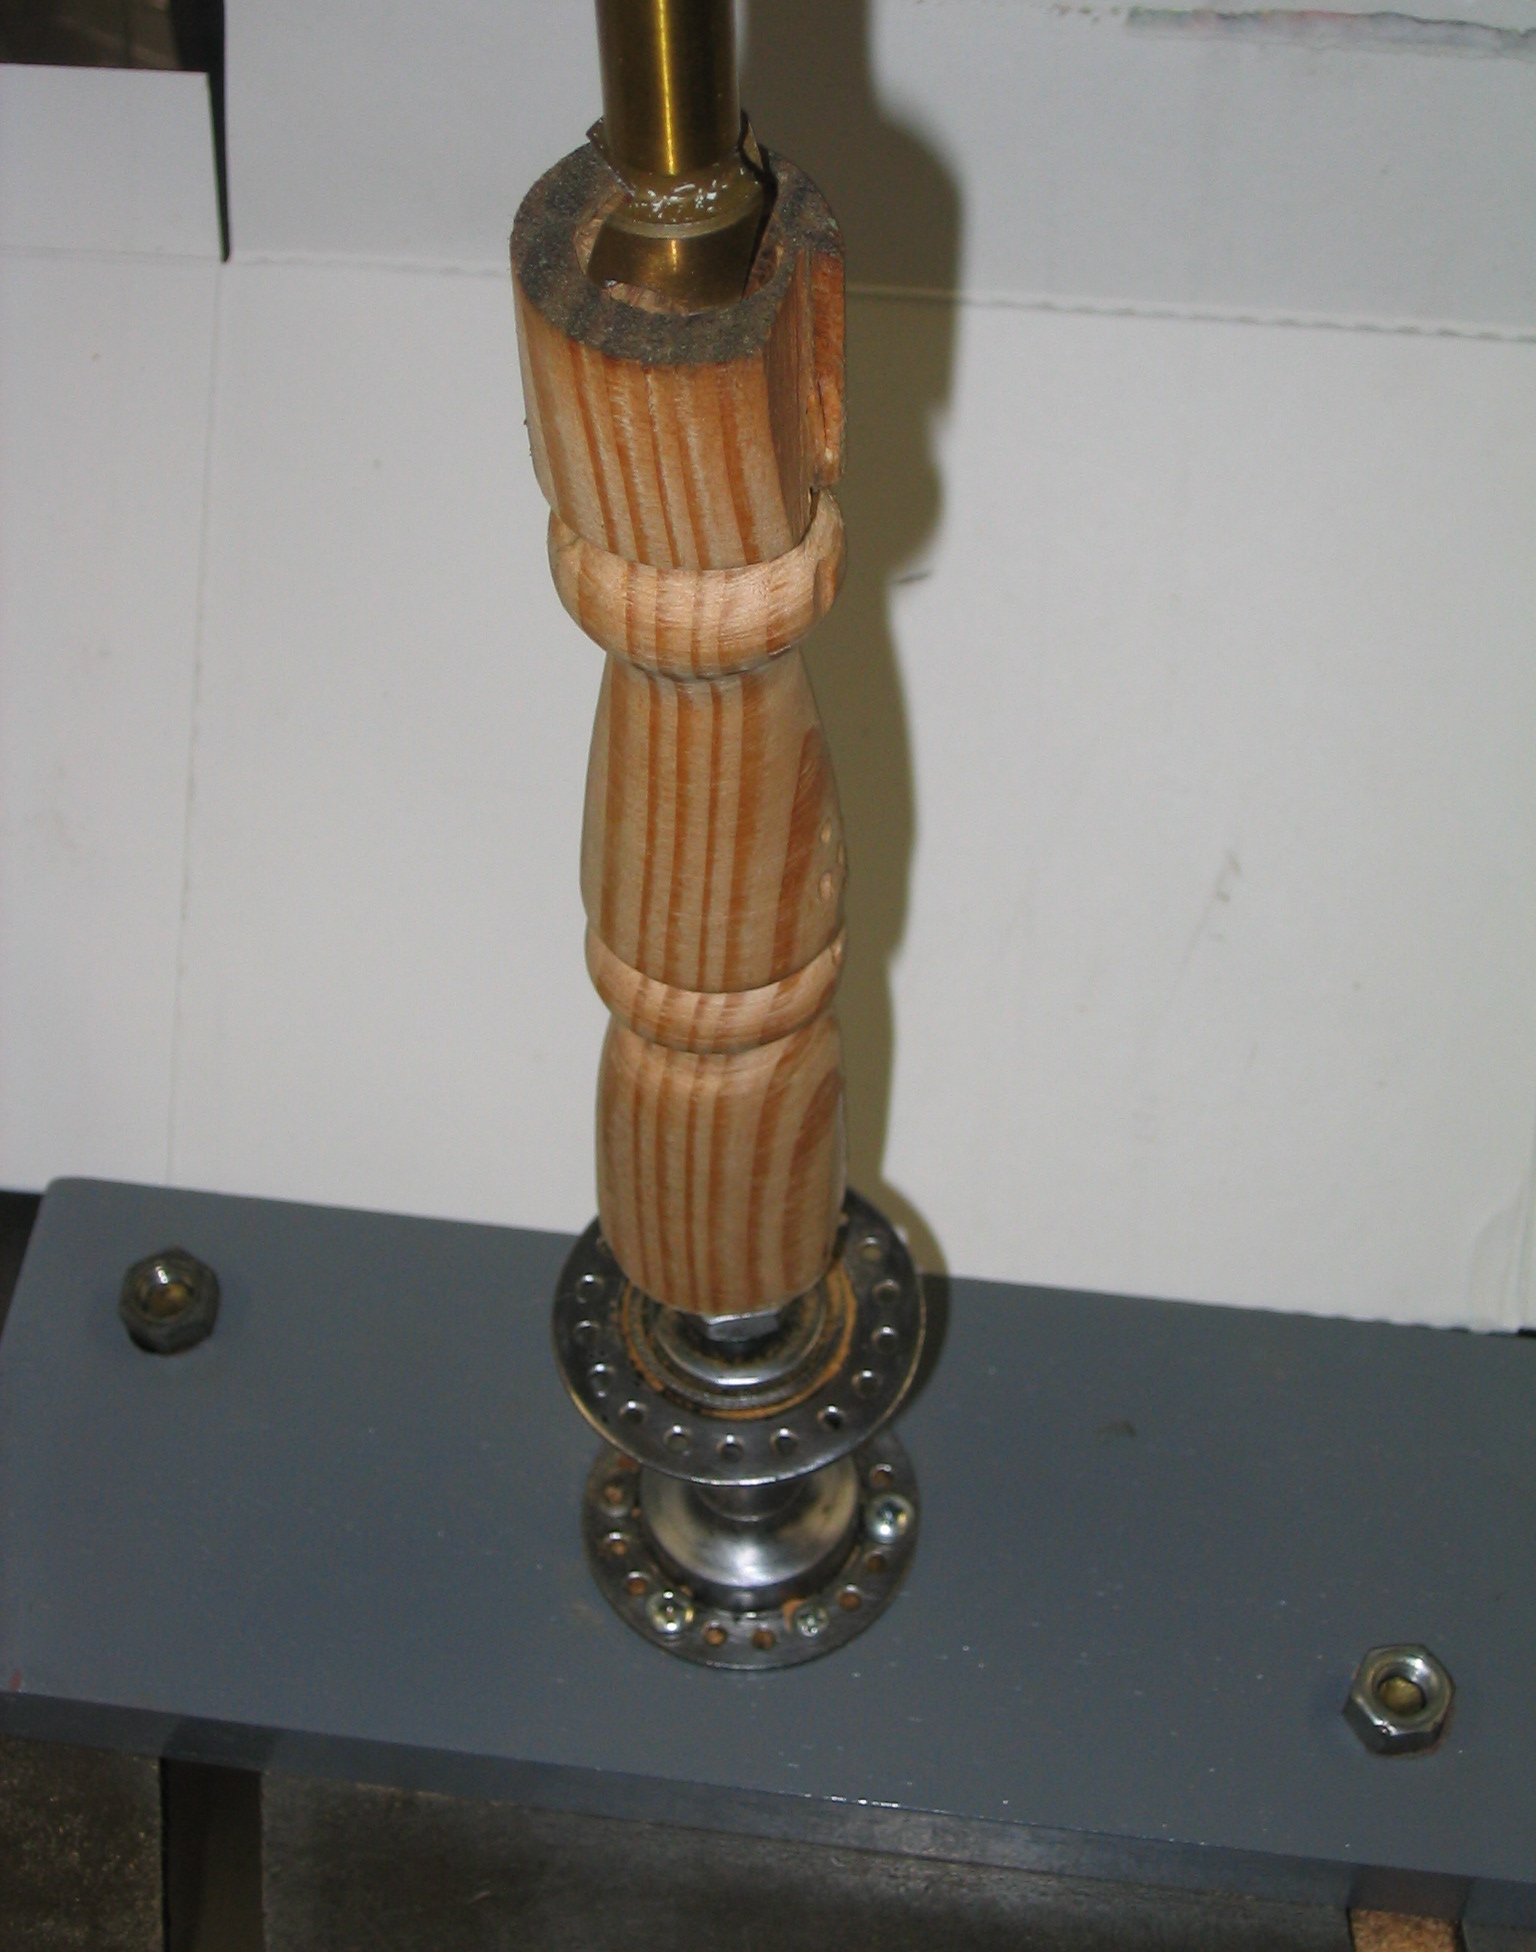
- Screw the hub to the wood. OK, the real part you were waiting for. Put some screws through a couple of those little spoke holes in the hub to secure it to your fancy-pants painted board. Make sure the screws don’t go all the way through the wood and scratch up your nice drill press table.
Congratulations! You have built yourself a live center. You have now completed half of the project. You’re in good company, because I’ve only completed this much also. I’m too impatient to wait, so let’s see some results now.
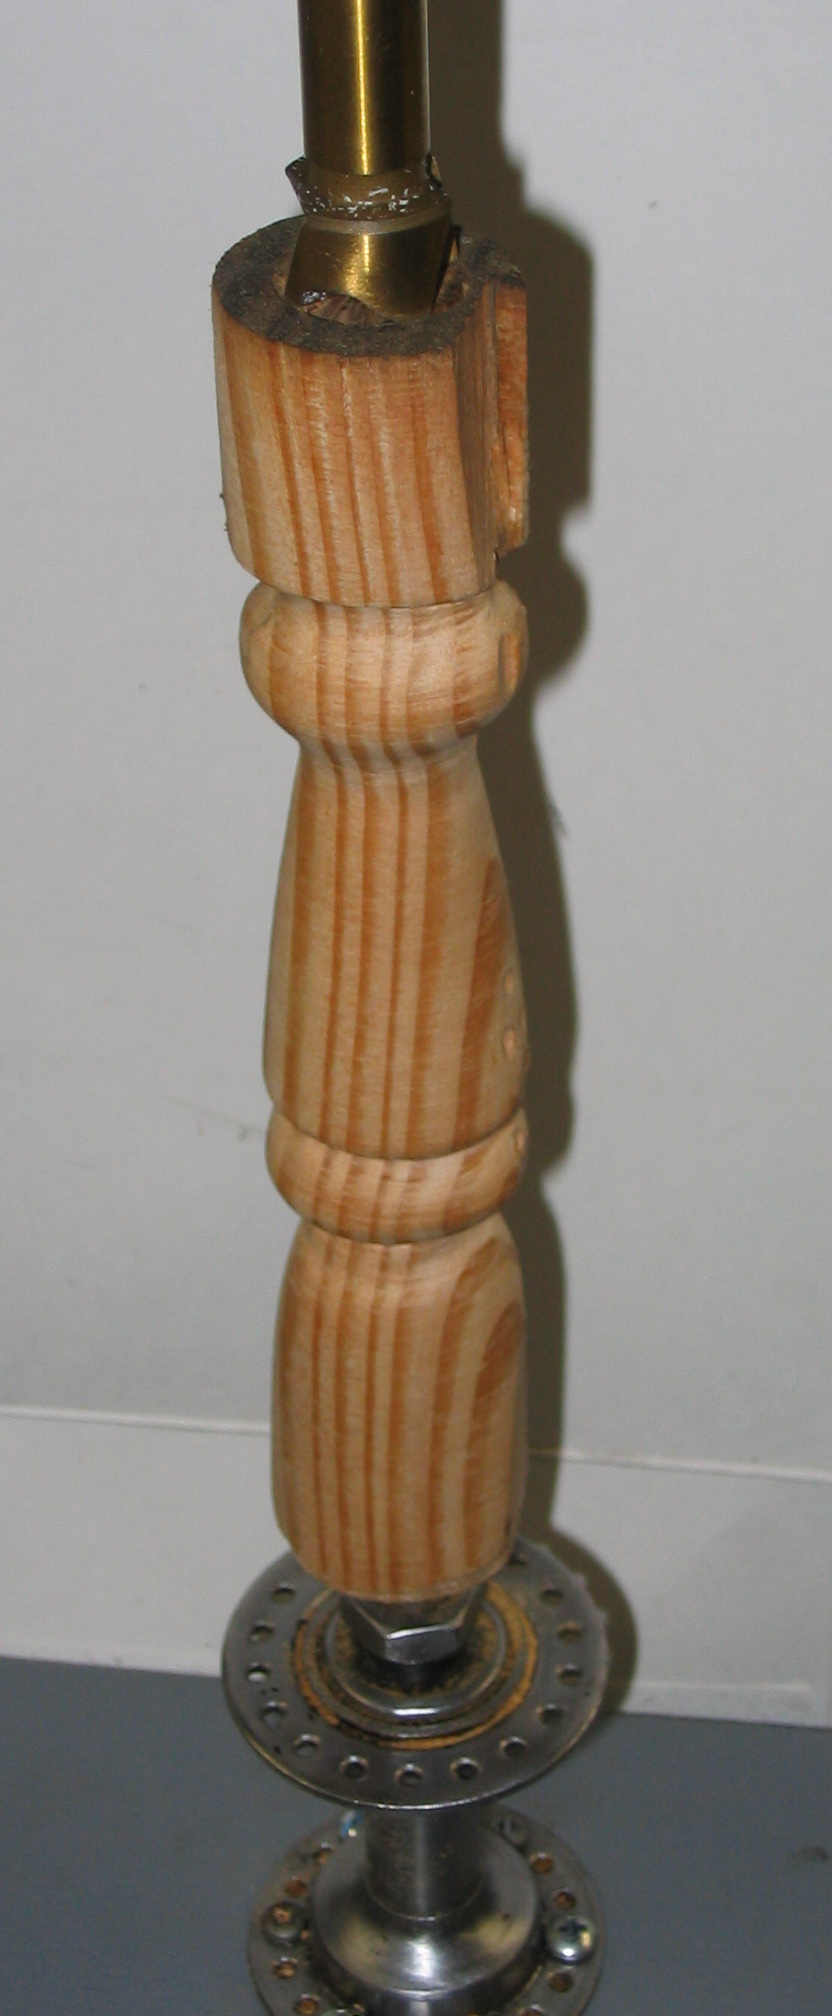
Line up the live center on the drill press table directly beneath the chuck, and clamp it down to the table. Put a wood screw into the top of your piece of wood and chuck up the screw, or chuck up a Forstner drill bit to press into the end of the wood. Raise the table or lower and lock the chuck to hold the wood firmly between the chuck and the live center. Now you can spin the wood. Give it a short spin, then tighten the gap again after the live center presses into the bottom of the piece.
Spinning wood is fun, but shaping it is even more fun. We are only half done, because we don’t have a tool rest to use for any carving tools. But I can’t wait that long, so we can use a wood rasp and files for some quick wood turning results.
This is the point where you go read up on safety somewhere. Holding a jaggedy rasp against a spinning piece of wood is a recipe for having a tool thrown at a vulnerable spot on your person, or some other such hazard. Seriously, be careful with this stuff.
Having said that, the rasp and files actually work nicely. Using combinations of straight, half-round, and rat-tail files, you can actually produce a moderately interesting piece of turned wood with this little jig.

 Many people have light-up Christmas decorations in their yard. A popular one is the white-wire reindeer, covered with mini lights. Having another yard with another reindeer sounded boring. What really sounded good would be to have what almost nobody else has: a moose.
 I bought a reindeer from the store and overhauled it. I studied pictures of moose, and got an idea of how their heads and shoulders varied from deer. And, of course, the antlers. I sketched the new shape in full size on paper, tracing around the existing wire deer head.
 Since the head and antlers were bigger than before, it needed more mini lights. I got more lights and redid the shoulders, head and antlers. The result: a one-of-a-kind Christmas moose. Merry Chrismoose!